In this article, we’ll learn how to deploy our ReactJS project to a free web host server which called Netlify.
If you want to create an editor in any of your React project using CKEditor 5 (include image upload with no server-side configuration and many cool features…) then checkout my article here ❤.
Drag and Drop the Build Folder in Netlify
The fastest and easy way to deploy a React application is just to drag and drop the builder folder in Netlify.
To create a builder folder, just execute one of two codes below from the command line from your project folder.
npm run build or yarn build
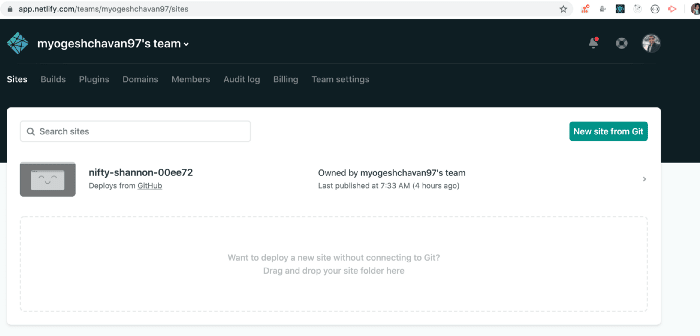
Once the build folder is created, you just need to drop the folder in the drop area under the sites menu
How to deploy an App to Netlify from a GitHub repository
This is my favorite way of deploying my React project to server since it super simple and convenience.
Every time you push any changes to GitHub repository, it will automatically be deployed to Netlify. Also, you can rollback your site if you wish.
If you already have a repository on GitHub, then all you need to do is just to connect it.
Login to your Netlify account, access the dashboard page and click on the New site from Git button.
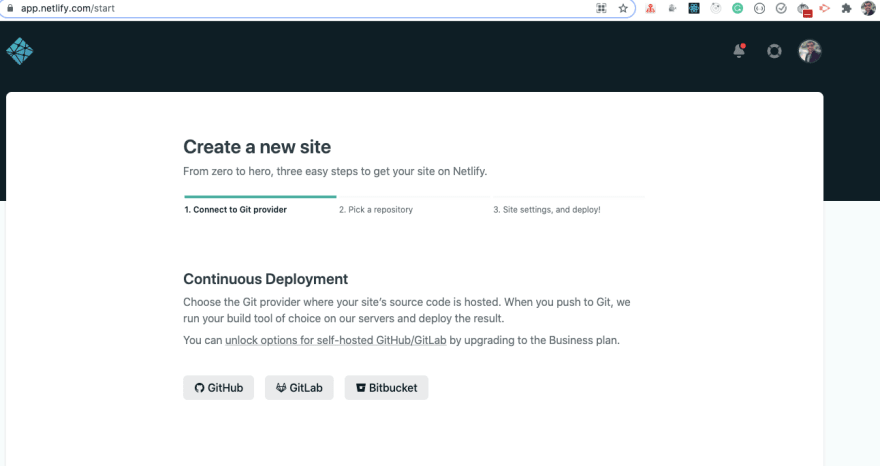
Click on the GitHub button and connect to your GitHub repository.
It will open a new tab, make sure the popup in enabled in your browser.
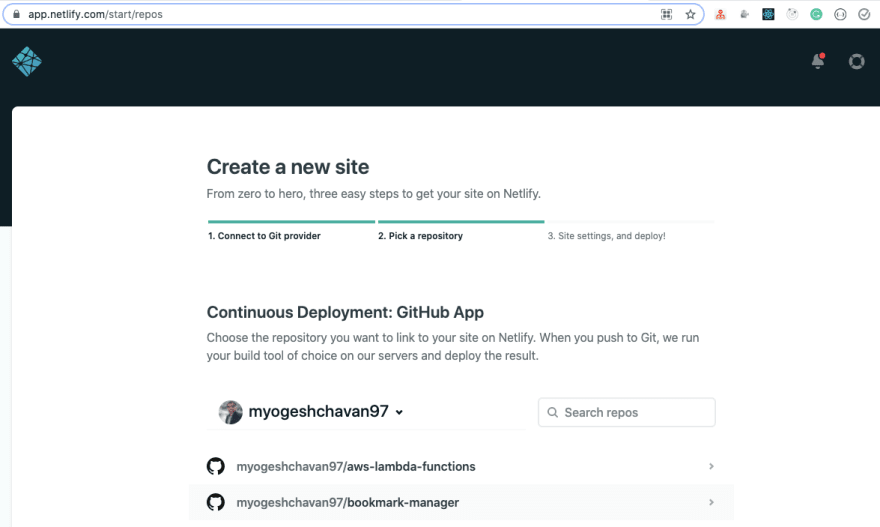
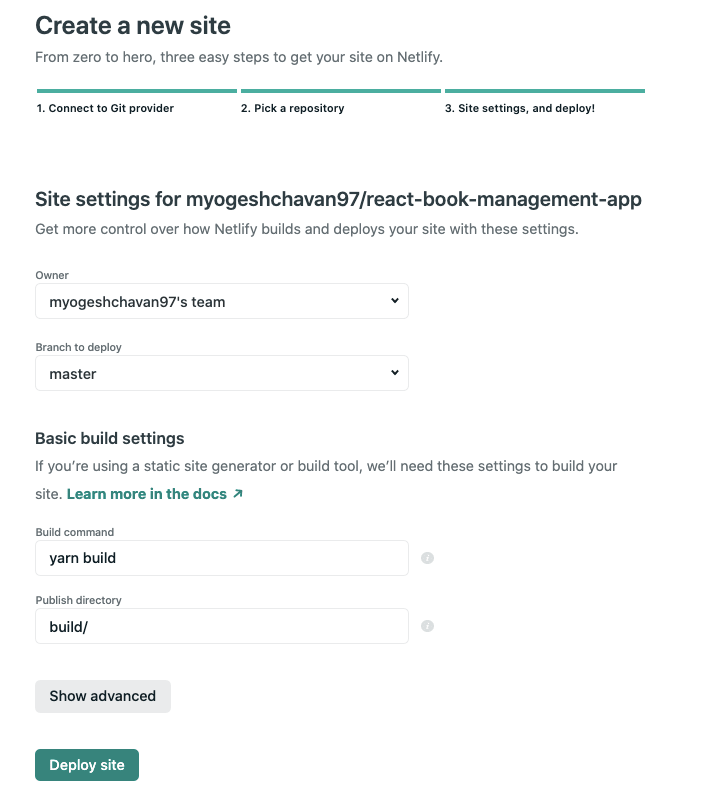
Search for the GitHub repository in the search box. Once you selected, you will see the following screen
All these configs are fine, you don’t need to change anything.
Now click on Deploy site button, once clicked you will see the Site deploy in progress message.
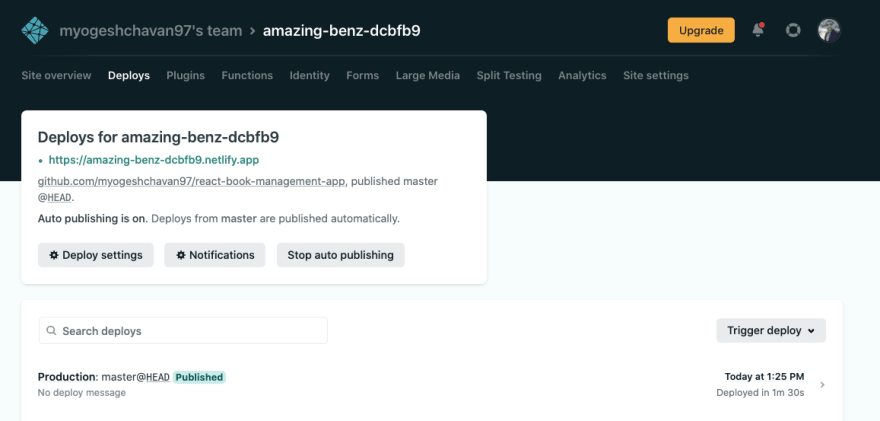
You’ll have to wait a minute until the process done. Once deployed is completed, you will see the following screen
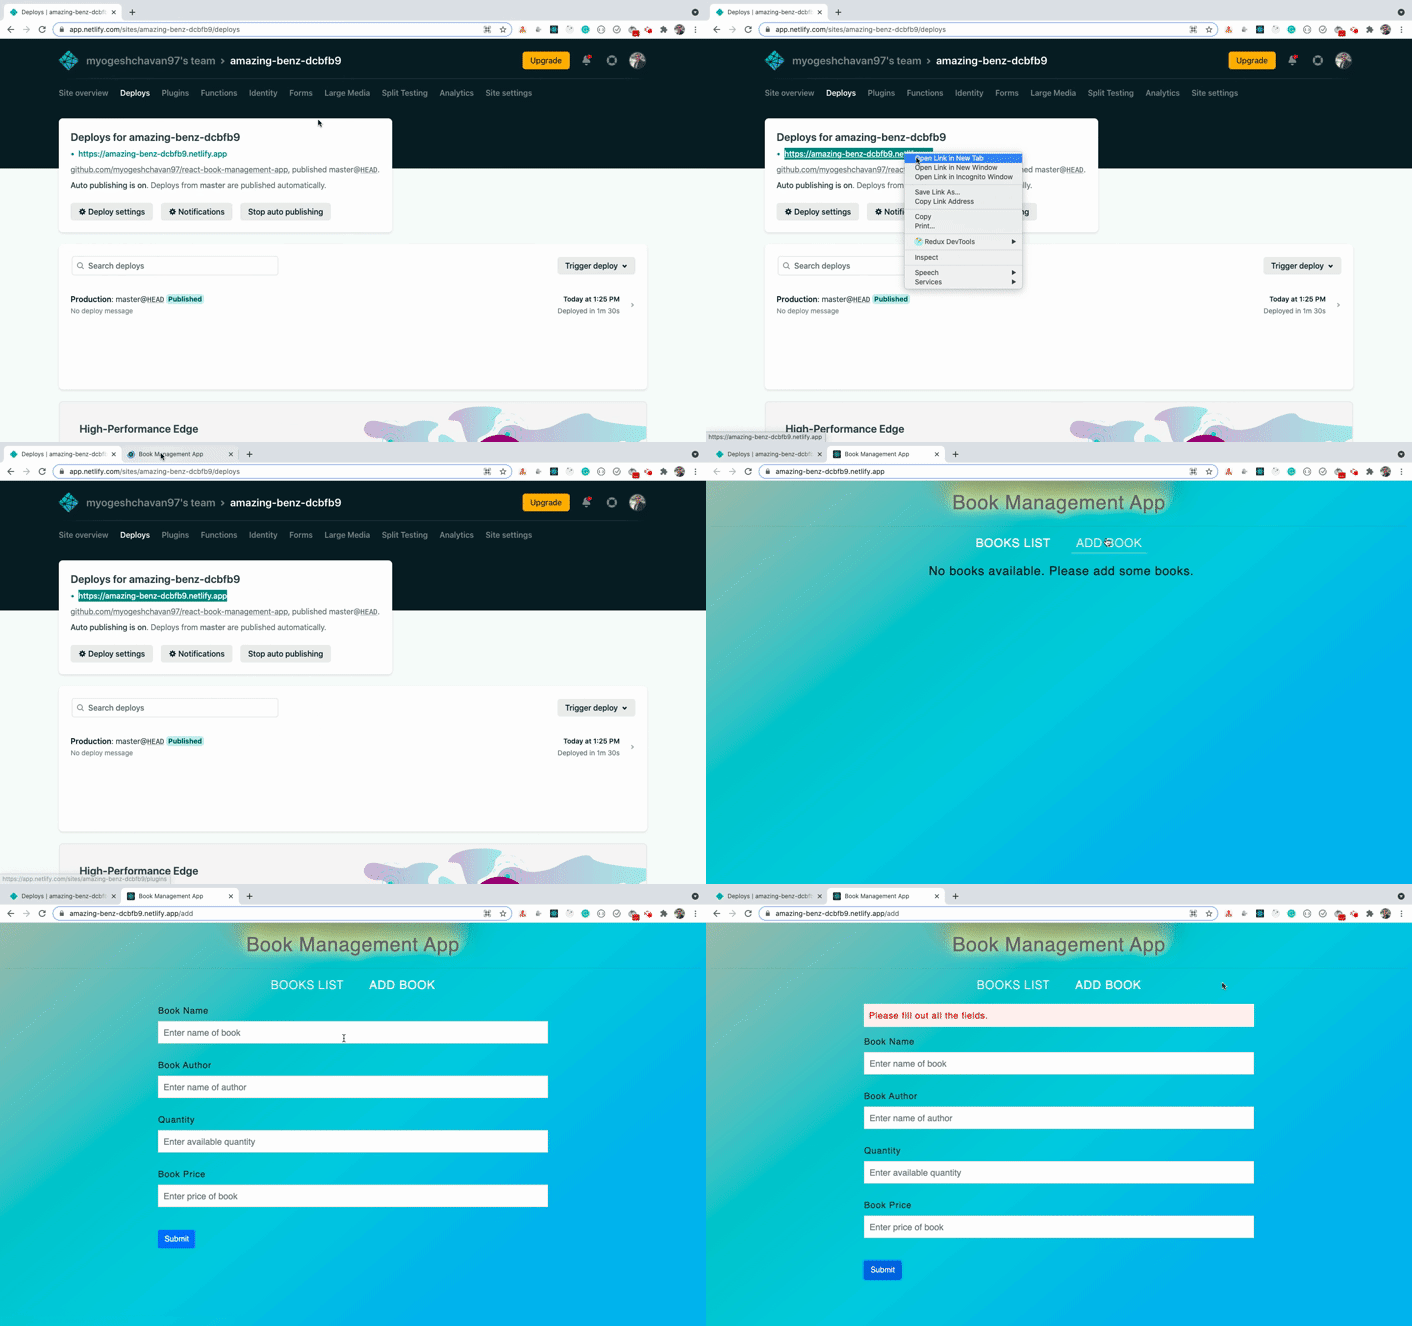
Click the link and you will be surprised. Tada, we have done it 😜
Awesome, now anytime you make any change to your repository, Netlify will automatically update your site according to your change, cool right.
Now the next section will be more excited.
How to change your site name in Netlify
At the moment, our domain quite ugly since it’s very hard to remember for anyone, especially when you have a lot of deployed projects. Luckily, Netlify provide us an easy way to solve this problem.
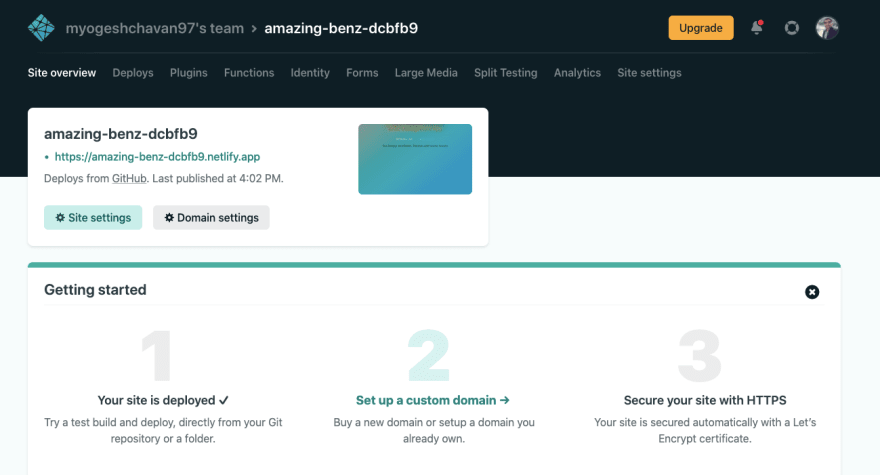
Click on the Site setting button displayed on the Site overview section.
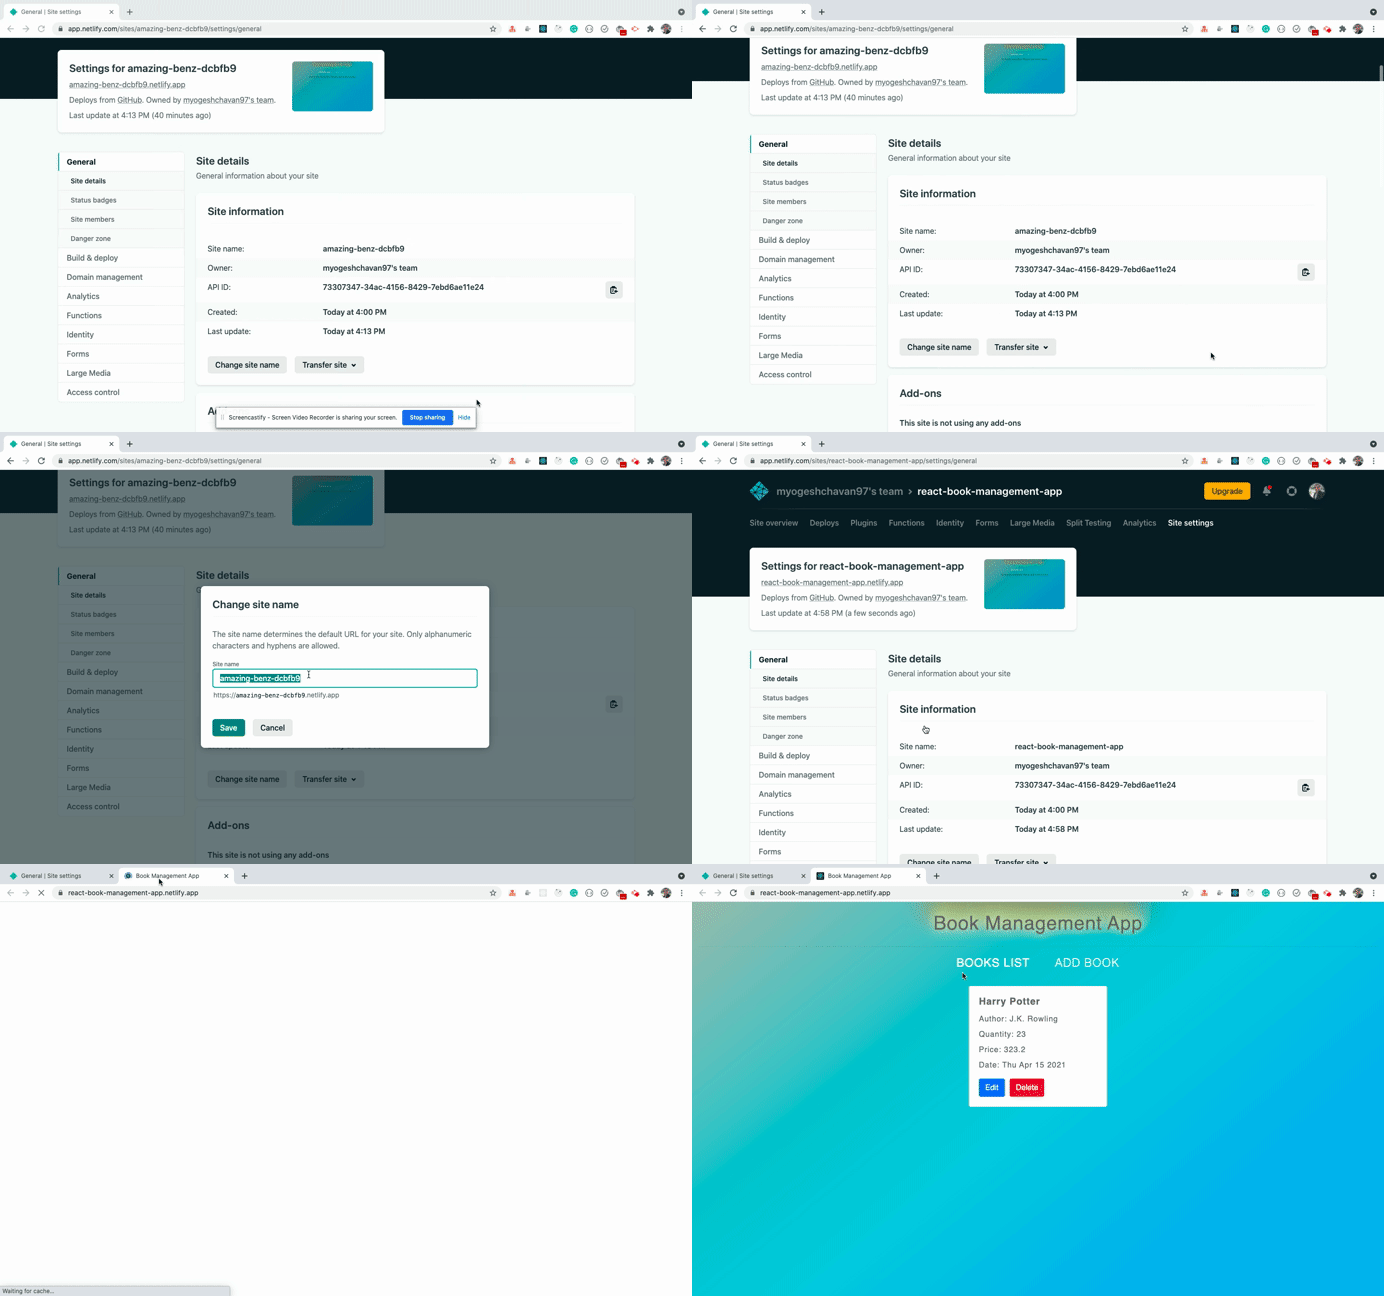
The click on the change site name button and enter your new name. Save it and now you can access your site with that new changed name.
Thanks for reading ❤
If this post was useful to you, please leave me a like and follow me that help me a lot 😁.
Also, if you want to find more interesting content like this from me you can refer to my portfolio website or my GitHub in case you want to see all the project that I have done 💋.
Again, thank you so much and have a good day 😘😘.





Latest comments (0)