
Component Diagram:

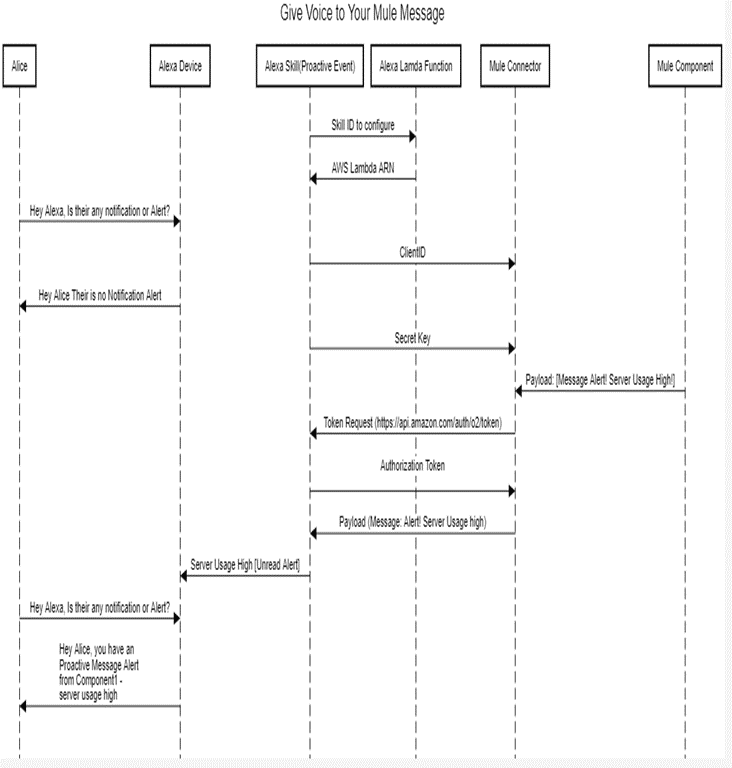
Sequence Diagram:
Alexa-Mule Adaptor:
The usecase of the custom Alexa-Mule Adaptor/connector is –
it connects the mule components and push the payload via connector to the Alexa skill model which triggers the Proactive Event Message Alert and reached to the Alexa devices which has subscribed to this Alexa skill at the specified endpoints. The Alexa devices which has subscribed to this Alexa skill but the endpoint is different to which alert is not pushed via connector. Those devices will not receive any Alert Message.
The custom Alexa-Mule Adaptor/connector creates an Alexa module support Echo Alexa operation.
Figure1 below represents the inside package structure of Alexa-Mule Adaptor/connector.

The code link is shared here:
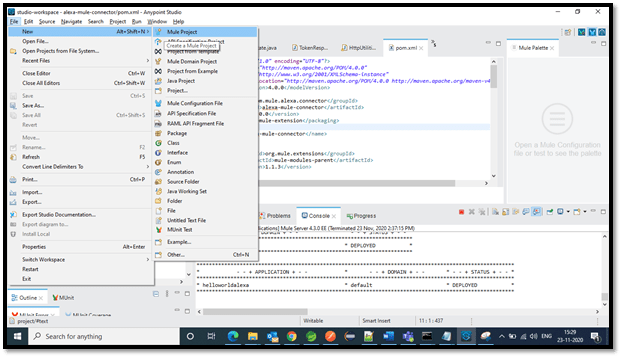
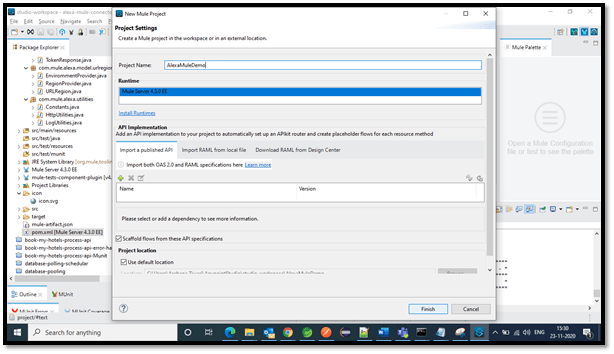
Steps involved in the creation of connector are:
Step 1:
After completing the connector code/either import from the source mentioned go to
Project ->right click ->properties
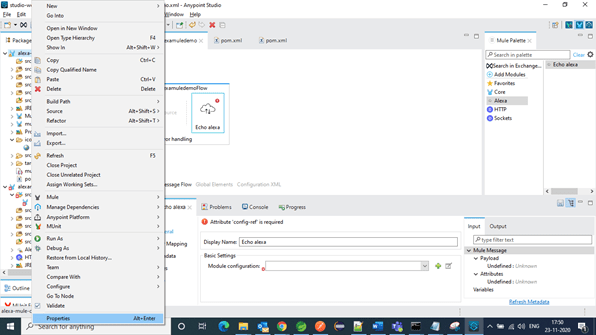

Step 2:
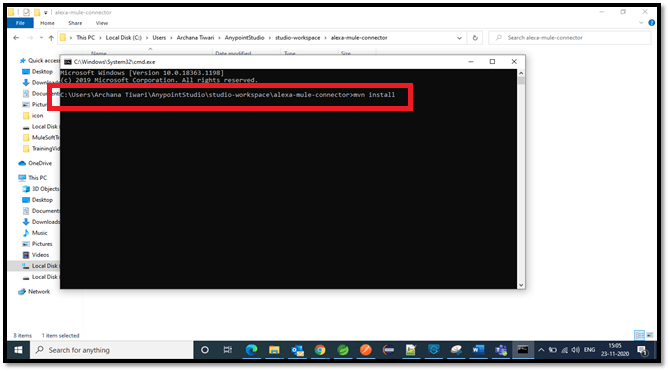
Installation:
mvn install
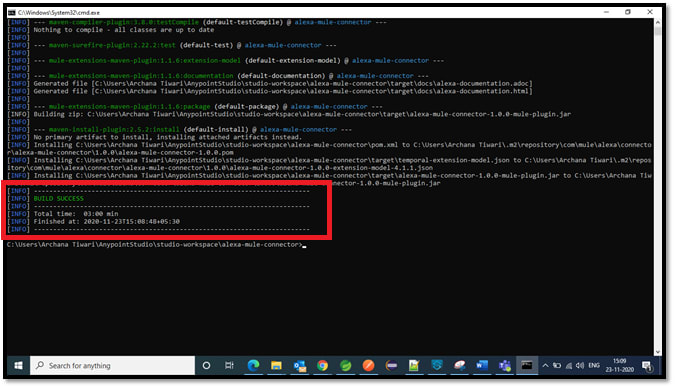
Step3:
After successful build run the below command in the command prompt. This will install the dependencies in the local repository which can be found in \.m2\repository\com\your package structure…
mvn install:install-file -Dfile=path of the jar file DgroupId=groupId value DartifactId=artifactId value -Dversion=version value -Dpackaging=jar

Example:
mvn install:install-file -Dfile=E:\alexa-mule-connector-1.0.0-mule-plugin.jar -DgroupId=com.mule.alexa.connector -DartifactId=alexa-mule-connector -Dversion=1.0.0 -Dpackaging=jar

Step 4:
Usage
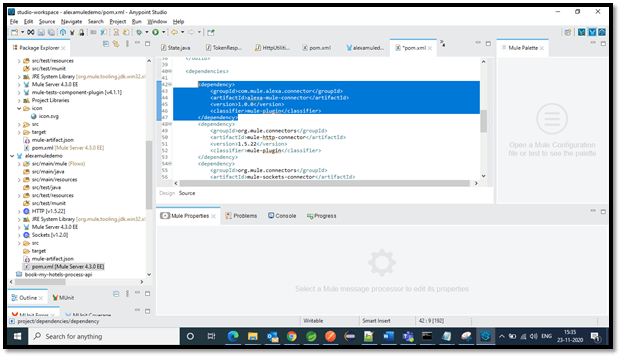
Once installed in your local repository add the following dependency to the pom.xml of your mule project Figure 4
   <dependency>
        <groupId>com.mule.alexa.connector</groupId>
    <artifactId>alexa-mule-connector</artifactId>
    <version>1.0.0</version>
    <classifier>mule-plugin</classifier>
    </dependency>
Step 5:
After added the dependency you can use the client as below:
You can find the Alexa module. Drag and drop the Echo Alexa operation and the components which are needed to pass the payload to Alexa Device (Show in the component diagram)

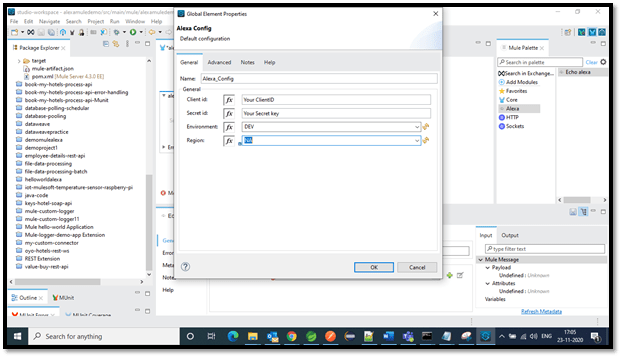
Enter Client Id and Secret ID, also respective Environment and Region i.e. to which subscribed zone you want to send alert.
- Environment: whether the target events will be sent to the live or development endpoints. Allowed values are dev and pro.
- Region: identifies the region of the Alexa endpoint to use to send proactive events. Allowed values are EU (Europe), NA (North America) and FE (Far East). Remember: if your users are located in NA and you are sending events trough the EU endpoint, users located in NA won't receive any notification.


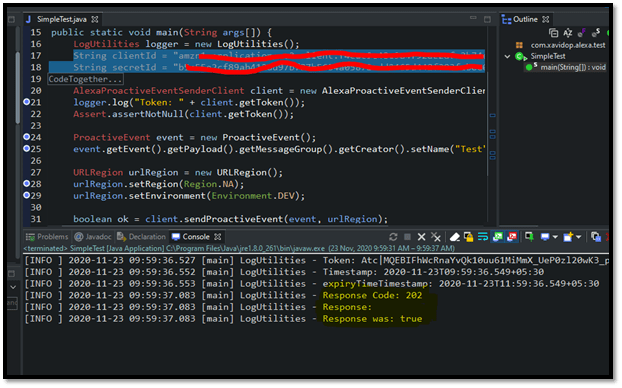
Alexa-Mule Adaptor Testing:
You can the run the code by passing the required client ID and Secret Id and other parameters mentioned.
Below figures show the response status of the connector whether it is able to reach the Alexa skill:
These are the values by default of an event when you create it:
{
        "timestamp": "",
        "referenceId": "UUID-AUTOGENERATED",
        "expiryTime": "",
        "event": {
          "name": "AMAZON.MessageAlert.Activated",
          "payload": {
            "state": {
              "status": "UNREAD",
              "freshness": "NEW"
            },
            "messageGroup": {
              "urgency": "URGENT",
              "creator": {
                "name": "Test"
              },
              "count": 1
            }
          }
        },
        "relevantAudience": {
            "type": "Multicast",
            "payload": {}
        }
    }
Alexa Developer Account setup:
What you will need:
- Amazon Developer Account (login if already registered)
- Amazon Web Services Account (login if already registered)
Note: both accounts should be same username and link both the accounts
- AWS Command Line Interface (CLI) (refer this link to install)
- Alexa Skills Kit Command Line Interface (ASK CLI) (refer this link to and install)
- Node.JS version 8 (refer this link to install)


Note: By default, values are:
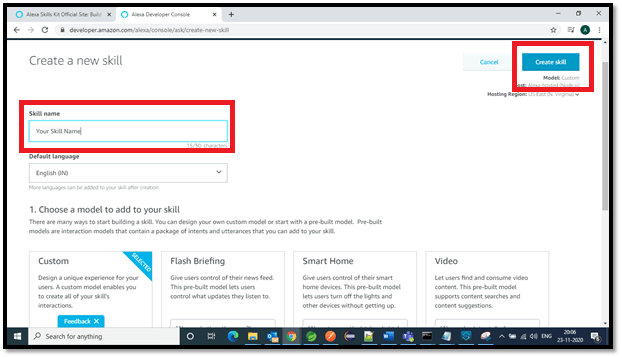
- Choose a model to add to your skill
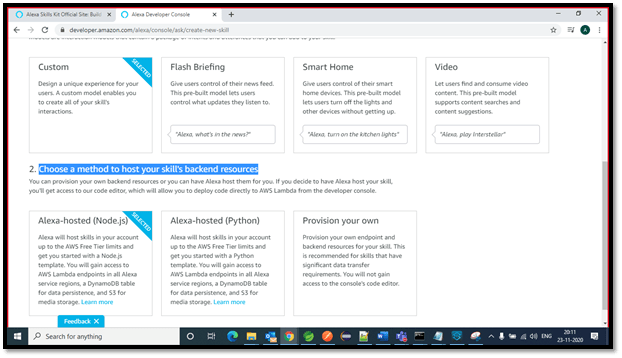
- Choose a method to host your skill's backend resources


The sample custom function can be created from here.
Use the below command to clone the project from above link.
git clone https://github.com/satr/aws-lambda-on-java-with-gradle-for-simple-alexa-skill-example

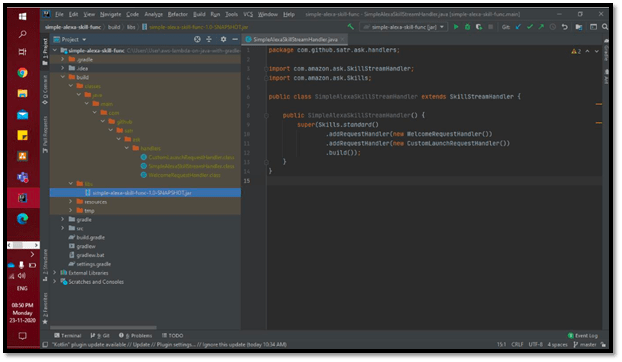
Create the jar file for handlers.
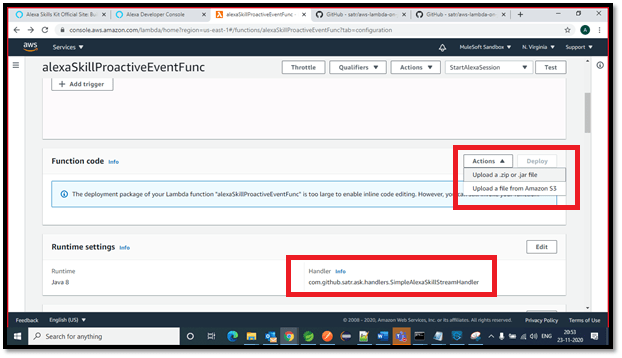


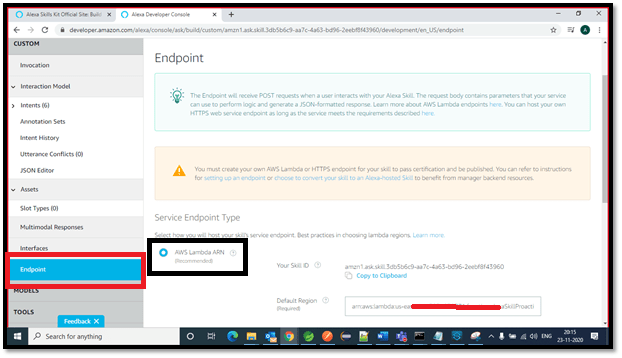
The ARN of the Lambda function should be the endpoint of Alexa Skill created in developers console the deploy the Alexa Skill.
In the command line configure ask cli using AWS lambda hosting (refer this link)
Use the following commands:

- To get the manifest from the Alexa skill created above
ask smapi get-skill-manifest -s {Skill-ID}

- To download the skill.json of your skill
ask smapi get-skill-manifest -s {Skill-ID}> skill.json
Open the skill.json in any editor then add permissions and events and subscriptions.

-
Use the below command to update the changes made above in skill.json
ask smapi update-skill-manifest -g development --skill-id {Skill-ID}--manifest file:./skill.json
Alexa Device Setup:
Refer the link to enable and grant permissions to the skill created above.


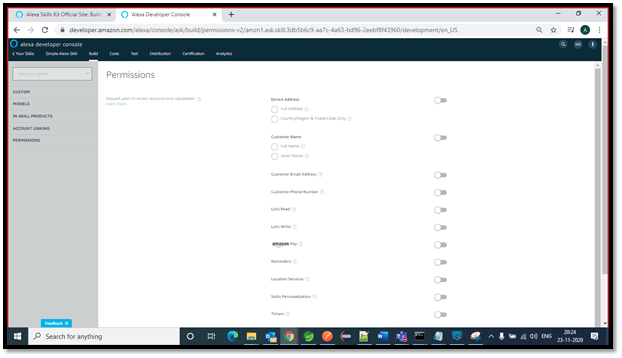
Once skill is enabled you will get the below options. Then go to setting and grant the permissions.


Once the skill is enabled the client Id and secret key will be generated in the developer console permission tab.
This is Id’s as a parameter in the mule connector/Adapter (explained in above screenshots)
Download Alexa-Mule-Adapter/Connector
Future Extension of the Adapter:
We believe and trying for the extension of the above Alexa-Mule-Adapter/Connector which can hold the following capabilities.
Alexa-Mule-Adapter/Connector current module named – Alexa has only one operation named Echo Alexa.
Future extension to the Module - Alexa is adding the below two operations.
- Route your flow via voice
- Make decision via voice
Route your flow via voice:
The functionality of this operation is that -user can manage and interact with the mule flow i.e. basically calling the operations/looking for specific operation in mule project.
Make decision via voice:
The Functionality of this operation is that – user can provide the input i.e. decision YES/NO START/STOP STATUS and to the certain extent login credentials, handling some of the auto fix issues via voice based on predefined keywords on which device is trained to perform the action specified by user.

Top comments (6)
Nicely Done!
Thank you!!
Thank you for your submission, Archana!
Amazing..! Good Job!
Thank You!!
Seems like a cool project. I am going to give it a try.
Some comments may only be visible to logged-in visitors. Sign in to view all comments.