My personal website sucks.
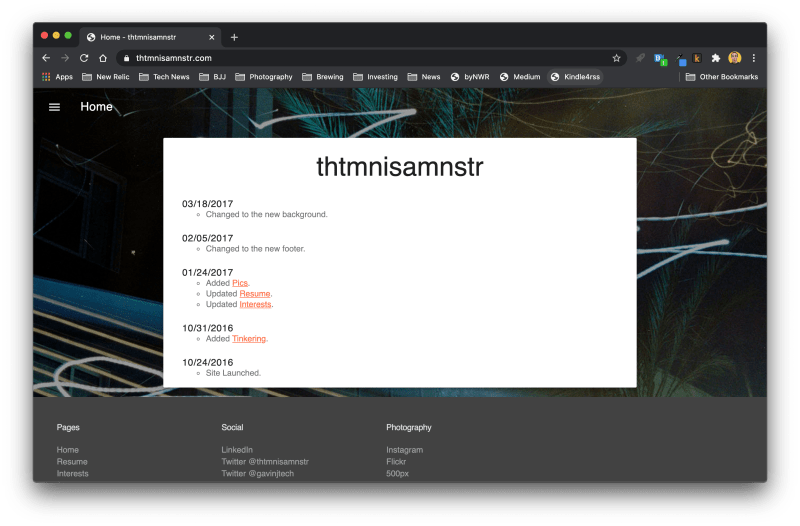
I haven't touched it since 2017, and it looks dated. It doesn't have any of the writing I've been doing for work included either. It's just not a good showcase of me or my work. So I'm going to update it.
We started using Gatsby for a few of the company websites where I work, New Relic. So I'll use Gatsby for my site too. I'm choosing the Novela theme by narative, because it's popular, and I'm basic.
I figured I'd document it and share it here. Hopefully somebody finds it useful.
FYI, I'm using a Mac, so there may be some Mac-specific commands.
Install prerequisites
- Install Homebrew
/bin/bash -c "$(curl -fsSL https://raw.githubusercontent.com/Homebrew/install/master/install.sh)"
- Install XCode Command Line Tools
xcode-select --install
- Install Git
brew install gitgit config --global user.name "Your Name"git config -- global user.email "your@email.com"
- Install Node.js
brew install node
Install Gatsby and create your starter site
- Install the Gatsby CLI
npm install -g gatsby-cli
- cd to the directory you want your site's root directory to be in (e.g. I have a development sandbox folder that I put all of my dev projects in).
- Create a starter site (using the Novela theme by narative)
gatsby new [site-root-directory] https://github.com/narative/gatsby-starter-novela
The last of your terminal output should be a confirmation like below:
Your new Gatsby site has been successfully bootstrapped. Start developing it by running:
  cd thtmnisamnstr-dotcom
  gatsby develop
- Build and run your starter site
cd [site-root-directory]gatsby develop
The last of your terminal output should be a confirmation like below:
You can now view site in the browser.
  http://localhost:8000/

View GraphiQL, an in-browser IDE, to explore your site's data and schema⠀
  http://localhost:8000/___graphql⠀

Note that the development build is not optimized.
To create a production build, use gatsby build

success Building development bundle - 14.604s
- Open your browser, and go to http://localhost:8000/

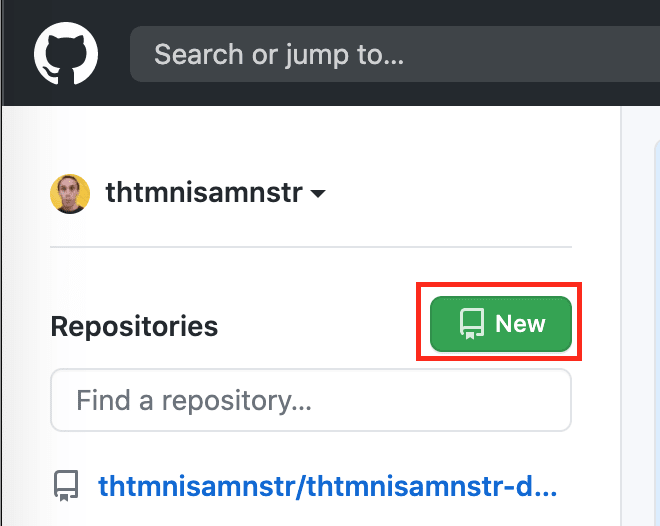
Create your GitHub repo
- Login to GitHub. Make an account if you don’t already have one.
- Create a new repo
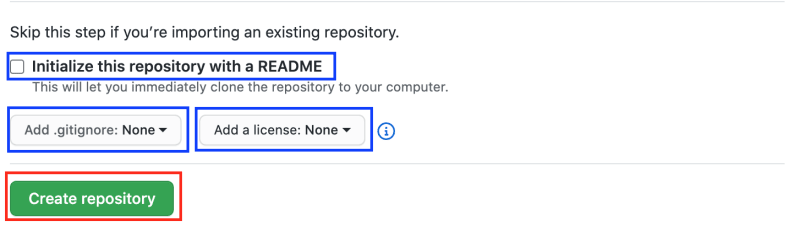
- Name it. Don’t initialize with a readme, add a .gitignore, nor a license. Click Create Repository.
- In Terminal...
cd [site-root-directory]git remote add origin https://github.com/[your-github-username]/[site-root-directory].gitgit push -u origin master
- In your repo on GitHub...
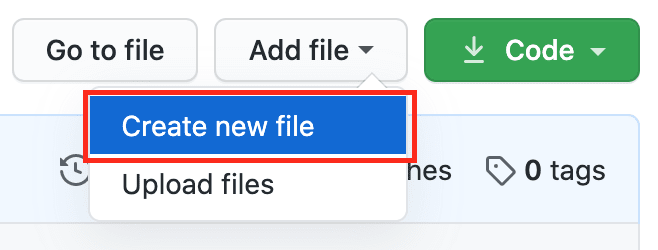
- Create New File
- Type “license", and click the Choose License Template button

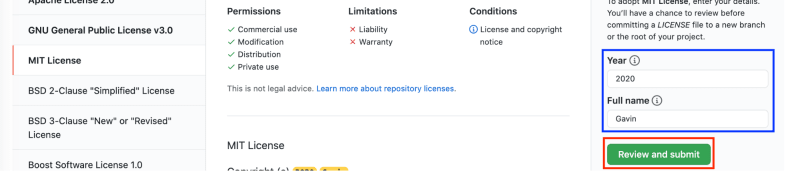
- Choose MIT License. Enter your full name. Click Review & Submit.
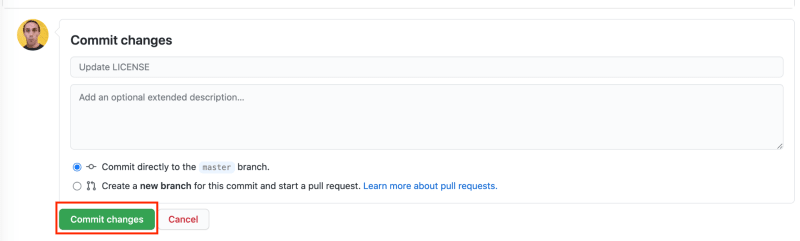
- Scroll to the bottom, and click Commit Changes
- Create New File
Note: You may have to merge a pull request if “Commit directly to the master branch.” wasn’t selectable in the previous screen.
- In Terminal...
git pull
Boom!
You just pulled down the MIT license file from your GitHub repo.
Rename your repo's default branch from Master to Main
...because nobody likes outdated terms, like Master, that are unnecessary references to slavery.
- In Terminal...
git branch -m master maingit push -u origin main
Your terminal output should be something like below:
Total 0 (delta 0), reused 0 (delta 0), pack-reused 0
remote:
remote: Create a pull request for 'main' on GitHub by visiting:
remote:      https://github.com/thtmnisamnstr/thtmnisamnstr-dotcom/pull/new/main
remote:
To https://github.com/thtmnisamnstr/thtmnisamnstr-dotcom.git
 * [new branch]      main -> main
Branch 'main' set up to track remote branch 'main' from 'origin'.
- In your GitHub repo...
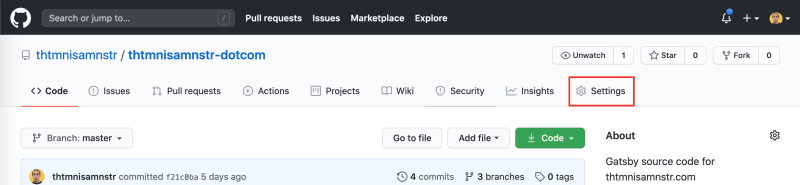
- Click Settings on your repo's navigation bar
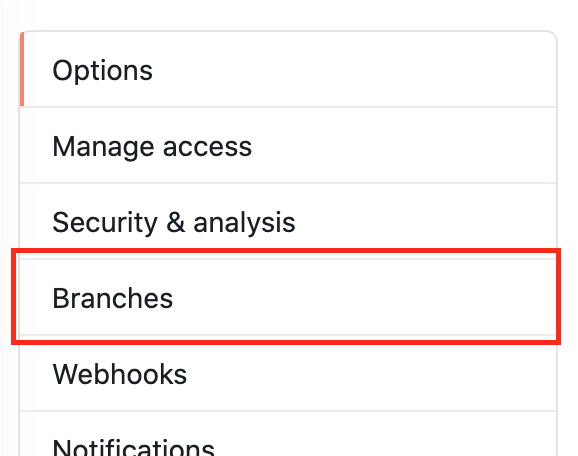
- Click on Branches in the Settings nav
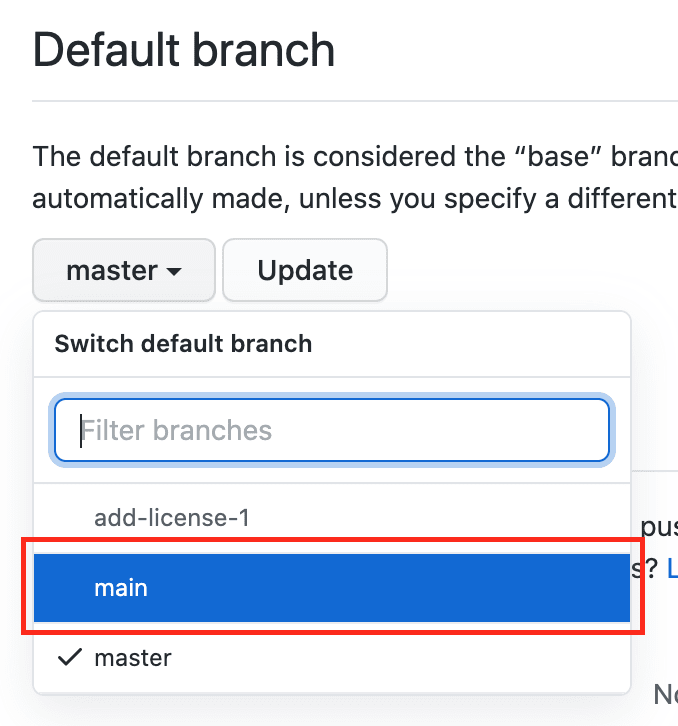
- Click the default branch dropdown (currently Master) and select Main
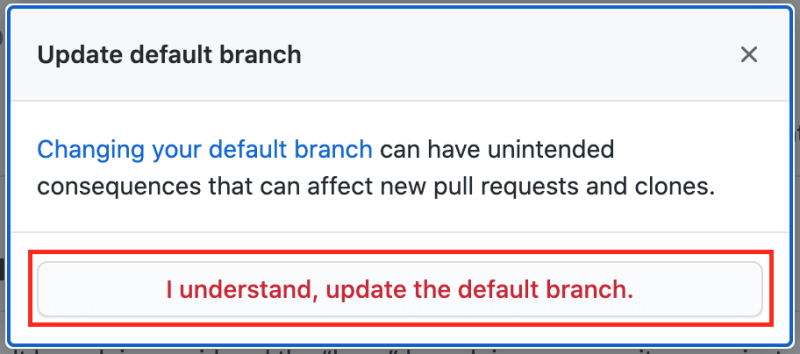
- Click the Update button

- A warning modal will pop-up. Click the "I understand, update the default branch" button
- Click Settings on your repo's navigation bar
Boom!
Now your repo's default branch is named Main.
That's it for today.
I'll post a more heavy duty tutorial next week on how to customize your new site, tailor it to you, build a resume page, and make your first post.

Latest comments (0)