
One of my favourite notification platforms out there is Pushover – easy to setup, easy to use, works with many applications out there in the market (home automation, Tautulli, Sonarr, Radarr just to name a few). So I thought I would give integrating it with AWS a go!
Creating a Pushover Application
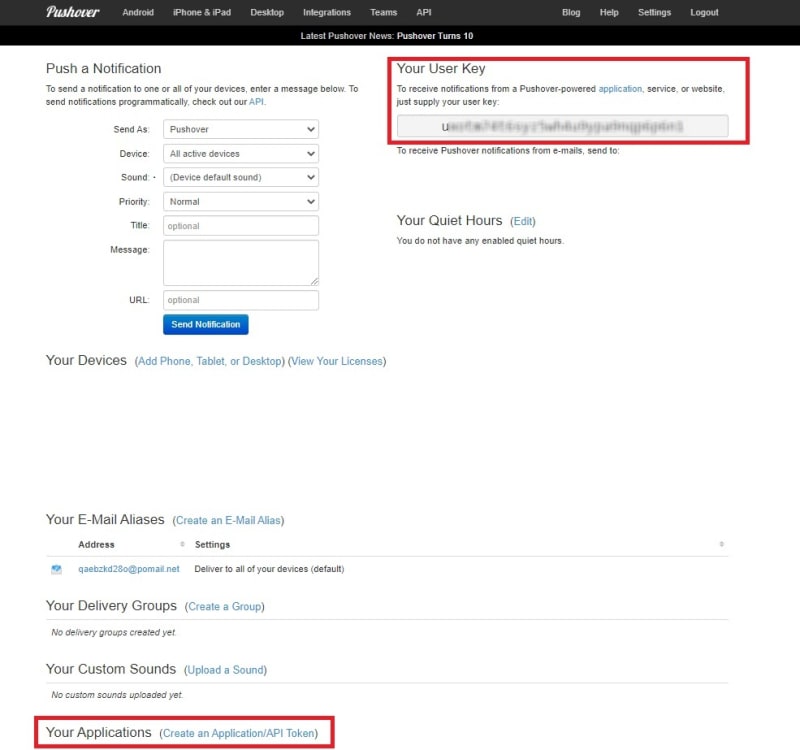
If you haven’t got an account already, I recommend setting one up. Its quick and easy. Once complete then you need to make a note of your User Key – this can be found on the top right hand corner of the page.
Then create an application within Pushover, this will give you an API Token (very handy!) by scrolling to the bottom of the page and selecting “Create Application/API Token”
Enter a name of the Application – this can be anything bu best practice would be something relevant to the use case. Description and URL are both optional fields, you can also add an icon for the application. This will be displayed each time the notification is sent to mobile device.
Agree to terms then click “Create Application”
Copy your new API Token/Key (we will be using this later on in our Lambda function)

Create a Node.js project
Here will be using a tool called NPM.
If you aren’t familiar or never used it before, continue below and get it installed on your machine.
If you already have it installed on your machine then you can skip to the command’s instructions.
Installing NPM
Visit NodeJs.org and download the relevant version for your machine.
Once downloaded, install the application. To verify the installation was a success, open your command prompt and type in the following command:
npm –version
the version installed should be displayed back to you within the terminal.
![]()
Great! – It’s installed. Now let’s continue
Commands
Within a command prompt (terminal) on your local machine (laptop, PC, etc) go to an empty directory.
Create a directory
mkdir pushover_app
Run the below commands
npm init
npm install pushover-notifications
Once the installation is complete, create a index.js file in that directory. Within that file copy the below code inside and save.
var Push = require('pushover-notifications');

exports.handler = function(event, context) {

    var p = new Push( {
      user: process.env['PUSHOVER_USER'],
      token: process.env['PUSHOVER_TOKEN']
    });

    var snsMessage = event.Records[0].Sns.Message;

    var alertSubject = snsMessage.Subject;
    var alertTime = snsMessage.Timestamp;
    var alertMessage = snsMessage;

    var msg = {
      title: alertSubject,
      message: alertMessage,
      priority: 2,
      retry: 30,
      expire: 300,
      timestamp: alertTime,
      url: "https://<link to site>",
      url_title: "AWS notifications"
    };

    p.send( msg, function( err, result ) {
      if ( err ) {
        throw err;
      }
    });

};
We are using this method due to the fact that we will be utilising a node module called ‘pushover-notifications’. This isn’t in the standard collection of modules that Lambda has access to, so we need to create the project offline, with all the requisite module dependencies, then ZIP and upload the package to Lambda.
And once saved, you can ZIP up the entire folder (including the ‘node_modules’ folder and others that may be automatically created in here) and keep the ZIP file aside for the next step.
To explain the code in more detail, the first line is just including the pushover-notifications module. Then the next bit called exports.handler is the standard function that AWS Lambda will call (with the SNS parameters passed in the event variable).
Next, we instantiate an instance of the Push() object called p, which is where we pass the Pushover API token and User token. Note: For security reasons, these tokens are stored as environment variables instead of being embedded within the code. We will need to set up these environment variables as part of setting up the Lambda function in the next section.
The next line after this just extracts the SNS notification details that are sent to the Lambda function from Amazon SNS and stores it in a variable called snsMessage.
Then we set up the subject, timestamp and actual message body. There are other fields we could extract; all depends on what information you provide the Lambda function.
Pen-ultimately, we set up an object called msg which contains the packet of data to send to Pushover. This includes the subject, timestamp and message body we created above, but more importantly, this also specifies the type of message. The priority variable is key. Normal messages are priority 0, but these messages are treated as non-urgent and won’t come through when DND mode is turned on the mobile device.
Priority 1 messages are marked ‘critical’ and WILL come through, but priority 2 messages are deemed ‘critical’ AND will also persist until they are acknowledged by the recipient.
For priority 2 messages, you also have to specify the retry period (which I set to 30 seconds) and the expire period (which I set to 5 minutes, or 300 seconds). This means that if you don’t acknowledge the message, it will keep pinging you every 30 seconds for up to 5 minutes.
At the bottom of this object, you can also specify a URL and a link name that gets sent with the notification.
Creating the Lambda function
Now we can create the Serverless function within AWS, which will transmit certain SNS (Simple Notification Service) messages to Pushover.
Log in to AWS Console.
In the search bar, type in “Lambda” select “Lambda” from the drop-down menu.
Select “Create Function”
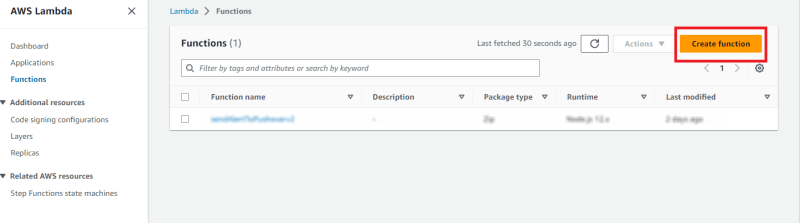
Now select ‘Author from scratch’ and give the function a meaningful name such as sendAlertToPushover, and specify ‘Node.js 18.x’ as the Runtime engine, and then click ‘Create Function’.
On the next screen, you won’t actually type in any code. Instead, you will replace the existing code by clicking on the ‘Actions’ button and selecting ‘Upload a .zip file’. This is where you find the location of the saved ZIP file, you created earlier and upload it to the function.
Once uploaded, now you need to create the ENVIRONMENT VARIABLES for the function.
Under the configuration tab, you will find a section called “Environment Variables”.

Here you will need to create the following entries:
PUSHOVER_USER: User token from Pushover
PUSHOVER_TOKEN: API Key/Token of App created in Pushover
Then click “Save”
Creating the SNS service
In the search bar, type in “SNS” select “Simple Notification Service” from the drop-down menu.
Then in the SNS dashboard, choose ‘Topics’ from the left hand menu, and click on ‘Create Topic’.
Here you need to give the topic a meaningful name, such as ‘PushoverNoteMessage’ or similar.
When done, click on ‘Create Topic’ at the bottom of the screen (leaving everything else as default for now – changes can be made at a later date).
Next you will be taken to “Subscriptions” screen, where you can click ‘Create Subscription’ to instruct AWS on how to handle the topic messages.
And on the subscription creation screen, you need to change the ‘Protocol’ to ‘AWS Lambda’ and then on the ‘Endpoint’ you need to choose the Lambda function that you created in the previous section.
Now you can click ‘Create Subscription’ at the bottom of the screen to save it.
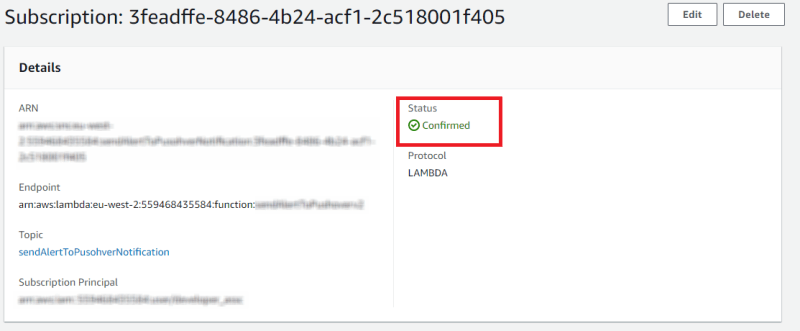
That’s all topic and subscription has been created. Just make sure the “Status” reads “Confirmed”
Testing
Before we go lets confirm all is well. Let’s publish a message to SNS!
By publishing a message to SNS, that message should get transmitted to the Lambda function and then to your mobile device.
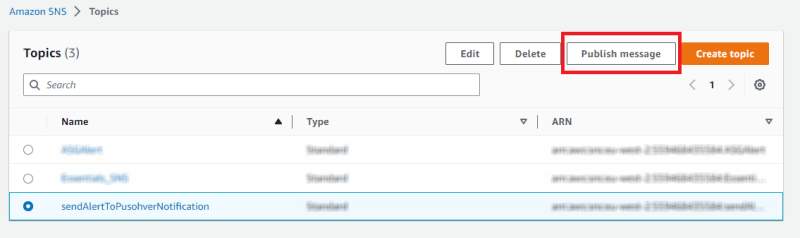
On the “Topics” dashboard, select your newly created topic. Once selected “Publish Message” should no longer be greyed out.
Select “Publish Message”
The next page is where you will be able to enter the contents of the notification. Subject and Message. Go ahead and enter your message. When ready, click on “Publish Message” at the bottom of your screen.
AWS will go off and perform the necessary work to get the message to your mobile device. Now go check that device! The message should have arrived! 😊
Congratulations you have just created a custom notification system using AWS Lambda, AWS SNS and Pushover!!!

Oldest comments (0)