AWS has gained exponential traction over the past years, and for all the good reasons.
While as a beginner AWS can be a bit of a headache (you know, due to the fact that there is over 200+ services to choose from) the entry level for the grand majority of them is relatively low, especially you have some software engineering experience.
So is the case for Step Functions, easy to understand, relatively hard to master. In this article I want to guide you through some techniques and introduce you to some concepts that will help you understand and efficiently manage the state.
Table of contents:
Intro
Wait, what are step functions?
Step functions are infrastructure as code meant to represent the series of steps your logical process. This process can be anything, moving data from S3 buckets, executing Lambdas, sending Alarms. Any of the AWS Services can be used in custom made flows that you will define, and later have available as IAC.
In this article, rather than explain what you can do with them, I will detail what the state is and how to manage it.
Set Up (Only if you want to follow along practically)
AWS offers free tier for 12 months (with certain limits), if you have never developed Step Functions in AWS, I recommend you build the step function as you follow along the article.
Make sure the step function has rights of execution by adding the AWSLambdaRole policy to the Step Function's role.
The State
The state is a JSON object that defines the input of the logical step you are executing as well as later becoming the output of it. This JSON structure is completely customizable, however, you need to take care of it's structure and content, otherwise it will become unreadable and unmaintainable.
Types of state:
- Execution State (Execution Context)
- Local State (Local Context)
Execution state
The execution state is the input the step function was executed with.
It can be defined when executing the step function manually or by schedulers/orchestrators which do it for you. You can modify it, but it is highly recommended you don't, this way you will be able to know how the step function was executed..
The execution state will be accessible during the whole flow of the function, leverage it!
Accessing the execution state
By using double $ as a prefix you can access the Execution State and use it's keys as if they were variables. You will also need to use .$ as a suffix in the key where you want to use it.
For example, let's run the hello-world Lambda using the following:
Execution State (Execution Input)
{
  "key1": "This is an execution argument!",
  "key2": "No, I can't fix your printer!",
  "key3": "HTML is not a programming language!"
}
Lambda Payload:
{
  "key1.$": "$$.Execution.Input.key1",
  "key2.$": "$$.Execution.Input.key2",
  "key3.$": "$$.Execution.Input.key3",
}
Remember:
- .$ as a suffix in the keys tells step functions that the value will be a call to a State.
- $$. as a prefix tells the step functions to access the Execution state.
Lambda step should look like this now:
Run the function:
If you look at the results, you will see the values have been successfully replaced:
Local State
The local state is the one you get to play with the most, since it gets changed / manipulated in every step.
In the first step of the step function, the Execution State will be copied and used as an input.
The flow goes as follows:
local state is used as input for a step (task) > local state is now the output of that step (task)
However, sometimes you want to be able to keep the output of a step for another one which is further down the line.
Whatever the case is, in 90% of situations you will need to manipulate it in order to fit your flow's needs.
Left unchecked, your state will become messy and unreadable (truncated, some of these objects are very long):
In this picture, the lambda invoke is the first step, thus the input is a copy of the Execution State. After that, the local state will become the Output. In the next step, the Input would be the Output shown.
Manipulating the local state
You can manipulate the state with the given paths:
It is key you understand what all these paths mean in order to master manipulating your state and leveraging it.
All the paths can be enabled at every step of your flow:
Input:
Output:
How are they executed:
- They are optional, so you can activate or deactivate them at any point, creating any combination with them.
- The flow goes as follows, this is the case for every step in your flow:
InputPath > Step Execution (Lambda) > ResultSelector > ResultPath> OutputPath
InputPath
The InputPath takes care of filtering the local state that acts as input for a certain step, you can select a certain key to use as input for the step, instead the whole local state that was passed from the previous step.
Add the following to the InputPath: ```
$.key1
Example:
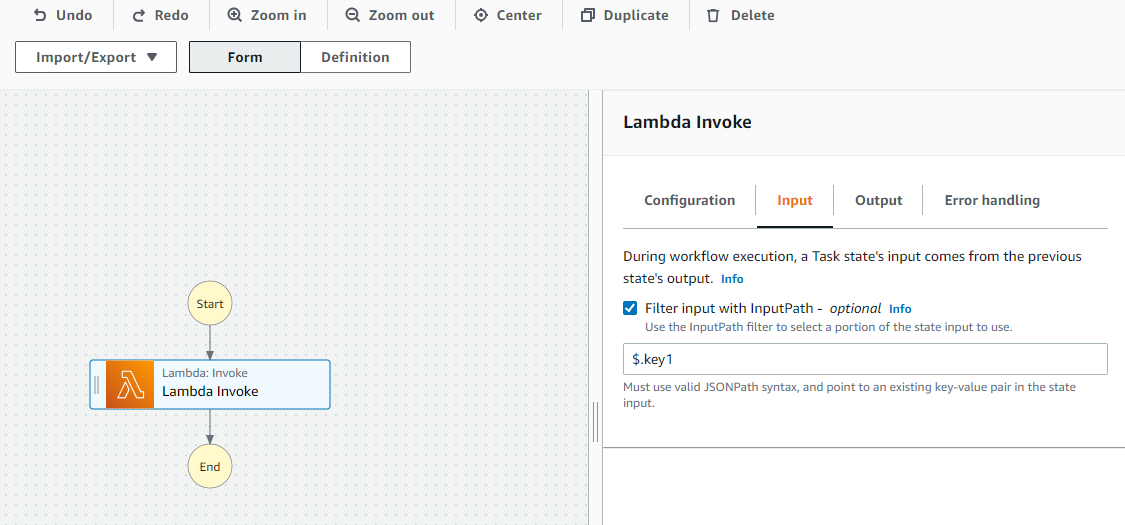
It looks like nothing happened, activate the advanced view:
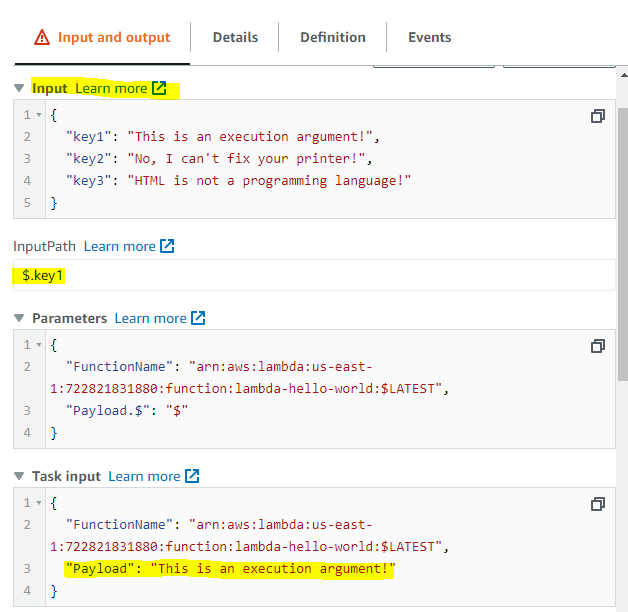
The payload was successfully changed. (The Lambda will fail, since the input is not supposed to be a string).
#### ResultSelector <a name="result-selector"></a>
The ResultSelector takes care of filtering and transforming the step's output, with this you can shape the output to whatever form you want.
Add the following to ResultSelector:
{
"im_changing_the_field.$": "$",
"im_a_copy.$": "$",
"im_another_copy.$": "$.Payload"
}
Run the function, look at the results (truncated):
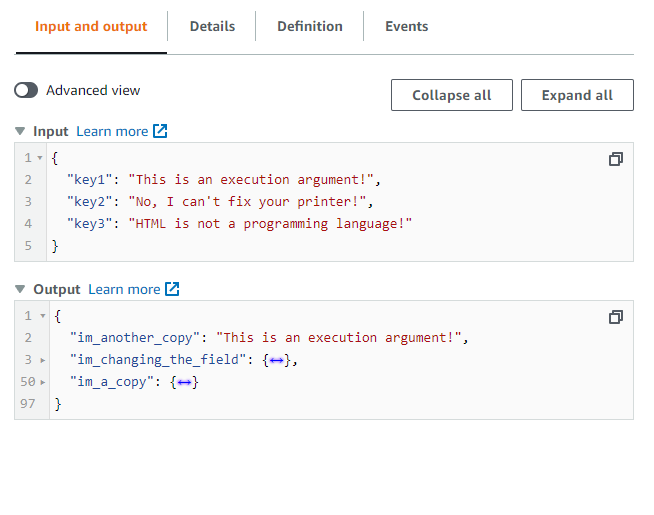
#### ResultPath <a name="result-path"></a>
The ResultPath (different than ResultSelector) takes care of adding or substracting structures from your state. This step is limited to two options:
- Add the output from OutputPath to your original unfiltered input with a new key.
- Discard the output from OutputPath and return your original unfiltered input.
Copy the following to your ResultPath (disable ResultSelector): ```
$.lambda_result
``` and select the first option.
Look at the results:
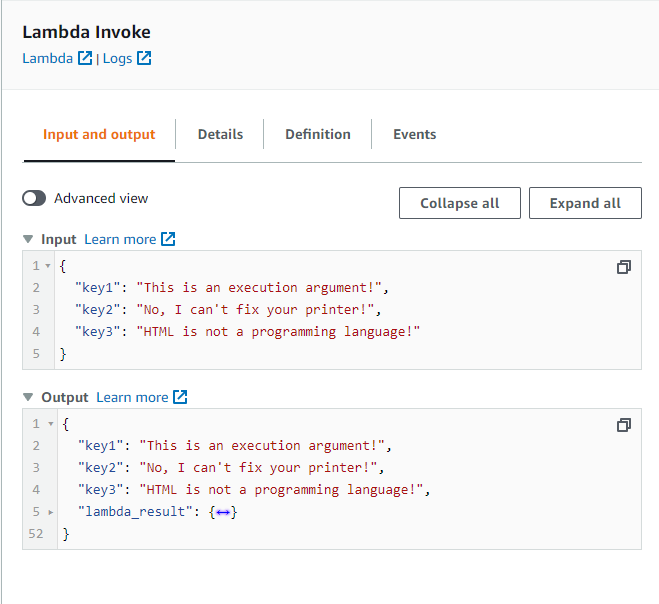
Do the same with the second option and look at the results:
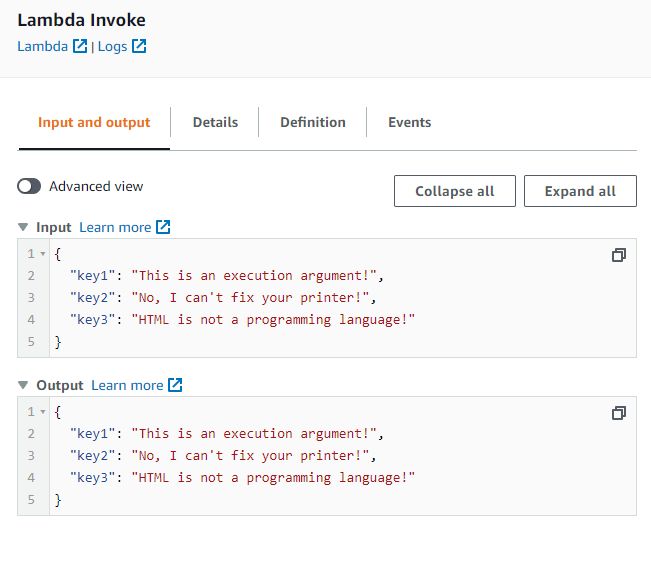
#### OutputPath <a name="output-path"></a>
The OutputPath does the same as the InputPath, but for the output. Take in account this output <u>can be the raw output from the step or, a transformed output that comes from ResultSelector/ResultPath</u>.
Add the following to OutputPath (disable ResultsPath): ```
$.Payload
Run the function, look at the results (enable advanced view):
Notice how the Result was filtered by the OutputPath.
Now try to combine all of them at the same time ;)
End Note
Now you know how the state works and how to manipulate it, it falls on your shoulders to keep it clean and readable.
Reflect on the following:
- What does my previous state output, is all the output needed for the next step?
- What does my next step need as an input, is all the local state needed for it?
- Do I need my local state to output at the end of the function, can you discard it?
- Will my step function have an execution input? How can you leverage that in order to keep the local state clean and simple?
These questions will help you design clean and readable step functions.
Thank you for reading and see you in the next one!


Top comments (1)
Your article is very useful, however the formatting after the InputPath section is bugged. It would be awesome if you can fix it!