Part 1. GenServer — Elixir/OTP
With the beginning of 2020 Elixir has been gaining a lot of popularity in the field of functional programming language. Being a software engineer who always looks out to try something new I instantly bought the idea of learning the language when it was introduced at my workplace by a fellow game developer.
As I started learning the language I found it a little difficult as I never wrote a single line in a functional way using Elixir. It promotes a coding style that helps developers write code that is short, concise, and maintainable which was pretty new to me.
As I dived into the language further I was introduced to the concepts of scalability, concurrency and fault tolerance. Everything about the language seems perfect the tooling to write, test and maintain code is smooth. Also when companies like Discord and Square-Enix are using it to handle large user base in real-time it gives a lot of credibility to the language.
The area where elixir shines is handling scalability and fault tolerance. As it can be pretty daunting to wrap your head around the concepts I decided to document every task that I did to get hold of the concepts in the easiest possible manner. This post and the posts to come deal with the concepts of writing concurrent and fault-tolerant code using Erlang’s OTP(Open Telecom Platform) behaviours, so if you are new to Elixir you might want to skip this post as it might be a little challenging to get directly into the intermediate parts of the language.
I am not going to dive deep into what Elixir is and how it runs on a system as this post is more about using OTP behaviours in Elixir to achieve concurrency and fault tolerance.
What to expect from this article 🤔
This will be a 7 part article where we will be learning Elixir concepts by building and continuously improvising a key-value store application. The application would let you simply create, update and delete a value in a store.
- Part 1. Creating a key-value store using GenServer.
- Part 2. Managing multiple stores using GenServer processes.
- Part 3. Persisting data in key-value store using GenServer.
- Part 4. Making operations on the key-value store faster by using worker processes.
- Part 5. Adding Supervisors to the key-value store.
- Part 6. Managing multiple Supervisors and a supervision tree for the key-value store.
- Part 7. Writing your first Webserver to expose the key-value store to the web.
Let’s get started 🏎️
Before beginning make sure you have Elixir and Mix installed in your system.
Now create a mix project by typing
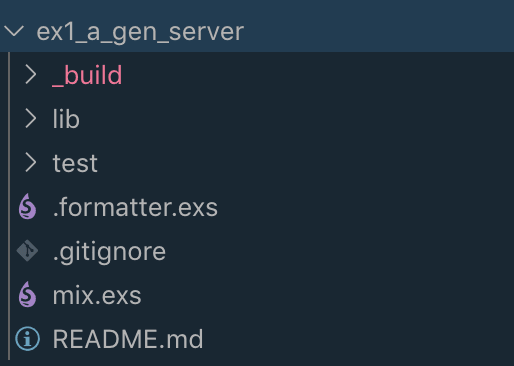
mix new ex1_a_gen_server
This command should create your project structure like this
delete all the files in the lib folder and create a file with name server.ex
This is the file where we are going to write all of our code.
Before starting to write the code let’s start with what are we going to build and how are we going to implement it using a GenServer.
The key-value store that we are going to build would be a simple process that should do the following three tasks.
- Put a value against a key in the store.
- Retrieve a value against a key in the store.
- Delete a value against a key in the store.
Now let’s discuss what is a Genserver.
A Genserver is behaviour module for implementing the server of a client-server relation.
It is a process like any other Elixir process and it can be used to keep state, execute code asynchronously and so on. The advantage of using a generic server process (GenServer) implemented using this module is that it will have a standard set of interface functions and include functionality for tracing and error reporting. It will also fit into a supervision tree(We will discuss this later in the coming posts).
So we are going to maintain our state i.e. the key-value store in the form of a map in a GenServer process and we are going to talk to the process in an async way by message passing.
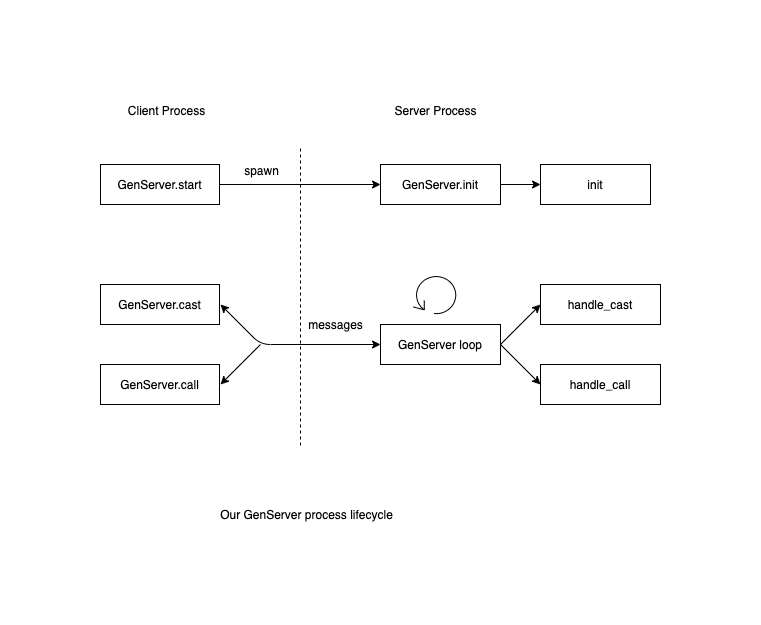
In order to make we create out key-value store app we need to implement these three callbacks in our server. init/1, handle_cast/2, and handle_call/3.
- init/1 accepts one argument. This is the second argument provided to GenServer.start/2, and you can use it to pass data to the server process while starting it.
- The result of init/1 must be in the format {:ok, initial_state}.
- handle_cast/2 accepts the request and the state and should return the result in the format {:noreply, new_state}.
- handle_call/3 takes the request, the caller information, and the state. It should return the result in the format {:reply, response, new_state}.
Show me some code 👨💻
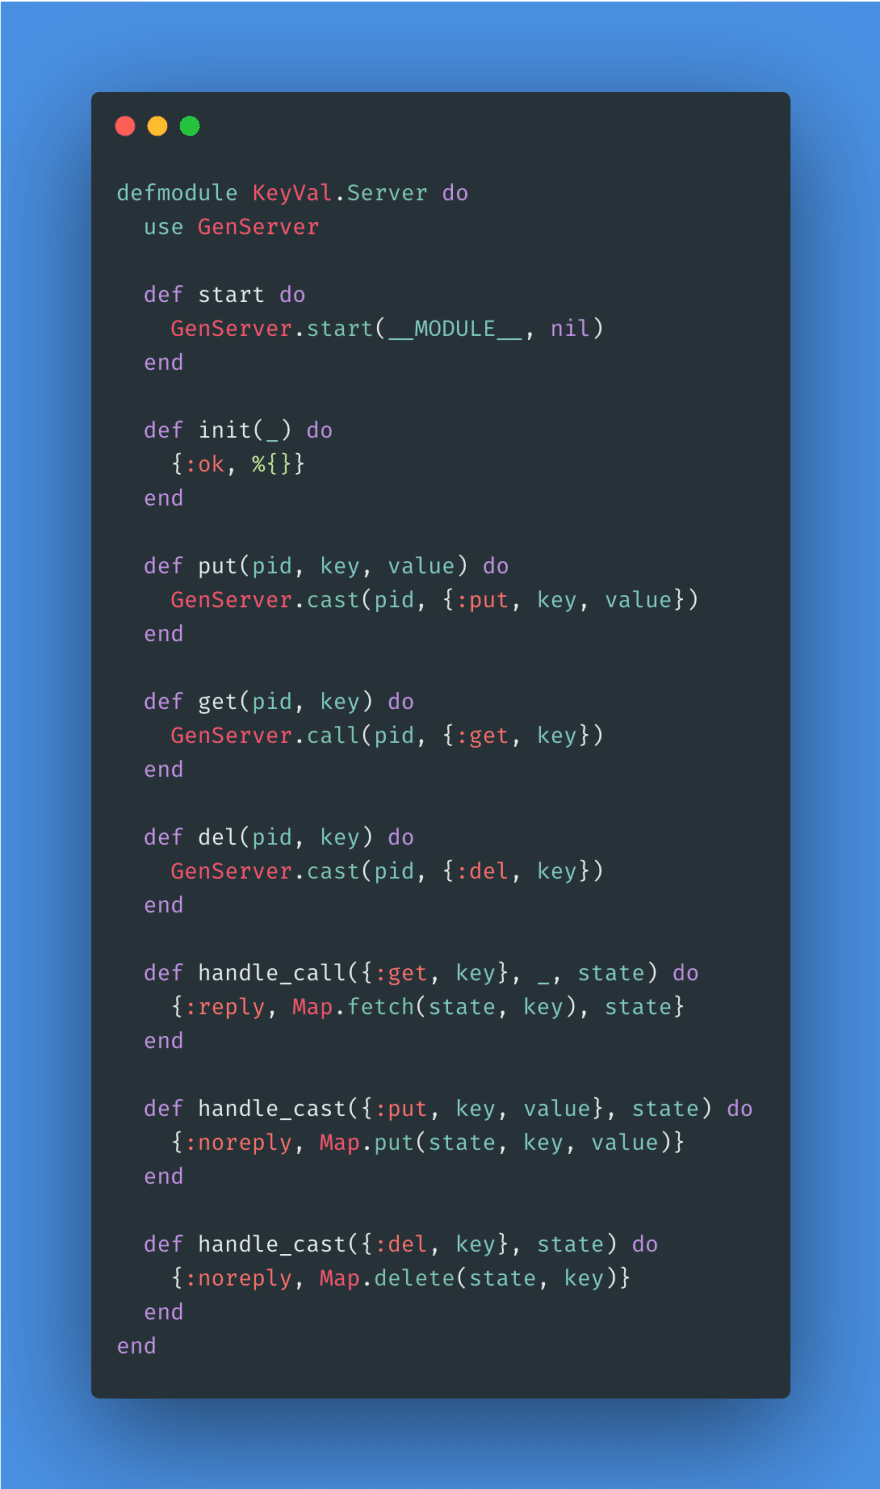
Ok, so here we start our GenServer by calling GenServer.start/2. The first argument is the module itself while the second argument can be any arbitrary argument that you want to pass to the server while it’s initialization.
- The GenServer.start/2 will call the init/1 function which would accept the argument passed to it while starting the server. It eventually returns {:ok, %{}} which is our empty initial state.
- The put, get and del functions are implemented to accept a PID and some relevant information and pass the information to the GenServer process running on the PID.
- After receiving the info depending on whether is a cast or a call request the server call the appropriate handler.
- Since the state is not mutable every time when the server state is changed a new state is returned from the handle call or cast functions to the update the server state.
- As the function names suggest Map.fetch, Map.put and Map.delete do what their function name describes.
- The reason why we are using handle_call for the get request is because it is the request where we care about the result returned to us. So we wait for the process to give us back the result.
The final run 📟
On starting the server we store the PID in a variable and then all the communication is happening using the PID of the process.
You can use the exposed put, get and del functions on the Server module to perform operations on the key-value store all you need to remember is the PID of the store process that you started.
This is the basic implementation of a GenServer in Elixir. I hope this post has helped you get a little bit better understanding of the whole process.
The complete source code of all the parts are here.


Top comments (0)