
Hi, Welcome to part 6 of this series.
Today, we are going to wrap up the backend of our app "Gourmet" by implementing the functionality that allows the admin to update the status of an order placed by a customer.
We are also going to set up our front-end client apps namely the web app for the admin and the mobile app for customers.
Let us begin by writing our tests.
- Ensure the main branch is up to date with the remote main branch
- Create a new
ft-admin-update-orderbranch off our main branch - Update
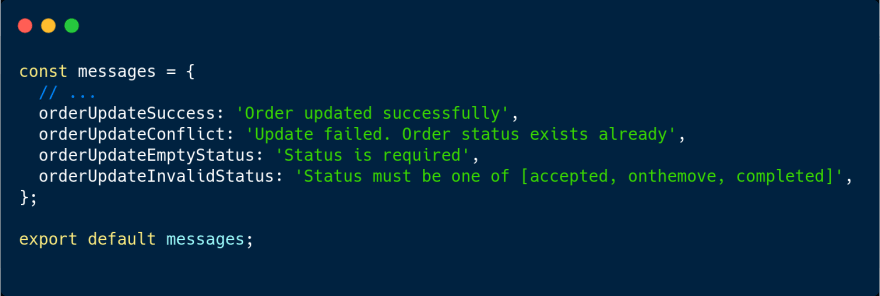
tests/orders.test.jsand add the followingADMIN UPDATE ORDERtest suite along with the new messages. Dont' forget theconflictstatus code.

- Update
src/utils/messages.jsand add the new messages
- Update
src/validations/orders.jsand add theupdateOrderfunction which will help us to validate the status.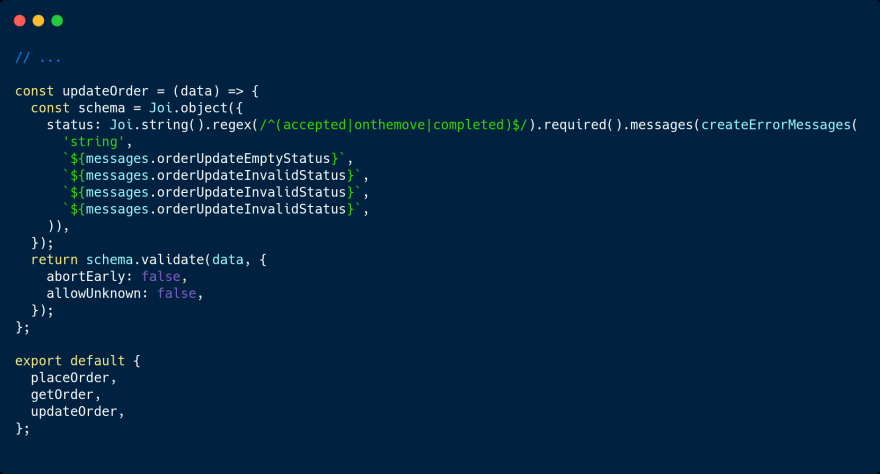
accepted, onthemove, and completed are the only allowed values.
- Update
src/middlewares/orders.jsand add thevalidateUpdateOrderfunction andcheckOrderStatusfunction.
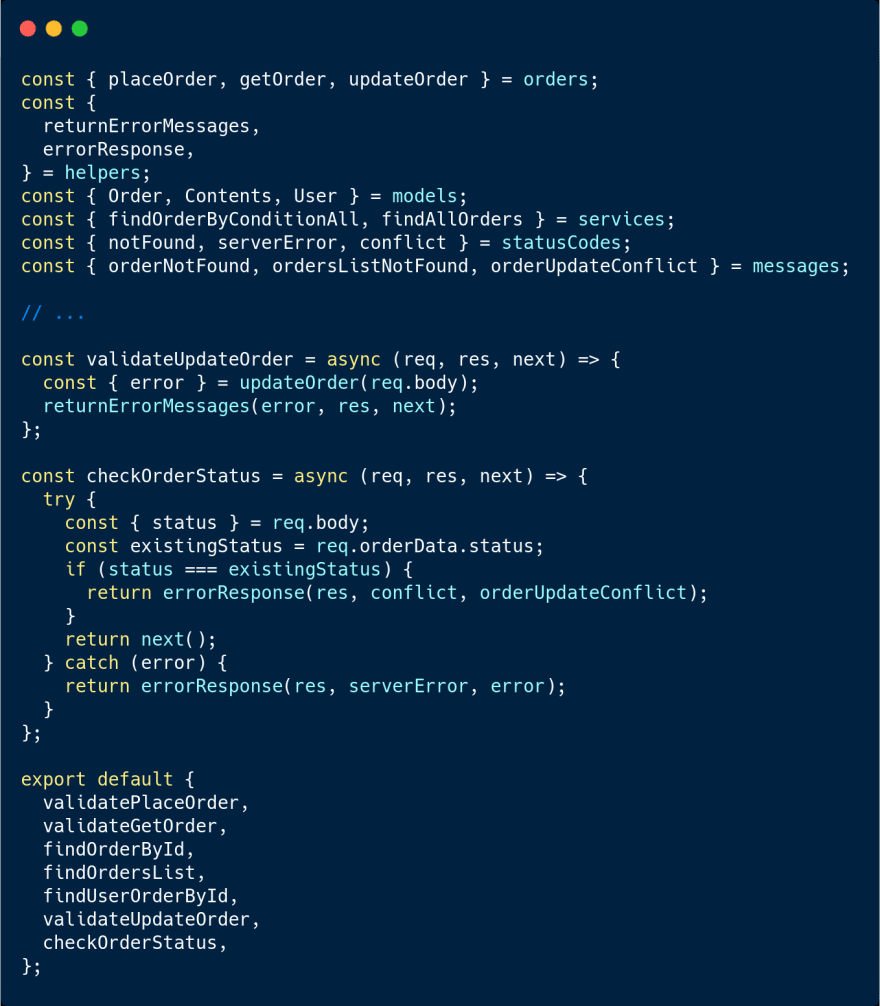
The checkOrderStatus function will help us to avoid updating an order status to a value that it already has thus saving up a bit on our server resources. For example, if the admin has already accepted an order, there's no point of accepting it again.
- Update
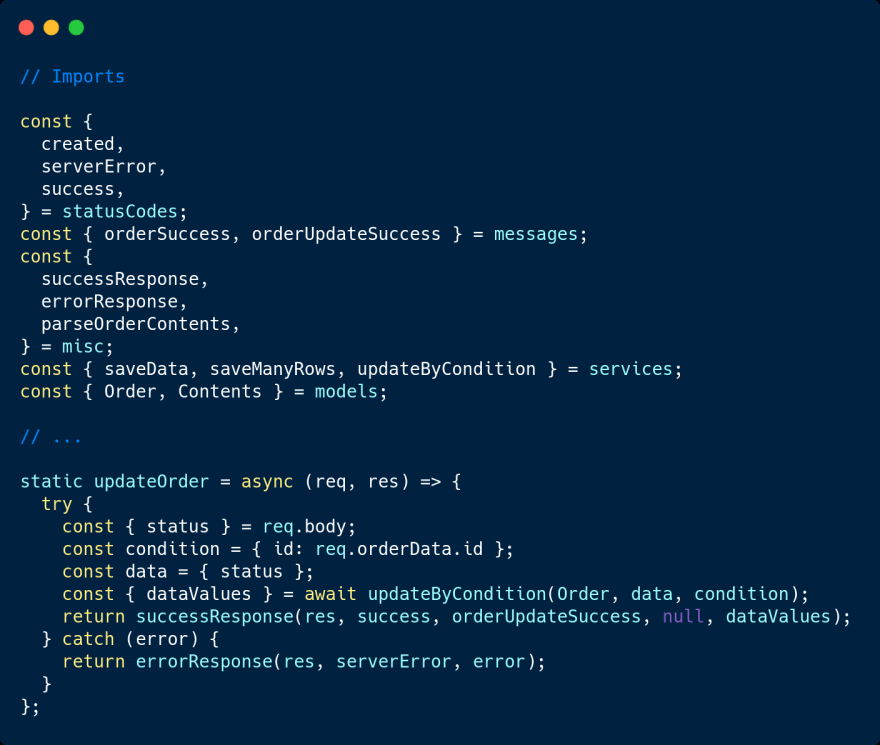
src/controllers/orders.jsand add theupdateOrdermethod
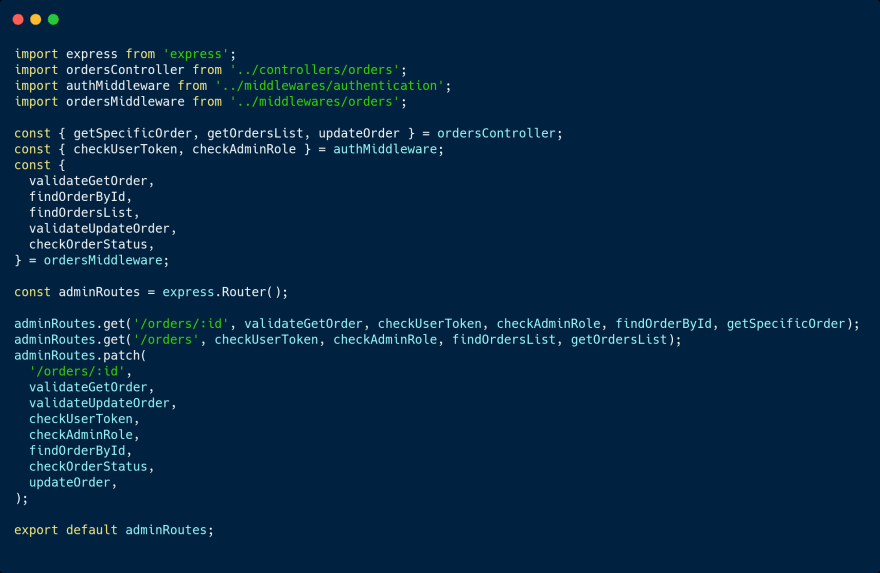
- Finally, update
src/routes/adminRoutes.jsand add the update order route. The finaladminRoutes.jsfile should look like the following:
And that's it!
If you run the tests again, they should all pass which means everything is working as it should.
Now, go ahead and commit the new changes to GitHub and open a PR. After a successful Travis build, merge the PR to trigger a new production build on Heroku.
Note: There's a bug I caught on signup. Check out the fix on this PR if you had not caught it.
Our simple backend is now done. Let us now set up the front-end client apps.
Admin Panel React App
This web app will help the admin of Gourmet restaurant to manage the orders of customers.
For now, the admin will be able to fetch all the orders, fetch a single order details, and update an order's status to let the customer know the progress of their order.
Later on, we could add more features like user management, staff management, analytics, inventory management and any other feature that would improve the processes of Gourmet as a business.
We are going to deploy this admin web app to Netlify, but you could use any other cloud service.
Going forward, I assume you are familiar with React. If not, check out React Offical Docs and Create React App.
Let's get started.
Using Create React App, create a new React app called
gourmet-adminWhen done, follow the instructions on your terminal to launch your new app in the browser
Install and configure React Testing Library. More info here
Refactor
App.jsto remove unnecessary boilerplate code andApp.test.jsto use React Testing Library then runyarn testto make sure the tests are passingAdd the project to a new GitHub repo, setup CircleCI and Netlify as our CI and CD respectively
Configure test coverage with both coveralls and CodeCov
Commit the changes to GitHub, open a PR to trigger a build job on CircleCI to run our tests.
When the build is successful, go ahead and merge the PR to trigger a new deploy build on Netlify.
This is going to be our workflow for the admin app going forward.
For reference, check out this branch
Customer React Native App
This mobile app will help customers to view the restaurant's menu and to place orders.
We are going to build a very simple Android React Native app but if you want an IOS version as well, it is fairly simple to configure it.
Let's get started.
If you are not familiar with React Native, follow this offical guide to learn how to setup the dev environment and core concepts.
Using
React Native CLI, create a new React Native App calledGourmetMake sure you can launch it on an emulator or a physical device
Configure ESLint, Jest, and setup React Native Testing Library
Remove unnecessary boilerplate code from
App.js, refactorApp.test.js, and run tests to make sure they are passingAdd the project to a new repo on GitHub, setup CodeCov, and GitHub actions
Commit the changes to GitHub, open a PR, wait for the workflow to succeed then merge the PR
For reference, check out this branch.
The basic implementation for our front-end apps is done. In the next post we will implement authentication in the following manner:
- Login and logout on the admin app.
- Sign up, login, and logout on the mobile app.
Thank your for reading, see you in the next one!


Top comments (0)