
Cascading style sheets ordinarily known as CSS is a language that illustrates how the elements of the HTML are to be presented on any media.CSS was proposed by Hakon Wium Lie on October 10, 1994. Several other style sheet languages were proposed at about the same time for the web. But the first one to be introduced was CSS1 and it was introduced in 1996.
CSS SYNTAX
A CSS-rule set consists of a selector and a declaration box. The_ selector_ points towards the element of HTML which you want to style. The declaration box consists of one or more declarations which are separated by semicolons “;”. A CSS declaration always ends with a semicolon, and declaration blocks are surrounded by flower brackets.

Just as the screenshot shows, the syntax is as simple as that. Firstly, you have to write the name of your selector like H1 then the opening curly brackets and then you have to write the property and then a colon sign and then the value you wish to give to the property followed by a semi-colon then again the closing flower braces.
CSS SELECTORS
If you want to “find” or select the HTML elements you want to style then you will have to use the CSS selectors. We can divide the CSS selectors into five categories:
- Simple selectors.
- Combinator selectors
- Pseudo class selectors
- Pseudo elements selectors
- Attribute selectors
Combinator selector: It explains the relationship between the selectors. A CSS selector can contain more than one simple selectors. Between the simple selector, we can include a combinator.
Simple selectors: It selects elements on the basis of name id and class.
Pseudo-class selectors: It is used to define a special state of an element, for example, the hover effect.
Pseudo-elements selectors: It is used to style specified parts of an element for example style the first letter or line of an element.
**Attribute selectors: **style HTML elements with specific attributes.
CSS COLORS
Colors are one of the very important features whenever we talk about the formatting and giving some attractive looks to our web page. We can write colors in four different ways.
- Passing the HEXAdecimal code. (also known as (HEX-CODE)
- Short HEXAdecimal code. (also known as short HEX-CODE)
- RGB absolute.
- Keywords.
HEX-CODE: In this, we will start with the hash and then followed by a six-digit code for example:-
- #000000 - Black
- #FF0000 - red
- #00FF00 - green
- #0000FF - blue
**Short HEX-CODE: **To write the color in short hex-code the rule is almost the same as the HEX-CODE but is shorter for instance:-
- #000 - black
- #F00 - red
- #0F0 - green
- #00F - blue
RGB Absolute: **There **are three basic colors in the world all the other colors are the mixture of these three colors. So RGB red green blue, the format is as under
- RGB(0,0,0) - black
- RGB(255,0,0) - red
- RGB(0,255,0) - green
- RGB(0,0,255) - blue
CSS BACKGROUND
These background properties are used to define the background properties of web elements. In this article, we will describe two properties of CSS background.
- Background color
- Background image
BACKGROUND-COLOR
The background-color property allows setting the background color of an HTML element. We can set this property to a predefined color name, color value or transparent. Color name includes the name of the color and color value includes the color code like hex code etc. In the following example, we are going to give a green background color to the heading.
BACKGROUND-IMAGE
The background image property specifies an image to use as the background of an element. In CSS by default, the image is repeated so that it can cover the background. So what it means is that if you want to apply your own picture in the background of your web element then you just have to save that image in your folder and then give that address in the code as shown in the following screenshot.

CSS BORDER
This property of the CSS allows you to write your text or picture in a border and what’s more is that you can specify the style, height, and width of your border. There are different styles of borders as such as dotted, dashed, solid, double, groove, ridge, inset, outset, and hidden. The example is shown in the form of the following screenshot.

CSS Margins
The elements which are outside any defined borders are given space around them using the CSS margin property. If you want to have an equal space around your test from all the four sides then it the best property for you. You can see for yourself in the following screenshot.

CSS PADDING
The elements which are inside any defined borders are given space around them using the CSS padding property. The syntax is the same as the syntax of the CSS margin property. You give padding to all sides of your element. there are properties for all the sides of the elements which are:
- Padding-top

- Padding-right

- Padding-left

- Padding-bottom

Individual padding:
The following screenshot shows padding from right, left, top and bottom.

CSS HEIGHT/WIDTH
As the name suggests this property is used to set to height and width of an element. It does not include margin or padding it the height and width of the elements inside margin, padding, and borders. It has the following five values:
- Auto: the browser calculates the height and width
- Length: it defines the property in pixels or centimeters.
- %: it defines the property in percentage.
- Initial: sets the default value of the height or width.
- Inherit: height or width will be inherited from parents.
CSS LISTS
While developing a web page we mostly have to apply bullets to our text or list of items that we have to display on the web page. For this, CSS lists are used. Now, in lists we have two types of lists one is the ordered list and the other is the unordered list. An ordered list is used when we have to apply simple bullets to our list items and an unordered list means that we have to apply numbers to our list. Both of these properties come in handy whenever we are using list items on our web page.
CSS DISPLAY
The display property defines how do you want to display your element and if you even want to apply any effect to your element or not. You can display your element inside an already displayed element, it is known as an inline display.
CSS POSITION
The position property is used to specify the positioning method for an element. There are five methods for positioning elements which are given below:
- Static: an element is not positioned in a special way it is positioned according to the flow of the page.

- Relative: it positions an element away from its actual position. Which can be left, right, top, or bottom relative.
- Fixed: an element with the fixed position will always stay fixed to its position even if the page is scrolled down.

- Sticky: In this position, the element is positioned relative at first, and when the page is scrolled it becomes fixed to its position.

- Absolute: in this, the element is positioned relative to the nearest ancestor.

CSS OVERFLOW
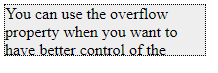
Some times we have to write a very long text on our web page which does not fit in its container. The overflow property is used to control the content which is too big or long to fit in an area. The overflow adds a scroll bar to the container so the reader can scroll down to read the whole text. It is very simple. You just have to write overflow: scroll; This property has the following values.
Visible: the overflow is visible, which means that the property is not clipped and the text will render outside the container.

Hidden: the overflow is cut off. The rest of the content is hidden.
Scroll: a scroll bar is added both horizontally and vertically.

Auto: it is similar to scroll but a scroll is only added when needed.
CSS FLOAT
It is basically to position the whole of the element. The element and all of its contents float to the right or left.
CSS IN-LINE BLOCK
The main difference in the in-line and in-line block is that it allows setting the height and width of the element and it does not allow a line break after the element so that the elements can sit together.

Top comments (0)