The purpose of this article is to provide a step by step guidance on how to create a webMethods Integration Server Docker image using Software AG installer 10.7 on a Linux flavored system. This is a new feature available in 10.7, where we don’t need to pre-install a base IS installation, to be able to create a IS docker image. I have performed this POC on a ubuntu based VM. I will also share the step-by-step process for installing the docker engine on Ubuntu VM, as having a docker engine running is mandatory for this IS docker image generation process to work.
Prerequisites:
- Have a Linux flavored system ready for use. I have done this on ubuntu, but it should work for other Linux flavored systems as well.
- You should have installation privileges on the system, to be able to run certain commands that we will perform in the below sections. For e.g.: docker installation commands and user group modifications command. The user who will be used to run the commands mentioned below should have ownerships of the folder where you will keep certain files, like the SAG installer file.
- Your machine (VM) should have an active connection to internet. This is needed for you to be able to download docker and for the SAG installer to connect to the SAG installer server.
- You have downloaded the latest .bin installer (for Linux system: SoftwareAGInstaller20210517-Linux_x86_64.bin) from empower and kept the installer ready in the VM, where you will be performing this POC.
Important Notes:
The POC I have done is based on my knowledge of the Linux, Software AG product suite and Docker, and it doesn’t necessarily say/recommend anything about the best way, and the best practices prescribed by anyone for doing it.
STEPS:
STAGE 1: install docker and give the proper privileges to your user
- login to your VM and then run below command. It will update the apt package index and install packages to allow apt to use a repository over HTTPS. It will give output like below.
sudo apt-get update

- Run below command. It should give output like below
sudo apt-get install apt-transport-https ca-certificates curl gnupg lsb-release

- Run below command to add Docker’s official GPG key.
curl -fsSL https://download.docker.com/linux/ubuntu/gpg | sudo gpg --dearmor -o /usr/share/keyrings/docker-archive-keyring.gpg

- Use the following command to set up the stable repository. This should give output like below.
echo “deb [arch=amd64 signed-by=/usr/share/keyrings/docker-archive-keyring.gpg] https://download.docker.com/linux/ubuntu $(lsb_release -cs) stable” | sudo tee /etc/apt/sources.list.d/docker.list > /dev/null

- Install Docker Engine
5.1 Run below command .
sudo apt-get update
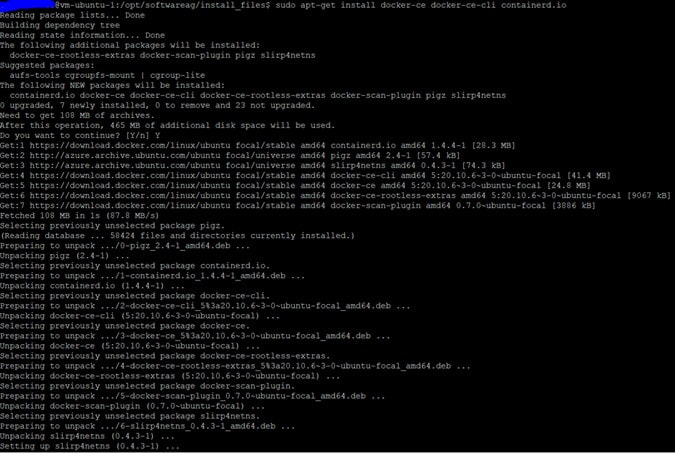
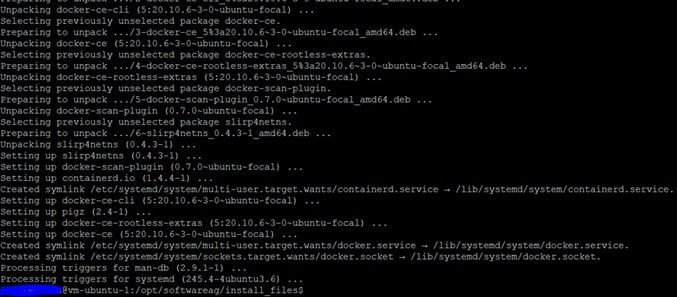
 5.2 Run the below command to install the Docker engine
sudo apt-get install docker-ce docker-ce-cli containerd.io
5.2 Run the below command to install the Docker engine
sudo apt-get install docker-ce docker-ce-cli containerd.io
 5.3 Use the below command to add your user to the docker group so that you can run docker commands. Here $USER is the user ID, which you will use to run the installation instructions.
sudo usermod -aG docker $USER
6.Restart your VM for the changes to take effect
5.3 Use the below command to add your user to the docker group so that you can run docker commands. Here $USER is the user ID, which you will use to run the installation instructions.
sudo usermod -aG docker $USER
6.Restart your VM for the changes to take effect - Check if your user has got the access to run docker command and also verify the docker installation. This is needed as otherwise; you will get permission denied error as shown below if you will run the installer for creating docker image with this user. See the sample error below.


STAGE 2: use SAG installer to create IS docker image
- Go to the directory where you have your .bin file present. This .bin file is the SAG installer file that you downloaded from empower. Please ensure that execute permission is there for your user.

- Run the below command in below format to start the installer. Here you can give centos:7 as the base OS image on top of which the IS image will be created. The sample output is shown below. Once you see the option “Enter: [N]. Press Enter.
sh SoftwareAGInstaller<yyyymmdd-operating_system>.bin -dockerCreateImage <docker_image_name> -dockerBaseImage centos:7 -console
For eg: sh SoftwareAGInstaller20210517-Linux_x86_64.bin -dockerCreateImage my_wm_img -dockerBaseImage centos:7 -console

- The installer will now try to connect to the empower server. If you have an active connection ( without needing a proxy server, I have not tested with proxy server) to it and installer can connect to it, then you should see below screen. Once you see “press Enter” message. Press Enter.

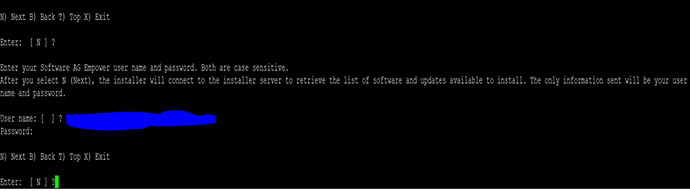
- Now you will be prompted to specify the credentials that would be used to connect to empower server. Please give the correct credentials and then press enter when prompted for.
- Now you will be asked to select the product suite. I want to use 10.7, so I select option 1 and then press Enter . Again once prompted to press Enter, please press Enter.

- After that, it will ask you to give the hostname and installation directory that will be created inside the docker image . You can leave that as such for this case. It will be automatically detected and populated. You can press Enter and it will take that value automatically.

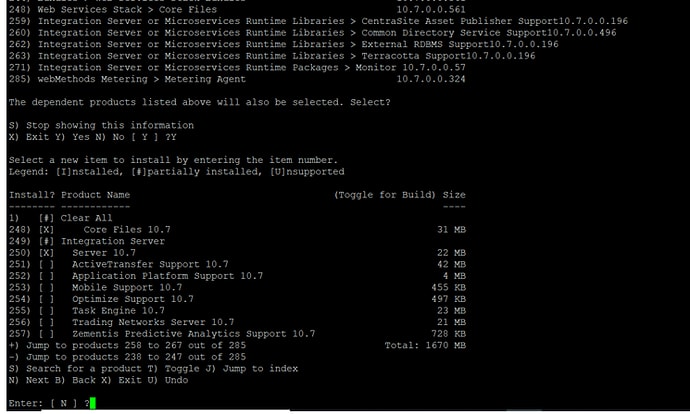
- At this stage, it will ask you to select the products that you want to choose in the image. I want to install a core Integration Server, so I select the proper number 250 as shown below in the images. It will prompt you to select the required dependencies, you say Yes to that and select those as well. Press enter once you are done with selecting the dependencies.
> Important note: As per documentation present at https://documentation.softwareag.com/webmethods/wmsuites/wmsuite107/SysReqs_Installation_and_Upgrade/compendium/index.html#page/install-upgrade-webhelp%2Fto-console_mode_26.html, “You can use Software AG Installer to create Docker images on Linux systems without a pre-existing installation. As part of the image generation, the product Docker scripts, and entry point scripts are used. The Installer client can install any certified products along with their fixes and build a docker image. Only products that are certified for containerization and their top-level dependencies are shown in the product tree and only a single runtime product can be selected at a time. For example, if you select Microservices Runtime then you won’t be able to select Universal Messaging, because both products provide their runtime and entry point scripts. “

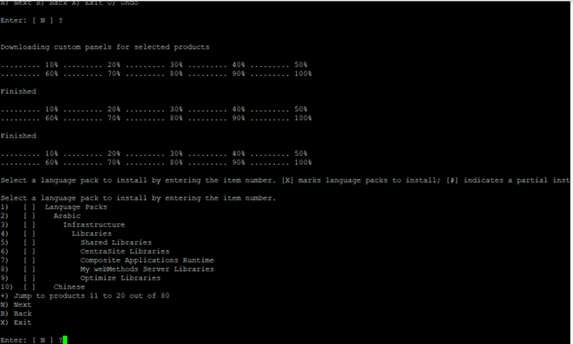
- You will be asked to choose a language pack if you want, since I wanted the default, I move forward by pressing Enter as and when prompted to.
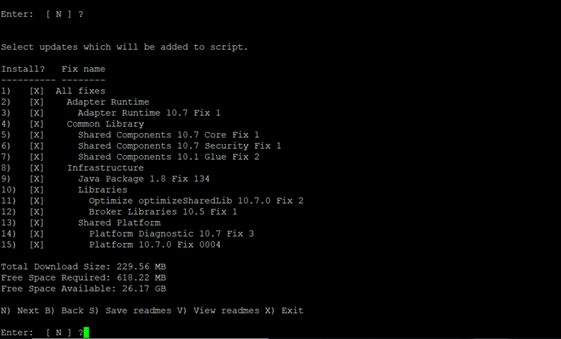
- Now you will be prompted to select the fixes that will be applied to the products that you selected as part of your docker image creation.
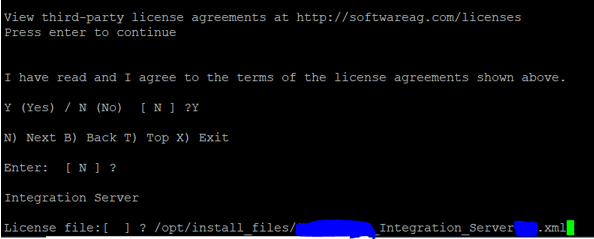
- Press Enter as and when needed, which will display messages for you to accept license agreements.


- Give the valid license file location from your machine on which you are running the installation.
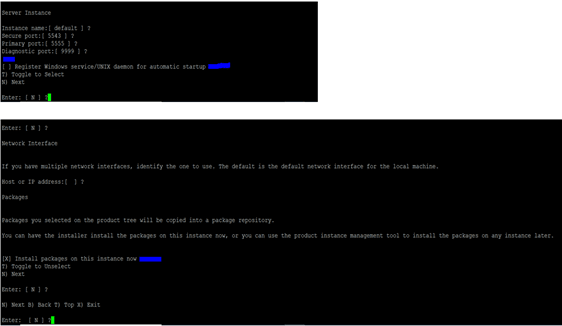
- Select the appropriate options as shown below, where you get to choose the port numbers and network interfaces. You can press Enter as and when prompted and let the default values kick-in automatically. We don’t need auto-startup so, we do not select the option of creating the auto-startup daemons.
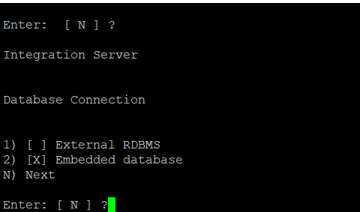
- Specify the DB connection parameters. If you want embedded DB for the testing purpose only, then you can press Enter as and when prompted.
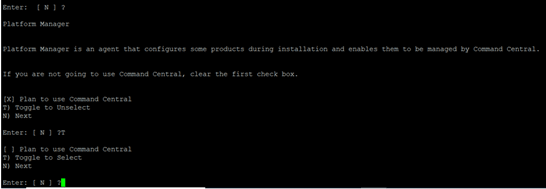
- If you don’t want command central, so you can uncheck that and then press Enter.
- If you don’t want any external DB as of now, so you can press Enter and let defaults kick in for DB parameters as shown below.

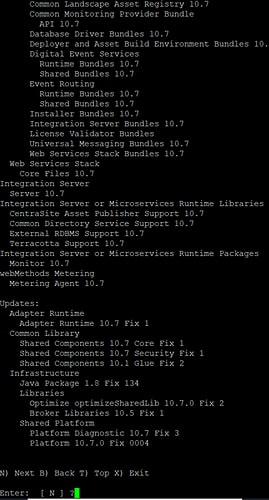
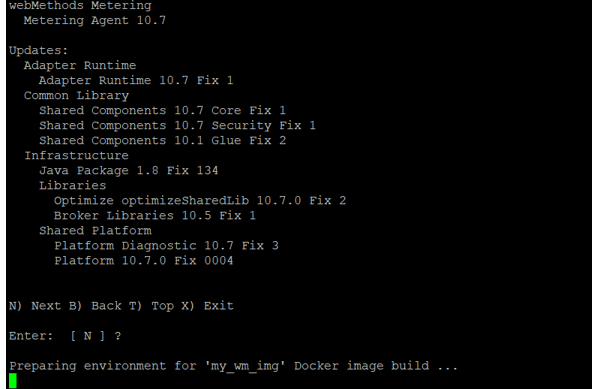
- After that the below screen will come, which will show you which components and fixes will be installed. Press Enter when prompted to. You will start seeing a message “Preparing environment for …. “, this means the process of creation of Docker image for webMethods Integration Server has started. Please see below.
- Once the steps are completed successfully, you will see below message. That marks the end of the process of docker image creation. Give “F” as input and press Enter as shown below. Now your image is ready and you can verify it as shown in the next step.

- Verify that image has been created. Run below command.
docker images

- If you want to check, if your image is correct and quickly test it, you can run below docker command to test.

- You can verify the server is up and running using logs of your container and browser. It should look like below.


Conclusion:
We were able to use SAG 10.7 installer for Linux system to create a docker image of IS and were able to launch a IS container from it.
Thanks for reading.


Top comments (0)