
As a developer, there is no denying that one of the important things you need to understand is how GitHub works and how Netlify as a hosting platform works. In this article, I will guide you through the steps of using a GitHub repository to host your website on Netlify.
Let us get started!
What is a GitHub repository?
A GitHub repository can be used to store a development project. It can contain folders and any type of file (HTML, CSS, JavaScript, Documents, Data, Images).
All the changes made to your files in a Git project are recorded and saved in your GitHub repository. This information is saved in the repository folder, often known as the git directory.
Git keeps track of all project modifications and stores them in the repository using a version control system. Users can then remove, copy, or create new repositories for active projects.
What is Netlify?
Netlify is a platform that allows web developers to host their websites in the cloud without having to manage any servers on the back end.
There are varieties of static website hosting platforms, but Netlify is almost everyones favourite. Netlify makes it extremely simple for developers to host websites in a scalable and secure manner.
In this session, I will be showing you a step-by-step guide on how to create a repository directly on your GitHub.
How To Create A GitHub Repository
Step 1
To do this, the first step is to create a repository on GitHub where you will keep the source code for your website. Here is a step-by-step guide.
Sign in to your GitHub account, or create one if you don't have any. You can sign up here
After logging in, select the "Repositories" option to get to the repositories page. if it is your first repository, there is a button at the left-hand corner of your GitHub account that says "create repository"
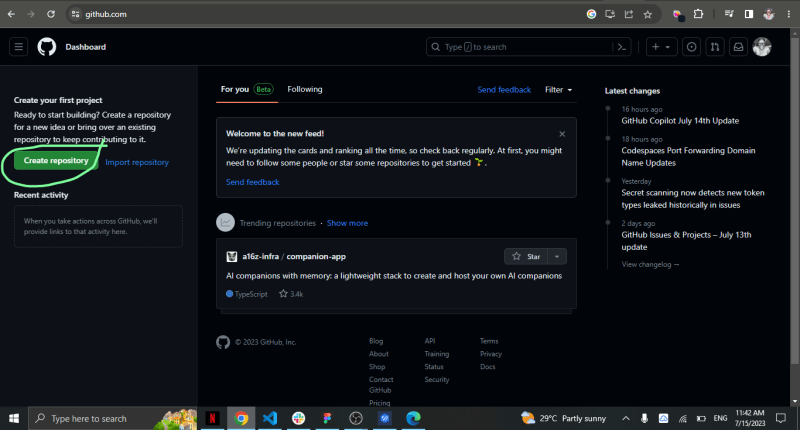
But if you are not new to GitHub, by the left-hand corner of your GitHub, there is a green button that says "New"

Give your repository a name that corresponds to the name of your website.
If your website is called "My New Repo" you might name the repository "my-new-repo" or any other suitable name.While giving your repository a. name, it tells you to give a description too for you to provide context for your website.
Please note, the description part is optional, you can decide to ignore it.The next thing to do is choose whether or not you want to make
your repository public or private. But in this context, I will suggest you leave it public.You can choose to add additional options like the "README file" but in this context, I will say you should ignore it for now.
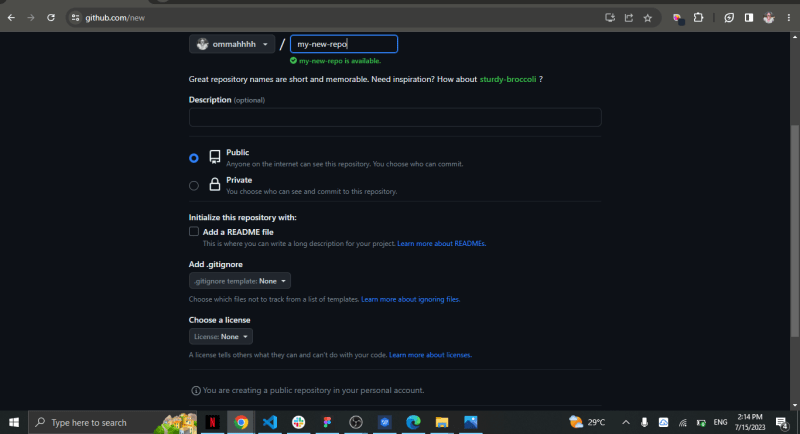
- Scroll down to the last part of this repository page and click "Create Repository" to create your new GitHub repository.
Step 2
Now that you've set up a GitHub repository for your website, it's time to push your website code to it. This will make the source code of your website available for deployment on Netlify.
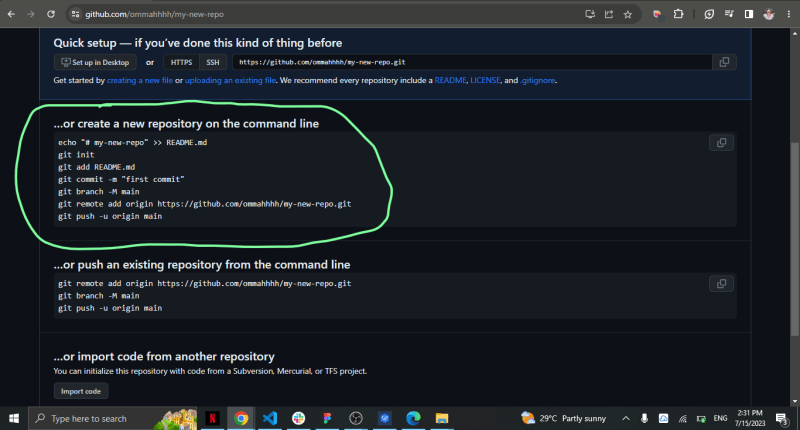
Note that when you create your new repository, an instruction shows up on your Git Hub on how to do every command in your terminal or command prompt.
What to do next?
Open your command prompt on your local machine or terminal on your VSCode
-
Go to the directory where the code for your website is stored.
Make sure you've used the "git init" command to create a local Git repository in this directory.git init -
Run the following command to add all of the files and folders in your website's code to your Git repository:
git add .
This particular command makes your files on your vs code turn green which means it is ready to get saved into git. Note that I mentioned earlier that the README is not necessary.
Now that the file has been added to the git versioning system and git recognizes it, then it is available to be saved and pushed to the cloud.
- Create a descriptive commit message before saving the changes to the Git repository. For instance:
git commit -m "my new repo"
Note that the "m" here means message, it helps you know at what point in the particular project where changes were made.
- Identify the branch you are pushing to because every GitHub repository has at least one branch which will serve as the main branch. That is why we call it "Main". So to do this, follow use the command below;
git branch -M main
Now that this is done, you should not get any errors at all.
- The following command should be used to link your local Git repository to the cloud GitHub repository:
git remote add origin https://github.com/ommahhhh/my-new-repo.git
-
Not that all these have been done, we can now push the code
from your local repository to your GitHub repository with the
command below:git push -u origin main
With this command, your work gets pushed to the remote GitHub repository's master branch.
Your website code will be posted to the GitHub repository when the command has been completely done. To ensure that all of your project files have been appropriately uploaded, you can now return to your GitHub page where you established the repository and reload the page, there you will see that your repository has been pushed successfully.
Here is a Youtube video from the Zuri Team that demonstrates how to create a repository on GitHub https://youtu.be/0FaJF4t5Kfo
Now that you are familiar with how the GitHub repository works, the next thing I will be showing you is how to host on your Netlify.
Let us get it done!
How To Host and Deploy On Netlify
Step 1
Before you can host your site at all on Netlify, you need to create a Netlify account and link it to your GitHub.
To register for a new account, click the "Sign up" button on
the site.You can then sign up using your GitHub account or establish a
new Netlify account by providing your email address and
password. whichever one works for you is fine.
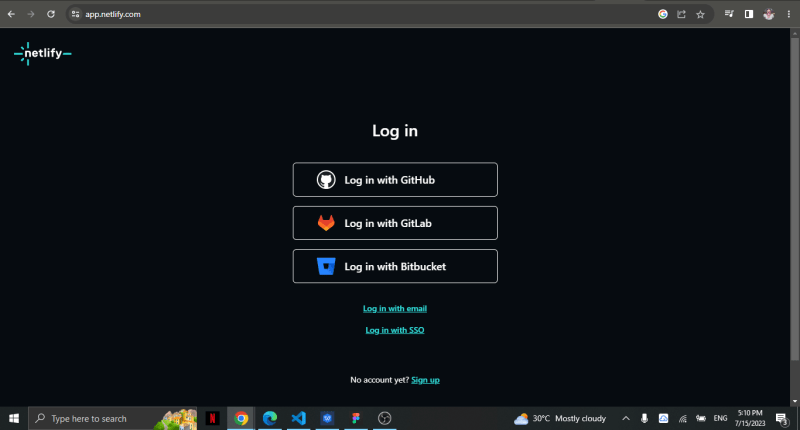
Please note that If you sign up using your GitHub account, you will be taken to a page where you may authorize Netlify to access your GitHub repositories. This permission allows Netlify to launch your site directly from your GitHub repository, which is exactly what we want to happen, therefore I strongly suggest you sign up with your GitHub.
- Now that you have signed up and your Netlify account has been Authorized by your GitHub account, you will then be redirected to Netlify.
Step 2
Now that you have successfully created a Netlify account and have been able to connect your GitHub account with it, so what's next?
Deploy your website on Netlify
Here is the step-by-step guide on how to deploy your website on Netlify;
Navigate to your Netlify dashboard.
When you're on the dashboard, click the "Sites" button. Then in
the right-hand corner, you will a button that states "Add new
site".
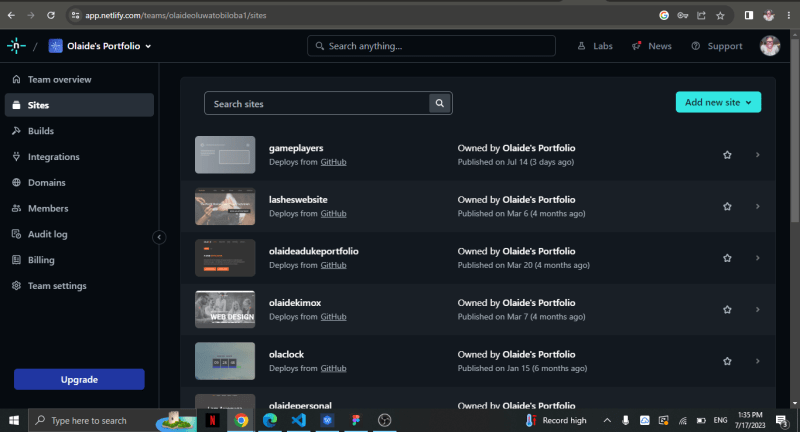
By clicking the "Add new site button", it will start the process of creating a new site with your GitHub repository.
- After clicking on the button, you will see options that state: Import an existing project, Start from a template, and Deploy manually
Please note that you can use any of these mentioned options above but I will suggest you use the first option "Import an existing project"
- Click on "Import an existing project" and you will see a list of Git providers that are currently accessible, choose GitHub from the list.

Now that you have clicked on GitHub, a list of your GitHub
repositories will be retrieved, it then tells you to pick a repository.
please note that there is a search box that says "search repo"Click on the search box and search for the exact repository
name you gave the website on your GitHub repository (if you do
not search for the exact name, it won't pop up on your Netlify)You can now select the repository that contains the website you want to deploy.
Now that the repository has shown on your Netlify, click on it,
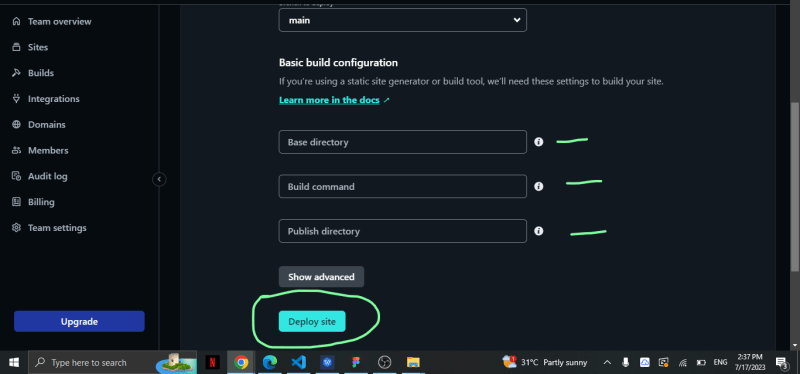
there you scroll down a bit to see the deployment settings appear on the same page, The settings are: Base directory, Build command, and Publish directory
These are just a few of the settings you may set up here. Although I will say you should safely disregard options and rely on the default settings to function, in some situations, you can change them to suit the needs of your project.
- On the same page is where the button that says "Deploy site", click on the button and start your deployment.
- Netlify will start developing and launching your website. The deploy logs on the Netlify dashboard allow you to keep track of the development.
Please note: if it takes time and it is still telling you it
is deploying, I will suggest you refresh your page, by then it should have deployed. However, wait a short while before you decide to refresh.
- When the deployment is finished, Netlify will provide you with a specific URL where your website can be seen online. You can now view your deployed site by visiting and sharing the URL.
Conclusion
Using Netlify to host and launch websites is a lot of fun. Overall, it is an excellent platform for developers looking to optimise their processes, build quick and dependable websites and applications.
Yipee! You have now successfully hosted your website on Netlify. Your website is ready to be viewed by anyone and give them a smooth surfing experience.
Feel free to message me on my Social accounts for any help.

Top comments (4)
Wow! Very good piece👌
Thank you 😊
The GitHub program is very valuable
Yes, it is