
Hello there! I will be walking you through how to create an Azure Function App and publish to Azure portal using Visual Studio.
Also, we would be creating and deploying a calculator app. So, sit back, follow through and enjoy the learning journey.
Prerequisites
Visual Studio Community with .Net Development workload (Click here to download).
Azure Account (Click here to register if you don't have an account or proceed to sign in).
Note: The interface of my Visual Studio might be different from yours as I am on a Mac, but the processes are almost the same with only slight difference.
Now that you have all the requirements, let's proceed to creating our function app.
Step 1: Log in to Azure Portal, Search for "Function App" in the search box and click on "Create".

Step 2a: Fill out the necessary fields.
 Note: Steps 2a and 2b can be completed in one step. I divided mine into two in order to capture the whole fields.
For resource group, You can create a new resource group by clicking the "create new" or you can choose a previously created resource group. I called mine "my resources". You can choose to call yours whatever name you desire.
"Function App Name" is also random. I chose "Blog-Calculator-App".
Select "Code" as against "Container Image".
Select ".Net" as your runtime stack. It will automatically choose the version and region for you.
Step 2b: Choose your preferred operating system and use the default hosting option. Then click on "Review + Create".
 At this point, you may want to grab a pop corn while it finishes deploying.
Step 3a: Open Visual Studio and click on "New".

Step 3b: Click on "General" under "Cloud". Then select "Azure Functions" and click on "Continue".

Step 3c: On the side side pane, select "Http trigger", give your function app a name and click on "Continue".
 The reason for choosing "Http trigger" is so that we could test it over the web or browser.
Step 3d: Go ahead and click on "Create".

Step 4: Replace the codes from line 13 to line 34 with this:
public static class Sum
{
[FunctionName("Sum")]
public static async Task Run(
[HttpTrigger(AuthorizationLevel.Anonymous, "get", "post", Route = null)] HttpRequest req,
ILogger log)
{
log.LogInformation("C# HTTP trigger function processed a request.");
int x = int.Parse(req.Query["x"]);
int y = int.Parse(req.Query["y"]);
int result = x + y;
return new OkObjectResult(result);
}
}

Step 5: Click on "Build" at the top of your IDE. Then click on "Build Solution".
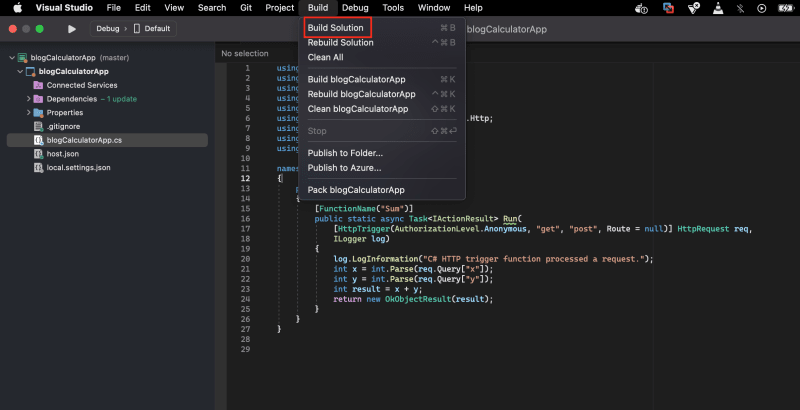 Ensure your application builds successfully.
Step 6: Click on "Build" and then "Publish to Azure". Then Proceed to sign in with your Azure credentials.

Step 7: You would see a list of your resource groups and services. Choose the one that matches the Function App name you created on Azure Portal. Then click on "Publish".

Wait for it to finish publishing. If it's successful you should see something like this in your browser

Step 9: Go back to Azure Portal and click on the function app you created earlier. On the left pane click on "Functions".
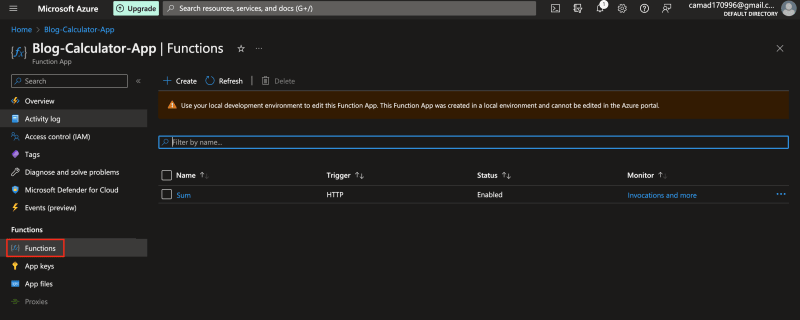 You should be able to see the function we just published with the name "Sum".
Step 10: Click on Sum, then click on "Get Function Url". Copy the Url.

Step 11: Paste the Url in any browser of your choice, append the values of x and y to the Url, click enter to know if the sum function is working perfectly.
 Notice how I appended the values of x and y to the Url.
There you have it. You have successfully published a Function App using Visual Studio to Azure portal, and you have tested it using http.
Connect with me
LinkedIn: https://www.linkedin.com/in/chisom-amadi/
GitHub: https://github.com/tchisom17

Top comments (0)