
React is a powerful JavaScript library used for building user interfaces. It allows developers to create interactive and dynamic web applications with ease.
In this article, we will explore what is React, why is it worth learning in 2023.
We will also cover setting up the development environment, creating your first React application, building component, managing state, handling events, conditional rendering, and transfer of data between components.
Introduction to React
- What is React?
The React JS framework is an open-source JavaScript framework and library developed by Facebook. It's used for building interactive user interfaces and web applications quickly and efficiently with significantly less code than you would with vanilla JavaScript.
- Why learn React in 2023?
Growing demand - The demand for React developers continuous to rise in the industry and is anticipated to increase in the upcoming future. The ease and optimum results offered by the React JS framework have made it the top-in-demand skill of the year 2023.
Popularity and community support - React JS is brought to life by its community. Since becoming open-source in 2015, a large contributor to React’s success comes from how its community of developers interacts with the library. As well as having large community repositories on GitHub and a buzzing forum on Stack Overflow, developers love working with React. It’s easy to see why.
In React we trust - The simple fact is that React is a safe bet for most front-end developers. Many tech giants use React, including Uber, Airbnb, Facebook, Netflix, Pinterest, Instagram, Shopify, Amazon, etc.
-
Advantages of learning React -
- Virtual DOM for faster rendering.
- Offers a Well-Supported library.
- Reusable components.
These advantages make React the best choice for web development.
Setting up your development environment
- Installing Node.js and npm
To start developing with React you must have Node.js and npm (Node Package Manager) on your chine. Follow these steps to download it.
Visit Node.js website and download the latest LTS version for your operating system.
Run the installer/.msi file as administrator and follow the on-screen instructions.
After installation, open your terminal/command prompt and type node -v and npm -v to verify that Node.js and npm are installed correctly.
- Downloading visual studio code
To start developing you'll need a code editor. You use a code editor of your choice I personally prefer visual studio code because of the features it has to provide. If you have visual studio code/your preferred code editor you can skip this step. Follow these steps to download it.
Visit Visual Studio Code Website and download the stable build for your operating system.
Run the installer as administrator and follow the on-screen instructions.
And that's it now you are ready to start coding and lay the foundation for your career as a web developer.
Creating your first React application
- Setting up a new React project using Create React App
Create React App is a popular tool that helps you set up a new React project with a predefined folder structure and development environment configuration. Here's how to use it:
Open terminal from visual studio code/command prompt and cd to your project directory. Example if you want to save your project on desktop then the command to navigate there would be.
cd desktopNow run the command:
npx create-react-app my-react-appReplace the my-react-app with the desired name of your project. Once the command is executed, navigate into your desired project directory in this case it will becd my-react-app.Now start your own development server by running:
npm start. This will start a small development server where you can test your React application.
Note: This development server is basic server made just for the development of your React application. Which means only those who are connect to your Wi-Fi will be available to access it. To be able to access it over different devices you'll have to host it online.
- Understanding the project structure
Understanding the structure of a React application is essential for efficient development. They are the key files and directories which are gonna help you to build your first React application. Which are:
node_modules: This folder contains all the React dependencies like react, react-dom, etc. It will also contain the modules which you might install in future for your project.
public: The public directory contains the HTML file that serves as the entry point for your application.
src/App.js: This file is the main component of your application. It is the starting point for building your React application.
src/App.css: This file is used to style your React app/components inside your React app.
src/index.js: This is the entry point for of your React application. This file renders the main component (App.js) and mounts it into the DOM.
src/index.js: This file is used to style your index.js file or basically the main body of your html file.
Building components
- Understanding types of components
Components are the building blocks of any React application. They are re-suable and self-contained. There are two types of React components:
- Functional component: Functional components are some of the more common components that will come across while working in React. These are simply JavaScript functions. We can create a functional component to React by writing a JavaScript function.
import React from 'react';

function MyComponent(props) {
  return (
    <div>{body of the component}</div>
  )
}

export default MyComponent;
OR
import React from 'react';

const MyComponent = (props) => {
  return (
    <div>{body of the component}</div>
  )
}

export default MyComponent;
- Class components: This is the bread and butter of most modern web apps built in ReactJS. These components are simple classes (made up of multiple functions that add functionality to the application).
import React, { Component } from 'react';

class MyComponent extends Component {
  render() {
    return (
      <div>{body of the component}</div>
    )
  }
}

export default MyComponent;
- React hooks: Hooks are a new addition that were introduced in React 16.8. They let you use state and other React features without writing a class.
import React, { useState, useEffect } from 'react';

const MyComponent = () => {
  const [count, setCount] = useState(0);

  useEffect(() => {
    document.title = `Count: ${count}`;
  }, [count]);

  return (
    <div>
      <p>Count: {count}</p>
      <button onClick={() => setCount(count + 1)}>Increment</button>
    </div>
  );
};

export default MyComponent
Here we used useState hook to declare a variable called count, setCount both of them holding the same value. The useEffect hook is used to perform live changes, such as updating the document title, when the count changes.
Managing State
What is React state_
Components often need to change what’s on the screen as a result of an interaction. Typing into the form should update the input field, clicking “next” on an image carousel should change which image is displayed, clicking “buy” should put a product in the shopping cart. Components need to “remember” things: the current input value, the current image, the shopping cart. In React, this kind of component-specific memory is called state.Why a regular variable isn't enough
Here’s a component that renders a sculpture image. Clicking the “Next” button should show the next sculpture by changing the index to 1, then 2, and so on. However, this won’t work:
App.js
import { sculptureList } from './data.js';

export default function Gallery() {
  let index = 0;

  function handleClick() {
    index = index + 1;
  }

  let sculpture = sculptureList[index];
  return (
    <>
      <button onClick={handleClick}>
        Next
      </button>
      <h2>
        <i>{sculpture.name} </i>
        by {sculpture.artist}
      </h2>
      <h3>
        ({index + 1} of {sculptureList.length})
      </h3>
      <img
        src={sculpture.url}
        alt={sculpture.alt}
      />
      <p>
        {sculpture.description}
      </p>
    </>
  );
}
data.js
export const sculptureList = [{
  name: 'Homenaje a la Neurocirugía',
  artist: 'Marta Colvin Andrade',
  description: 'Although Colvin is predominantly known for abstract themes that allude to pre-Hispanic symbols, this gigantic sculpture, an homage to neurosurgery, is one of her most recognizable public art pieces.',
  url: 'https://i.imgur.com/Mx7dA2Y.jpg',
  alt: 'A bronze statue of two crossed hands delicately holding a human brain in their fingertips.'
}, {
  name: 'Floralis Genérica',
  artist: 'Eduardo Catalano',
  description: 'This enormous (75 ft. or 23m) silver flower is located in Buenos Aires. It is designed to move, closing its petals in the evening or when strong winds blow and opening them in the morning.',
  url: 'https://i.imgur.com/ZF6s192m.jpg',
  alt: 'A gigantic metallic flower sculpture with reflective mirror-like petals and strong stamens.'
}, {
  name: 'Eternal Presence',
  artist: 'John Woodrow Wilson',
  description: 'Wilson was known for his preoccupation with equality, social justice, as well as the essential and spiritual qualities of humankind. This massive (7ft. or 2,13m) bronze represents what he described as "a symbolic Black presence infused with a sense of universal humanity."',
  url: 'https://i.imgur.com/aTtVpES.jpg',
  alt: 'The sculpture depicting a human head seems ever-present and solemn. It radiates calm and serenity.'
}, {
  name: 'Moai',
  artist: 'Unknown Artist',
  description: 'Located on the Easter Island, there are 1,000 moai, or extant monumental statues, created by the early Rapa Nui people, which some believe represented deified ancestors.',
  url: 'https://i.imgur.com/RCwLEoQm.jpg',
  alt: 'Three monumental stone busts with the heads that are disproportionately large with somber faces.'
}, {
  name: 'Blue Nana',
  artist: 'Niki de Saint Phalle',
  description: 'The Nanas are triumphant creatures, symbols of femininity and maternity. Initially, Saint Phalle used fabric and found objects for the Nanas, and later on introduced polyester to achieve a more vibrant effect.',
  url: 'https://i.imgur.com/Sd1AgUOm.jpg',
  alt: 'A large mosaic sculpture of a whimsical dancing female figure in a colorful costume emanating joy.'
}, {
  name: 'Ultimate Form',
  artist: 'Barbara Hepworth',
  description: 'This abstract bronze sculpture is a part of The Family of Man series located at Yorkshire Sculpture Park. Hepworth chose not to create literal representations of the world but developed abstract forms inspired by people and landscapes.',
  url: 'https://i.imgur.com/2heNQDcm.jpg',
  alt: 'A tall sculpture made of three elements stacked on each other reminding of a human figure.'
}, {
  name: 'Cavaliere',
  artist: 'Lamidi Olonade Fakeye',
  description: "Descended from four generations of woodcarvers, Fakeye's work blended traditional and contemporary Yoruba themes.",
  url: 'https://i.imgur.com/wIdGuZwm.png',
  alt: 'An intricate wood sculpture of a warrior with a focused face on a horse adorned with patterns.'
}, {
  name: 'Big Bellies',
  artist: 'Alina Szapocznikow',
  description: "Szapocznikow is known for her sculptures of the fragmented body as a metaphor for the fragility and impermanence of youth and beauty. This sculpture depicts two very realistic large bellies stacked on top of each other, each around five feet (1,5m) tall.",
  url: 'https://i.imgur.com/AlHTAdDm.jpg',
  alt: 'The sculpture reminds a cascade of folds, quite different from bellies in classical sculptures.'
}, {
  name: 'Terracotta Army',
  artist: 'Unknown Artist',
  description: 'The Terracotta Army is a collection of terracotta sculptures depicting the armies of Qin Shi Huang, the first Emperor of China. The army consisted of more than 8,000 soldiers, 130 chariots with 520 horses, and 150 cavalry horses.',
  url: 'https://i.imgur.com/HMFmH6m.jpg',
  alt: '12 terracotta sculptures of solemn warriors, each with a unique facial expression and armor.'
}, {
  name: 'Lunar Landscape',
  artist: 'Louise Nevelson',
  description: 'Nevelson was known for scavenging objects from New York City debris, which she would later assemble into monumental constructions. In this one, she used disparate parts like a bedpost, juggling pin, and seat fragment, nailing and gluing them into boxes that reflect the influence of Cubism’s geometric abstraction of space and form.',
  url: 'https://i.imgur.com/rN7hY6om.jpg',
  alt: 'A black matte sculpture where the individual elements are initially indistinguishable.'
}, {
  name: 'Aureole',
  artist: 'Ranjani Shettar',
  description: 'Shettar merges the traditional and the modern, the natural and the industrial. Her art focuses on the relationship between man and nature. Her work was described as compelling both abstractly and figuratively, gravity defying, and a "fine synthesis of unlikely materials."',
  url: 'https://i.imgur.com/okTpbHhm.jpg',
  alt: 'A pale wire-like sculpture mounted on concrete wall and descending on the floor. It appears light.'
}, {
  name: 'Hippos',
  artist: 'Taipei Zoo',
  description: 'The Taipei Zoo commissioned a Hippo Square featuring submerged hippos at play.',
  url: 'https://i.imgur.com/6o5Vuyu.jpg',
  alt: 'A group of bronze hippo sculptures emerging from the sett sidewalk as if they were swimming.'
}];

The handleClick event handler is updating a local variable, index. But two things prevent that change from being visible:
- Local variables don’t persist between renders: When React renders this component a second time, it renders it from scratch—it doesn’t consider any changes to the local variables.
- Changes to local variables won’t trigger renders: React doesn’t realize it needs to render the component again with the new data.
To update a component with new data, two things need to happen:
- Retain the data between renders.
- Trigger React to render the component with new data (re-rendering).
The useState Hook provides those two things:
- A state variable to retain the data between renders.
- A state setter function to update the variable and trigger React to render the component again.
- Adding a state variable
To add a state variable, import useState from React at the top of the file:
import { useState } from 'react';
Then, replace these lines:
let index = 0;
with
const [index, setIndex] = useState(0);
index is a state variable and setIndex is the setter function.
and
function handleClick() {
    index = index + 1;
  }
with
function handleClick() {
  setIndex(index + 1);
}
and there you go now the slides should change.
Handling events
- Adding event handlers To add an event handler, you will first define a function and then pass it as a prop to the appropriate JSX tag. For example, here is a button that doesn’t do anything yet:
import React from 'react';

class MyComponent extends React.Component {
  handleClick() {
    console.log('Button clicked!');
  }

  render() {
    return <button onClick={this.handleClick}>Click me</button>;
  }
}

export default MyComponent;
You defined the handleClick function and then passed it as a prop to . handleClick is an event handler.
Event handler functions:
Are usually defined inside your components.
Have names that start with handle, followed by the name of the event.
By convention, it is common to name event handlers as handle followed by the event name. You’ll often see onClick={handleClick}, onMouseEnter={handleMouseEnter}, and so on.
Conditional rendering
In React, there is no special syntax for writing conditions. Instead, you’ll use the same techniques as you use when writing regular JavaScript code. For example, you can use an if statement to conditionally include JSX:
let content;
if (isLoggedIn) {
  content = <AdminPanel />;
} else {
  content = <LoginForm />;
}
return (
  <div>
    {content}
  </div>
);
OR
<div>
  {isLoggedIn ? (
    <AdminPanel />
  ) : (
    <LoginForm />
  )}
</div>
When you don’t need the else branch, you can also use a shorter logical && syntax:
<div>
  {isLoggedIn && <AdminPanel />}
</div>
All of these approaches also work for conditionally specifying attributes. If you’re unfamiliar with some of this JavaScript syntax, you can start by always using if...else.
Rendering Lists
You will rely on JavaScript features like for loop and the array map() function to render lists of components.
For example, let’s say you have an array of products:
const products = [
  { title: 'Cabbage', id: 1 },
  { title: 'Garlic', id: 2 },
  { title: 'Apple', id: 3 },
];
Inside your component, use the map() function to transform an array of products into an array of <li> items:
const listItems = products.map(product =>
  <li key={product.id}>
    {product.title}
  </li>
);

return (
  <ul>{listItems}</ul>
);
Notice how <li> has a key attribute. For each item in a list, you should pass a string or a number that uniquely identifies that item among its siblings. Usually, a key should be coming from your data, such as a database ID. React uses your keys to know what happened if you later insert, delete, or reorder the items.
const products = [
  { title: 'Cabbage', isFruit: false, id: 1 },
  { title: 'Garlic', isFruit: false, id: 2 },
  { title: 'Apple', isFruit: true, id: 3 },
];

export default function ShoppingList() {
  const listItems = products.map(product =>
    <li
      key={product.id}
      style={{
        color: product.isFruit ? 'magenta' : 'darkgreen'
      }}
    >
      {product.title}
    </li>
  );

  return (
    <ul>{listItems}</ul>
  );
}

Transfer of data between components
When you start developing in React you'll be needed to transfer data between two different components or files
That's where props function comes into use
Let's say we have a function called App in App.js
import React, { useState } from 'react';
import MyButton from './components/MyButton.js';

function MyApp() {
  const [count, setCount] = useState(0);

  function handleClick() {
    setCount(count + 1);
  }

  return (
    <div>
      <h1>Counters that update together</h1>
      <MyButton data={count} onClick={handleClick} />
    </div>
  );
}

export default App;
In this function called App we have called another function named MyButton which performs two events.
onClick: this event sends the so called
handleClickfunction which increases the count const by 1.data: this event send the data called
countto the MyButton function whenever it's updated.
Now let's have a look at the MyButton function at MyButton.js file
import React from 'react';

function MyButton({ data, onClick }) {
  return (
    <button onClick={onClick}>
      Clicked {data} times
    </button>
  );
}

export default MyButton;
Here we imported 2 props called data and onClick. Remember how we sent two events in the App function on named data and other named onClick the data sent from App.js is used here.
Now the MyButton function has a event called onClick which performs the whatever function is being passed by the App function through the onClick event in the App function that is handleClick. Thus whenever the button is clicked the value of the count data increases by 1. Now, do you remember we also imported a prop named data from App.js into MyButton.js and if you paid attention before in the App function we pass the count data to MyButton function through a event called data. Therefore the line
Clicked {data} times
above in MyButton function pulls the data called count from the function called App and display the data over the screen. So every time you click the button the data change over the screen.
Bonus advice
- Install React Developer Tools extension React Developer Tools is a browser extension that provides helpful tools for debugging and inspecting React components. Here's how to install it:
- Open your web browser and search for the "React Developer Tools" extension.
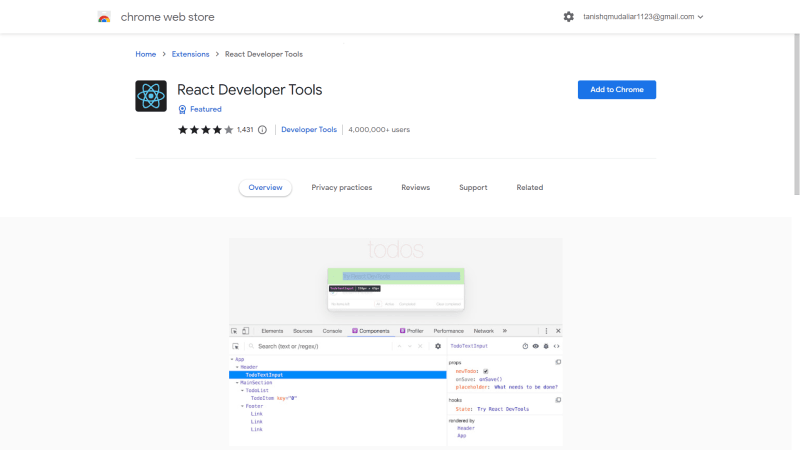
2.Once installed, you can find the React Developer Tools icon in your browser's toolbar.
React Developer Tools allows you to inspect component hierarchies, view component props and state, and track component updates, among other useful features. It greatly assists in debugging and understanding your React applications.
That's it for this article and now you should be able to start coding and make some amazing React applications.
If you wanna learn how to host your React application online for free (Will post soon) or some other cool stuff follow me and stay tuned.


Top comments (0)