
I will introduce how to connect the data uploaded to "The Things Network" to "TagoIO" and save and visualize the data.
1. How to connect "The Things Network" and "TagoIO".
- Create a free plan account for "TagoIO".
1.1 Device registration
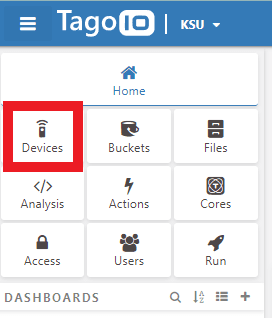
- Log in to TagoIO.
- Click "Devices".
- Select "+ Add Device" → "Custom TTI / TTN" or "Custom TTI / TTN".
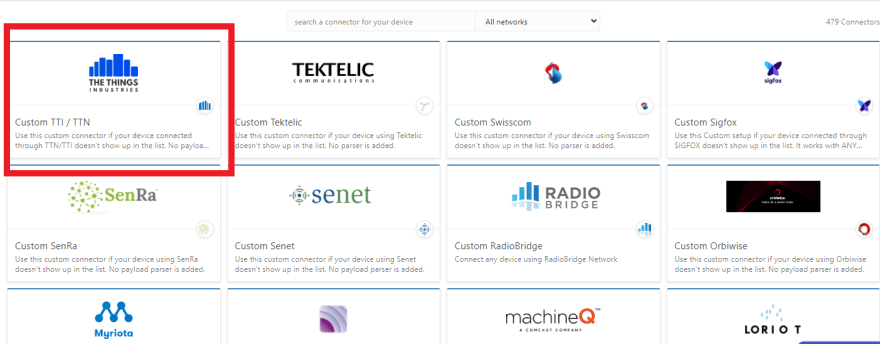
- Enter the "device name" and "device EUI". Any "device name" is fine.


- Creating an authorization.
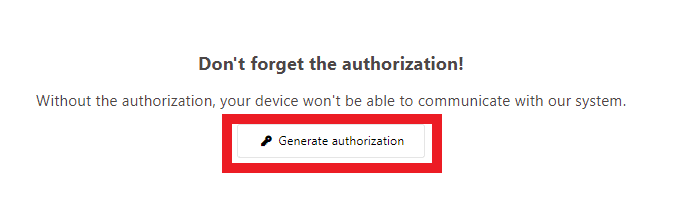
- Any name is fine.

- Copy the Authorization you created.

1.2 Settings in TTN
- Log in to TTN.
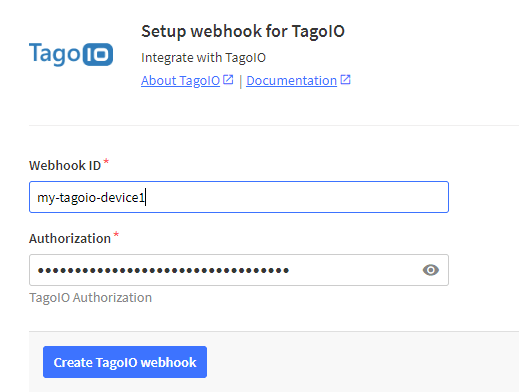
- Select "Webhooks" from your application.

- Select "TagoIO".

- Any "Webhook ID" is fine.
- For "Authorization", enter the "Authorization" created by TagoIO.
- If TTN and TagoIO can work together, "Active" will be "Yes".

2. Data visualization
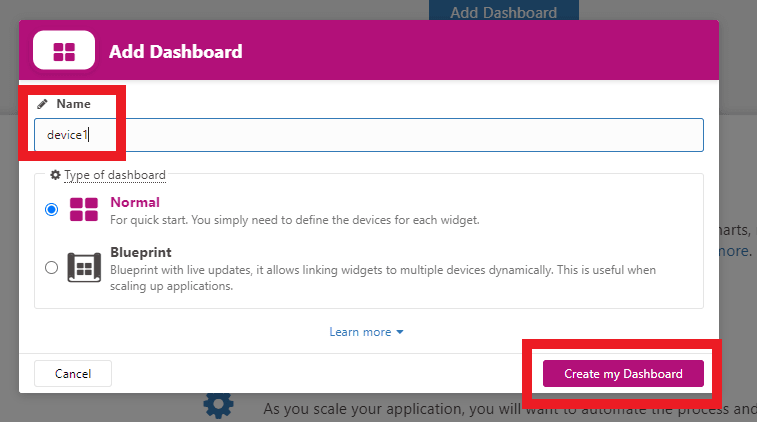
- Click "+" on DASHBOARDS
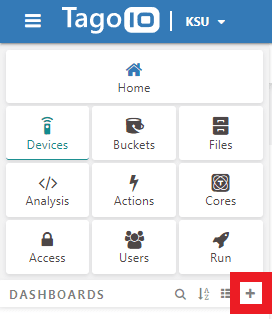
- Any name is fine.
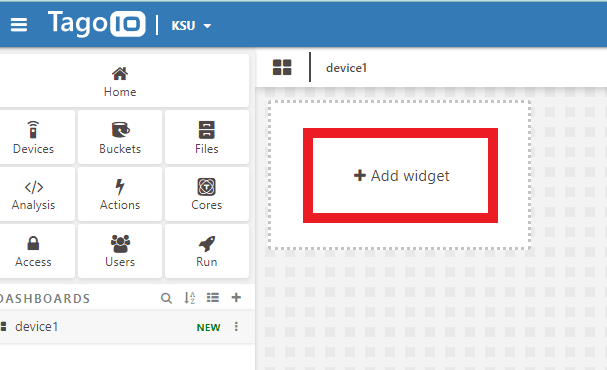
- Click "Add widget".
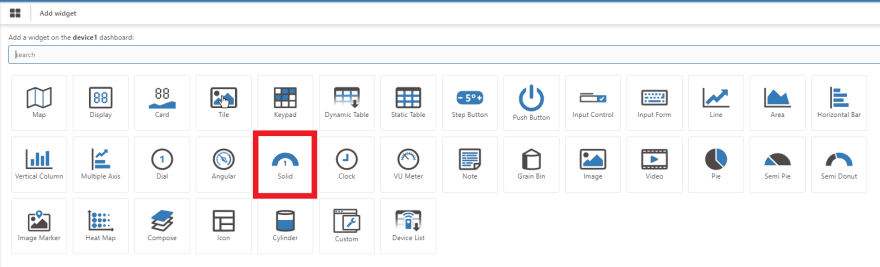
- First, let's visualize the latest data.
- Select "Solid".
- Next, decide the details.
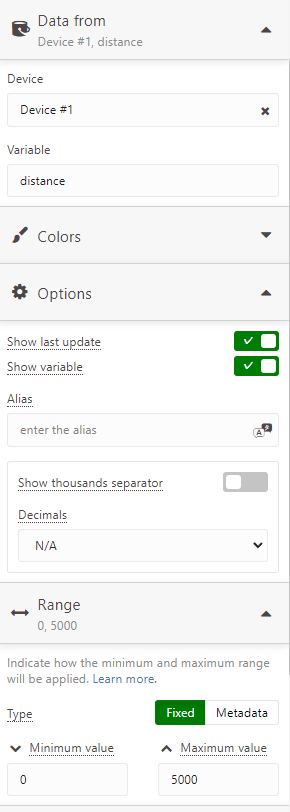
In "Data from", enter which variable data of which device is used.
If you enable "Show last update" in "Options", you can see when it was updated.
Enter the minimum and maximum values for "Range".
Click "Create" when you are done.
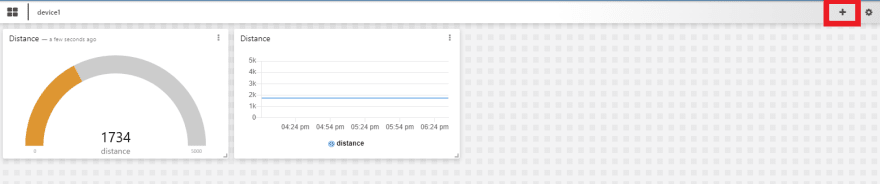
- You can add a widget by clicking the "+" on the top right.
- Similarly, try various things.

Top comments (0)