The .NET MAUI Scheduler provides all the scheduling functionalities to create and manage professional and personal appointments. This blog explains how to load appointments on demand in the .NET MAUI Scheduler control via web services using JSON data.
Let’s get started!
Creating a web data model
First, we need to create a .NET MAUI application and a web data model to get the appointment information from a web service.
Refer to the following code example.
public class WebData
{
    public string Subject { get; set; }
    public string StartTime { get; set; }
    public string EndTime { get; set; }
}
Creating a web API service and fetching data from it
We can get the online JSON data with the help of the GetStringAsync method and deserialize it as a list of WebData models. We will use the hosted service as an example.
Refer to the following code example to deserialize JSON web data.
SchedulerViewModel.cs
private async Task<List<WebData>> GetJsonWebData()
{
    var httpClient = new HttpClient();
    var response = await httpClient.GetStringAsync("https://services.syncfusion.com/js/production/api/schedule");
    return JsonConvert.DeserializeObject<List< WebData >>(response);
}
Load appointments on demand via web service in .NET MAUI Scheduler
Let’s load the deserialized data into the Syncfusion .NET MAUI Scheduler control on demand.
Note: Before proceeding, please read the getting started with .NET MAUI Scheduler documentation.
Step 1: Register the handler
We register the handler for Syncfusion core in the MauiProgram.cs file.
Public static MauiApp CreateMauiApp()
{
     var builder = MauiApp.CreateBuilder();
     builder.ConfigureSyncfusionCore();
}
Step 2: Creating an appointment model class
Next, we create the appointment Event data model class containing basic information to generate the appointments.
Refer to the following code example.
Event.cs
public class Event : INotifyPropertyChanged
{
    private DateTime from;
    private DateTime to;
    private bool isAllDay;
    private string eventName;
    private Brush background;

    /// <summary>
    /// Gets or sets the value to display the start date.
    /// </summary>
    public DateTime From
    {
        get
        { return this.from; }
        set
        {
           this.from = value;
           this.OnPropertyChanged(nameof(From));
        }
    }

    /// <summary>
    /// Gets or sets the value to display the end date.
    /// </summary>
    public DateTime To
    {
        get { return this.to; }
        set
        {
            this.to = value;
            this.OnPropertyChanged(nameof(To));
        }
     }

     /// <summary>
     /// Gets or sets the value indicating whether the appointment is all day or not.
     /// </summary>
     public bool IsAllDay
     {
        get { return this.isAllDay; }
        set
        {
            this.isAllDay = value;
            this.OnPropertyChanged(nameof(IsAllDay));
        }
     }

     /// <summary>
     /// Gets or sets the value to display the subject.
     /// </summary>
     public string EventName
     {
        get { return this.eventName; }
        set { this.eventName = value; }
     }

     /// <summary>
     /// Gets or sets the value to display the background.
     /// </summary>
     public Brush Background
     {
        get { return this.background; }
        set { this.background = value; }
     }

     public event PropertyChangedEventHandler? PropertyChanged;

     private void OnPropertyChanged(string propertyName)
     {
        this.PropertyChanged?.Invoke(this, new PropertyChangedEventArgs(propertyName));
     }
}
Step 3: Create the appointments
Following that, we’ll look at creating an Events collection from online data retrieved via the web service.
You can load appointments on demand with a loading indicator based on the Scheduler’s visible date range. We can improve the appointment loading performance using the QueryAppointmentsCommand property.
Refer to the following code example to retrieve web appointments in the view model class.
SchedulerViewModel.cs
public ICommand QueryAppointmentsCommand { get; set; }

private ObservableCollection<Event> events;
public ObservableCollection<Event> Events
{
    get
    {
        return this.events;
    }
    set
    {
        this.events = value;
    }
}

public SchedulerViewModel()
{
    this.QueryAppointmentsCommand = new Command<object>(LoadAppointments);
}

private async void LoadAppointments(object obj)
{
    //// Get appointment details from the web service.
    if (jsonWebData == null)
        jsonWebData = await GetJsonWebData();

    Random random = new Random();
    var visibleDates = ((SchedulerQueryAppointmentsEventArgs)obj).VisibleDates;
    this.Events = new ObservableCollection<Event>();
    this.ShowBusyIndicator = true;

    DateTime visibleStartDate = visibleDates.FirstOrDefault();
    DateTime visibleEndDate = visibleDates.LastOrDefault();

    foreach (var data in jsonWebData)
    {
       DateTime startDate = Convert.ToDateTime(data.StartTime);
       DateTime endDate = Convert.ToDateTime(data.EndTime);

       if ((visibleStartDate <= startDate.Date && visibleEndDate >= startDate.Date) ||
          (visibleStartDate <= endDate.Date && visibleEndDate >= endDate.Date))
       {
          Events.Add(new Event()
          {
              EventName = data.Subject,
              From = startDate,
              To = endDate,
              Background = this.colors[random.Next(this.colors.Count)]
          });
       }
    }

    if (jsonWebData != null)
        await Task.Delay(1000);

    this.ShowBusyIndicator = false;
}
Step 4: Bind appointments to the Scheduler
Let’s initialize the .NET MAUI Scheduler control.
MainPage.xaml
xmlns:scheduler="clr-namespace:Syncfusion.Maui.Scheduler;assembly=Syncfusion.Maui.Scheduler"

<scheduler:SfScheduler/>
Next, we bind the custom data Events to the .NET MAUI Scheduler’s AppointmentsSource using the appointment mapping feature.
Refer to the following code example to bind the QueryAppointmentsCommand and AppointmentsSource properties from the SchedulerViewModel class.
MainPage.xaml
<scheduler:SfScheduler View="Month"
                       QueryAppointmentsCommand="{Binding QueryAppointmentsCommand}"
                       AppointmentsSource="{Binding Events}">
 <scheduler:SfScheduler.AppointmentMapping>
  <scheduler:SchedulerAppointmentMapping Subject="EventName"
                                         StartTime="From"
                                         EndTime="To"
                                         Background="Background"
                                         IsAllDay="IsAllDay" />
 </scheduler:SfScheduler.AppointmentMapping>
 <scheduler:SfScheduler.BindingContext>
  <local:SchedulerViewModel/>
 </scheduler:SfScheduler.BindingContext>
</scheduler:SfScheduler>
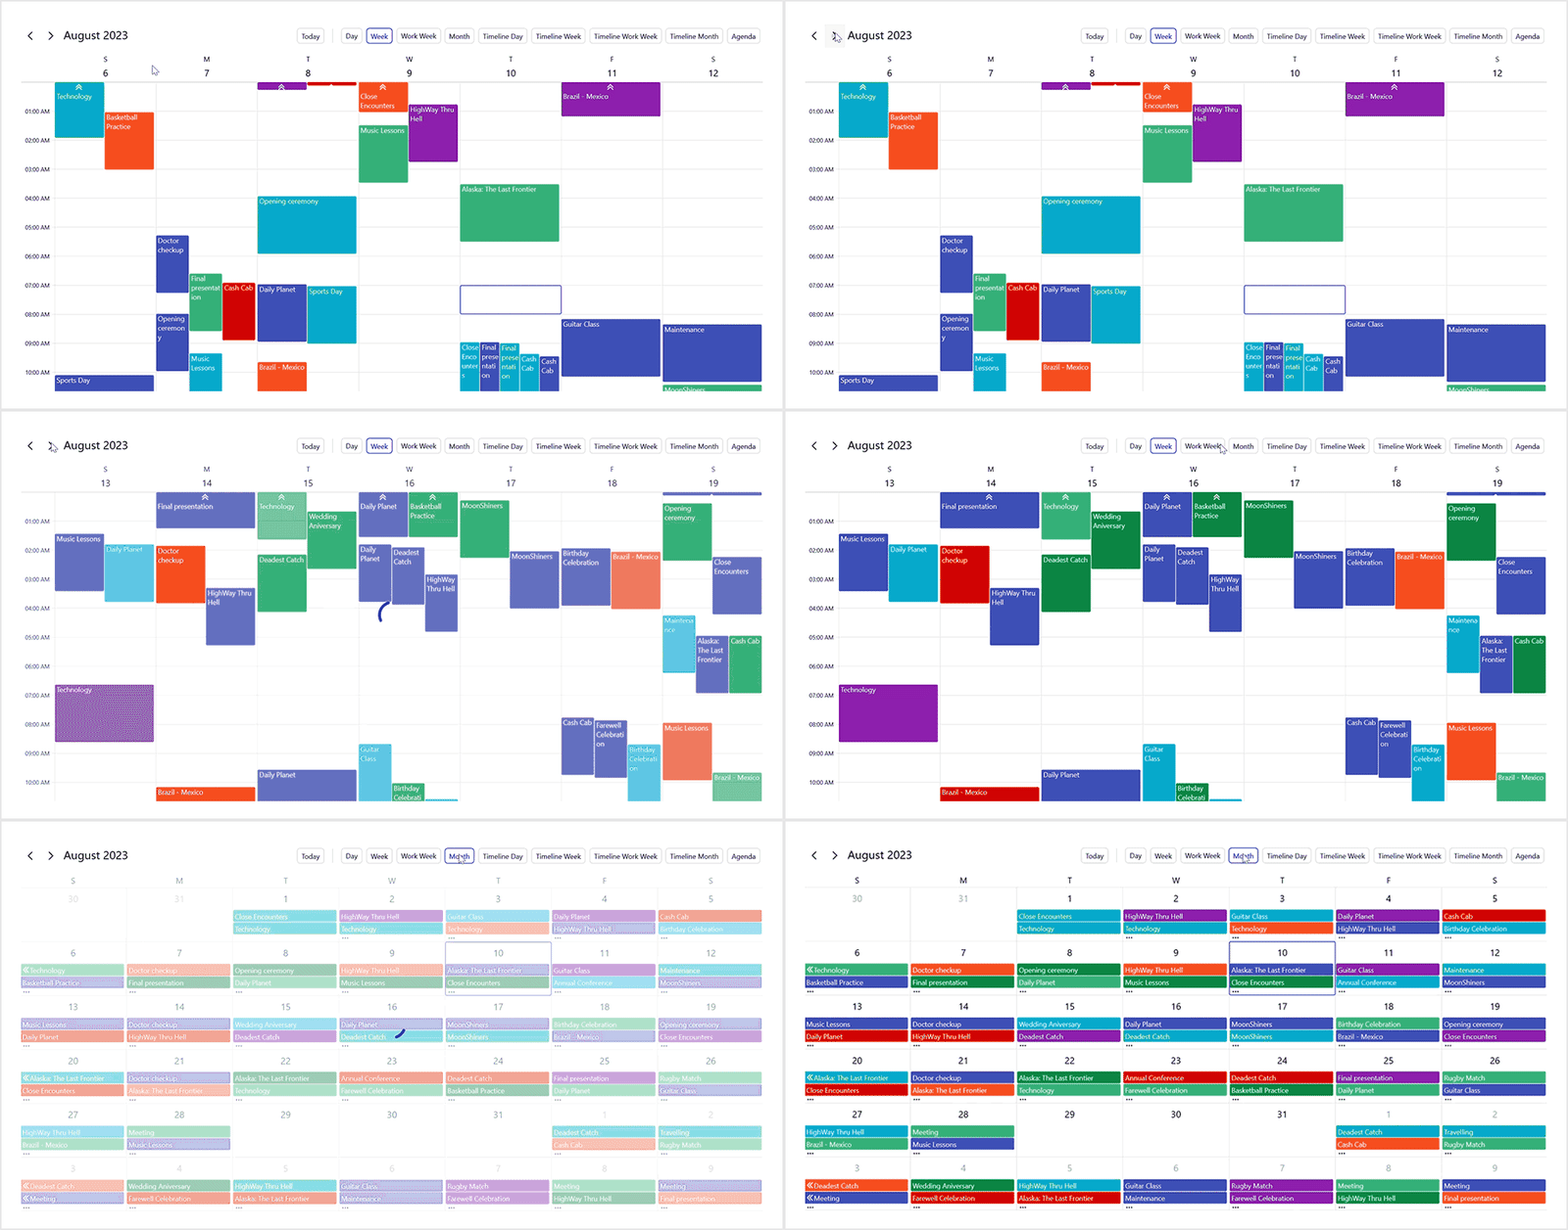
After executing the previous code examples, we’ll get output like in the following image.
GitHub reference
For more details, refer to the example for loading appointments on demand via web services in .NET MAUI Scheduler using JSON data on GitHub.
Conclusion
Thanks for reading! In this blog, we learned how to load appointments on demand in the .NET MAUI Scheduler control via web services. With this, you can load only the required appointments on demand and considerably enhance the loading performance of your app. Try out the steps and leave your feedback in the comments section below!
For current Syncfusion customers, the newest version of Essential Studio is available from the license and downloads page. If you are not a customer yet, try our 30-day free trial to check out these new features.
You can also contact us through our support forum, support portal, or feedback portal. We are always happy to assist you!


Top comments (0)