
In this blog, we’ll see how to load appointments in the WinUI Scheduler control from the SQLite database, execute CRUD (create, read, update, delete) actions, and dynamically update the Scheduler changes.
The Syncfusion WinUI Scheduler has comprehensive scheduling capabilities, making it an excellent solution for appointment management tasks.
SQLite, renowned for its lightweight nature, open-source availability, and self-contained architecture. It is used for relational database management in embedded systems, mobile apps, and desktop software. Its simplicity and efficiency make it a popular choice among developers.
Note: Before proceeding, ensure you have familiarized yourself with the Getting Started with WinUI Scheduler documentation.
Create SQLite connection, define the model, and populate appointments
Let’s start by connecting the SQLite database with the Syncfusion WinUI Scheduler.
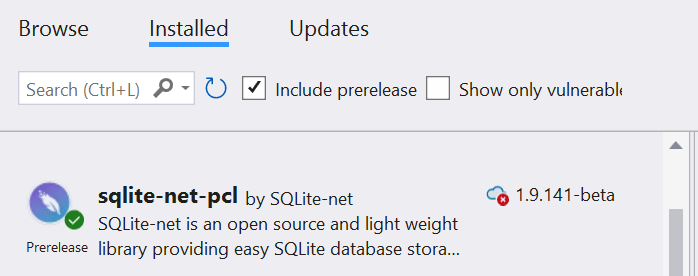
Step 1: Install the required package
First, install the sqlite-net-pcl package to connect the SQLite database.
 Step 2: Create the SQLite connection
Define the SQLite connection using the dynamic SQLiteConnection API and set up the database path property in the SchedulerDatabase.cs file.
Refer to the following code example.
SchedulerDatabase.cs
readonly SQLiteConnection sqLiteConnection;
public SchedulerDatabase(string dbPath)
{
    sqLiteConnection = new SQLiteConnection(dbPath);
}
Create an instance for the SQLite connection with the database Path property and initialize it in the App.Xaml.cs file to use the database.
App.xaml.cs
static SchedulerDatabase database;
public static SchedulerDatabase Database
{
    get
    {
        if (database == null)
        {
            database = new SchedulerDatabase(System.IO.Path.Combine(Environment.GetFolderPath(Environment.SpecialFolder.LocalApplicationData), "WPFSchedulerDatabase.db3"));
        }
        return database;
    }
}
Step 3: Define the database table model
Then, define the Appointment model class to hold the key property values extracted from the database table.
Appointment.cs
public class Appointment
{
    [PrimaryKey, AutoIncrement, Unique]
    public int Id { get; set; }
    public string EventName { get; set; }
    public DateTime From { get; set; }
    public DateTime To { get; set; }
    public bool AllDay { get; set; }
    public string Notes { get; set; }
}
Create a table named Appointment in that SQLite database.
SQLiteDatabase.cs
sqLiteConnection.CreateTable<Appointment>();
Step 4: Populate SQLite database appointments
In the SchedulerViewModel class, populate the data from the SQLite database.
public ObservableCollection<ScheduleAppointment> Appointments { get; set; }
var dataBaseAppointments = App.Database.GetSchedulerAppointments();
if (dataBaseAppointments != null && dataBaseAppointments.Count > 0)
{
    Foreach (Appointment appointment in dataBaseAppointments)
    {
        Appointments.Add(new ScheduleAppointment()
        {
            StartTime = appointment.From,
            EndTime = appointment.To,
            Subject = appointment.EventName,
            IsAllDay = appointment.AllDay,
            Id = appointment.Id
        });
    }
}
Then, retrieve the appointments from the SQLite database in the SchedulerDatabase.cs file.
public List<Appointment> GetSchedulerAppointments()
{
    return sqLiteConnection.Table<Appointment>().ToList();
}
Step 5: Bind appointments to the Scheduler
Initialize the WinUI Scheduler control and bind its ItemSource property to the Appointments property of the SchedulerViewModel class.
Refer to the following code example.
MainPage.xaml
xmlns:scheduler="using:Syncfusion.UI.Xaml.Scheduler"
<Grid x:Name="grid">
    <Grid.DataContext>
        <local:SchedulerViewModel/>
    </Grid.DataContext>
    <scheduler:SfScheduler x:Name="Scheduler" ViewType="Week" AppointmentEdi-torClosing="Scheduler_AppointmentEditorClosing"
                     Al-lowedViewTypes="Day,Week,WorkWeek,Month,TimelineDay,TimelineWeek,TimelineWorkWeek,TimelineMonth"
                     ItemsSource="{Binding Appointments}">
    </scheduler:SfScheduler>
</Grid>
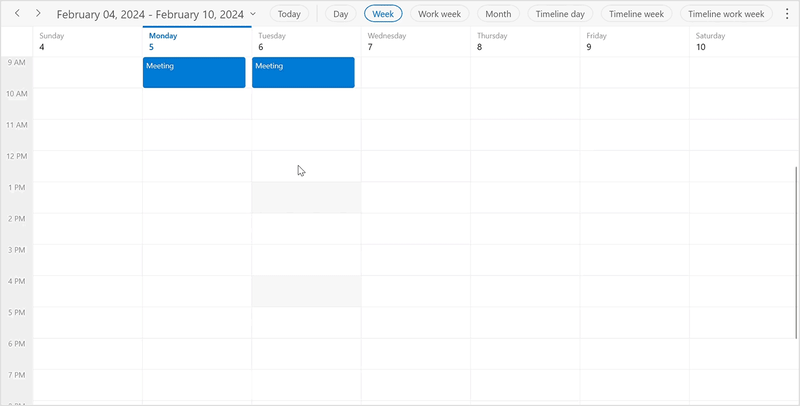
After executing the previous code examples, we’ll get output like in the following image.

Build a schedule appointment editor
Let’s create an appointment editor that enables the addition, saving, and deletion of appointments in the WinUI Scheduler.
When double-tapping the Scheduler, you will be able utilize the appointment editor to add, edit, and delete appointment details using the Scheduler AppointmentEditorClosing event.
private void Scheduler_AppointmentEditorClosing(object sender, AppointmentEditor-ClosingEventArgs e)
{
    SchedulerViewModel viewModel = this.grid.DataContext as SchedulerViewModel;
    if (viewModel != null)
    {
        if (e.Action == AppointmentEditorAction.Add || e.Action == AppointmentE - ditorAction.Edit)
        {
            viewModel.AddAppointmentDetails(e.Action.ToString(), e.Appointment);
        }
        if (e.Action == AppointmentEditorAction.Delete && e.Appointment != null)
        {
            viewModel.DeleteSchedulerAppointment(e.Appointment);
        }
    }
}
Refer to the following image.

When clicking Save or Delete in the appointment editor, it is necessary to update the WinUI Scheduler and the SQLite database.
Perform CRUD operations with SQLite database and update in the WinUI Scheduler
Let’s see how to execute CRUD actions on the SQLite database and synchronize the changes with the WinUI Scheduler control using the Scheduler appointment editor.
Save an appointment
You can add appointments by providing the required details and clicking the Save button in the appointment editor. The following code example illustrates the command associated with the Save button.
SchedulerViewModel.cs
internal async void AddAppointmentDetails(string action, ScheduleAppoint-ment scheduleAppointment)
{
    appointment = scheduleAppointment;
    var endDate = appointment.ActualEndTime.Date;
    var startDate = appointment.ActualStartTime.Date;
    var endTime = appointment.ActualEndTime.TimeOfDay;
    var startTime = appointment.ActualStartTime.TimeOfDay;
    if (endDate < startDate)
    {
        await ShowDisplayAlert("End date should be greater than start date");
    }
    else if (!appointment.IsAllDay && endDate == startDate)
    {
        if (endTime <= startTime)
        {
            await ShowDisplayAlert("End time should be greater than start time");
        }
        else
        {
            AppointmentDetails(action, appointment);
        }
    }
    else
    {
        AppointmentDetails(action, appointment);
    }
}
private void AppointmentDetails(string action, ScheduleAppointment scheduleAp-pointment)
{
    if (action == "Add" && this.Appointments != null)
    {
        appointment.Id = Appointments.Count;
        //// Add the appointments in the Scheduler.
        Appointments.Add(appointment);
    }
    SaveSchedulerAppointmentAsync();
}
Refer to the following code example to save an appointment in the SQLite database.
SchedulerViewModel.cs
private void SaveSchedulerAppointmentAsync()
{
      //// - add or edit the appointment in the database collection.
      var editAppointment = new Appointment() { From = appointment.StartTime, To = appointment.EndTime, AllDay = appointment.IsAllDay, Notes = appointment.Notes, EventName = appointment.Subject, Id = (int)appointment.Id };
      App.Database.SaveSchedulerAppointment(editAppointment);
}
SchedulerDatabase.cs
//Insert an appointment in the database.
public int SaveSchedulerAppointment(Appointment appointment)
{
    return sqLiteConnection.InsertOrReplace(appointment);
}
Deleting an appointment
By clicking the Delete button, we can delete an appointment in the WinUI Scheduler and the SQLite database. The following code examples demonstrate the command associated with the Delete button.
SchedulerViewModel.cs
internal void DeleteSchedulerAppointment(ScheduleAppointment scheduleAppointment)
{
    appointment = scheduleAppointment;

    //// Remove the appointments from the Scheduler.
    Appointments.Remove(this.appointment);
    //// Delete appointment from the database.
    var deleteAppointment = new Appointment() { From = appointment.StartTime, To = appointment.EndTime, AllDay = appointment.IsAllDay, Notes = appointment.Notes, EventName = appointment.Subject, Id = (int)appointment.Id };
    App.Database.DeleteSchedulerAppointment(deleteAppointment);
}
SchedulerDatabase.cs
public int DeleteSchedulerAppointment(Appointment appointment)
{
    return sqLiteConnection.Delete(appointment);
}
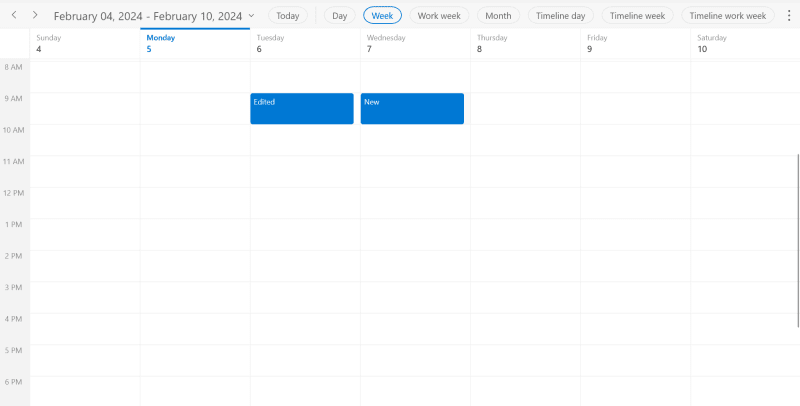
When rerunning the application, the WinUI Scheduler will fetch the updated appointments from the SQLite database, and the output will be as follows.
Conclusion
Thanks for reading! In this blog, we learned how to load appointments in the WinUI Scheduler with the SQLite database and perform CRUD operations with ease. Try out the steps discussed in this blog and leave your feedback in the comments section below!
Existing customers can access the new version of Essential Studio from the License and Downloads page. If you’re not a Syncfusion customer, why not explore our features with our 30-day free trial?
For questions, you can contact us through our support forum, support portal, or feedback portal. We’re here to help you every step of the way!
Related blogs
- From Stars to Hearts: Explore Creative Rating Designs in WinUI
- What’s New in 2023 Volume 4: WinUI and WPF
- Chart of the Week: Creating a WinUI Stacked Area Chart to Visualize US Primary Energy Consumption
- Introducing the New WinUI Shimmer Control
- Unleashing the Power of Navigation and Filtering with WinUI Segmented Control


Top comments (0)