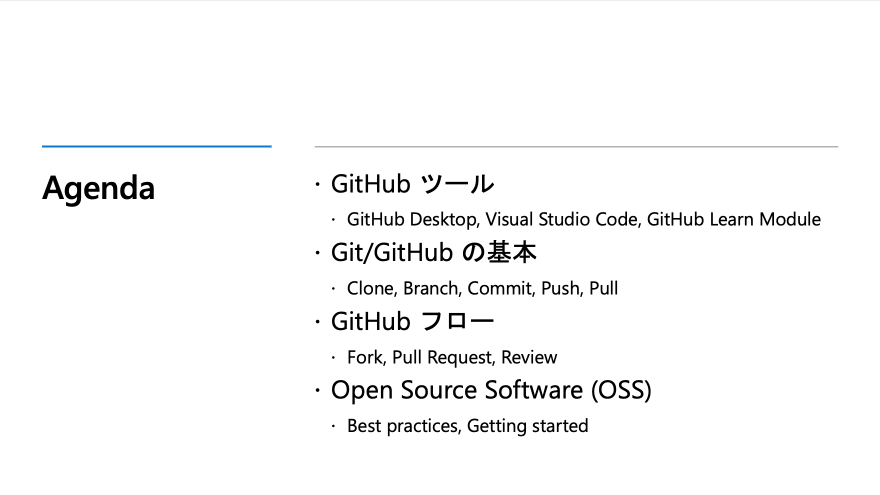
There is today's Agenda.
After introducing some useful GitHub tools, I'll review the basics of Git/GitHub.
Then I'll explain the GitHub flow, which is an important element, and finally I'll tell you how to proceed with OSS development.
GitHub tools
Before we get into the various tools associated with GitHub, let's first take a look at the GitHub website.
This is already logged in. You can create a new repository right here.
Next, let's take a look at profile, where you can see at a glance what kind of work you do on a daily basis, including repositories, commits, and other activities, and the organizations you belong to.

Next up is GitHub Desktop. There are client apps for Mac and Windows.
You can do various operations from the app's interface, just like the website. Of course, you can also use the command line from the terminal, but I've skipped it this time.


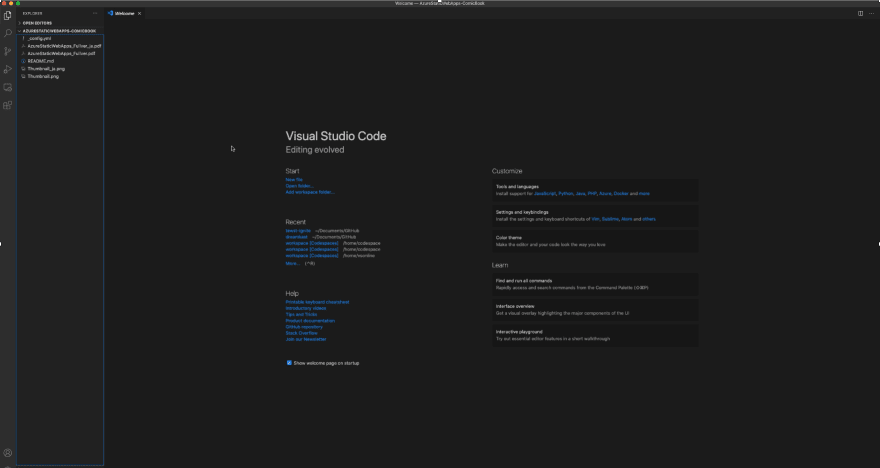
And Visual Studio Code, a very popular editor, which is also good for GitHub operations.
It can also be used in conjunction with GitHub Desktop, which I mentioned earlier.

https://code.visualstudio.com/
Next, let's talk about learning resources.
Microsoft offers an e-learning service called Microsoft Learn, and of course there's GitHub content available in that service.
Let's go through the modules, there's also content in Japanese.

https://aka.ms/intro-to-github
https://docs.microsoft.com/ja-jp/learn/modules/introduction-to-github/
GitHub also has a learning content called Learning Lab, which offers a variety of courses.
I recommend it because it's a great way to create a repository on GitHub and get hands-on experience with it.

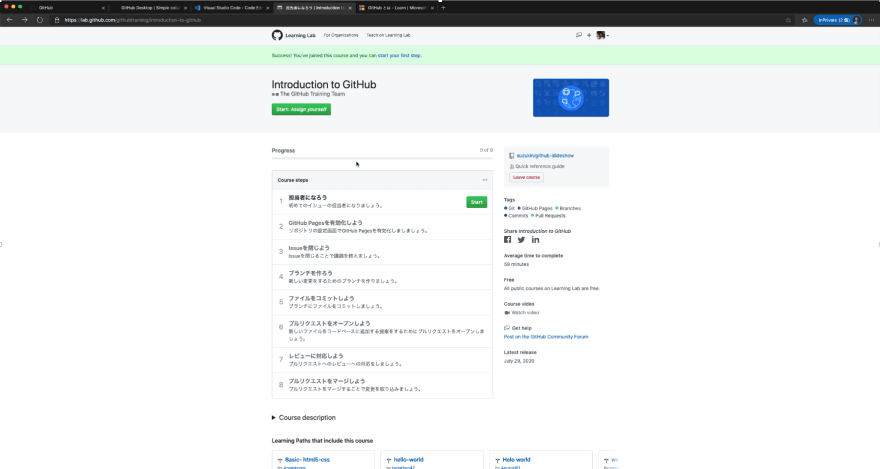
https://lab.github.com/githubtraining/introduction-to-github
Git/GitHub
Now that I've covered the tools on GitHub, I'd like to briefly discuss what Git is in the first place.
Git is one of the most popular version control systems. It keeps track of the changes you make to a file and makes it easy to revert to a particular version.
Imagine a file in your local machine, Do you copy and put a version number on it?
However, when you consider the collaboration of multiple developers, it is difficult to work in local environment. So came up with a centralized server version control system. The central server manages the version, and the local clients check out files from the server and work on them.
While this configuration is simple and straightforward to manage, it has a major disadvantage. It has a single point of failure on the central server. If for some reason the central server is inaccessible or the files are corrupted, you will lose all your work records. So nowadays, distributed version control systems are the norm. where the client also has a complete copy of all files and work records, mirroring the entire operation.

https://git-scm.com/book/en/v2/Getting-Started-About-Version-Control
Now let's take a look at the sequence of steps on GitHub using the tools I just introduced.
First, create a repository from GitHub site. You should have a public repository and a README file. The next step is to copy your repository to your local environment, which is called clone. Let's open it up in GitHub Desktop. The next you want to make changes to the code, you'll first create a branch.


Next, you can edit the README file in your local environment using VS Code. Now that GitHub Desktop has detected your edits, you can commit this fix. You can include a summary and a description in your commit. I'll leave a note saying "from Desktop". You can then take your local work and apply it to the remote environment on GitHub, which is called a push.


And now we'll make some more changes on GitHub, leaving "from GitHub" in the summary for clarity. Let's modify the README file again, this time in GitHub, using GitHub Desktop. And then we'll use GitHub Desktop to make those changes locally, which is called a pull.


That's the basic flow of version control on GitHub.
The GitHub Flow
Here's a very important point, the branch-based GitHub flow is a big part of what made GitHub the de facto developer collaboration de-facto among the many version control systems out there, and I'll give you an overview of the GitHub flow, and then I'll go through the fork-to-Pull Let's experience the process of requesting and reviewing with a sample repository.
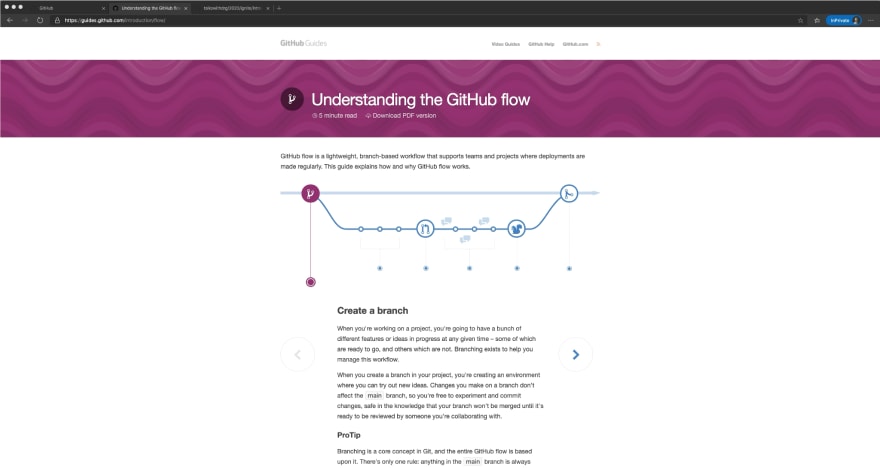
https://guides.github.com/introduction/flow/
Let's see how a modification is reflected here. The horizontal line at the top of the screen is the main branch, and the branch at the bottom is the modification branch. You create a new branch first, and then you commit some modifications to it. Then you submit a request to your main branch to merge the branch with some of your modifier commits, which are called Pull Requests. The developers discuss the fixes and review them, committing additional fixes and so on. They can also test and actually deploy the code in a fix branch before merging it into the main branch. When all the reviews are done, the modified commits are merged back into your main branch.
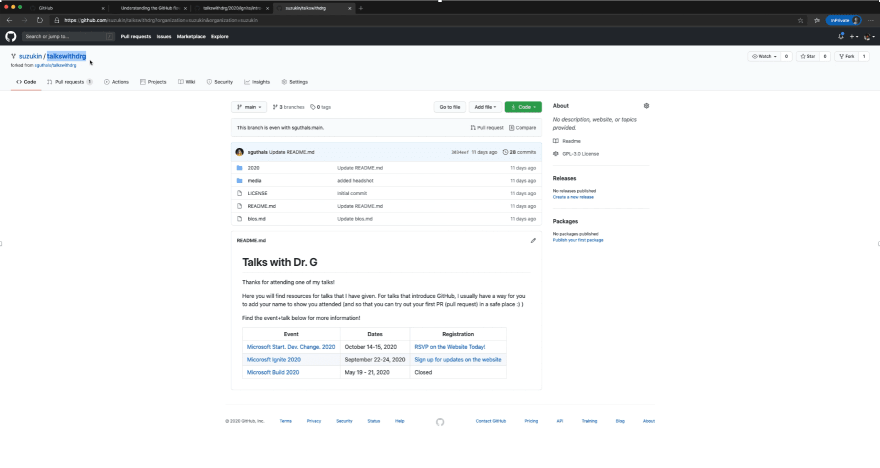
Let's demonstrate this process in action with a sample repository.

https://github.com/sguthals/talkswithdrg/tree/main/2020/ignite/intro-to-github
This is the repository of Sarah, the original speaker for this session. I'm going to submit a pull request to the main branch of this repository now. You'll need to fork this repository first. A fork is a copy of the original repository into your own repository, and you must fork it before you can suggest changes to other projects to which you don't have permission to edit.
The next step is to create a pull request. There are several steps to take, but here I will show you how to create a pull request by editing the file directly from the website and creating a new branch. The following two steps are done together.
- Create a new branch and commit your changes instead of the main one in your own repository (you can't create a branch in the original repository).

- Make a pull request from your newly created branch to original main branch (not a pull request to your main branch).
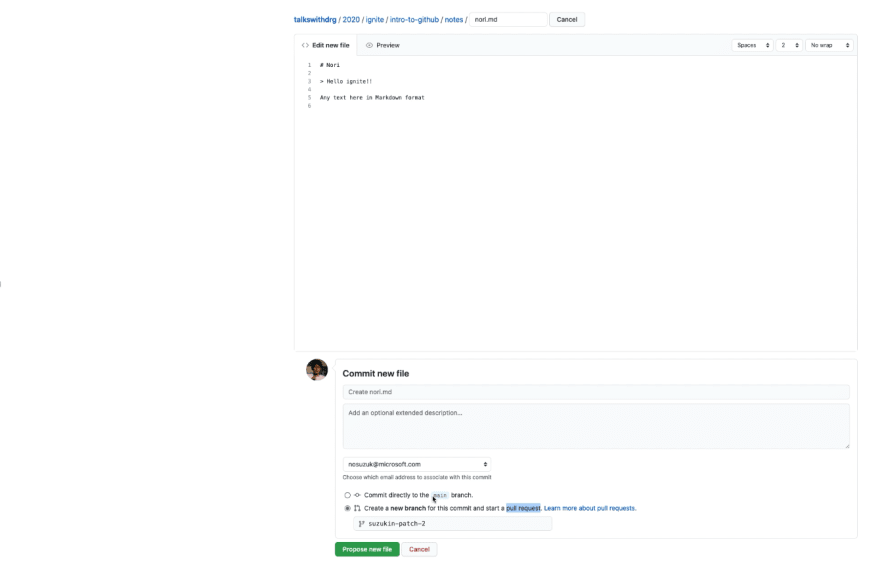
Here's a look at a pull request we've made in the past, requesting Sarah to add "nori.md" to under the original repository. suzukin:suzukin-patch-1 to sguthals:main, which is a request for Let's check it out. This is the discuss and review phase, as described earlier, and will be merged after her review.

As you can see, making a Pull Request in this way, and spinning the review and deployment process around as quickly as possible will lead to accelerated development.
OSS
Lastly, I would like to introduce some tips on how to promote OSS development. There are many OSS projects on GitHub, then there are ways to contribute to them. I'm going to ask VS Code to come back to the demo.
Pull Request is a great way to contribute to OSS, but Issue is also an important factor. So where do you start? GitHub issues have a feature called Labels, which categorizes many issues. When in doubt, take a look at tags such as "good-first-issue" and "help-wanted".
We encourage you to contribute to open source to the extent that you can.


Top comments (0)