What is LiteSpeed Web Server?
Litespeed Web Server is one of the best and most well-known web server software in the world. Some sources also mention that this webserver is ranked 4 as the most famous and popular web server today. LSWS is a product made by LiteSpeed Technologies which was released in 2003.
The software has the same working system as Apache because the purpose of its release is to replace the software. This is what makes LSWS increasingly popular because websites before LSWS do not have to be reformatted to get the same appearance after using LSWS.
LSWS has a control panel that is easier to use than Apache. This software also acts as a replacement for Apache program functions and provides an event-driven approach in order to be able to run certain commands.
By using the event-driven approach, the format calibration system will not be as complicated as when using Apache which is famous for its many special formats. Not to mention that the format is also easy to learn and control even for beginners.
Features of LiteSpeed Web Server
- Event-Driven Architecture
- Apache Drop-In Replacement
- HTTP/2 & QUIC Support
- Zero Downtime Maintenance
- CloudLinux Integration
- Fastest PHP Available
- Use with cPanel, Plesk, DirectAdmin, CyberPanel, etc
- Unlimited Concurrent Connections
- Mod_Security Compatible
Advantages of LiteSpeed Web Server
- The hardware required is not too big
- Easy to learn
- Provide excellent customer service and community
- Transactions are easier than Apache format
- More guaranteed safety quality
This blog will learn how to install OpenLiteSpeed Server on Ubuntu 20.04 along with PHP 8.0 and MariaDB.
Prerequisites
- The operating system running Ubuntu 20.04 Linux
- A root or non-root user with Sudo privileges
- Has stable internet connection
- Terminal window / Command line
1. Install OpenLiteSpeed
First, download the OpenLiteSpeed repository script.
wget http://rpms.litespeedtech.com/debian/enable_lst_debian_repo.sh
Run the script.
sudo bash enable_lst_debian_repo.sh
The script will automatically download repository files and update your server.
Then, Install OpenLiteSpeed. Run the following command:
sudo apt-get install openlitespeed -y
The -y flag in the command will automatically allow the server to install OpenLiteSpeed. If you don’t add the -y flag, it will simply ask you for confirmation.
Once you install OpenLiteSpeed, then start the OpenLiteSpeed service and enable it to start at system reboot. Run the following command:
sudo systemctl enable lshttpd
sudo systemctl start lshttpd
Next, verify the status of OpenLiteSpeed, Run the following command:
sudo systemctl status lshttpd
You can also verify the OpenLiteSpeed version. Run the following command:
sudo /usr/local/lsws/bin/openlitespeed -v
LiteSpeed/1.7.15 Open (BUILD built: Tue Feb 22 16:27:52 UTC 2022)
    module versions:
    lsquic 3.0.4
    modgzip 1.1
    cache 1.64
    mod_security 1.4
2. Install MariaDB Server
You can install the MariaDB server and client package, Run the following command:
sudo apt-get install mariadb-server mariadb-client -y
The -y flag in the command will automatically allow the server to install MariaDB. If you don’t add the -y flag, it will simply ask you for confirmation.
Once you install MariaDB, then start the MariaDB service and enable it to start at system reboot. Run the following command:
sudo systemctl start mariadb
sudo systemctl enable mariadb
You can verify the installed version of MariaDB. Run the following command:
mariadb --version
3. Install PHP 8.0 And Enable PHP 8.0 Support
By default, the latest version of PHP is not available in OpenLiteSpeed. When writing this blog, the newest version of PHP is 8.0. You can install the PHP 8.0 by running the following command:
sudo apt-get install lsphp80 lsphp80-mysql lsphp80-common lsphp80-opcache lsphp80-curl -y
The -y flag in the command will automatically allow the server to install PHP 8.0. If you don’t add the -y flag, it will simply ask you for confirmation.
Once installed, you will need to create a symbolic link of the installed package:
sudo ln -sf /usr/local/lsws/lsphp80/bin/lsphp /usr/local/lsws/fcgi-bin/lsphp5
Next, restart OpenLiteSpeed, Run the following command:
sudo systemctl restart lshttpd
4. OpenLiteSpeed Port Change
By default, OpenLiteSpeed listens on port 8088. You can check it using the following command:
ss -antpl | grep 8088
It is recommended that you change the default port to 80. To do so, edit the OpenLiteSpeed default configuration file:
sudo nano /usr/local/lsws/conf/httpd_config.conf
Find the following line:
address *:8088
And, replaced it with the following line:
address *:80
After updating your httpd_config.conf file, press CTRL+X, Y, and Enter key to save the httpd_config.conf file.
Next, restart OpenLiteSpeed, Run the following command:
sudo systemctl restart lshttpd
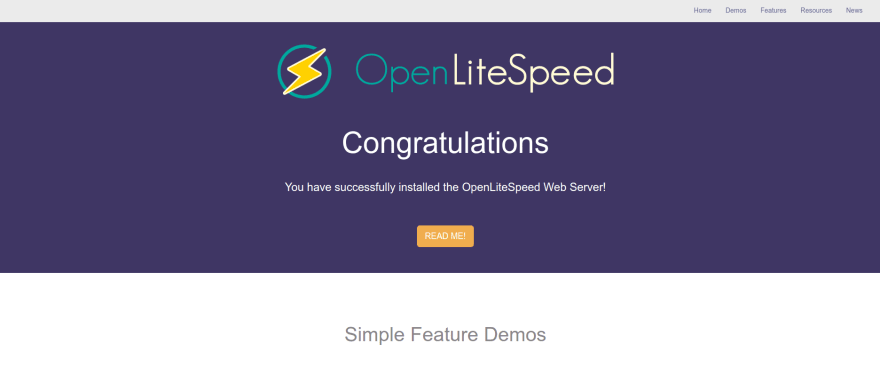
Now, open your web browser and type the URL http://your-server-ip-address. You should see the OpenLiteSpeed default page:

5. Create Admin User In OpenLiteSpeed
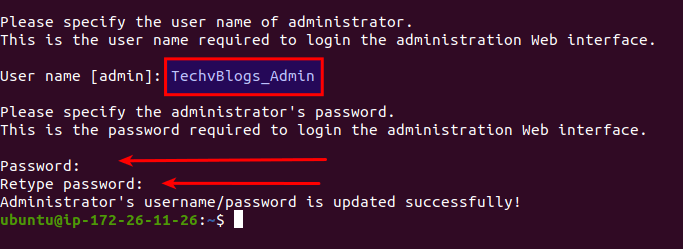
To access the Administrative dashboard, you need to set a username and password. To accomplish this, run the following command:
sudo /usr/local/lsws/admin/misc/admpass.sh

Be sure to specify the username and password for the Admin user. Once done, visit the URL shown.
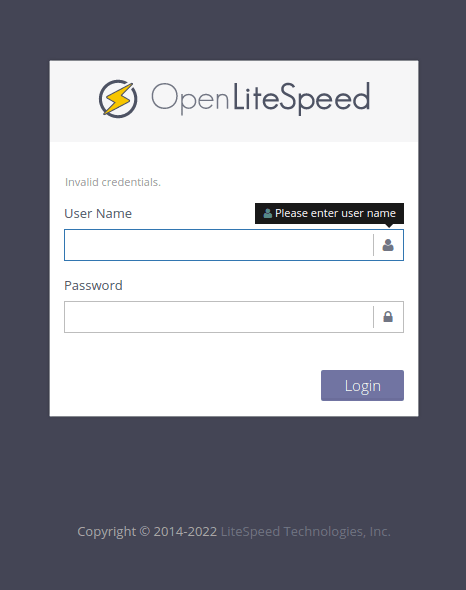
https://your-server-ip-address:7080

Provide your admin username, password, and click on the Login button. You should see the OpenLiteSpeed default dashboard on the following screen:

Thank you for reading this blog.


Top comments (1)
To install OpenLiteSpeed on Ubuntu 20.04, you can follow the steps outlined below:
Step 1: Update the System
Start by updating the package lists and upgrading the existing packages on your Ubuntu system:
sudo apt update
sudo apt upgrade
Step 2: Install OpenLiteSpeed
Next, you can proceed to install OpenLiteSpeed using the LiteSpeed repository. Here's how:
Add the LiteSpeed repository key:
wget -qO - rpms.litespeedtech.com/debian/enab... | sudo bash
Install OpenLiteSpeed:
sudo apt install openlitespeed
Step 3: Configure Firewall
If you have a firewall enabled, you'll need to open the necessary ports for OpenLiteSpeed. By default, OpenLiteSpeed listens on port 8088 for HTTP and port 7080 for the admin panel. Adjust your firewall rules accordingly.
For example, to allow incoming traffic on port 8088, you can use the following command if you are using UFW:
sudo ufw allow 8088
Step 4: Start OpenLiteSpeed
You can start OpenLiteSpeed using the following command:
sudo systemctl start lsws
Step 5: Access the Admin Panel
Once OpenLiteSpeed is running, you can access the admin panel using a web browser. Open the following URL:
your-server-ip:7080
Replace "your-server-ip" with the actual IP address or domain name of your server. You should see the OpenLiteSpeed admin panel.
Step 6: Secure the Admin Panel (optional)
For security reasons, it's recommended to set a password for the OpenLiteSpeed admin panel. To do this, run the following command:
sudo /usr/local/lsws/admin/misc/admpass.sh
Follow the prompts to set the username and password for the admin panel.
That's it! You have successfully installed and configured OpenLiteSpeed on Ubuntu 20.04. You can now use OpenLiteSpeed as a web server and explore its various features and settings through the admin panel.