
What is Gatsby? 🤔
Gatsby is a React based, GraphQL powered, static site generator.
It uses powerful pre-configuration to build a website that uses only static files for incredibly fast page loads, service workers, code splitting, server-side rendering, intelligent image loading, asset optimization, and data prefetching.
Contents 🔥
- Create New Page
- Gatsby Link
- Style the page
- Adding Meta Tags to Page
- MDX
- Working with Images
- Image Optimization
- Adding Images to MDX posts
- Syntax Highlight
- Analyzing Bundle Size
- Build Website
What makes Gatsby special? 😲
- The way Gatsby uses GraphQL to build it’s data layer. Gatsby is made to collect your data from wherever it may be: Markdown, JSON, your favourite CMS, third party APIs, anywhere! And at build time, it creates an internal GraphQL server of all of this data. So in your react components, all of your data is queried at build time from that same place, in the same way through GraphQL.
- Gatsby removed the boilerplate for getting started and deploying apps to the production.
- Gatsby deploying static assets, because its static you don't have to worry about database access, server going down, etc.
- Once you are done with Gatsby unified query, you run the Gatsby build process which gives a folder of static assets. Then you can host up in any server like Netlify, S3, FTP.
- Once you hit the browser it rehydrate into a fully functional react app. So, you don't just serve static sites, you are actually serving Progressive web app.
- Gatsby follows the PRPL pattern and other performance best practices. It generate only static assets(no server required).
- If you want to change or modify the webpack or babel, then you can do that. While modifying the webpack, you don't have to modify full config, as Gatsby will take care of composing that together. Customise only what you need, no ejection required(ejecting entire app like maintaining everything).
Let's start creating Gatsby page 📄
Lets clone this repo Gatsby Intro
Now, will go through the files:
- In
package.json, you only need three dependencies to build Gatsby: gatsby, react, react-dom. - In
src, you have all the view code. - In
static, it will generate all static assets after building the page.
To Run:
$ npm install

$ npm run develop
Enter the host http://localhost:8000 into browser.
1️⃣ Create New Page 🆕
In src/pages path, add new file named about.js
about.js:
import React from 'react'

export default() => (
<>
    <div> About Me</div>
</>
)
As you know, the file name given as about.js, so you can simply navigate to about page as localhost:8000/about
There is no need to restart the server after creating pages, Just create a file and check in browser by hitting the new page url. As, Gatsby also supports hot reloading. 🥳
2️⃣ Gatsby Link 🔗
You can use anchor tag but while using anchor tag, it will reload the whole page (that's not a good sign for performance). As we know, Gatsby generating React App, you have the ability to do dynamic routing.
So Gatsby comes prepackaged with React Router.
import React from 'react';
import {Link} from 'gatsby'
export default () => (
<>
<div>Homepage</div>
<Link to='/about'>About Us →</Link>
</>
)
3️⃣ Style The Page 🎨
For styling, you can use any plugin like emotion, SASS, etc. I will be using SASS here.
To setup SASS, follow this article
4️⃣ Adding Meta tags to page 🔖
When you want to reuse common pieces of data across the site (for example, your site title), you can store that data in siteMetadata.
To add meta tags to page for increasing SEO performance, follow this article
5️⃣ MDX
MDX is way to enable React component inside of mark down.
Rendering Components in MDX:
To render MDX in component, there is some dependencies which needs to install:
$ npm i gatsby-plugin-mdx @mdx-js/mdx @mdx-js/react
Once the plugin installed, you need to configure in gatsby-config.js.
gatsby-config.js:
plugins: [
        'gatsby-plugin-sass',
        'gatsby-plugin-react-helmet',
          {
            resolve: 'gatsby-plugin-mdx',
            options: {
                defaultLayouts: {
                    default: require.resolve('./src/components/layout')
                }
            }
          }
          ]
gatby-mdx requires little bit of configuration, like passing options. So writing in resolve.
In options, we need to pass what layout you will be using for MDX.
NOTE: This layout will be going to use across all the pages.
After adding the above config, restart the server. And create a page team.mdx. As we added the mdx plugin, now it looks for mdx file in pages directory.
team.mdx:
# My team

Welcome to Our Team 😋
Check localhost:8000/team, It will show the team page.
How can you add react component in MDX file? 🤔
We will be creating a wave component, where we will increase count on clicking button.
wave.js:
import React, {useState} from 'react'
import './wave.scss'

const Wave = () => {
    const [waves, setWaves] = useState(0);
    const label = `👋 ${waves} ${waves == 1 ? 'wave' : 'waves'}`;

    return (
        <button onClick={() => setWaves(waves+1)}>{label}</button>
    )
}

export default Wave
How can we add component into mdx file? 😲
team.md:
import Wave from '../components/wave/wave'

# Contact Me

Welcome to contact page 🥳

## You can wave to Me

<Wave />
Yeah, that's it. Just need to import the component and add it to the place. 🤩
Also, you can add JSX into MDX.
NOTE: You need to have 4 line break to get the JSX keep the markdown parts inside 😐
<div style = {{background: 'red'}}>
// 1
// 2
## helloo
// 3
// 4
</div>
Build Blog using MDX
Creating two post using mdx.
hello-world.mdx:
---
title: "Hello World!"
slug: hello-world
author: Suprabha
---

This is my first blog post!
Inside --- is called frontmatter.
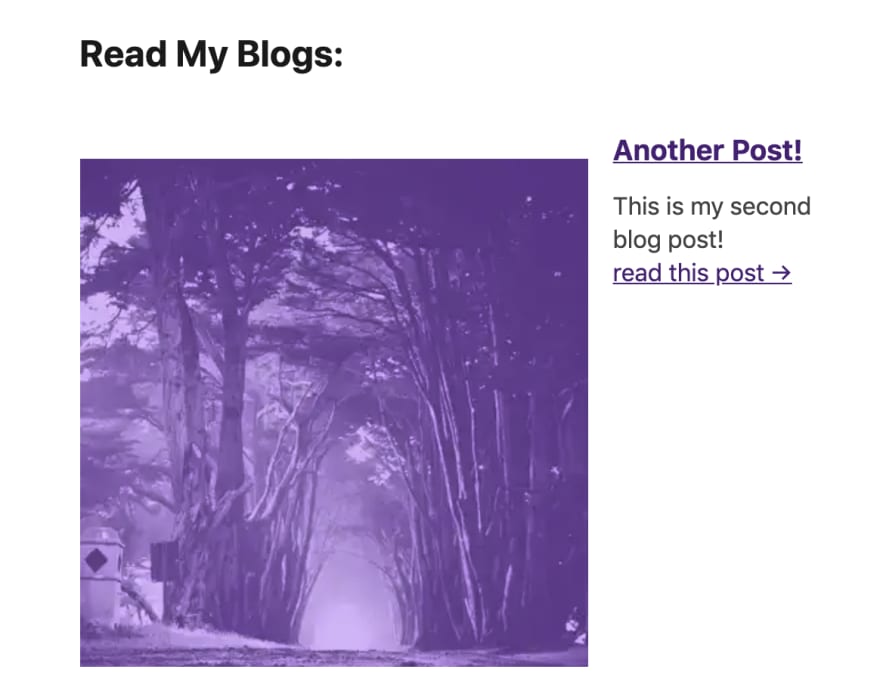
another-post.mdx:
---
title: Another Post!
slug: another-post
author: Suprabha
---

This is my second blog post!
How do we get these posts into Gatsby view? 🤔
Using gatsby-source-filesystem plugin, you will be getting into the data layer so you can access them into the page.
$ npm i gatsby-source-filesystem
gatsby-config.js: (into plugins)
{
    resolve: 'gatsby-source-filesystem',
    options: {
        name: 'posts',
        path: 'posts'
    }
}
In above snippet, I have given path, so it will look only in posts folder. Its going to load anything it finds as parts of data layer in posts path.
It will get the MDX files and transform those into GraphQL nodes.
Now, we will query from the posts using GraphQL.
In GraphQL, edge is describing the relationship and node is describing the data itself.(Only in Gatsby)
You can find the all changes related to creating posts here
After showing list of post in homepage, once you click on any post, It will show 404 page.
To resolve this, you need to configure gatsby node config in the root.
gatsby-node.js:
// gatsby give utility methods actions, graphql, reporter
// reporter is gatsby console log
exports.createPages = async ({actions, graphql, reporter}) => {
    // passing only slug, so accg to page we will fetch the rest of the data
    const result = await graphql(`
        query {
            allMdx {
                nodes {
                    frontmatter {
                        slug
                    }
                }
            }
        }
    `);
        // check the error scenario
    if(result.errors) {
        reporter.panic("failed to craete post", result.errors)
    }
        // if there is no error then getting nodes into posts variable
    const posts = result.data.allMdx.nodes
        // need to iterarte through the posts so using forEach here
    posts.forEach(post => {
        actions.createPage({
            path: post.frontmatter.slug,
            component: require.resolve("./src/templates/post/post.js"),
            context: {
                slug: `/${post.frontmatter.slug}`
            }
        });
    });
};
In above snippet, you have something called context. To get the data in post.js you need to look context. You can get the context in Post component via pageContext
post.js:
const PostTemplate = ({pageContext}) => (
    <pre>{JSON.stringify(pageContext, null, 2)}</pre>
)

//output
{
    "slug": "/hello-world/"
}
Now, you can use the data. In context you can also pass title, author, body but later it will be bit complex so just adding slug and will fetch the rest data using that slug.
Whenever you change gatsby node, restart the server.
Following code has been done here.
To get the data in post preview page, you need to look into context. You will be doing query based on slug/url from context for all the data.
post.js:
import React from 'react'
import {graphql} from 'gatsby'
import {Link} from 'gatsby'
import {MDXRenderer} from 'gatsby-plugin-mdx'
import './post.scss'
import Layout from '../../components/layout'
export const query = graphql`
query($slug: String!) {
mdx(frontmatter: {slug: {eq: $slug}}) {
frontmatter {
title
author
}
body
}
}
`
// aboved query will return data
const PostTemplate = ({data: {mdx: post }}) => (
<Layout className='post-wrapper'>
<h1>{post.frontmatter.title}</h1>
<p className='author'>Posted by author</p>
<MDXRenderer>{post.body}</MDXRenderer>
{/* <pre>{JSON.stringify(pageContext, null, 2)}</pre> */}
<Link to="/">← back to all posts</Link>
</Layout>
)
export default PostTemplate
In above snippet, you can see that we are using MDXRenderer. When you check body of the query it will be in different form which you can not read(mixing of both MDX and JSX). By using MDXRenderer, you can able to render the body in right format.
You can find all graphql operator here.
6️⃣ Working With Images
Add the images into static folder which can be easily accessible.
You can add image to homepage as:
<div className='hero-bg'> </div>
.hero-bg {
    background-image: url('../../../static/images/banner.jpg');
    height: 50vh;
    background-position: top 40% center;
    background-size: cover;
}
I have added the changes here.
7️⃣ Image Optimisation
Find the article here for Image optimization.
8️⃣ Adding Images to MDX Posts
You can add the images into MDX posts via installing gatsby-image dependencies:
$ npm i gatsby-image
Its same as gatsby-background-image but gatsby-image for regular images.
post-preview.js:
import Image from 'gatsby-image'

<Image
    className='post-image'
    fluid={post.image.sharp.fluid}
    alt={post.title}
/>
Note: You need to add image into the query, so you can able to fetch it in post data.
To add it into the post data:
import {graphql, useStaticQuery} from 'gatsby';

const usePosts = () => {
    const data = useStaticQuery(graphql`
        query {
            allMdx {
            nodes {
                frontmatter{
                    title
                    slug
                    author
                    image {
                        sharp: childImageSharp {
                            fluid(
                                maxWidth: 200
                                maxHeight: 200
                                duotone: {shadow: "#663399", highlight: "#ddbbff"}
                            ) {
                                ...GatsbyImageSharpFluid_withWebp
                            }
                        }
                    }
                }
                excerpt
            }
            }
        }
    `)
    return data.allMdx.nodes.map(post => ({
        title: post.frontmatter.title,
        slug: post.frontmatter.slug,
        image: post.frontmatter.image,
        author: post.frontmatter.author,
        excerpt: post.excerpt
    })
    )
}

export default usePosts
In above snippet, you added maxWidth, maxHeight and duoTone for defining size and duotone is for background color on blurred image.
The duotone option, given two hex colors shadow and highlight defining start and end color of the duotone gradient, converts the source image colors to match a gradient color chosen based on each pixels relative luminance.
You can find all the snippet here
Adding Optimized Image to Posts
If you want to show the image inline or in blog, you need to install one more plugin called gatsby-remark-images.
hello-world.mdx:

Above snippet won't work because Gatsby building all the files, and its doesn't able to find the image path where we would expect them to be.
$ npm i gatsby-remark-images
Remark is a mark down parser that can converts markdown into HTML.
gatsby-config.js:
{
    resolve: 'gatsby-plugin-mdx',
    options: {
        defaultLayouts: {
            default: require.resolve('./src/components/layout')
        },
        gatsbyRemarkPlugins: ['gatsby-remark-images'],
        plugins: ['gatsby-remark-images'],
    }
}
Now, once you restart the server, the image will work 🙌🏻
9️⃣ Syntax Highlight
To work on Syntax Highlight, Checkout the article here.
🔟 Analyzing Bundle Size 🎒
The last thing is to check the output, that the only thing which you have added should be there. To check that you will check bundle.
To check that, you will be using gatsby-plugin-webpack-bundle-analyzer plugin
$ npm i gatsby-plugin-webpack-bundle-analyzer
gatsby-config.js:
{
    resolve: 'gatsby-plugin-webpack-bundle-analyzer',
    options: {
        production: true,
        disable: !process.env.ANALYZE_BUNDLE_SIZE,
        generateStatsFile: true,
        analyzerMode: 'static',
    }
}
You want this plugin to run only on production bundle, then disable Should only run on some environment check.
package.json:
"scripts": {
    "analyze": "ANALYZE_BUNDLE_SIZE=true gatsby build"
}
If you are using MACbook, then its fine. But if you are using windows, then add this script also add cross env dependencies.
"scripts": {
    "analyze": "cross-env ANALYZE_BUNDLE_SIZE=true gatsby build"
}
Once its done, run the analyze command in terminal
$ npm run analyze
It will redirect you to below page:

In above snippet, you can see what's the size of the bundle, what are the images you are using.
If you are importing any lodash function then try to import it via lib, so it will download whole lodash function.
You can find the full snippet here 😎
Build Website ⛩
Once you run build command:
$ npm run build
It will generate all static files into public folder.
Then you can serve the page by below command:
$ npm run serve
And you can see build website on localhost:9000
One more awesome thing, If you are in homepage and once you hover on menu about us link then it will prefetch the about us page data. So when you go to about us page, it will load very fast, 😍🤩 (file will be already available)
I will be writing the artcile soon on how can we deploy Gatsby blog on Netlify 😍
Cache Clean in Gatsby 🧹
Adding the below script into package.json:
"cache": "gatsby clean"
Run it into terminal:
$ npm run cache
Reference 🧐
| 👩🏻💻 Suprabha.me |


Top comments (2)
helpful and effective , thanks
What are your thoughts on running gatsby only on /blog/ and manually building out the main pages?