
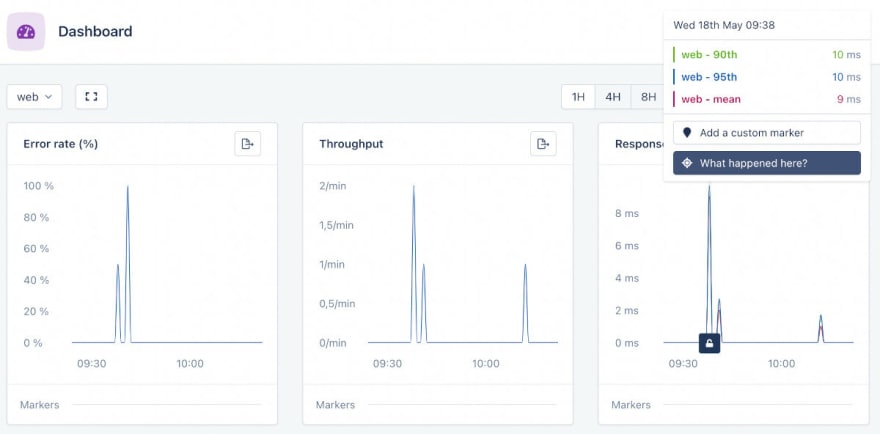
At Superface, we use NestJS framework for backend, and AppSignal APM for monitoring and error tracking. While AppSignal provides a Node.js integration, getting it up and running with NestJS proved to be somewhat tricky.
In this blog post, I will share how we managed to get AppSignal to work with NestJS.
Code snippets used in this blog post are part of our example project.
AppSignal initialization and configuration
AppSignal uses auto-instrumentation which attaches hooks into Node.js tools and frameworks (Express, Koa, PostgreSQL, Redis, …) and observes for certain functions to be called. Once the functions are called, the instrumentation automatically collects trace spans on behalf of your application.
AppSignal has the following requirements (taken from AppSignal docs) to make auto-instrumentation work:
To auto-instrument modules, the
Appsignalmodule must be both required and initialized before any other package.
The standard way to instantiate objects in NestJS is using the Dependency Injection (DI) Container.
To fulfill the requirement, we cannot use NestJS DI Container to instantiate AppSignal. AppSignal has to be instantiated as a global variable, which also means that we cannot take advantage of NestJS ConfigModule.
Example of AppSignal instantiation and configuration using environment variables:
//source file: src/appsignal.ts

const name = process.env.APPSIGNAL_NAME;
const pushApiKey = process.env.APPSIGNAL_PUSH_API_KEY;
const active =
  process.env.APPSIGNAL_ACTIVE === '1' ||
  process.env.APPSIGNAL_ACTIVE === 'true';

export const appsignal = new Appsignal({
  active,
  name,
  pushApiKey,
});
You also need to register the AppSignal middleware when initializing Express in NestJS application bootstrap code:
//source file: src/main.ts

async function bootstrap() {
  const app = await NestFactory.create<NestExpressApplication>(AppModule);

  app.use(appsignalExpressMiddleware(appsignal));

  await app.listen(3000);
}
bootstrap();
That's it, once you set APPSIGNAL_PUSH_API_KEY environment variable to valid AppSignal key and configure APPSIGNAL_NAME, APPSIGNAL_ACTIVE environment variables, AppSignal will start collecting metrics from all HTTP requests handled by your application.
Error tracking
Nest comes with a built-in exceptions layer, which is responsible for processing all unhandled exceptions across an application. See Nest Exception filters docs for details.
To track errors handled by Nest exception filters, we have created AppsignalExceptionFilter which implements Nest ExceptionFilter interface.
//source file: src/exception_filters/appsignal_exception.filter.ts

@Catch()
export class AppsignalExceptionFilter<T extends Error>
  implements ExceptionFilter
{
  catch(error: T, _host: ArgumentsHost) {
    let status: number;
    const tracer = appsignal.tracer();

    if (!tracer) {
      return;
    }

    if (error instanceof HttpException) {
      status = error.getStatus();
    }

    if (error && (!status || (status && status >= 500))) {
      tracer.setError(error);
    }
  }
}
The AppsignalExceptionFilter tracks HttpException exceptions with status code 5xx and any other exception types.
You can use AppsignalExceptionFilter by extending it in your custom exception filter implementation and register your exception filter in Nest app.
Example of extending AppsignalExceptionFilter:
//source file: src/exception_filters/all_exception.filter.ts

@Catch()
export class AllExceptionFilter extends AppsignalExceptionFilter<Error> {
  catch(error: Error, host: ArgumentsHost) {
    super.catch(error, host);

    const ctx = host.switchToHttp();
    const req = ctx.getRequest<Request>();
    const res = ctx.getResponse<Response>();

    const status = 500;

    const problem = {
      status,
      title: 'Internal server error',
      instance: req.path,
    };

    res.status(status).contentType('application/problem+json').json(problem);
  }
}
Example of global filter registration:
//source file: src/main.ts

async function bootstrap() {
  const app = await NestFactory.create<NestExpressApplication>(AppModule);

  app.use(appsignalExpressMiddleware(appsignal));
  app.useGlobalFilters(new AllExceptionFilter());

  await app.listen(3000);
}
bootstrap();
Monitoring @nestjs/bull processes
In addition to NestJS we also use Bull for background jobs processing. NestJS provides @nestjs/bull package as a wrapper of for Bull.
AppSignal doesn't trace Bull jobs automatically. Fortunately, we can use Appsignal custom instrumentation to handle tracing ourselves.
To trace Bull jobs, we have created a Bull process decorator ProcessMonitor:
//source file: src/bull/process_monitor.decorator.ts

export function ProcessMonitor(): MethodDecorator {
  return function (
    target,
    propertyKey: string,
    descriptor: PropertyDescriptor
  ) {
    const method = descriptor.value;

    descriptor.value = async function (...args: any) {
      const tracer = appsignal.tracer();

      const span = tracer.createSpan({
        namespace: 'worker',
      });
      span.setName(`JOB ${this.constructor.name}.${propertyKey}`);
      span.setCategory('job.handler');

      const job = args[0];

      if (job) {
        span.setSampleData('custom_data', { jobId: job.id });
      }

      let result;
      await tracer.withSpan(span, async span => {
        try {
          result = await method.bind(this).apply(target, args);
        } catch (error) {
          span.setError(error);
          throw error;
        } finally {
          span.close();
        }
      });

      return result;
    };
  };
}
The ProcessMonitor method decorator creates new span in worker namespace, collects job ID, sets span with the error in case an exception occurs.
Once you add ProcessMonitor decorator into your code base, start using it by decorating your Bull queue processor method:
export const MAILING_QUEUE = 'mails';
export const SEND_EMAIL = 'send_email';

@Processor(MAILING_QUEUE)
export class MailingProcessor {

  @Process(SEND_EMAIL)
  @ProcessMonitor()
  async sendEmail(job: Job) {
    ...
  }
}
Graceful AppSignal stopping
By default, @appsignal/nodejs starts minutely probes, which keep track of Node.js V8 heap statistics. This feature gives you insights about Node.js internals.
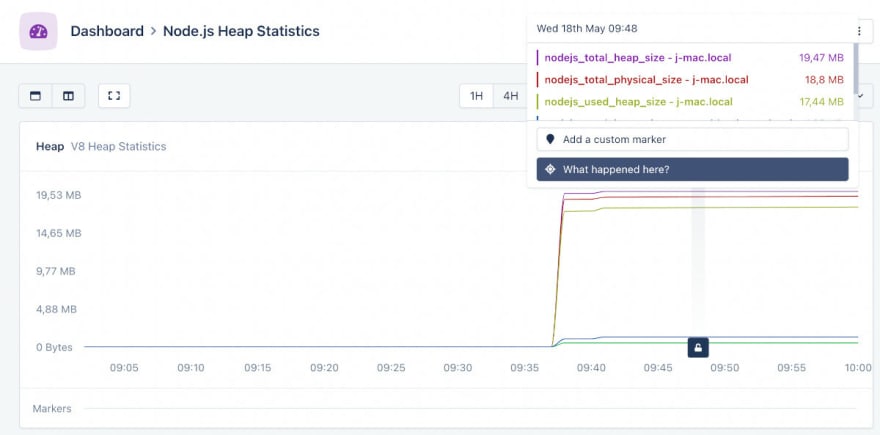
Unfortunately, with minutely probes enabled, you have to explicitly stop the probes by calling the stop method. Otherwise your application process won't stop gracefully.
Nest comes with the onApplicationShutdown lifecycle event, which is the right place to call AppSignal stop method. See example of AppsignalShutdownService implementation below:
//source file: src/appsignal_shutdown.service.ts

@Injectable()
export class AppsignalShutdownService implements OnApplicationShutdown {
  onApplicationShutdown(_signal: string) {
    appsignal.stop();
  }
}
Do not forget to add AppsignalShutdownService in your Nest application module.
//source file: src/app.module.ts

@Module({
  providers: [AppsignalShutdownService],
})
export class AppModule {}

Top comments (1)
Good tutorial thanks for the run through. Starting to use a lot more NestJS previously I defaulted to Express. But NestJS is more ideal for TypeScript because the setup is cleaner.