
In this post, we will focus on building the Angular frontend integrating with WebApi
Overview
Building Angular Single Page Application integrating with backend ASP.NET WebAPI.
Setting up Angular 11 for Local Development
To install angular the following pre-requisites installations is required
- NodeJs active LTS
- NPM package Manager Installing the Angular CLI > The Angular CLI is a command-line interface tool that you use to initialize, develop, scaffold, and maintain Angular applications.
npm install -g @angular/cli
Verify the version of angular using the below command
ng — version
Angular Version installed in my local development environment

Creating an Angular App
Run the CLI command ng and provide the name of the app as shown below
ng new myapp
Run the App
To run the application navigate to the app folder created and run the below command
cd myapp

npm install

ng serve — open
The ng serve command launches the server watches your files and rebuilds the app as you make changes to those files.
In this application, we are going to use the ng bootstrap CSS. To install run the below command in the terminal
npm install — save @ng-bootstrap/ng-bootstrap
Angular App Structure
Using visual studio code editor for building the application. Below is the application structure

Project code is available on Github
 sunilkumarmedium
/
CleanArchitectureApp
sunilkumarmedium
/
CleanArchitectureApp
Clean Architecture Application Design from Scratch using Dotnet Core 3.1 WebApi and Angular 11 FrontEnd
CleanArchitectureApp
Clean Architecture Application Design from Scratch using Dotnet Core 3.1 WebApi and Angular 11 FrontEnd
Technologies
- ASP.NET Core 3.1
- NHibernate
- Angular 11
- Angular CLI 11
- Clean Architecture
- Swashbuckle.AspNetCore.Swagger
- Design Pattern: Command Query Responsibility Segregation (CQRS)
- Fluent Validation
- WebAPI Global Exception Middleware
- Login, Logout and Forgot Password using JWT tokens
- Microsoft Sql Server and Postgresql supported.
Pre-requisites
- .Net core 3.1 SDK
- Visual studio 2019 OR VSCode with C# extension
- NodeJs (Latest LTS)
- Microsoft SQL Server (Optional: If MS SQL server required instead of Sqlite during development)
- POSTGRESQL
Configuration
- Clone the repo: git clone https://github.com/sunilkumarmedium/CleanArchitectureApp.git
- Execute the sql scripts available in the folder
/sql/- MSSQL use CleanArchitectureDB.sql
- POSTGRES use CleanArchitectureDB-Postgres
- Change the database connectionstring in appsettings.json
- Path : CleanArchitectureApp.WebApi/appsettings.Development.json or appsettings.json
-
"DBProvider": "MSSQL" ,UseMSSQLto connect to Microsoft SqlServer OrPOSTGRESto connect to PostgreSQL database "ConnectionStrings": { "MSSQLConnection": "Data Source=DESKTOP-SUNILBO;Initial Catalog=CleanArchitectureDB;User ID=sa;Password=xxx;MultipleActiveResultSets=True", "PostgresConnection": "Server=127.0.0.1;Port=5432;Database=CleanArchitectureDB;User Id=postgres;Password=xxx;Timeout=30;TimeZone=UTC" }'
- cd to…
Creating project folders
Inside the “app” folder, let’s create the folders “_models”, “_components”, “_shared” “_services”.
In the “_models” folder we will place our entities, like User:
Creating Components
Components are the main building block for Angular applications. Each component consists of:
- An HTML template that declares what renders on the page
- A Typescript class that defines the behavior
- A CSS selector that defines how the component is used in a template Optionally, CSS styles applied to the template
Sample Login Component
Services
Services can be used to have business logic in one place and can be injected into components when required.
Dependency Injection in Angular
Dependency injection (DI), is an important application design pattern. Angular has its own DI framework, which is typically used in the design of Angular applications to increase their efficiency and modularity.
To create a service, run the below command in the terminal window
ng generate service _services/authentication
Below is the sample Service
Interceptors
Intercepting requests and responses, With interception, you declare interceptors that inspect and transform HTTP requests from your application to a server. The same interceptors can also inspect and transform a server’s responses on their way back to the application. Multiple interceptors form a forward-and-backward chain of request/response handlers.
In our application, We have created JwtInteceptor to add the JWT token to every request that hits to web API. Below is the code implementation.
Global Error Handler
Handling exceptions in common service that implements ErrorHandler.
AuthGuard
AuthGuard can be used to restrict the user from viewing unauthorized pages or Components. Below is the AuthGuard Implementation.
Running the Application in Visual Studio Code
Open the project folder in the visual studio code and click on the run tab and select the projects to run as shown in the below screenshot

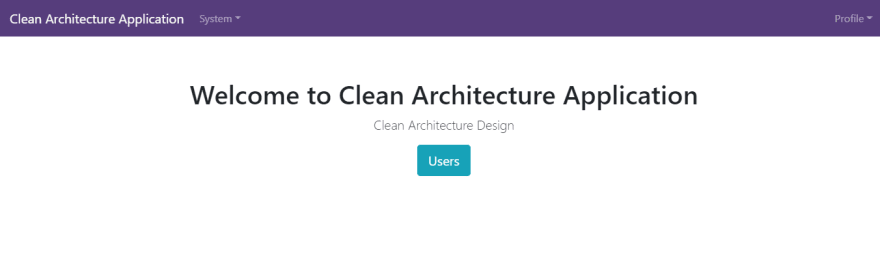
Angular Application and WebAPI are running in URL's below
- WebAPI: http://localhost:5001

- AngularWeb: http://localhost:5003 Test User to Login
- Username: system
- Password: admin@123

Conclusion
Hope you enjoyed the post and please feel free to play around with code
Happy Coding!
Series Links
Building an ASP.NET Core WebAPI using Clean Architecture

Building an Angular 11 Application integrated with WebAPI


Top comments (0)