Learn howto install and run a headless Ghost content management system in the cloud. Deploy Ghost in a Docker container and make it accessible to your teams. This guide focuses on the specifics of a headless configuration and fully prepares you for the awesome Jamstack.

Ghost started as a blogging platform but now officially announces itself a powerful content management system (CMS) with support for headless mode. Headless means that you can run it as a pure content source, replacing it's build-in front-end with a Jamstack variant.
As Jamify sources in all content from a Ghost CMS, this guide focuses on setting it up correctly for the Jamstack and particularly for use with the Jamify tools. Jamify currently requires you to run your CMS on a public endpoint, because inline images are served directly from the CMS. Hosting your CMS on a public cloud also enables you to invite team members, so it's generally good for collaboration.
Choosing a cloud host
Public accessibility means that you need to pick a hosting service. The installations steps that follow can be easily adapted to other cloud providers, such as Digital Ocean, Scaleway or Vultr, just to name three alternatives.
For this guide, I choose Hetzner Cloud, because it as an extremely reliable and cost-efficient service. Although not that widely known, it's a very professional company with a fast network, featuring DDOS protection and GDPR compliancy.
For under $3/month you can host your Ghost CMS with them which is extremely competitive for a hight quality service. However, you do have to install, maintain and secure your server yourself.
Hetzner Cloud
If you want to closely follow the installation steps shown in this guide, start by registering a new account with Hetzner. Just Sign up and you are good to go. Unfortunately, you cannot register with your existing Github account, they are still a bit old school in that respect.
Set up a new project
After setting up an account with Hetzner Cloud, go to the Cloud Console, add a new project and give it the name ghost. To simplify access to the cloud, make sure to configure your ssh key and generate an API token:
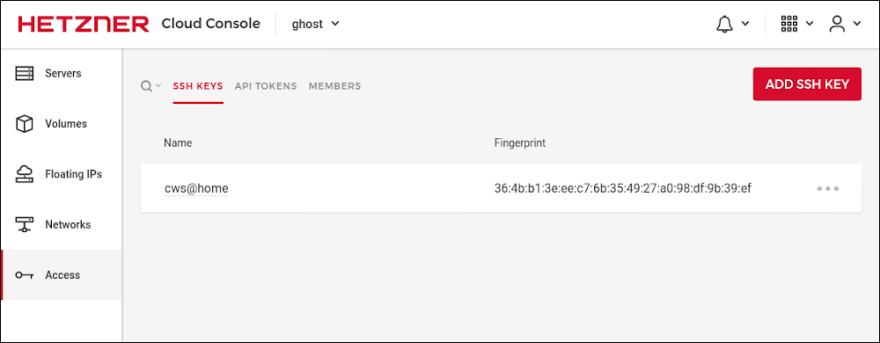

Make sure to copy the API token in the clipboard, so you can paste it later. For security reasons, you cannot see it a second time.
Install and connect hcloud
Initially you may find it easier to configure your cloud servers on their web interface, but you will soon discover the benefits of the CLI tool hcloud. It will make automating processes a breeze, so installing it will save you a lot of time later. Just follow their install instructions on Github. After installation, check the version:
[local]$ hcloud version
hcloud v1.16.2
You can now create a context in hcloud that lets you access your ghost project.
[local]$ hcloud context create ghost
Token:
Paste you previously generated API token at the token prompt, and you'll see the confirmation message Context ghost created and activated. hcloud is now connected to your ghost project.
Create a cloud server
With the command hcloud server-type list you get a list of currently supported servers. The smallest option is totally sufficient for a Ghost CMS, so you can create a new server with the following command:
Don't forget to replace the ssh-key name with your own!
[local]$ hcloud server create --image fedora-32 --location fsn1 --type cx11 --name ghost --ssh-key your@key
When you follow the commands in this guide you should also use the Fedora OS, because installation commands can vary slightly between different Linux distributions. Check the status of your server:
[local]$ hcloud server list
ID NAME STATUS IPV4 IPV6 DATACENTER
5838079 ghost running 49.12.109.72 2a01:4f8:c17:a6dc::/64 fsn1-dc14
Connect a domain name
Now that you have a cloud server with a dedicated IP, you can connect your domain name with it. You can purchase a new one with Hetzner or you can use an existing one that you registered with another provider. In any case, you need to configure your DNS zone file:

Configure at least three A records for @, www and cms to point at your server IP. As you can see from the figure above, I am using the domain blazing-blogs.com.
It can take up to 24 hours until these settings have propagated to all DNS servers.
Protect your server
As a very first step, you must further harden the server. As the only authentication method to your server is a key based SSH method, it should not be possible for others to log into your server. Still, you should close down all ports that you don't need, rate-limit your SSH port and update all software packages to the latest version.
Firewall
Log into your server with ssh root@$(hcloud server ip ghost) and install the uncomplicated firewall ufw:
[remote]$ dnf -y install ufw
Create a file containing the firewall commands:
[remote]$ (cat << EOF
#!/bin/sh
ufw default deny incoming
ufw limit in 22/tcp comment "rate-limit SSH"
ufw default allow outgoing
ufw allow ssh
ufw allow 80/tcp
ufw allow 443/tcp
EOF
) > ./firewall.sh
Execute and enable it with:
[remote]$ sh ./firewall.sh
[remote]$ systemctl enable --now ufw.service
You can check the firewall rules at any time with:
[remote]$ ufw status
Important: To verify that you have not locked out yourself, open a new terminal window and check that you can login in with
ssh root@$(hcloud server ip ghost).
Update all packages
Second most important step is to bring the kernel and other software packages up-to-date:
[remote]$ dnf -y update
These updates are only fully applied after a reboot.
Kernel tweak for docker
In perfect foresight, we are going to make a kernel tweak here, that is needed later for running docker. You need to enable the backward compatibility for cgroups.
[remote]$ grubby --update-kernel=ALL \
    --args="systemd.unified_cgroup_hierarchy=0"
Reboot
For all these changes to take affect, a reboot is required:
[remote]$ reboot
Logon again
You have to wait a minute until the OS has booted up again. Then login as usual:
[local]$ ssh root@$(hcloud server ip ghost)
and check that the firewall is up and running
[remote]$ ufw status
and the kernel updates have been applied:
 [remote]$ uname -a
 Linux ghost 5.6.11-300.fc32.x86_64 #1 SMP...
Install Docker
Use Fedora's package manager to install Docker:
[remote]$ dnf -y install docker docker-compose
[remote]$ systemctl enable --now docker
Fedora now uses the Moby Project to assemble the Docker components. Check that docker is running with an up-to-date version:
[remote]$ docker version
Client:
 Version: 19.03.8
Server:
 Engine:
  Version: 19.03.8
Obtain certificates from LetsEncrypt
The connection to your CMS should be SSL encrypted, so network traffic is secured. This is an important step as you do not want to send your passwords in plain-text over the internet.
[remote]$ dnf -y install certbot
Substitute blazing-blogs.com with your domain, your@mail.com with your email and put it in a variable:
[remote]$ DOMAIN=blazing-blogs.com
[remote]$ EMAIL=your@mail.com
Use certbot to get a certificate:
[remote]$ certbot certonly --standalone --no-eff-email \
--agree-tos --rsa-key-size 4096 --email ${EMAIL} \
--domains ${DOMAIN},www.${DOMAIN},cms.${DOMAIN}
If this command exits on error, check that DNS servers have already picked up the changed IP. You should see your cloud server IP with
[local]$ ping <your-domain.tld>, otherwise you have to wait up to 24 hours until you can complete this step.
Install Nginx
Nginx is a reverse-proxy and load-balancer that routes incoming traffic to your internal endpoints. It needs to be installed and configured with the previously obtained certificates:
[remote]$ dnf -y install nginx
The nginx configuration specifies how nginx relays traffic from your public endpoint to your internal Ghost installation. It also handles SSL encryption for you.
Statically serving images
With a default install of Ghost, Nginx will proxy all requests to Node.js. That means Nginx is proxying a request that it could handle itself much faster. You may wonder why you should be concerned about proxy speeds on your CMS. There are two valid reasons why you want to improve image load performance:
- Reduce initial build times: Although all resources are cached on Jamify, initial build times can be reduced when images are served faster.
- Accelerate live sites: Feature images are added to the static assets in Jamify, but inline images are currently still served from your Ghost CMS.
[remote]$ (cat << EOF
server {

  listen 80;
  listen [::]:80;
  listen 443 ssl http2;
  listen [::]:443 ssl http2;

  server_name cms.${DOMAIN};

  ssl_certificate /etc/letsencrypt/live/${DOMAIN}/fullchain.pem;
  ssl_certificate_key /etc/letsencrypt/live/${DOMAIN}/privkey.pem;
  ssl_protocols TLSv1 TLSv1.1 TLSv1.2;

  location / {
    proxy_set_header Host \$http_host;
    proxy_set_header X-Real-IP \$remote_addr;
    proxy_set_header X-Forwarded-For \$proxy_add_x_forwarded_for;
    proxy_set_header X-Forwarded-Proto \$scheme;
    proxy_pass http://127.0.0.1:2368;
  }

  location ^~ /content/images/(!size) {
    root /root;
  }

  location ^~ /.well-known/acme-challenge/ {
    default_type "text/plain";
    root /var/www/letsencrypt;
  }

  location = /.well-known/acme-challenge/ {
    return 404;
  }

}
EOF
) > /etc/nginx/conf.d/cms-ghost.conf
The first location block above describes the proxy to Ghost and is followed by the discussed bypass to serve images statically.
The last two location blocks are for LetsEncrypt, so certbot can renew your certificates while your web server is up and running. Finally, start nginx with:
[remote]$ systemctl enable --now nginx
and check it is running correctly:
[remote]$ systemctl status nginx
● nginx.service - The nginx HTTP and reverse proxy server
     Loaded: loaded (/usr/lib/systemd/system/nginx.service; enabled; vendor preset: disabled)
     Active: active (running) since Fri 2020-05-15 16:47:30 CEST; 6s ago
Ghost CMS in a Container
You are now fully prepared to install headless Ghost CMS. With all the prerequisites out of the way this is the easy part. A couple of environment variables must be defined that allow Ghost to send emails such as user invites or lost password requests:
[remote]$ EMAIL_FROM=noreply@your-blog.com
[remote]$ SMTP_HOST=mail.server.com
[remote]$ SMTP_PORT=587
[remote]$ SMTP_USER=user@server.com
[remote]$ SMTP_PASS=strong password
Replace the values with your own mail provider and use the following command to make a docker-compose.yml definition file:
[remote]$ (cat << EOF
version: '3.3'

services:
  ghost:
    image: ghost:alpine
    restart: always
    ports:
      - 2368:2368
    volumes:
      - ./content:/var/lib/ghost/content
    environment:
      # see https://docs.ghost.org/docs/config#section-running-ghost-with-config-env-variables
      url: https://cms.${DOMAIN}
      mail__transport: SMTP
      mail__from: ${EMAIL_FROM}
      mail __options__ host: ${SMTP_HOST}
      mail __options__ port: ${SMTP_PORT}
      mail __options__ auth__user: ${SMTP_USER}
      mail __options__ auth__pass: ${SMTP_PASS}
EOF
) > ./docker-compose.yml
This file configures the url for ghost and exposes the service on the standard port 2368. The service is configured to be persistent, so all configuration and database files are saved in your local directory under contents. This directory is created on-the-fly when you start the container.
Register your admin account
Fire up Ghost with docker. In this foreground mode, you see a lot of info messages and also warnings and errors, if they occur.
[remote]$ docker-compose up
Open your CMS in a web browser, which is https://cms.blazing-blogs.com in this example. You should see the Ghost sign up page. Complete the registration process until you see the Ghost Admin panel.


If everything goes fine, stop your running container with Ctrl+C and re-start it in detached mode, so it runs in the background.
[remote]$ docker-compose up -d
Now, your docker container will be running also after a reboot.
Configure Headless Mode
For headless mode, it's crucial to switch on the private flag. It makes sure that the Ghost CMS does not interfere with your Jamify front-end. I did not manage to change this setting on the command line, but it's not a big deal to do it in the admin panel:

This enables password protection in front of the Ghost install and sets <meta name="robots" content="noindex" /> so your Jamify front-end becomes the authoritative source for search engines.
Enable Members
If you plan to integrate a newsletter subscription form into your site or would like to use Ghost Members features in the future, it's now a good time to enable that feature in Ghost Admin.

Just activate the Enable members switch and leave all other settings with their defaults. You can come back to those later.
When your users subscribe to your site, Ghost CMS will send a magic subscription link to the provided email address. For that to work, email must be correctly configured. If you correctly set up your EMAIL and SMTP variables as discussed above, this should be already working. Test it by pressing the Send button under Labs -> Test email configuration:

In order for you users to be able to see sign up messages on the Jamify site, make the following tweak in your nginx configuration:
// /etc/nginx/conf.d/cms-ghost.conf

server {

  ...

  server_name cms.${DOMAIN};

  ssl_certificate /etc/letsencrypt/live/${DOMAIN}/fullchain.pem;
  ssl_certificate_key /etc/letsencrypt/live/${DOMAIN}/privkey.pem;
  ssl_protocols TLSv1 TLSv1.1 TLSv1.2;

  if ($args ~* "^action=subscribe&success=") {
    return 301 $scheme://www.${DOMAIN}$request_uri;
  }

  ...

}
Jut put the shown if statement below the certificate block. This statement instructs nginx to redirect subscription messages to your Jamify front-end. I made the assumption, that your Jamify site runs under www.${DOMAIN}. Please change it to the public endpoint of your production site.
Install Automation
In order to understand the installation steps, a manual install is preferable. Ultimately, you want to fully automate the process. I have great news for you: you can use a fully working automation script that I published on Github:
$ git clone https://github.com/styxlab/ghost-on-hetzner-cloud.git
$ cd ghost-on-hetzner-cloud
The scripts also includes additional features, some of which are discussed further below.
- Floating IPs
- SSH on non-standard port
- Scheduled backup
- Certificate renewal
- System updates
Hetzner Cloud doesn't let you attach environment variable in their Cloud Console, therefore you have to provide them trough your own scripts. Create a .env file that contains the following environment variables:
# .env file

# Server
CLOUD_SERVER_NAME=ghost
CLOUD_SERVER_IMAGE=fedora-32
CLOUD_SERVER_TYPE=cx11
CLOUD_SERVER_LOCATION=fsn1
CLOUD_SSH_KEY=you@home

# LetsEncrypt + Nginx
DOMAIN=your-blog.com
EMAIL=you@your-blog.com

# Ghost email settings
EMAIL_FROM=noreply@your-blog.com
SMTP_HOST=mail.server.com
SMTP_PORT=587
SMTP_USER=user@server.com
SMTP_PASS=SMTP_password
Please take some time to review this file, because your install script will fail with wrong variables. You have to substitute at least all values starting from
CLOUD_SSH_KEYuntilSMTP_PASSwith your own ones.
Start the automated install with:
[ghost-on-hetzner-cloud]$ sh create.sh
The script introduces a break when it asks you to update/verify your DNS zone file. You can comment out these lines, once you know that DNS is working.
The full install takes approximately 10 minutes to complete. After that you have a fresh Ghost installation and you can continue with the above steps for registering your admin account and configuring headless mode.
Snapshots
If you want to set up more installations or just want to make a backup of a fresh install, you can make a snapshot:
hcloud server create-image --type snapshot ghost
You can always create a new server from your snapshot image:
hcloud server create --image 16614774 --location fsn1 --type cx11 --name ghost --ssh-key your@key
Note that snapshots occupy cloud space and therefore incur costs.
Danger zone - tear down
You can easily remove your server again with hcloud. This is especially great during the testing phase, because a removed server doesn't incur any costs.
Caution! Make sure you have backed up all your data before doing this. You cannot recover this step - everything on your server will be lost.
[local]$ hcloud server delete ghost
Server 5851202 deleted
Operation
If you are running your own cloud server, you need to be comfortable with maintaining it. You can automate a lot, but checking it from time to time is necessary.
Scheduled Backups
Taking snapshots as shown before, is a quick way to make backups. In the long run, you want a backup strategy and implement scheduled backups.
All you need to backup from Ghost is the content directory that we persisted earlier during the docker install. This directory contains the database file and the image assets. You can use a systemd timer to set up the schedule, compress the directory and copy it over to another location.
If you are using the automated install, this is already set up for you. Otherwise follow the manual steps below.
Start by creating a new directory for your backup storage:
$ mkdir -p /root/backup/weekly
and subsequently create the following systemd unit files backup-weekly.service and backup-weekly.timer:
[remote]$ (cat << EOF
[Unit]
Description=Backup Ghost

[Service]
Type=oneshot
ExecStart=/usr/bin/sh -c 'rsync -avr --delete-after /root/backup /backup/weekly'
EOF
) > /usr/lib/systemd/system/backup-weekly.service

[remote]$ (cat << EOF
[Unit]
Description=Run backup-weekly.service

[Timer]
OnCalendar=Mon *-*-* 02:02:02

[Install]
WantedBy=multi-user.target
EOF
) > /usr/lib/systemd/system/backup-weekly.timer
In this example your backup is scheduled to run every Monday at 2 in the morning. Enable your timer with:
[remote]$ systemctl enable --now backup-weekly.timer
You can view all active timers with:
[remote]$ systemctl list-timers
In this example, the data is stored on the same disk. You can customize the systemd service and use rsync to copy all files in a remote location, for example in a private AWS S3 bucket. Another option is to use Hetzner's backup service that you can enable in the Cloud Console.
Certificate Renewal
The previously installed certbot already ships with a systemd service and timer similar to the ones that we previously discussed for backups. If you are using the automated install with the create.sh script, everything should already been set up for you. This is the manual install instruction:
[remote]$ systemctl enable --now certbot-renew.timer
Always check that the scheduler is correctly installed:
[remote]$ systemctl list-timers
Ghost updates
If you use the standard Ghost install based on the ghost-cli, updating to a new version is always risky: strangely enough the official update process does not provide a method to revert to a previous version.
Luckily, we are not affected by this limitation, as we are using the Docker approach. With Docker, updating Ghost is just a matter of downloading a new image and you can always revert back to the old image, if the update fails.
It is still important to make a backup of the
contentdirectory before updating, because the new version might make irreversible changes to your database.
In order to update, just update the docker-compose.yml file with the new image version. Here, I added 3.16.0- to the image signature. You can always check the latest version on the Docker hub.
version: '3.3'

services:
  ghost:
    image: ghost:3.16.0-alpine
    restart: always
    ports:
      - 2368:2368
Once you have updated docker-compose.yml you need to restart with:
[remote]$ docker-compose up -d
My previous image was based on version 3.15.3, so I will see the new image pulled and the container restarted shortly after. You should then see a new entry in your image list:
[remote]$ docker image ls
REPOSITORY TAG IMAGE ID CREATED SIZE
ghost 3.16.0-alpine 2e6185cc8040 16 hours ago 351MB
ghost alpine fcc77b9d5f98 7 days ago 336MB
This process could be automated and accompanied with a revert script. If you like to do that and contribute to this project, just go ahead an let us know.
System Updates
You should make every effort to keep your system up-to-date. With new security vulnerabilities discovered every day, frequent updates are a necessity. The following systemd units download updates every day:
[remote]$ (cat << EOF
[Unit]
Description=System update

[Service]
Type=oneshot
ExecStart=/usr/bin/sh -c 'dnf -y update'
EOF
) > /usr/lib/systemd/system/system-update.service

[remote]$ (cat << EOF
[Unit]
Description=Run daily system update

[Timer]
OnCalendar=*-*-* 03:03:03

[Install]
WantedBy=multi-user.target
EOF
) > /usr/lib/systemd/system/system-update.timer
and performs a reboot to apply the kernel updates every week:
[remote]$ (cat << EOF
[Unit]
Description=System Reboot

[Service]
Type=oneshot
ExecStart=/usr/bin/sh -c 'reboot'
EOF
) > /usr/lib/systemd/system/system-reboot.service

[remote]$ (cat << EOF
[Unit]
Description=Weekly system reboot

[Timer]
OnCalendar=Tue *-*-* 04:04:04

[Install]
WantedBy=multi-user.target
EOF
) > /usr/lib/systemd/system/system-reboot.timer
You can change these scripts to your own needs. They are already included and enabled if you use the automation scripts provided on ghost-on-hetzner-cloud.
Summary
This tutorial contains a lot of information. Congrats for following it through! Running your own Ghost instance is no rocket science: you can easily do it yourself. With this guide you get the knowledge and the tools to operate Ghost it in a predominantly unsupervised way.
While you learned a lot about the operational aspects, we also focused on a headless Ghost configuration: by setting the private flag correctly, by serving assets statically and by tweaking the members functionality.
You are now fully prepared for the next step: Sourcing your content from a headless Ghost into your Jamify front-end. Start publishing flaring fast websites today!
This post was originally published at jamify.org on April 7, 2020.

Top comments (0)