
One of the characteristics of reactive systems is that the timing of certain things becomes irrelevant. Angular Effects changes the way you think about components.
This is part III in a series on Reactive State in Angular. Read Part II: Getting started with Angular Effects
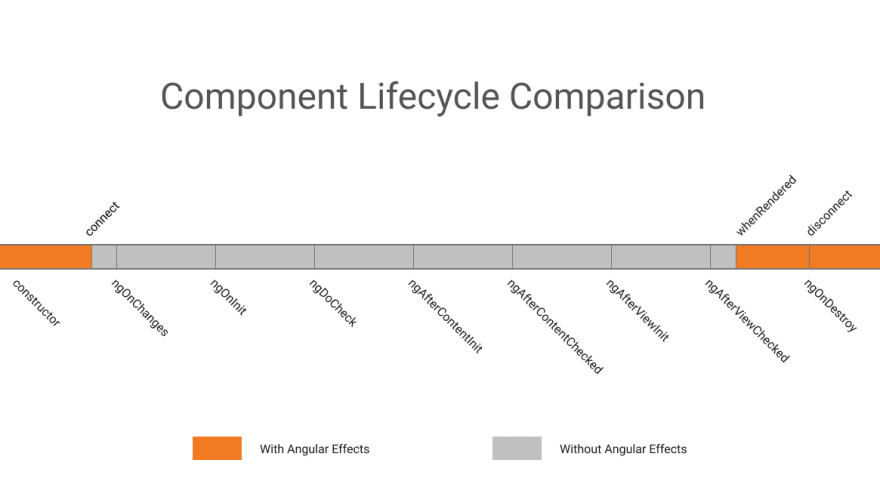
Up until now we've been trained to use imperative lifecycle hooks to make components work. This is fine if you stick with imperative code. The ceremony required to make these hooks reactive however, has lead to verbose and brittle code that is hard to read, test or maintain.
Angular Effects takes a different approach. Instead of subscribing to lifecycle hooks, we subscribe to the component state itself. We are then able to observe when certain properties have changed and create effects that respond to those changes through the composition of observable streams. Whether we subscribe early, or subscribe late, the timing of state changes does not really matter. As a result, we might not need lifecycle hooks at all!
How to use Angular Effects
To realign yourself into thinking about components reactively, this article will walk you through some common Angular concepts and their usage with Angular Effects.
Input bindings
Perhaps the most important part of components is receiving and responding to inputs. Here's how you can observe inputs without ngOnChanges or setters.
@Component({
    template: `{{ count }}`
})
export class CountComponent {
    @Input()
    count = 0

    @Effect()
    logCountChanges(state: State<AppComponent>) {
        return changes(state.count).subscribe(count => console.log(count))
    }
}
TIP: The
changes()operator is the same asskip(1), and is used to indicate that we are only interested in observing changes to the state, not the initial value.
This component is set up to log count whenever it changes. If we set the input value to 10:
<app-count [count]="10"></app-count>
Output:
> 10
As expected, we observe that the input value has changed. This works for non-input values as well.
@Component({
    template: `{{ count }}`
})
export class CountComponent {
    count = 0

    @Effect()
    logCountChanges(state: State<AppComponent>) {
        return changes(state.count).subscribe(count => console.log(count))
    }

    @Effect("count")
    setCount() {
        return scheduled(from([10, 20, 30]), asyncScheduler)
    }
}
Here we create a binding effect to update count when it emits. This time however we have removed the @Input() decorator.
<app-count></app-count>
Output:
> 10
> 20
> 30
We still observe the changes, even though it's not an input. When used with bindings, effects also trigger change detection to update the view. Kind of like an async pipe 🤔
Want to observe the entire state?
@Component()
export class AngularComponent {
    @Input()
    name = "angular"

    @Input()
    version = {
        major: 9,
        minor: 0,
        patch: 0
    }

    @Effect()
    logState(state: State<AppComponent>) {
        return latest(state).subscribe(({ name, version }) => console.log(name, version))
    }
}
TIP:
latest()is a small wrapper aroundcombineLatestthat lets you pass in a sources object, similar toforkJoin.TIP: You can replicate the behaviour of
ngOnChangesby using thepairwiseoperator to get the previous and current values of the state you are observing.
Output bindings
We can connect effects to outputs in a couple of ways. We can connect it imperatively by subscribing to it:
@Component()
export class CountComponent {
    @Input()
    count = 0

    @Output()
    countChange = new EventEmitter(true)

    @Effect()
    emitCount(state: State<AppComponent>, context: Context<CountComponent>) {
        return state.count.subscribe(context.countChange)
    }
}
Or we can connect it with an observer binding by using HostEmitter. HostEmitter is a drop-in replacement for EventEmitter that makes it easier to work with Angular Effects.
@Component()
export class CountComponent {
    @Input()
    count = 0

    @Output()
    countChange = new HostEmitter(true)

    @Effect("countChange")
    emitCount(state: State<AppComponent>) {
        return state.count
    }
}
The effect is the same as the first example, just more concise.
NOTE: Angular Effects only supports observer bindings when using
HostEmitter. See the first example for imperative usage withEventEmitteror other RxJS subjects.
A note on ExpressionChangedAfterItHasBeenCheckedError
You might see this error at some point when using Angular Effects. It tends to happen when effects emit values that update a parent component (via outputs) after the view has been checked. You can avoid this error by passing true to the constructor of EventEmitter or HostEmitter as seen in the examples above. This causes outputs to be emitted asynchronously, thus avoiding the error.
Host bindings
Host bindings need no extra treatment when using Angular Effects. It's just easier to use them when they are derived from observable data.
@Component()
export class BoxComponent {
    @HostBinding("style.width.px")
    width = 0

    @HostBinding("style.height.px")
    height = 0

    @Effect("width")
    setWidth(state: State<AppComponent>) {
        return of(1024)
    }

    @Effect("height")
    setHeight(state: State<AppComponent>) {
        return of(768)
    }
}
Bound effects trigger change detection when values are emitted, which in turn updates host bindings.
Host listeners
The @HostListener decorator doesn't work with event emitters, requiring additional boilerplate to connect it with an observable. Angular Effects solves this with HostEmitter, which talks like an event emitter but walks like a function.
@Component()
export class ClickComponent {
    constructor(private elementRef: ElementRef<HTMLElement>) {}

    @HostListener("click", ["$event"])
    clicked = new HostEmitter<MouseEvent>()

    @Effect()
    handleClick(state: State<AppComponent>) {
        return state.clicked.subscribe(event => console.log(event))
    }
}
Normally we might access an event emitter from the Context argument to use it inside our effects. We keep HostEmitter unwrapped inside State for extra convenience.
Template listeners
If we bind template events to a HostEmitter instead of a function or event emitter, using them inside effects is trivial.
@Component({
    template: `<button (click)="click($event)"`
})
export class ClickComponent {
    click = new HostEmitter<MouseEvent>()

    @Effect()
    handleClick(state: State<AppComponent>) {
        return state.click.subscribe(event => console.log(event))
    }
}
Two-way binding
Two-way binding is just syntactic sugar, so everything works as you would expect it to.
@Component()
export class CountComponent {
    @Input()
    count = 0

    @Output()
    countChange = new HostEmitter(true)

    @Effect("count")
    resetCount(state: State<AppComponent>) {
        return changes(state.count).pipe(
            delay(1000),
            mapTo(0)
        )
    }

    @Effect("countChange")
    emitCount(state: State<AppComponent>) {
        return changes(state.count)
    }
}
@Component({
    template: `<app-count [(count)]="count"></app-count>`
})
export class AppComponent {
    count = 10

    @Effect()
    handleCountChange(state: State<AppComponent>) {
        return state.count.subscribe(count => console.log(count))
    }
}
Queries
In Angular we can get a reference to child components, directives and providers of a view by using queries. There are four types, each available at different stages of the component lifecycle.
| Query | Type | Lifecycle |
|---|---|---|
| ContentChild | any | OnInit, AfterContentInit |
| ContentChildren | QueryList | AfterContentInit |
| ViewChild | any | OnInit, AfterViewInit |
| ViewChildren | QueryList | AfterViewInit |
In Angular Effects, we wait for the first change detection cycle before inspecting the value of view queries. Effects that depend on view queries should be deferred by configuring the @Effect() decorator with whenRendered: true. Static or dynamic queries make no difference here.
For example, given a child component we would like to query:
@Component()
export class ChildComponent {}
We can read the query within our deferred effects.
@Component({
    template: `
        <app-child *ngFor="let item of items></app-child>
    `
})
export class AppComponent {
    items = [1, 2, 3]

    @ViewChild(ChildComponent)
    viewChild: ChildComponent

    @ViewChildren(ChildComponent)
    viewChildren: QueryList<ChildComponent>

    @Effect({ whenRendered: true })
    logQueries(state: State<AppComponent>) {
        return latest(state).subscribe(({ viewChild, viewChildren }) => {
            console.log(viewChild)
            console.log(viewChildren.length)
        })
    }
}
TIP: The above example works for
@ContentChild()and@ContentChildren()too
QueryList is a bit tricky to work with. You need to be aware that once the value has been attached to the component, you must additionally subscribe or switchMap to the query list changes observable to see any changes in view or content children. A small utility function can be written to make it easier:
function queryList<T extends QueryList<any>>(source: Observable<T>): Observable<T> {
    return source.pipe(
        switchMap(queryList =>
            queryList.changes.pipe(
                startWith(queryList)
            )
        )
    )
}
Then use it with state
queryList(state.viewChildren).subscribe(viewChildren => console.log(viewChildren))
Adapt your thinking
There's a lot to digest here. The good news is that you can take an incremental approach to adapting your existing applications with Angular Effects. As with RxJS, use what you know and take things one step at a time as you need them.
Speaking of adapters, the next article will explain how you can use effect adapters to write even more concise and expressive Angular Effects. This will also cover integration with global state stores, such as NgRx.
Thanks for reading!
Next in this series
- Part I: Introducing Angular Effects
- Part II: Getting started with Angular Effects
- Part III: Thinking reactive with Angular Effects (You are here)
- Part IV: Extending Angular Effects with effect adapters
- Part V: Exploring the Angular Effects API
- Part VI: Deep dive into Angular Effects


Top comments (0)