
If in recent times you have found yourself unexpectedly working from home, you're not alone.
Many occupations have made a hasty transition into remote working - teachers, lecturers, students, researchers, doctors, recruiters, journalists, human resources staff, and computer programmers just to name a small handful. While those who hold positions that allow for remote work are rather fortunate, it doesn't come without challenges. For these folks, human interaction outside of their dwelling may only happen through a laptop screen and speakers via video conference calls. Which is why the quality of these calls can matter a lot when it comes to understanding one another and retaining good social connections.
My colleague Chris Traganos and I both have experience with remote working and have been iterating on our audio and video setups for some time now. As a result we've discovered what works best for video conferencing and presenting online.
Today we're pooling our advice and sharing it with you in case you're also interested in improving your own setup. We anticipate that budget will vary wildly from person to person, so we have options for everyone.
An
FYI- working from home related gear is currently in high demand so you might not be able to source these recommendations for a little bit depending on which country / city you live in.
Audio
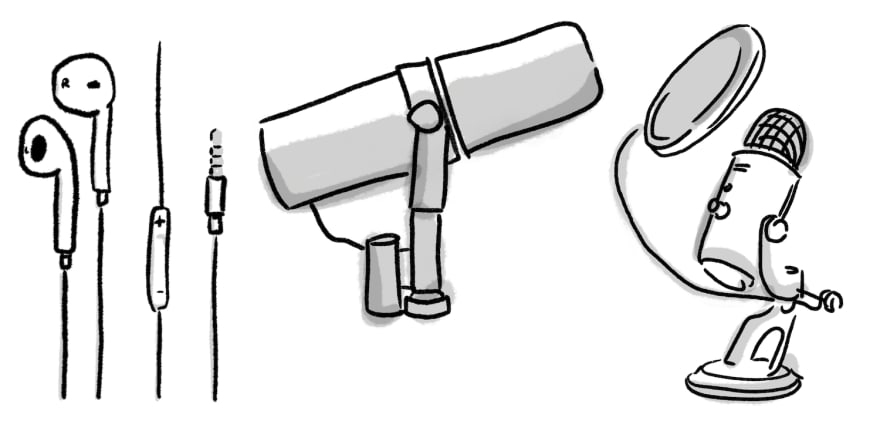
Being heard loud and clear is one of the most important parts of attending meetings. Having to repeat yourself is never fun. Investing in a good microphone can help a lot with facilitating quality conversations. A crisp reproduction of your voice can make all the difference to everyone feeling like you're right in the room with them, and being able to understand every word.
Most laptops have a built-in mic. While this can work in a pinch, the microphone is generally not close enough to your face to capture you well. It can also suffer from interference in the form of noisy laptop fans that may be in close proximity with the microphone. In addition, computers can run hot when the internal speaker is running during calls.
Switching to a set of corded headphones featuring a microphone (such as a pair of 3.5mm Apple headphones that came with your phone) will be an instant step up if you're low on budget. This is what I actually used to get started with live streaming and it worked fine. Using headphones will also solve for any echo problems as using speakers can cause your teammates' voices to feed right back into your microphone. No one will appreciate that painful squeal!
If you have a gaming headset you use in your personal time, now is a great time to also use it during work hours. Popular Bluetooth headphones such as the Bose QuietComfort range also feature microphones that will generally be better than your laptop due to proximity to your face.
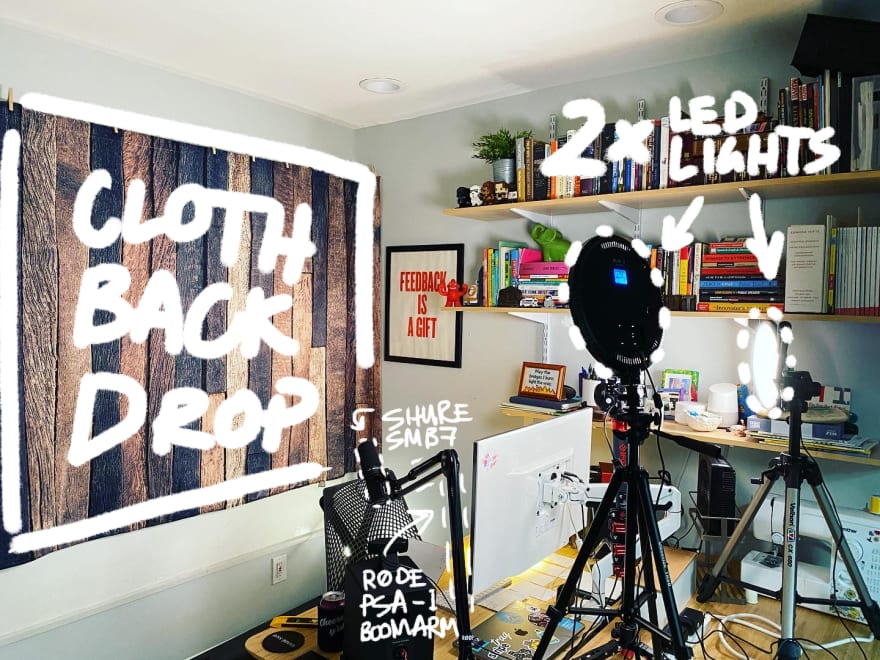
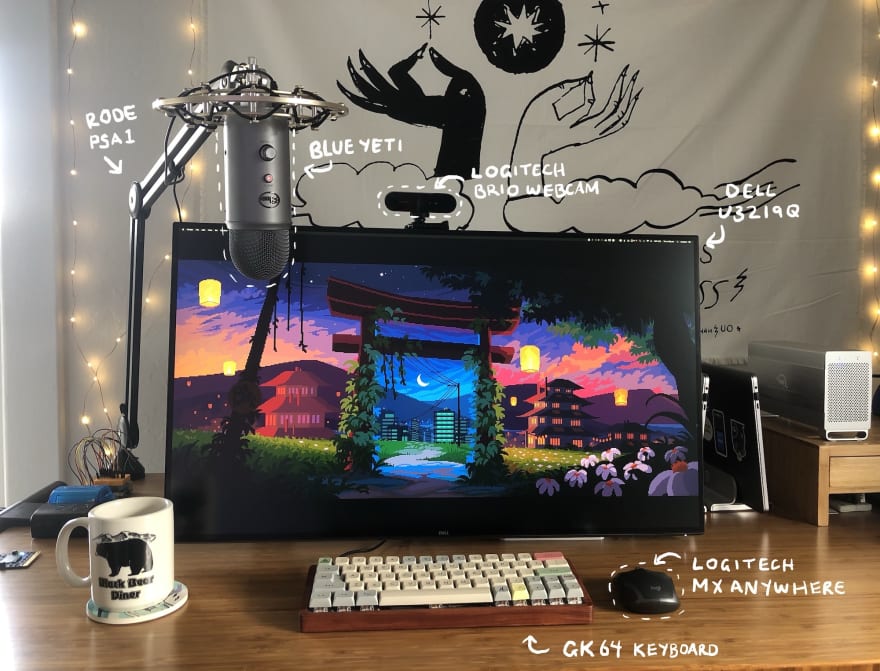
However nothing beats a pro condenser microphone, so if you can splurge we say do so! I personally use a Blue Yeti, while Chris loves his Shure SM7B.
Our recommendations if you're in need of an audio upgrade:
Budget pick: Lavalier clip on microphone
Splurge pick: Blue Yeti USB Mic and stand
Video
Most laptops feature a webcam in addition to a built-in microphone. These cameras will vary in quality from laptop model to laptop model. A Chromebook webcam will generally produce a lower quality image than a more expensive computer's webcam. If you're stuck with the built-in camera, there are a couple of tricks that can help to improve output quality.
The first thing to watch out for is lighting, as a well lit but not too bright room will help dramatically with any webcam's sensor, even if the webcam is not high-end. I have some lighting tips in the next section for you to consider.
Another improvement to consider is laptop placement. If you have a desk or table to work from, propping the laptop up on a pile of books whenever you have a meeting will elevate the built-in webcam closer to eye-level. When people sit down to talk to one another, they're generally sitting with their eyes level with each other. Laptop webcams often produce that "looking up your nose" effect instead, which can feel unnatural and awkward. An eye-level camera can have a similar effect to crisp audio - it can help nudge things a bit closer to feeling like you're in the same room from your teams' perspective.

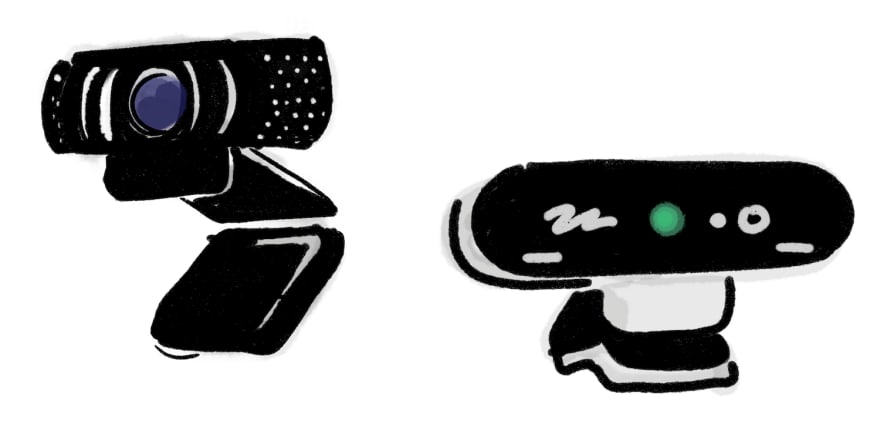
If you're able to invest in an external webcam, great! You'll notice a marked improvement in your picture quality after you set one up. Just remember the eye-level placement rule if you can! Clipping the webcam onto the top bezel of your laptop or monitor is a good place to start for placement.
If you already have a DSLR camera, it might support you using it as a webcam. This can introduce an extremely high definition but flattering video of yourself! In order to do this you'll likely need a third party device to stream the camera's HDMI signal to your computer, such as the Elgato Cam Link. You should also confirm that your camera can output clean HDMI signal, can be powered externally from a wall outlet, and also allows turning off of automatic sleep mode. Just do some research first and this might be a good option for you.
Our recommendations for video gear:
Budget pick: Logitech C920 webcam
Splurge pick: Logitech Brio 4K webcam
Lighting
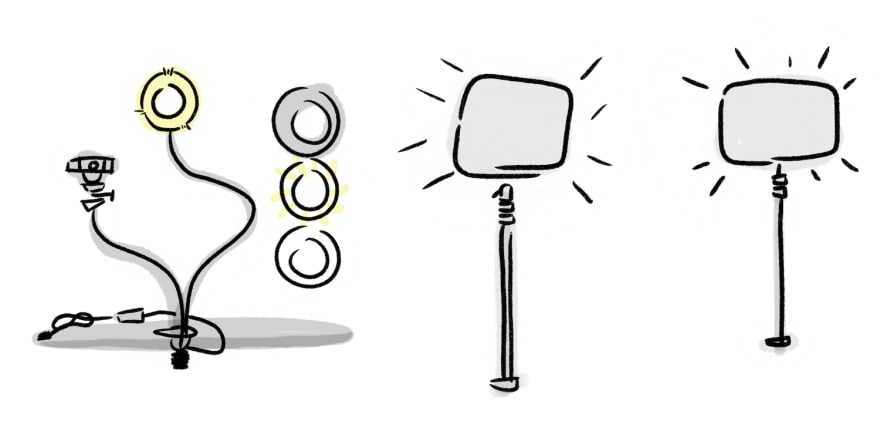
Even the best camera or webcam in the world will still struggle if there's poor lighting for it to make use of. One quick fix is to avoid sitting in a location where there is a window behind you. A bright light source behind you is probably the worst lighting scenario you can have. Your camera will compensate for the bright light source by lowering the exposure, effectively throwing you into shadow. Sitting while facing a window can help if you work during daylight hours and are on a budget.
Fact: I have been running my livestream with just a window as a light source and still do almost four years later! So it's definitely possible to avoid buying lighting at all if you have a good window to set up near as long as it's facing the right way.
If you need a light source, we have a budget and more expensive recommendation respectively below:
Budget pick: Clip-on LED ring light
Splurge pick: Elgato Key Light Air
Background
Outside of lighting, camera and microphone choices, we're sharing a couple of neat tips we have picked up that can help you cheat your way to a cool looking setup by use of backdrops, backgrounds, or filters.
Photography backdrops can be hung cheaply and temporarily so they're a good option even if you're renting. Chris has a wood photo backdrop behind him which really warms up his video frame and is a lot more nice to look at than a plain white wall. I hung a printed tapestry that I sourced from Society6. It took 5 minutes to steam the wrinkles out and 5 minutes to hang with a couple of drawing pins.
Going one step further, a green screen can be an option if you're working in a part of your home that is less private. However if this would prevent folks from seeing your cat stroll by, consider not getting a green screen! We love to see pets and we want to say hello to them.
Our background gear recommendations:
Some video conference calls offer a 'background replace' feature (super popular in Zoom video conferencing software) which will allow you to skip the green screen entirely.
Replacing your background can be used in very subtle ways that might not seem obvious at first. One of my favorite techniques that I picked up from a fellow live streamer is to take a picture of whatever is usually behind you, without being in the frame. Apply a blurring filter to that picture via a photo editing app, and then use that as your background replacement. It will look natural, and gives the convincing impression that you have a camera that is capable of producing a low depth of field.
If you're looking for digital backgrounds to replace your real one, Chris has put together some free to use photos to create a nice ambiance. Clicking the tweet below will take you to the thread where many photos are shared for your use:

 Trag@chris_trag
 ⛓. Stuck at home working via @zoom_us all day?
🎨. Tempted by those silly virtual backgrounds?
💡. Take a nice room pic & focus on a pencil to blur.
✨. Magic... you're now free from the confines of your tiny apartment.
📸. Enjoy!20:32 PM - 12 Mar 2020
6
46
Sharing our own setup
Here is what Chris' setup looks like:
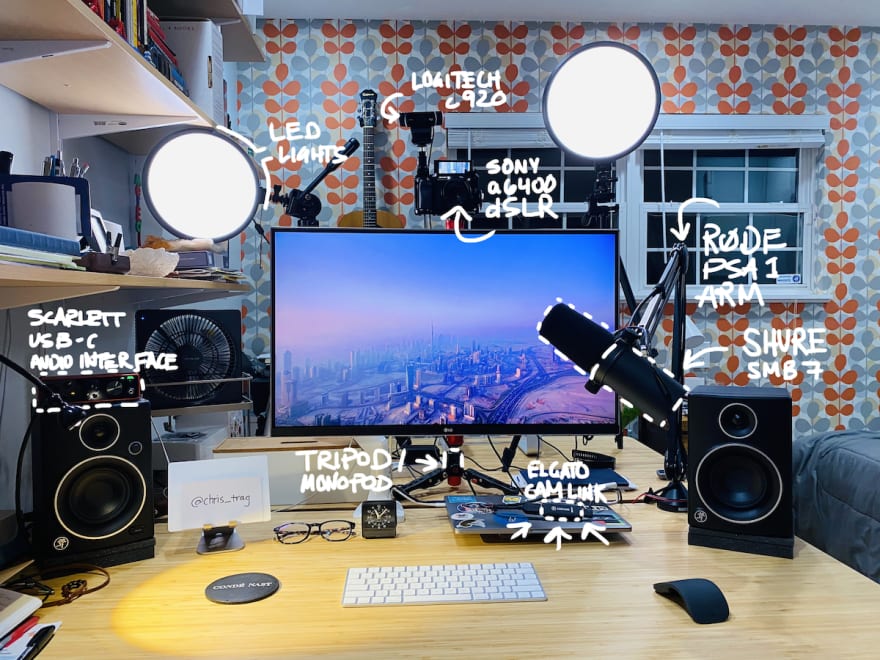
Here is what my setup looks like:
Recapped list of gear:
-
🎙 Microphone:
-
📹 Webcam:
-
🔅 Lighting:
-
🖼 Background:
We hope these recommendations help you and your team improve the quality of your conversations over video conferencing. Even with zero budget, some small hacks can make a large impact. If you're comfortable sharing, show off your own setup in the comments as we'd love to see them.
Hang in there, and we'll get through this together ❤️
Illustrations by Chris Traganos and Suz Hinton


Top comments (2)
For the past few days I've been testing a few apps that transform a smartphone into a webcam. I already own a Pixel 3, which has a great camera, so why wouldn't I want to use it? 🙂 Turns out it's easier than I thought and budget friendly.
First I tested DroidCam and it worked quite well, albeit with a few quirks. But then I stumbled upon iVCam and never looked back! The quality is much better, there are many more useful features, the PC app is more user-friendly and gives much more control and on top of that I can switch my phone's cameras so I have access to the back camera, front camera and also the wide-angle front camera which is absolutely awesome! That's something I couldn't do with DroidCam.
One word of advice: although both of these apps allow you to connect to your phone via WiFi, I'd recommend connecting through a USB cable which gives a much more stable connection and less lag.
I liked this solution so much that I bought the pro version of iVCam and ordered a mount for my phone that'll allow be to attach it directly to my laptops display. Right now I'm using a selfie stick / tripod.
Thank you for all the great tips over the last couple of weeks that have helped me create my WFH setup :)