
This tutorial will focus on the problem of network latency when requesting large numbers of media assets from a REST API and, in particular, how a Content Delivery Network (CDN) can help to solve this issue.
Prerequisites
To follow this tutorial, you will need the following:
- Package manager (yarn or npm)
- Node.js (v16 or v18).
- Code editor (Visual Studio code, Sublime)
- Basic knowledge of Javascript
- Basic knowledge of Strapi
- AWS account
- Postman
Introduction
When building applications that store lots of media assets, such as images, videos, and audio files, we need to be mindful of data retrieval speeds as our applications grow.
Imagine, for instance, an e-commerce store that's hosted on a single server. This server handles all of the web traffic with a Rest API, which includes serving product images and user data. At first, the performance was good as it had a relatively small number of users. Fast forward a year, and the application now has 100,000 users. So, the single server starts experiencing a high load, leading to slower response times across the board. There will also be a geographical latency depending on where the server is hosted and where the users are requesting content.
Content Delivery Network (CDN)
One of the solutions to this problem is a Content Delivery Network (CDN). This would enable the application to cache images, videos, and other static assets at multiple locations worldwide. This just means that the primary server will handle fewer requests for static content, and there's no geographical latency, seeing as static assets are cached nearer to the user's location, meaning the server can now focus on other processing.
Ultimately this would lead to the website being able to handle higher traffic volumes with no degradation in the user experience.
Understanding Strapi and Media Asset Management
Strapi or Strapi CMS is an open-source headless content management system that allows us to create APIs quickly. The headless architecture separates the content management and content delivery layers. This feature enables us to consume the content via API and use whatever frontend technology we prefer.
How does Strapi store media assets?
Strapi stores any media assets you upload to the file system of the server where Strapi is running, meaning when you upload a file through the Strapi admin panel, it will get saved to a specified directory on the server; this would mean on a server reset any stored assets would be lost.
However, Strapi also supports integrations with various cloud storage providers such as Cloudinary, Google Cloud, Azure, and AWS.
We will be focusing on uploading images to AWS S3 which is a widely used cloud storage service where we can upload various types of files, on top of being performant and scalable it is also very secure and reliable.
Strapi and AWS S3
So our infrastructure so far would be a single Strapi REST API that has a connection to an AWS S3 bucket. When we upload images to our server, it uploads those images to the S3 bucket, and the URL stored in our database for that image will be the public URL provided by S3 for accessing the asset.
So now, when the frontend requests the asset, Strapi will send the S3 bucket URL as part of the response, meaning the weight of the processing will be put on AWS S3, which is pretty fast.
The problem will come when we have more users globally. S3 buckets are situated in a specific location (depending on where you set them up). Let's say you set one up in Europe, but someone makes a request for an asset, and they are situated in Asia. This is where the geographical latency will come in as they are further away from the source, and as such, it takes longer to serve the assets.
Cloudfront
This is where Cloudfront comes in, which is a CDN available on AWS. It will cache static content in multiple locations around the world, meaning users can download assets from a server close to their location. In turn, this will reduce latency. CDNs are also designed and optimized to serve static content and handle large volumes of traffic.
Cloudfront features
- Global Edge Network: CloudFront has a network of edge locations across the globe, ensuring low-latency delivery to users.
- Cache-Control: Developers can fine-tune caching behavior using cache policies, origin request policies, and control over Time-to-Live (TTL) settings for different content types.
- Real-Time Monitoring: CloudFront provides detailed metrics and logs via Amazon CloudWatch, allowing users to monitor performance, track usage, and troubleshoot issues.
- Origin Servers: It supports multiple origin types, including S3 buckets, HTTP servers, and other AWS services.
Set Up AWS S3 and CloudFront
Now we have an understanding of the problem and an idea of how to solve it let's take a look at how to implement it practically.
Creating an IAM user in AWS
First, we will need to create an IAM user for our AWS account. It's generally considered bad practice to use your root account credentials, so we will be creating another user who has just the right amount of permissions we need to access the S3 bucket and nothing else.
Navigate to AWS in your browser and log in to your account. Once logged in, type IAM into the search bar at the top of the page and select IAM from the dropdown.

This will navigate you to the dashboard. Now select users from the left-hand side menu, which will take you to the user dashboard, and select Create user on the right-hand side.

Give your user a name and click next.

Now, we will want to add our user to a group that specifies the permissions that each user has. That's just so later if our team grows, we can add users to this group to give them the same permissions quickly, so click on Add user to group and then Create group.

Give the group a name, and then check AmazonS3FullAccess; this will give the users in this group full permission to update and delete objects from the S3 bucket, then click Create user group.

Once created, check the group you just created to add the user to it, and then click next; the summary should now look like this.

We have a user called strapi-iam-user, which is part of the group strapi-s3, giving full access permission to the S3 service; now, create the user.
Now click on the user and navigate to Security credentials.

Scroll down and create an access key for this user. Note the secret and access key, as we will use this later to enable the AWS SDK. Also, click on your user from the table and note down the IAM ARN number, which we will use later.
Create an S3 Bucket
Now that we have an IAM user, we will need to create an S3 bucket, type s3 into the search bar at the top of the page, and select it from the dropdown menu.
This will bring you to the Amazon S3 dashboard.

Click Create bucket and give your bucket a name.

Under Object Ownership tick the box to enable ACLs; this will allow our plugin from the Strapi backend to work.

For now, let's make the bucket public by unticking Block all public access and keeping the bottom two options ticked.

And tick the box to acknowledge that you are making your bucket public.
Now scroll down and click on Create bucket, this will take you back to the dashboard and you will see your newly created bucket in the table.
Create a Cloudfront Distribution
Now, let's navigate to the Cloudfront console by typing cloudfront into the search bar at the top and clicking it from the dropdown menu.
Click on Create a CloudFront distribution.

Next, choose the origin domain, which will be the S3 bucket you just created.
As our bucket's access is public we can keep the origin access as public and under Web Application Firewall select Do not enable security protections. Scroll down and enter index.html for the Default root object.
All other options can be left as they are. Now scroll down and click Create distribution.
This will bring you back to the dashboard where you will be able to see your CDN in the state of Deploying wait a few minutes for that to finish.

Now let's test that our CDN is working correctly, first copy the Distribution domain name from the dashboard and then let's navigate back to our S3 bucket and upload an image to it.
Click on Upload from the table.

On the next page, click Add files and add a random image if you have one. If not, hit up Shutterstock or something similar.
Scroll down and click the dropdown for permissions; for now, let's make this public just to demonstrate the CDN working in our browser; later, we won't need to do this as images will be uploaded and accessed with our credentials.

Then click Upload; now, if you copy your CloudFront URL and the name of the file you just uploaded, you should get the image displayed. For example, your URL should look something like this: https://d2urqgzsm6mm3p.cloudfront.net/polynesia.jpg
That's it now: CloudFront is set up to cache and serve files from our S3 bucket.
Integrating S3 and CloudFront with Strapi
We will be using a plugin called @strapi/provider-upload-aws-s3 to connect AWS S3 and Cloudfront with our Strapi backend.
Create a Strapi Project
First of all, let's create a new Strapi instance and run it locally. Run the below command in your terminal.
npx create-strapi-app@latest strapi-cdn-tutorial
That will automatically build and run your project for you; when it navigates to the register-admin screen, enter your details to create the admin user; this will land you on the Strapi admin dashboard.

Install AWS S3 Plugin
In your terminal, navigate to the root of your Strapi project and install the AWS S3 plugin from the Strapi market by running the below command
yarn add @strapi/provider-upload-aws-s3
In your project's .env file, add the following environment variables underneath JWT_SECRET.
AWS_KEY_ID=<Access Key>
AWS_SECRET=<Secret key>
AWS_REGION=<the region you deployed bucket>
AWS_BUCKET=<your bucket name>
CDN_URL=<your CloudFront url>
The AWS_KEY_ID and AWS_SECRET are the credentials you noted down when creating the IAM user earlier.
Now open up your project and paste the below code into your config>plugins.js file.
module.exports = ({ env }) => ({
  // ...
  upload: {
    config: {
      provider: 'aws-s3',
      providerOptions: {
        baseUrl: env('CDN_URL'),
        rootPath: "",
        s3Options: {
          credentials: {
            accessKeyId: env('AWS_KEY_ID'),
            secretAccessKey: env('AWS_SECRET'),
          },
          region: env('AWS_REGION'),
          params: {
            Bucket: env('AWS_BUCKET'),
          },
        },
      },
      actionOptions: {
        upload: {},
        uploadStream: {},
        delete: {},
      },
    },
  },
  // ...
});
This code is targeting the default upload feature of Strapi, we are using the provider we installed and passing our AWS credentials, CDN url, Bucket details etc through to that provider.
Create a Collection Type
Let's test that out to make sure everything is running smoothly. Restart the project so that the environment variables will be included.
In the Strapi dashboard, create a new collection type called photo.

Give it a text field called title.

Then, give it a media field called image.

Now click finish and save in the top right-hand corner to restart the server.

Create Entries
Let's create some entries under that collection type, navigate to the content manager, create an entry by entering a name, and then click to upload an asset.

Here, click "add more assets" and pick from your desktop

Click "upload 1 asset to the library" then click "finish" on the next page.

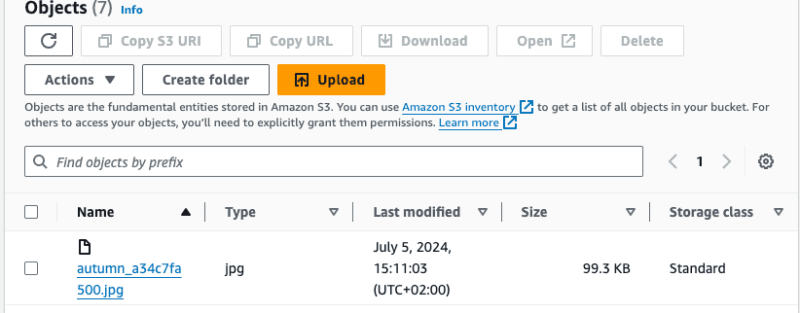
If you navigate back to your S3 bucket, you should be able to see your newly uploaded image asset.
Now, to check that it's requesting the asset through our CDN, save and publish it, then select it from the table.

If you click the link to your image and paste it into your browser, you will clearly see that it is requesting the asset through our Cloudfront CDN.
Solve S3 Thumbnail Issue with Strapi
You may have noticed that the thumbnails in the Strapi backend aren't showing the images we're uploading.
We just need to add the S3 and CDN URLs to the authorized sources in our strapi:security middleware config.
So under config > middlewares.js add the following code:
module.exports = ({ env }) => [
  "strapi::errors",
  {
    name: "strapi::security",
    config: {
      contentSecurityPolicy: {
        useDefaults: true,
        directives: {
          "connect-src": ["'self'", "https:"],
          "img-src": [
            "'self'",
            "data:",
            "blob:",
            "dl.airtable.com",
            `https://${env("AWS_BUCKET")}.s3.${env(
              "AWS_REGION"
            )}.amazonaws.com/`,
            env("CDN_URL"),
          ],
          "media-src": [
            "'self'",
            "data:",
            "blob:",
            "dl.airtable.com",
            `https://${env("AWS_BUCKET")}.s3.${env(
              "AWS_REGION"
            )}.amazonaws.com/`,
            env("CDN_URL"),
          ],
          upgradeInsecureRequests: null,
        },
      },
    },
  },
  "strapi::cors",
  "strapi::poweredBy",
  "strapi::logger",
  "strapi::query",
  "strapi::body",
  "strapi::session",
  "strapi::favicon",
  "strapi::public",
];
Restart the project, and now, when you visit the admin dashboard, the media assets should be showing a preview like so:

Create a Custom AWS S3 Strapi Upload Provider
Maybe you would like more control over the implementation when uploading to AWS. For instance, this feature may be very important to you, and if AWS updates their SDK, this plugin may cease to work. Let's look at coding our own local provider, so you have complete control over the implementation and can make changes to it quickly if required.
First, create a providers folder in the root of the application, and then create a directory for our provider called strapi-provider-upload-cdn. Change into this directory and run the below command to initialize:
yarn init
Give it the name strapi-provider-upload-cdn and make sure the main entry point is index.js.
Now install the AWS SDK by running the below command:
yarn add @aws-sdk/client-s3
Create the index.js file and paste the following code inside:
const {
  S3Client,
  PutObjectCommand,
  DeleteObjectCommand,
} = require("@aws-sdk/client-s3");

module.exports = {
  init: (config) => {
    const S3 = new S3Client(config);

    const upload = (file, customParams = {}) => {
      const path = file.path ? `${file.path}/` : "";
      const Key = `${path}${file.hash}${file.ext}`;

      const uploadCommand = new PutObjectCommand({
        Bucket: config.bucket,
        Key,
        Body: file.stream || Buffer.from(file.buffer, "binary"),
        ACL: "public-read",
        ContentType: file.mime,
        ...customParams,
      });

      return new Promise((resolve, reject) => {
        S3.send(uploadCommand)
          .then(() => {
            if (config.cdn) {
              file.url = `${config.cdn}/${Key}`;
            } else {
              file.url = `https://${config.bucket}.s3.${config.region}.amazonaws.com/${Key}`;
            }

            resolve(file);
          })
          .catch((err) => reject(err));
      });
    };

    return {
      uploadStream(file, customParams = {}) {
        return upload(file, customParams);
      },
      upload(file, customParams = {}) {
        return upload(file, customParams);
      },
      delete(file, customParams = {}) {
        return new Promise((resolve, reject) => {
          const path = file.path ? `${file.path}/` : "";

          S3.send(
            new DeleteObjectCommand({
              Key: `${path}${file.hash}${file.ext}`,
              Bucket: config.bucket,
              ...customParams,
            })
          )
            .then((data) => resolve(data))
            .catch((err) => reject(err));
        });
      },
    };
  },
};
Here, we are just defining a module for Strapi to interact with AWS S3. It provides functions to upload and delete files from an S3 bucket. We pass the details of our CDN and bucket through with the config argument.
Update config > plugins.js to use our custom provider by copying the following code there:
module.exports = ({ env }) => ({
  upload: {
    config: {
      provider: "strapi-provider-upload-cdn",
      providerOptions: {
        region: env("AWS_REGION"),
        bucket: env("AWS_BUCKET"),
        cdn: env("CDN_URL"),
        credentials: {
          accessKeyId: env("AWS_KEY_ID"),
          secretAccessKey: env("AWS_SECRET"),
        },
      },
      actionOptions: {
        upload: {},
        uploadStream: {},
        delete: {},
      },
    },
  },
});
In the root of your application, uninstall the official S3 plugin by running the following command
yarn remove @strapi/provider-upload-aws-s3
And add the following line to the package.json file under dependencies:
"strapi-provider-upload-cdn": "file:providers/strapi-provider-upload-cdn",
This is linking our local code as a dependency.
Now, if you run the command below in the terminal, it will install our custom provider as a dependency, which can then be used from the plugins.js file.
yarn install
You can now check that the custom provider is working by uploading some images from the dashboard and then checking the S3 bucket to make sure they were uploaded.
You can check if deletion is working correctly by accessing the Strapi dashboard media assets, clicking the assets you want to delete, and pressing the delete button.

When accessing your S3 bucket, the object should have been deleted, as shown below.

Requesting Assets from the Strapi REST API
Now that we have everything up and running, let's make an API request to get the asset from Strapi's REST API.
First make sure you have some photos uploaded so we can access them.
By default, Strapi requires authentication to query our API and receive information, but that is outside the scope of this tutorial. Instead, we will make our API publicly accessible. We can find more about authentication and REST API in this blog post: Guide on authenticating requests with the REST API.
Set API Permissions
From the left sidebar, click on Settings. Again, on the left panel under USERS & PERMISSIONS PLUGIN, click on Roles, then click on Public from the table on the right. Now scroll down, click on Photo, and tick Select all then save in the top right to allow the user to access information without authentication.

Open up Postman either in your browser or on your desktop, depending on what version of the application you have.
Create a new workspace, a new collection, and finally, create a new request:

Now enter the following URL in the input at the top: http://localhost:1337/api/photos?populate=* This is hitting the GET request that Strapi automatically generated for us, and we are populating the media asset (in our case, the image).
Click send, and you should get a 200 success response along with the JSON body. If you scroll down inside the image, the data should be populated, and you will be able to see the Cloudfront URL for the asset.

Conclusion
Throughout this tutorial, we have learned about CDN, Strapi media asset management, CloudFront, how to set up AWS S3 and CloudFront, integrate S3 and CloudFront with Strapi, create a custom AWS S3 Strapi upload provider plugin, and request assets from the Strapi REST API.
As you can see, the decision to integrate S3 and Cloudfront with Strapi offers significant benefits, such as enhanced performance, efficient content delivery, scalability, and improved security, reinforcing your confidence in this approach.
By setting up these services with AWS, we ensure fast, reliable access to our static assets and media, with Strapi reducing latency for our end users.
For future improvements, consider implementing advanced caching strategies, monitoring tools, and scaling techniques such as load balancing to accommodate more extensive applications.
Additional Resources
- Github link to the complete code.

Top comments (0)