
Shopify is a subscription service that lets you create, manage and sell your products or services.
When combined with Strapi and its ability to customize and manage content, you have on your hands a sleek, powerful website or app that is both attractive to your customers and very easy to use.
In this tutorial, we will create a Shopify store to sell custom-made clothes and integrate our store into our Strapi-powered website.
Outline
- Introduction
- Goal
- Prerequisites
- Setup Strapi
- Create the Strapi project.
- Register your first admin user.
- Create content types.
- User permissions
- Setup Shopify
- Create a Shopify account.
- Create a "private app" on Shopify.
- Create products on your Shopify store.
- Integrate Shopify into Strapi
- Install Shopify API package for NodeJS.
- Customize controllers for the products.
- Add Shopify constant with API details.
- Get metadata from Shopify.
- Create a product entry on Strapi.
- Verify that it works.
- Summary
- Resources
Introduction
Goal
By following this tutorial, you will learn how to integrate Shopify into your Strapi website using the Shopify API. This tutorial aims to guide you through the entire process by breaking it into small, easy-to-follow steps, ensuring that you understand each step before moving on to the next one.
Prerequisites
To follow this tutorial, you need to have the following:
- Basic understanding of JavaScript
- NodeJS
- npm
- Yarn
- A Shopify store. Shopify offers a 14-day free trial for new accounts, which will be sufficient for this project. Click here to get started.
- The latest version of Strapi. Previous knowledge of Strapi will help you understand and follow this tutorial quicker, but you can follow along just fine if you don't have prior experience.
Setting up Strapi
Below are the steps to set up Strapi account and create a new collection.
Create the Strapi project.
Open your terminal, navigate to the folder where you want to store your project, and run the following command:
npx create-strapi-app strapi-shopify --quickstart
or using yarn
yarn create strapi-app strapi-shopify --quickstart
When the project has been successfully created, cd into your project folder strapi-shopify and run the following command in your terminal:
npm run develop
or using yarn
yarn develop
Register your first admin user
When you run yarn develop or npm run develop in your terminal, it will build the UI for your admin dashboard and automatically open localhost:1337/admin on your browser with the following content:

Fill the form with your relevant details and click on "LET'S START" to access the admin dashboard.

Create content types
Click on the "Content-Types Builder" tab under Plugins and create a new collection type named "Product."

When you click "Continue," a modal will pop up to provide you with options to create fields for your collection type:

We will add four fields to our collection type:
- "Text" field for the name of our product
- "Rich Text" field for our product description
- "Media" field for our product image
- "Text" field to put in our Shopify ID
Select "Text" to add a field for your product name

Click on "+ Add another field" and select "Rich Text" to add a field for your product description.

Click on "+ Add another field" and select "Media" to add a field for your product image.

Click on "+ Add another field" and select "Text" to add a field name shopifyID. This will contain the ID of your Shopify product.

When you are done, click the "Finish" button. Strapi will automatically restart your server to implement your changes.

User permissions
We need to let our users view our products whether they are authenticated or not.
Click on "Settings" located on your dashboard's sidebar, then scroll down to "Users & Permissions Plugin" and click on "Roles."
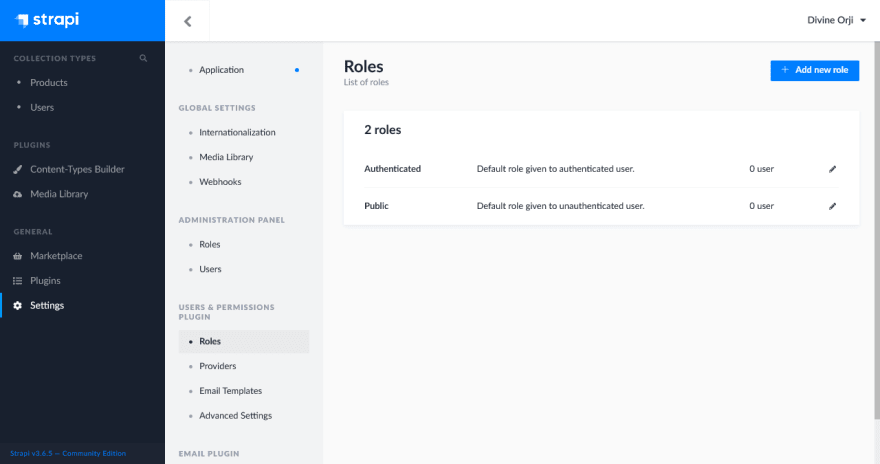
Click on "Public" to edit permissions for public users. Scroll down to the "Permissions" section and check the box "findOne" to enable users to see products by their ID.
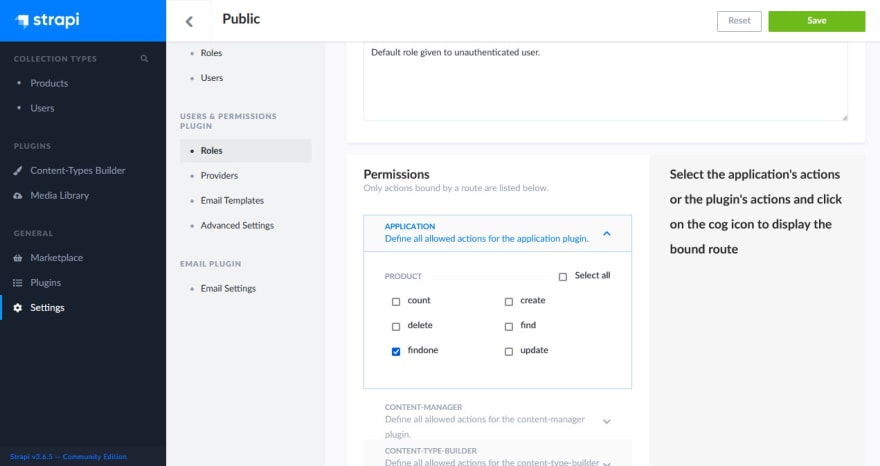
Click on “Save” to save your permission updates.
Setup Shopify
Below are the steps to set up a new Shopify store account.
Step 1: Create a Shopify account
If you haven't already created your Shopify account and store, open www.shopify.com on your browser, click on "Start a free trial," and fill in the appropriate details for your store.

If you successfully create your account, you will see something like this. For this tutorial, the name of our store is Divi Apparels.

Create a “private app” on Shopify
Shopify apps are used to add new features to your store or enhance admin capabilities. There are three main app types available on Shopify: Public, custom, and Private apps. Public apps can be installed from Shopify's app store or a Shopify developer's website.
Custom apps are built specifically for your Shopify store by a developer and don't require API or Admin access to your store. Private apps are also only available to your store, and they require API and Store Admin access.
We will need this API access to be able to integrate Shopify into Strapi.
On the sidebar of your store's dashboard, click on "Apps" and then click "Manage private apps."

You might see a warning screen saying, "Private apps are currently disabled," along with some extra info to explain why.

Click on "Enable private app development," tick the boxes, and enable private apps.
Next, create your private app by clicking on "Create private app."

In the "App Details" section, put in a name for your Shopify private app and an email address to get technical updates.

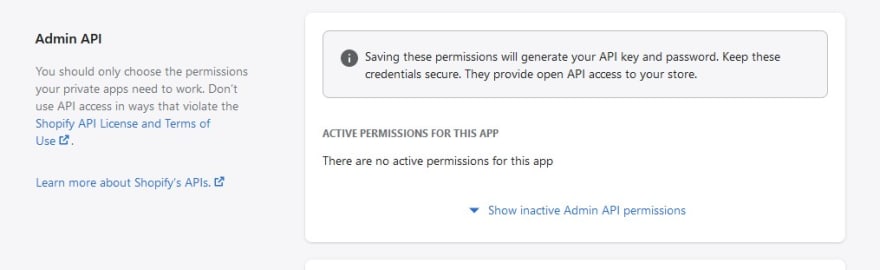
Scroll down to the "Admin API" section and click on "Show inactive Admin API permissions."
In the dropdown menu, scroll down until you locate "Products," click on "No Access," and select "Read Access."
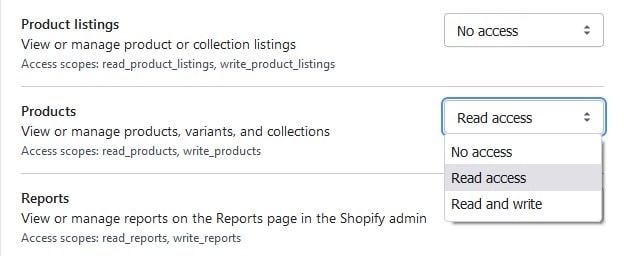
Then scroll down to the end of the page and click "Save."
Congratulations, you have successfully created your first private app. Please take note of your API credentials as you will need them later.
Create products on your Shopify store.
You can skip this step if you already have some products on your Shopify store. If you don't have any, then follow along:
On the sidebar of your store's dashboard, click on "Products" and click on "Add Products."

Go ahead and add details of your product, such as its title, description, pictures, pricing, etc.
Be sure to change your product's status from "Drafts" to "Active" when you're ready to display it in your store.

After adding your product details, click on the "Save" button located at the top-right corner of your dashboard's navbar to save your product. Repeat the same process to add as many products as you wish to your store.
Integrate Shopify with Strapi
Below are the steps to integrate Strapi API with Strapi:
Install Shopify API package for NodeJS.
Shopify API is a handy little package that allows you to connect your website or app to your Shopify store using the API keys you created.
Open your terminal and run the command:
npm install --save shopify-api-node
or using yarn
yarn add shopify-api-node
Customize controllers for the products
In your browser, open the Strapi documentation on customizing controllers in your Strapi backend, scroll down to "Collection Type" in the "Core Controllers" section.
We are going to copy the findOne controller function and modify it to fit our project.

In your project folder, navigate to api/product/controllers/products.js and replace its content with the code above.
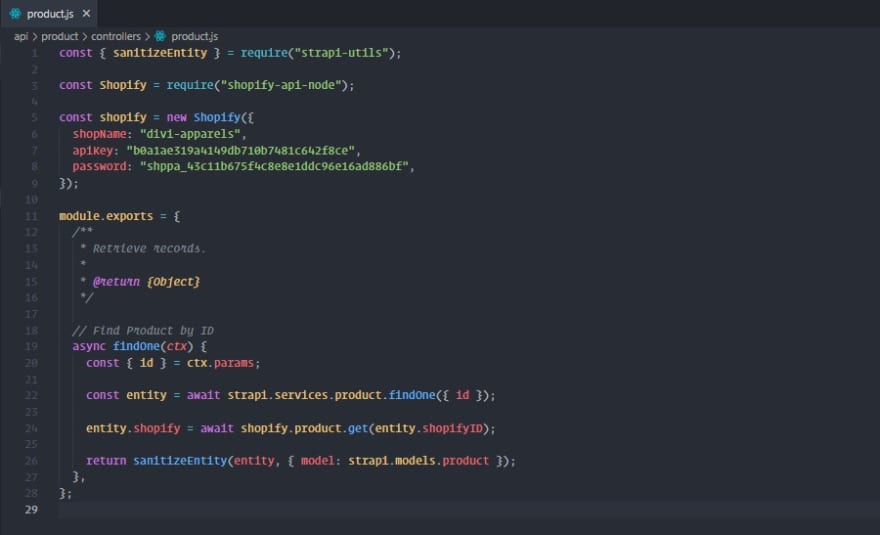
To modify it for our project, replace the restaurant with the product or whatever you named your collection-type in your Strapi dashboard. This is how the code will look when you're done:
    const { sanitizeEntity } = require("strapi-utils");
    module.exports = {
      /**
       * Retrieve records.
       *
       * @return {Object}
       */

      // Find Product by ID
      async findOne(ctx) {
        const { id } = ctx.params;
        const entity = await strapi.services.product.findOne({ id });
        return sanitizeEntity(entity, { model: strapi.models.product });
      },
    };
Add Shopify constant with API details
Go to the Shopify API GitHub page and copy the boilerplate code to create a shopify constant that will contain your API information.
Paste this code in the same file as your controllers (api/product/controllers/products.js) above your module.exports

Replace 'your-shop-name' with the name of your Shopify store, which you can get from your browser's search bar

Replace 'your-API-key' with the API key you created for your Shopify private app and 'your-app-password' with your private app's password. Make sure you input these details as strings.
Get metadata from Shopify
We need to tell our findOne controller to get our product's metadata using our Shopify API details.
In your findOne() function, below the entity constant, type in this code:
entity.shopify = await shopify.product.get(entity.shopifyID);
Your product.js file should look like this when you’re done:
Save your changes to restart your server.
Create a product entry on Strapi.
We will create a product entry that matches the product we wish to get from our Shopify store. On your Shopify admin dashboard, click on "Products" in the sidebar and click on the product you wish to add to your Strapi website.

In the search bar of the tab displaying your Shopify product, copy the product ID.

In a separate browser tab, open your Strapi admin dashboard, and select "Products" under "Collection Types," then click on "+ Add New Products." Fill in the exact details as you did in the Shopify store, add an image, and in the shopifyID section, paste the ID you copied from the Shopify website.

Click on “Save” and then click on “Publish”.
Verify that it works
Open a new browser tab and type http://localhost:1337/products/1 to see the metadata for the first product you created. It should look like this on Firefox:
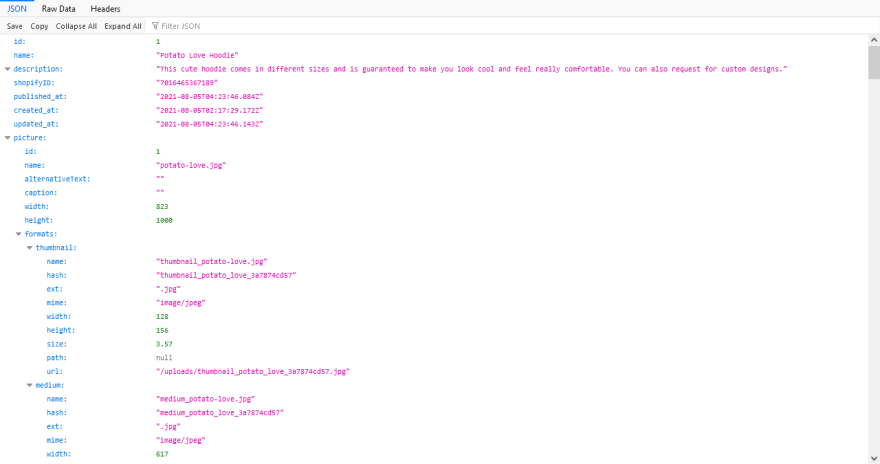
Congratulations! You've successfully integrated Shopify into your Strapi website.
Resources
- Quick Start Guide - Strapi Documentation
- Understanding the Shopify API - YouTube
- App Types - Shopify
Summary
In this tutorial, you learned how to integrate your Shopify store into your Strapi website. Check out the source code for this tutorial here.
You can take it a step further and build the website's front-end part using your preferred framework.

Top comments (0)