
Learn the differences between Authentication, Authorization, and Access Control and implement authentication in Strapi using Auth0.
Author: Mary Okosun
Software applications need a way to identify users, store user data uniquely and serve these data to the right user at the right time. This process birthed authentication and authorization in software development. Almost every application today has an authentication flow and if you look closely, you will notice the similarity in the flow of authentication across different applications.
Some developers handle authentication from scratch because they have time and are confident enough to carry out the task. Others let third party authentication companies like Auth0 handle their authentication for them. Either way, the choice is yours and there is no better approach as long as your application is secured enough and most importantly works fine.
In this blog post, we will cover implementing authentication in Strapi using Auth0 (a Strapi authentication provider). Strapi is an open-source and headless content management system ( CMS ) that gives developers the freedom to use their favorite tools and frameworks during development.
Authentication, Authorization, and Access Control
These three terms are often confused and used interchangeably because of the similarities in how they sound. Let us take an in-depth research at these terms for a better understanding.
Authentication
Authentication is the process of identifying who the user is. This is often done through the process of providing some personal details belonging to the user. In most applications, you would be asked to provide a username and a password. When the correct details are provided, the user is logged in and granted certain privileges. This brings us to Authorization.
Authorization
Authorization refers to the amount of privileges a particular user has. In most applications, the admin user has more privileges than a regular user. Some of the most common privileges of admins including creating a new user, deleting a user or blocking users profile as the case may be. A regular user usually do not have these privileges.
Access Control
Access control is the method through which access to a secured resource is granted to a user. The process or mechanism that the authentication process takes to grant authorization to a user is the access control.
Authentication vs Authorization
Authentication identifies who the user is while authorization determines what the user is authorized to do when authenticated. Here's a Beginner's Guide to Authentication and Authorization in Strapi.
Providers in Strapi
Strapi is shipped with a number of access control mechanisms and authentication providers. When authenticating users in Strapi, you can do this using the users’ email/username and password or using the Strapi OAuth.
Strapi has a rich documentation on how to use any of the Strapi providers. For the purpose of the tutorial, we will focus on how to authenticate a Strapi using Auth0.
Auth0
Auth0 is an adaptable authentication and authorization platform. Auth0 takes out the pain of developing a full authentication system from scratch for your application and managing user credentials by yourself.
OAuth vs Auth0
OAuth is a way of getting user data from third party applications where they have previously logged in without having to ask for their user name and password while Auth0 handles your authentication process for you. We need to create an Auth0 account and configure our tenant to work with Strapi.
Step 1: Create an Auth0 Account
To get started with Auth0, we need to create an account. Head to the Auth0 website and create an account using your username and password.
After a successful registration, you will be redirected to a page where you will specify if your account is a personal account or a company account. For the purpose of this tutorial, I chose a personal account.

Step 2: Setup our Auth0 Tenant
Click on Next; this will give you a default tenant name and United States as the region we want our user data to be stored in the cloud.
After this, you will be redirected to a dashboard where the rest of the configuration will be done.
Note: Auth0 can be used to authenticate a good number of different application types ranging from a single page applications, API and even mobile and desktop applications. We want to authenticate our Strapi API using it. The steps outlined here will differ for other application types.
Step 3: Create a New Auth0 API
In the Auth0 dashboard, we need to create a new API. To do this, click on Applications→APIs→Create API
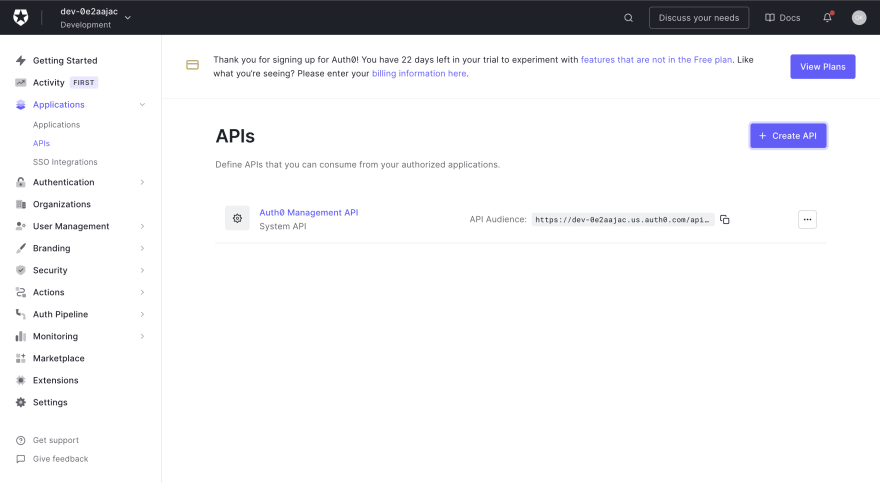
A modal will pop up where you will be required to fill in the details of your new API. Fill in the details in the form and click on the create button to continue.

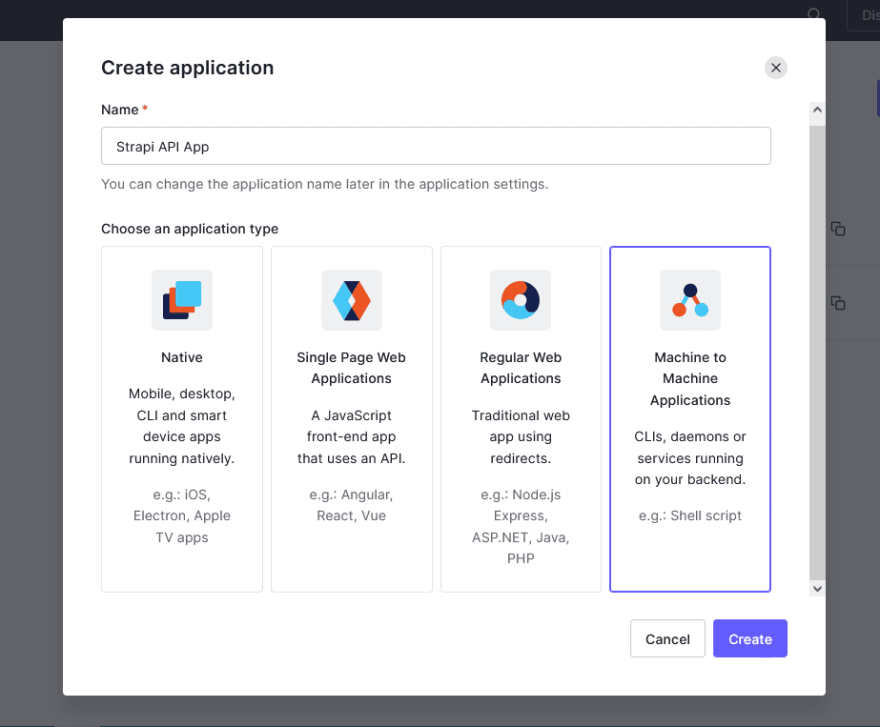
Step 4: Create an Application
To complete our AuthO setup, we need to create an application that will be linked to the API we just created. To do this, click on applications→create application. This will pop up a model prompting you to create a name for the application and to select the application type. Create a name and select "machine to machine application then click on create like so:
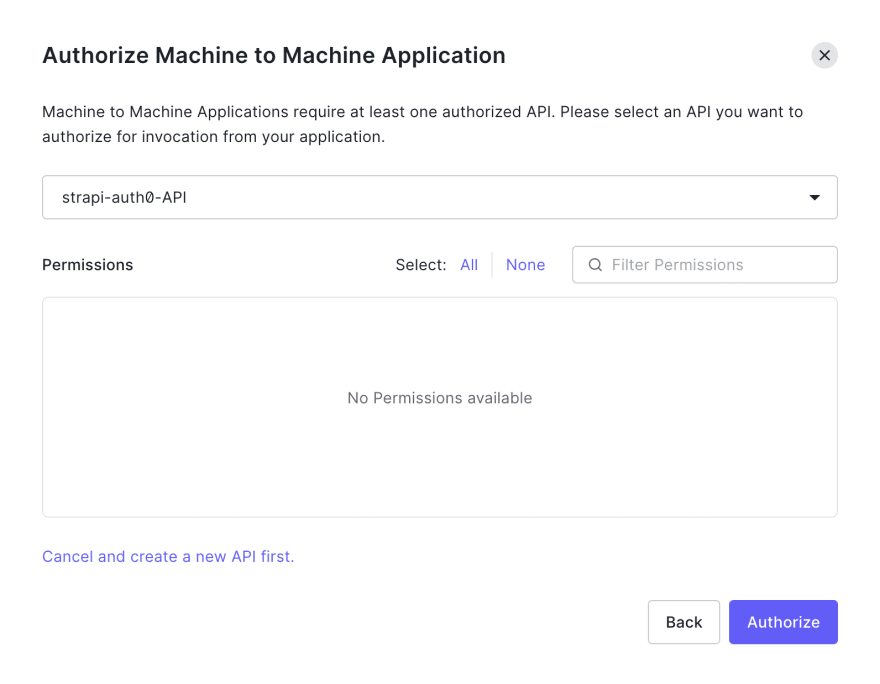
Next, you have to link the newly created app to the API by authorizing it. From the drop down, select the strapi-auth0-API and click on Authorize.
Once the above is completed, head over to the settings tab of the application and fill in the following details to complete the configuration process:
-
Allowed Callback URLs:
http://localhost:1337/connect/auth0/callback -
Allowed Logout URLs:
http://localhost:3000 -
Allowed Web Origins:
http://localhost:3000

Scroll down till you find these details and replace them with the details provided above.

After filling in these details, scroll to the bottom of the page and click the save changes button.
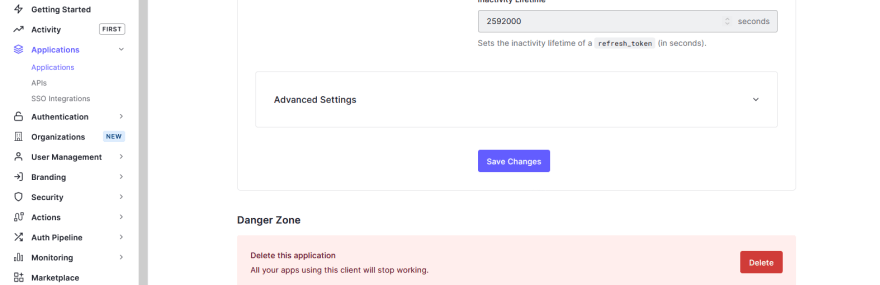
After adding these, click on the Advanced Settings and check to the Grant Types tab. Ensure the following is checked or enabled.
- Implicit
- Authorization Code
- Refresh Token
- Client Credentials
Afterwards, you can click on Save Changes.

Strapi Configuration
In order to complete the authentication flow, we need to configure Strapi. Auth0 is one of the authentication providers in Strapi. We need a Strapi app to test, if you need help creating a new Strapi application, follow the steps in the Strapi documentation. From your Strapi admin dashboard, click on Settings→Users & Permissions plugin →Providers.
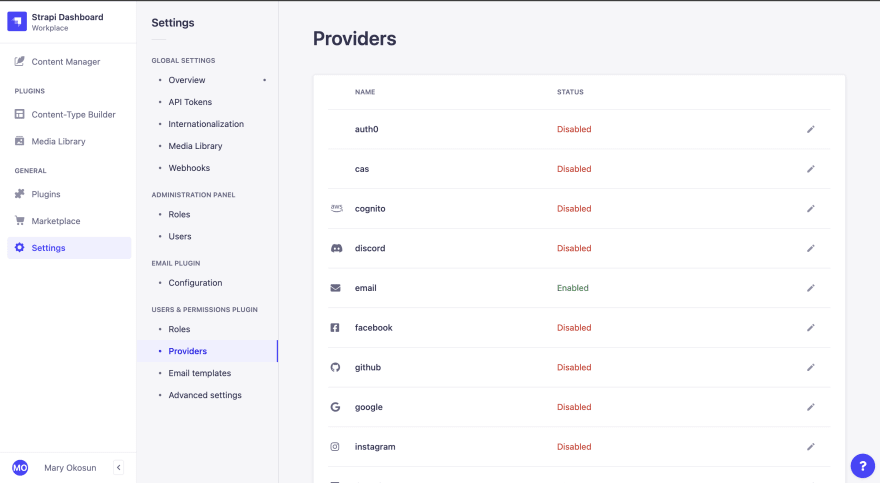
Click on auth0 and this will open a modal where we will enable all the necessary Auth0 details. You will have to enter the following details:
- Enable:
TRUE - Client ID:
<Your Auth0 Client ID> - Client Secret:
<Your Auth0 Client Secret> - Subdomain:
<Your Auth0 tenant url>, example it is the part in bold in the following url: dev-0e2aajac.us.auth0.com - The redirect URL to your front-end app:
http://localhost:3000/connect/auth0
All of these details can be found in your Strapi API App Auth0 dashboard. After entering the details, click Save.

That’s all we have to do from the Strapi dashboard for now. We also need to specify the absolute url of your backend in config/server.js
    module.exports = ({ env }) => ({
      host: env('HOST', '0.0.0.0'),
      port: env.int('PORT', 1337),
      url: env('', 'http://localhost:1337'),
    });
React Frontend Application
We need a frontend application to test. For the purpose of this tutorial, we will use the react login example app (an app build by Strapi for testing purposes).
Follow the link below to clone the app using the following command
git clone https://github.com/strapi/strapi-examples.git
After cloning the application, navigate into the /login-react directory using the following command:
cd strapi-examples/login-react
Install dependencies using Yarn (Make sure you have yarn installed globally in your computer. For more details on how to install Yarn, follow the link)
yarn install
After installing the dependencies, we need to launch the Strapi backend and the React app in http://localhost:3000. It should work. Launch the app with the following command:
REACT_APP_BACKEND_URL=http://localhost:1337 yarn start
It's time to test. Open http://localhost:3000 in your browser.
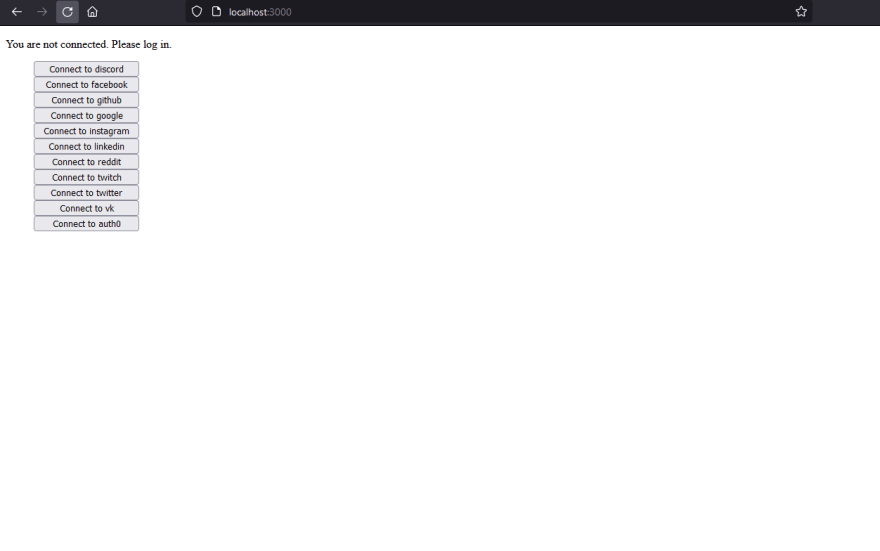
Click on the Connect to auth0 button. This will redirect you to the Auth0 page and you can sign up for an account here.

After that, you will redirected to Authorize App. Here, Strapi API App is requesting access to your tenant account.

After successfully logging in, you will be redirected back to the React application with your Access token. This lets Strapi remember the user and lets him access routes from the Strapi API as a logged in user.

Conclusion
We have come to the end of this tutorial. By now, you should:
- Have a clear understanding and be able to differentiate between authentication, authorization and access control.
- Be able to create and configure an Auth0 tenant to work with Strapi backend for authentication.
- Test this authentication flow using the Strapi React test app for authentication.
You can also try to improve on what we have here and explore other technologies too. Remember to share your experience with the rest of the community. Cheers!

Top comments (0)