
Ever wondered, if there could be a better way to take screenshots of elements within the browser? Well, if you do then you might find this post interesting.😇
In this tutorial, I am going to show you the best method to take screenshots of page elements without the need for any browser extension or third-party snipping software.
Prerequisite:
Basic knowledge of:
1) HTML
2) Browser's Developer Tools
Demonstrated on following browsers:
1) Google Chrome (StoryboardThat)
2) Microsoft Edge (Google Colab)
3) Brave Browser (Google Form)
4) Firefox (Flipkart)
5) Opera (GitHub)
Note: This tutorial only covers an in-depth explanation for Google Chrome but the steps remain same for all browsers.
1) StoryboardThat using Google Chrome
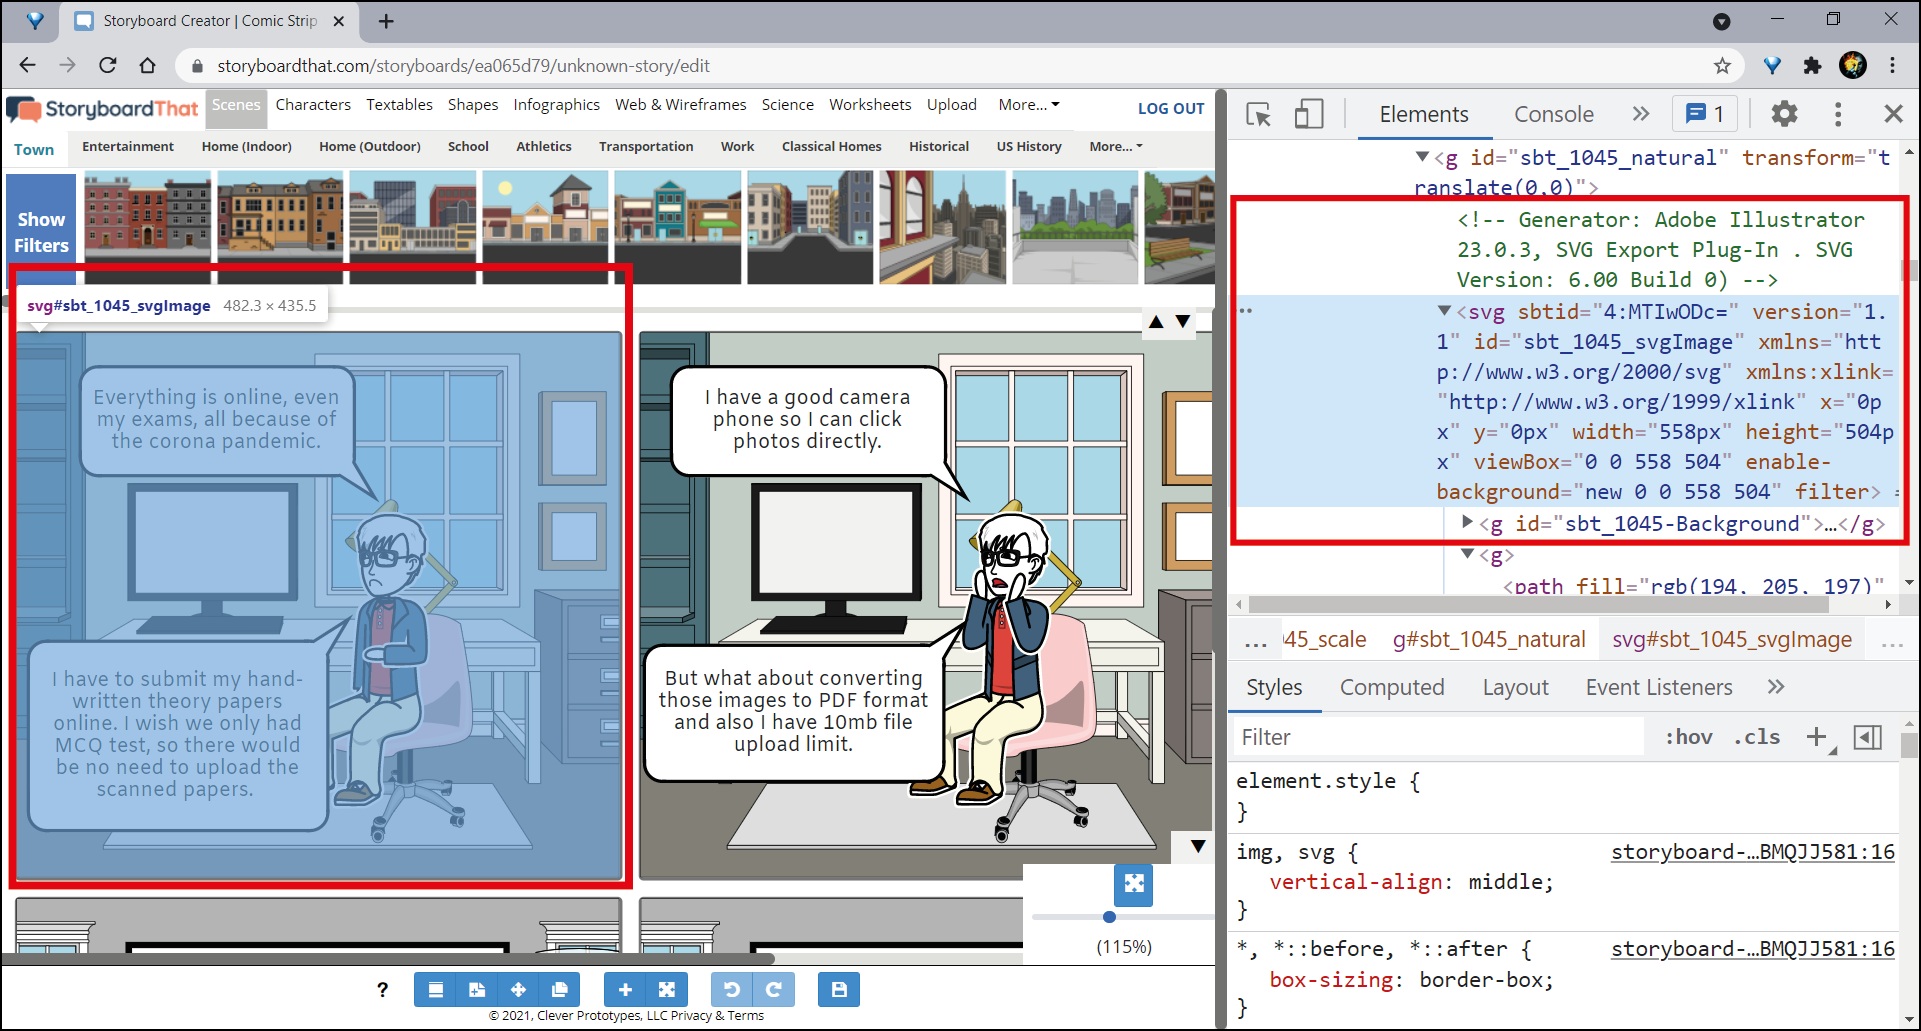
Step 1:
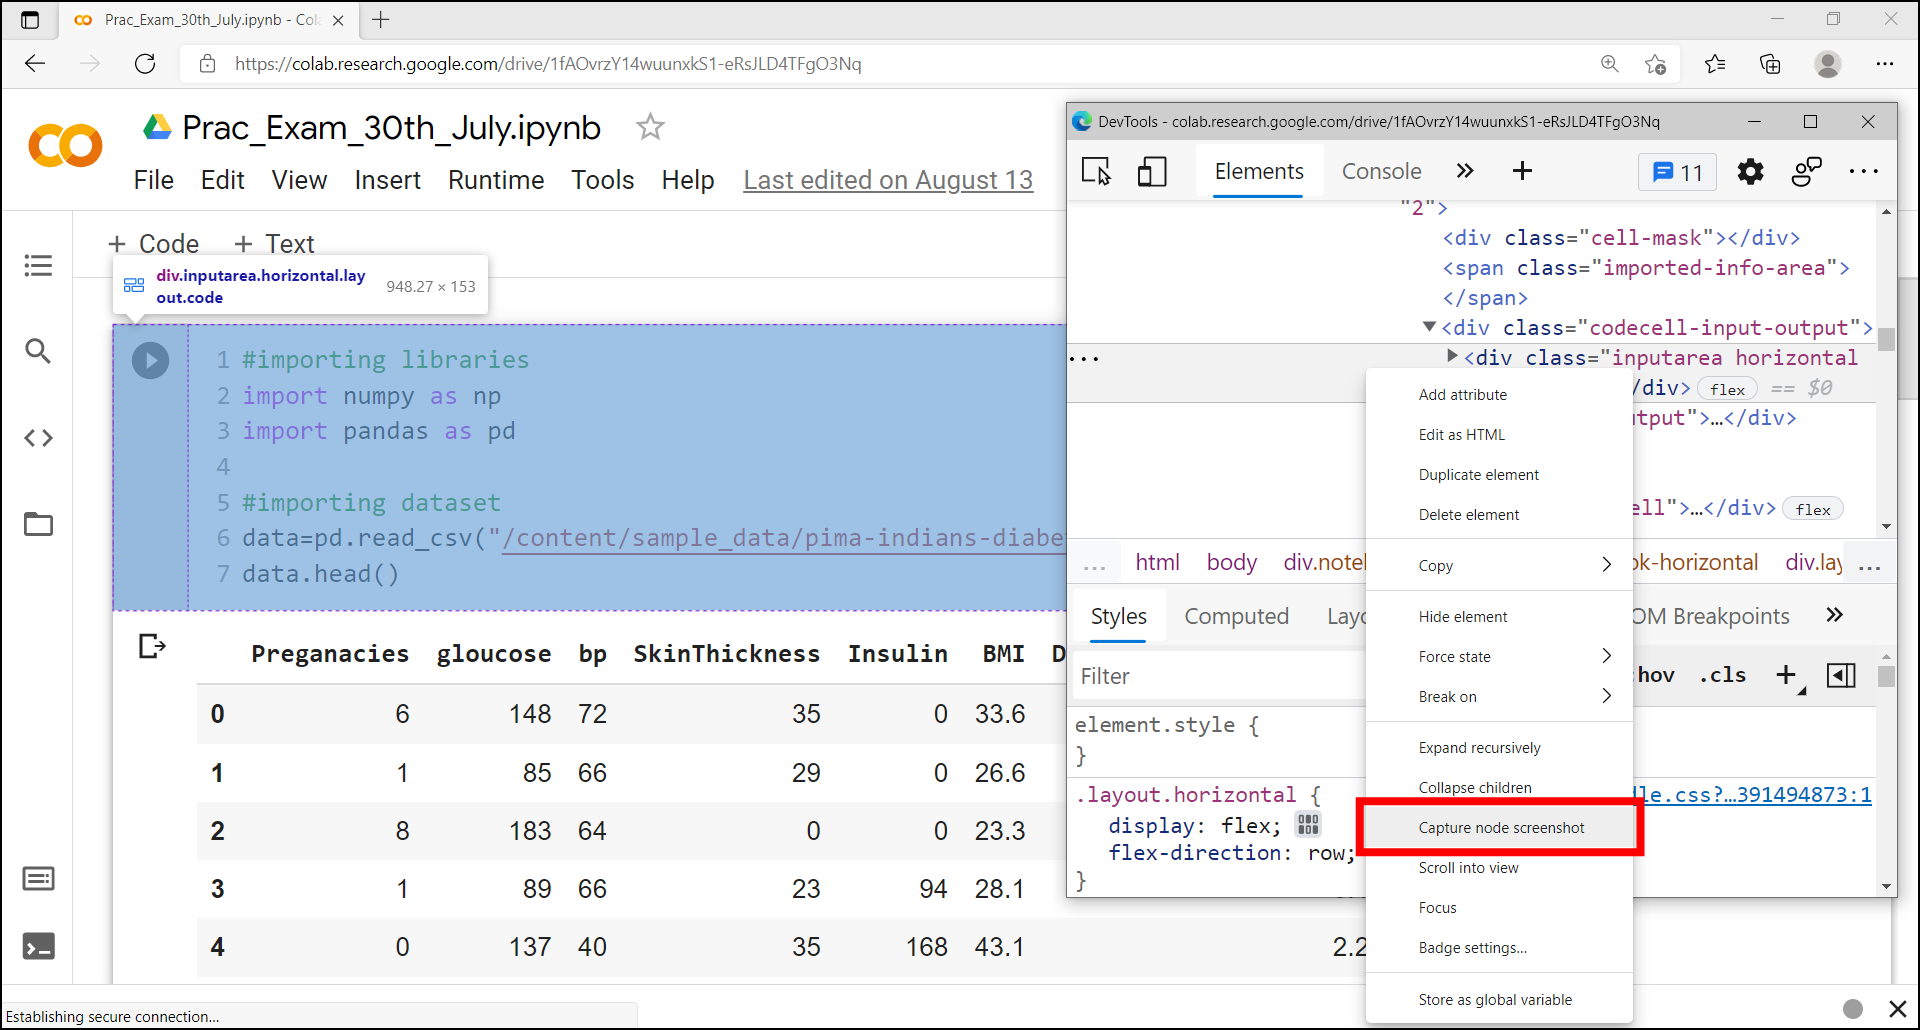
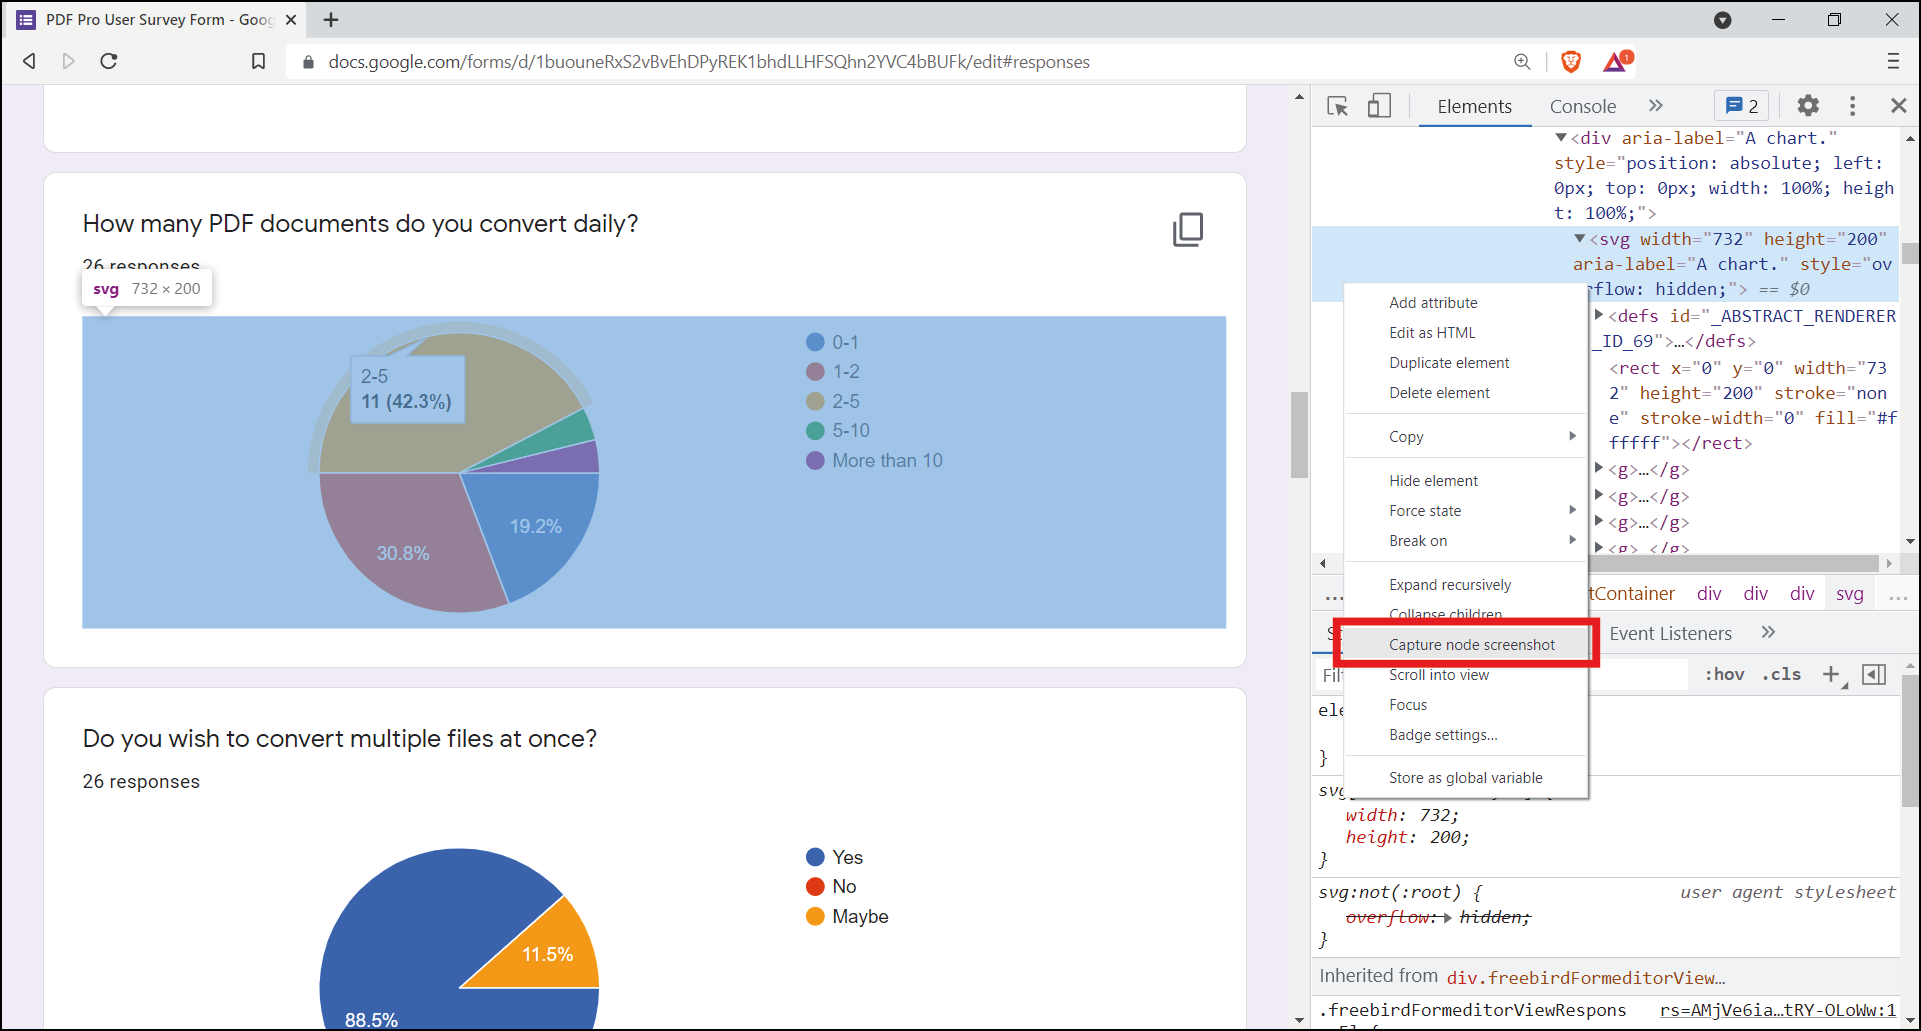
Open DevTools and select the particular HTML Element you want to take a screenshot of. Make sure that the blue selection covers the entire element you want.

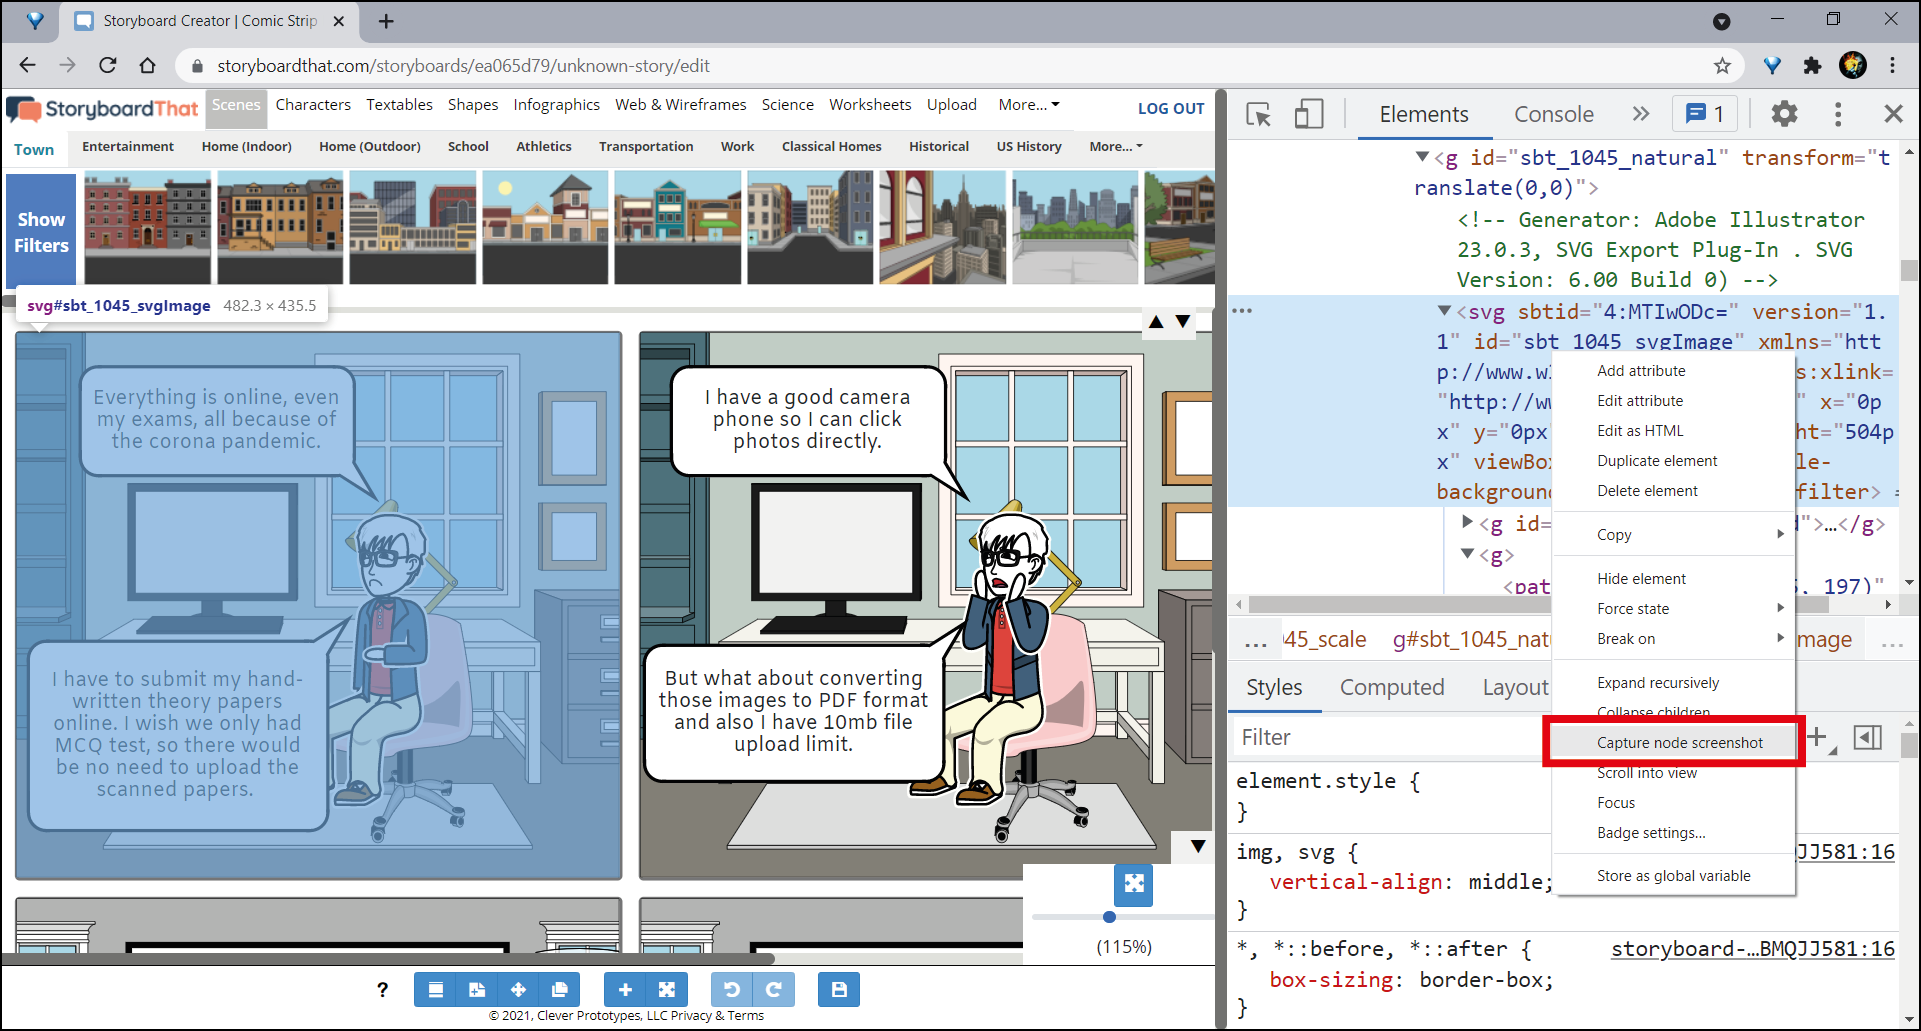
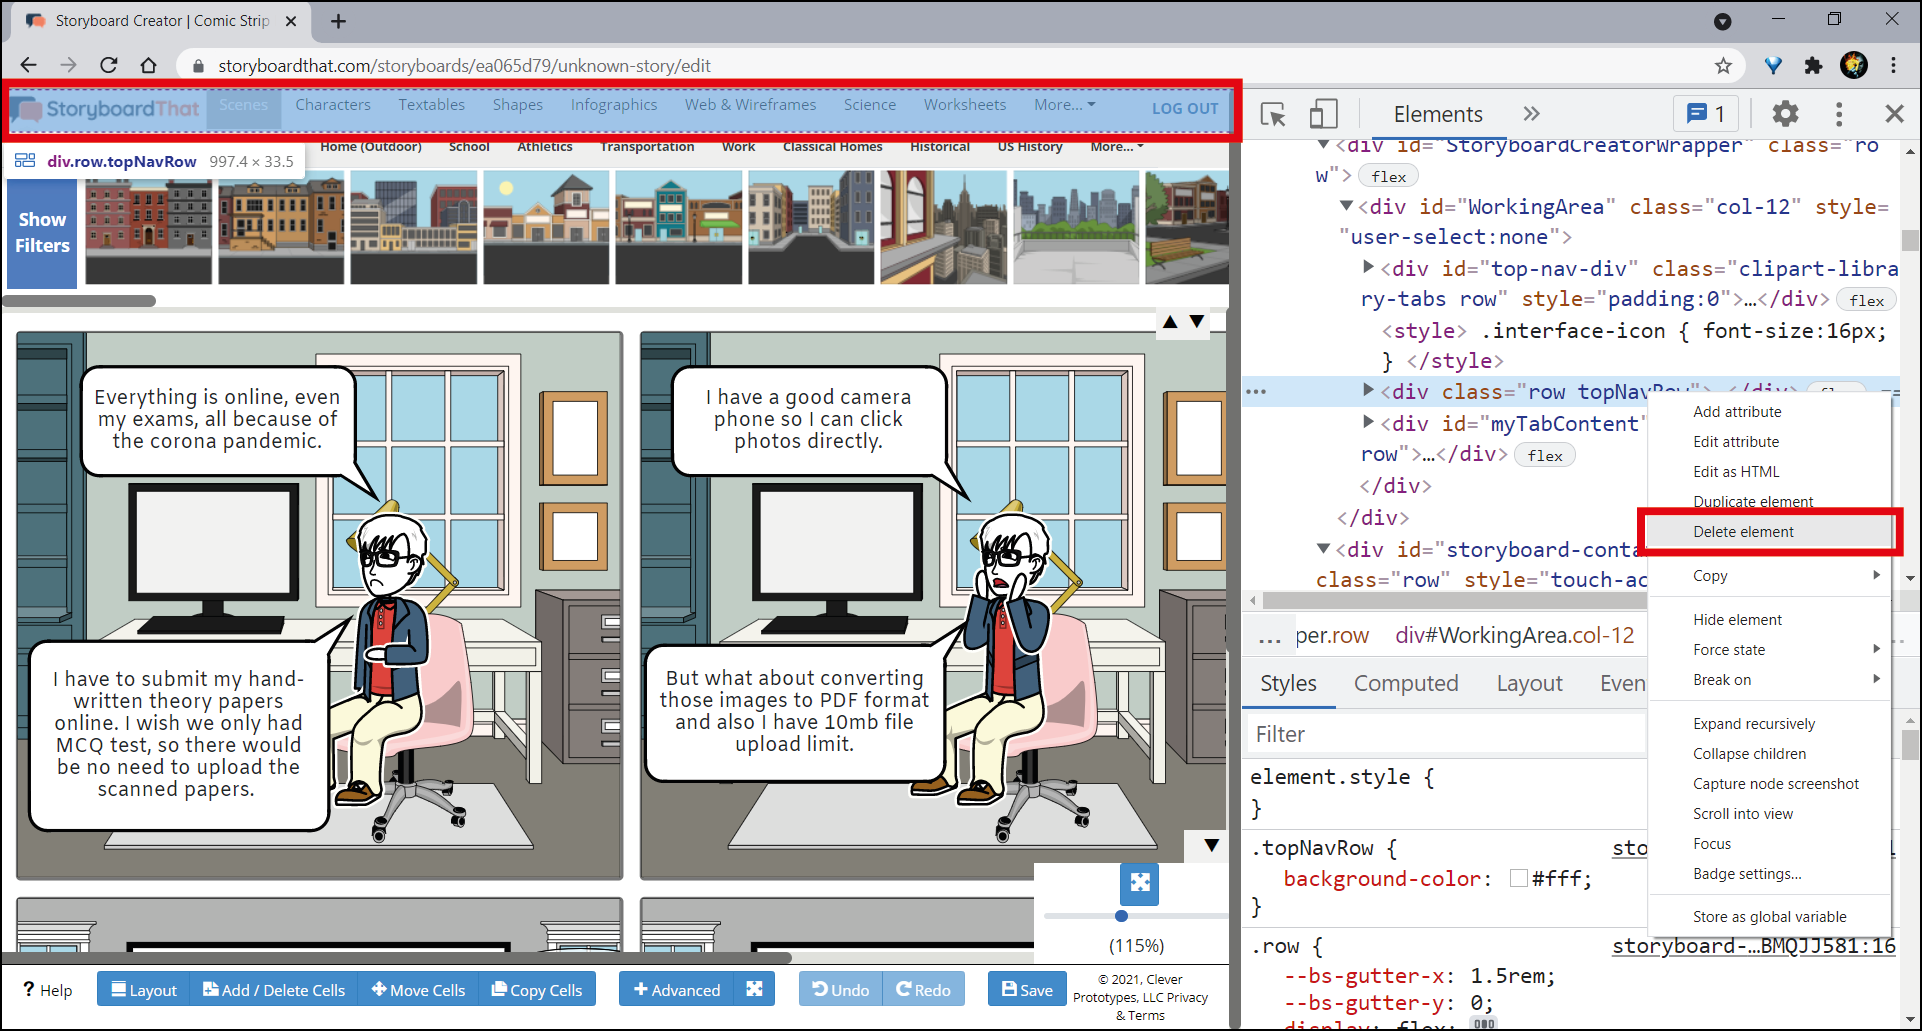
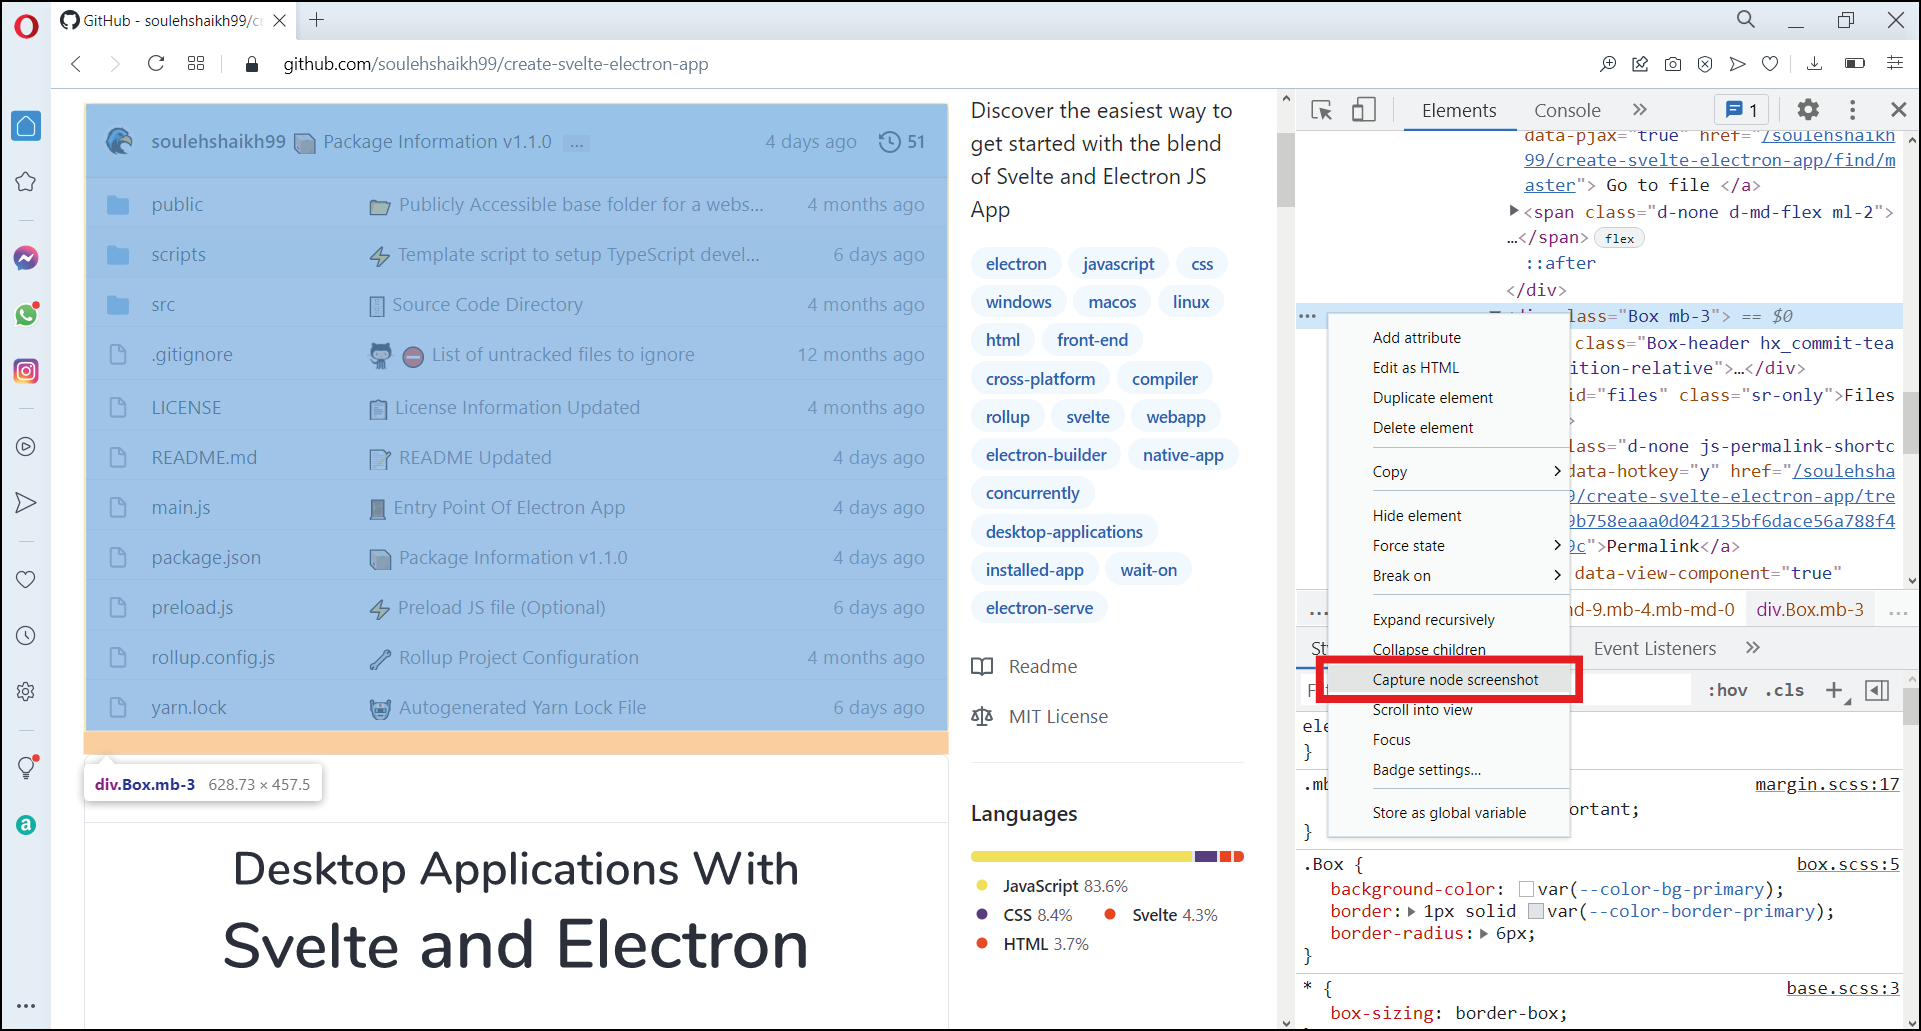
Step 2:
Now, right-click and from the context menu, select the Capture node screenshot option.

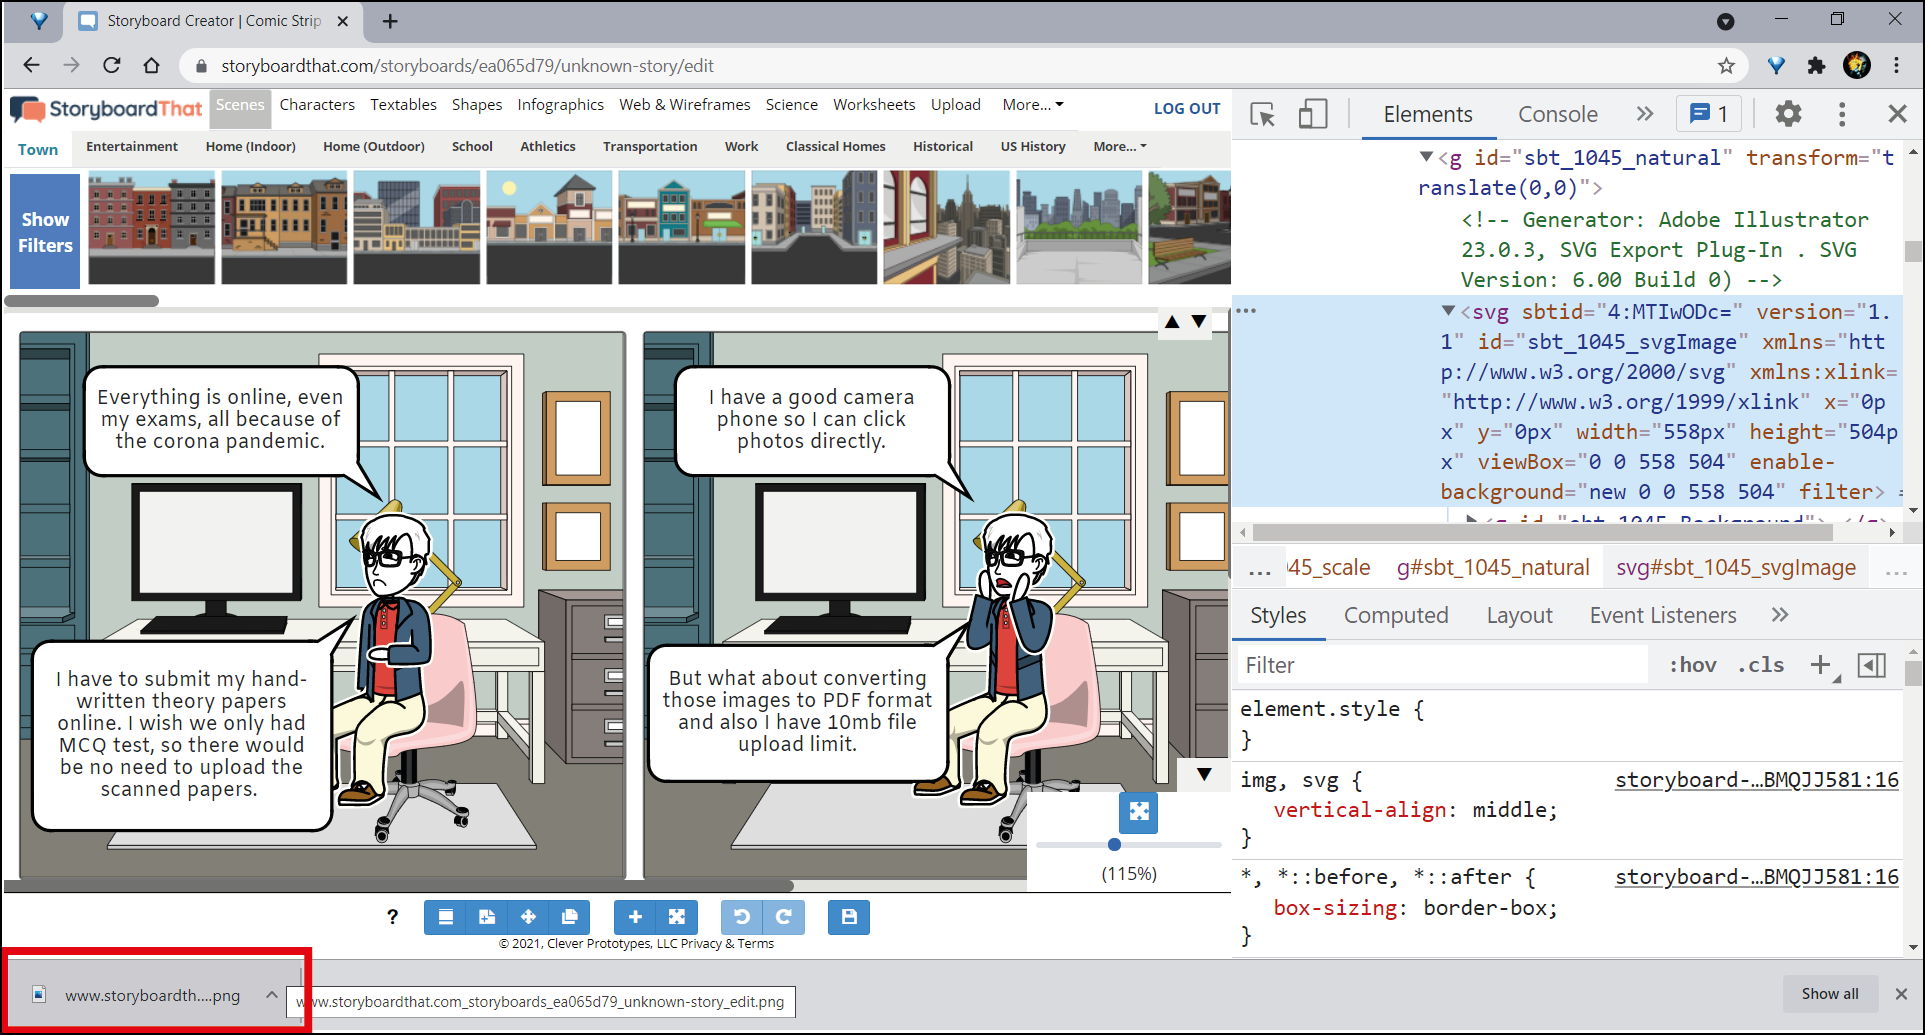
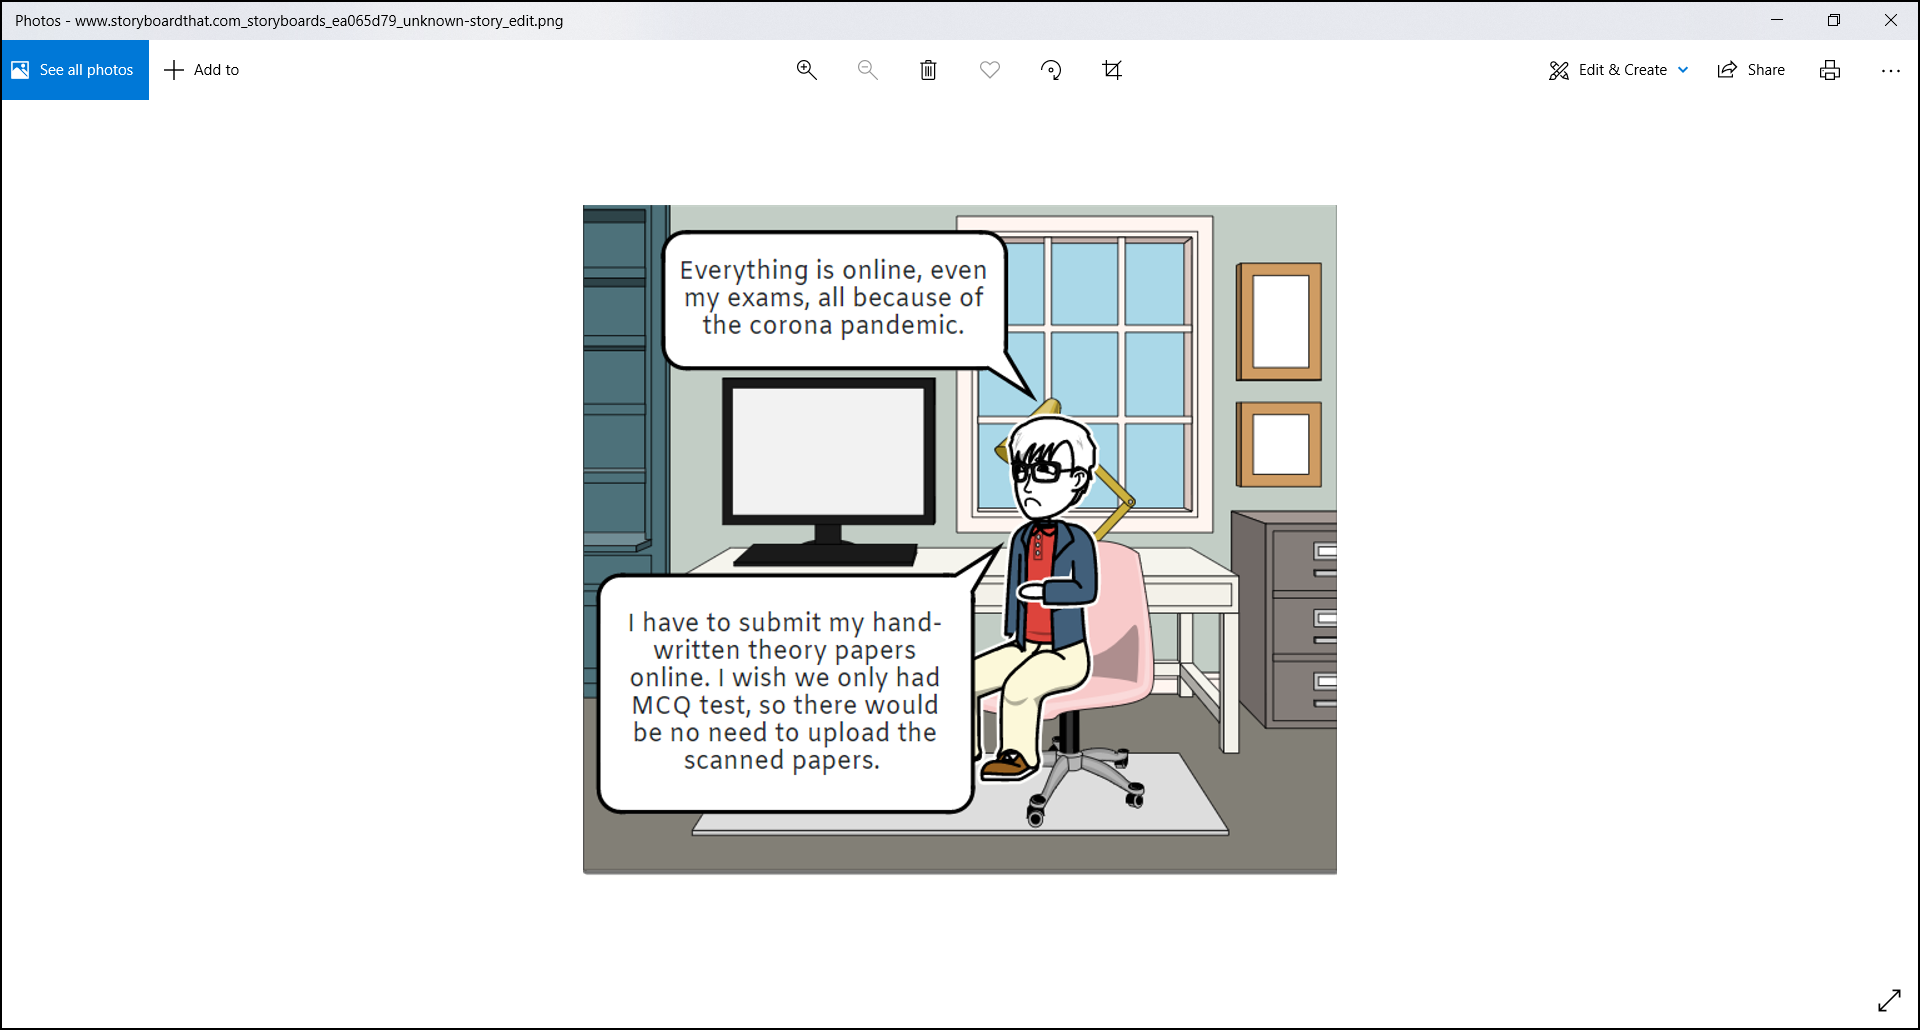
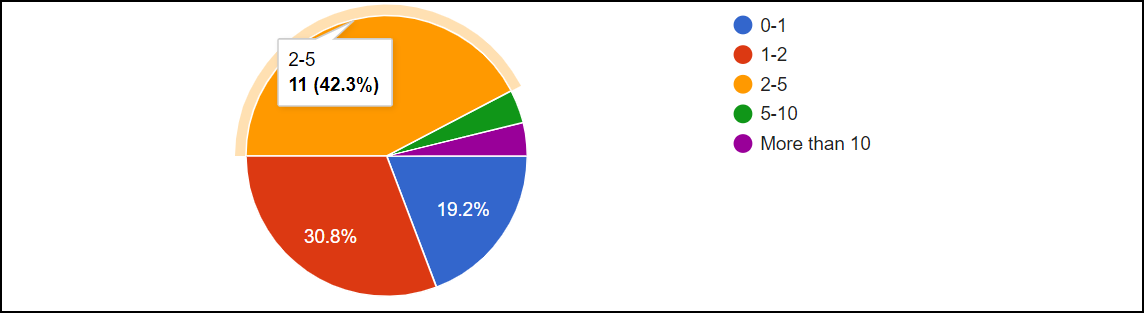
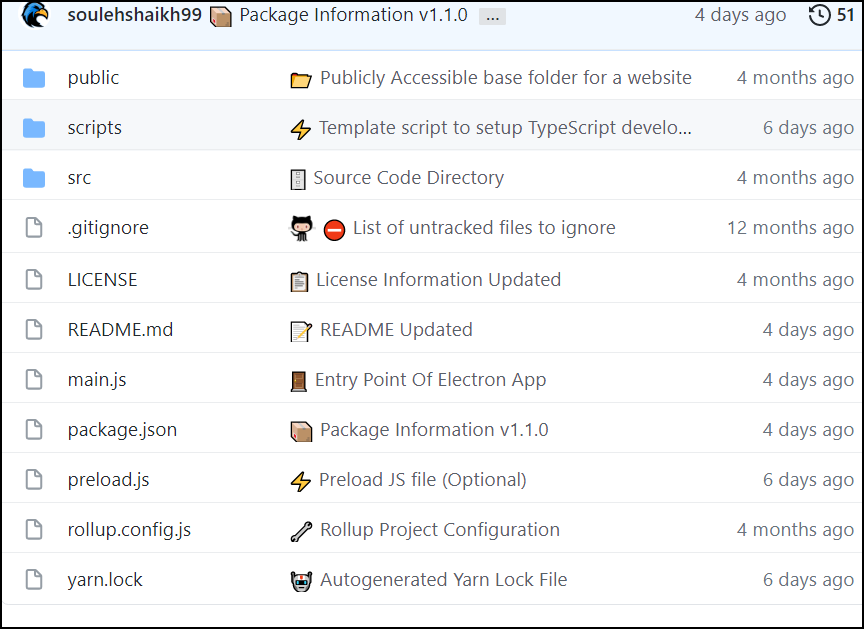
Step 3:
The screenshot will be automatically downloaded in PNG format.

Result:

Step 4:
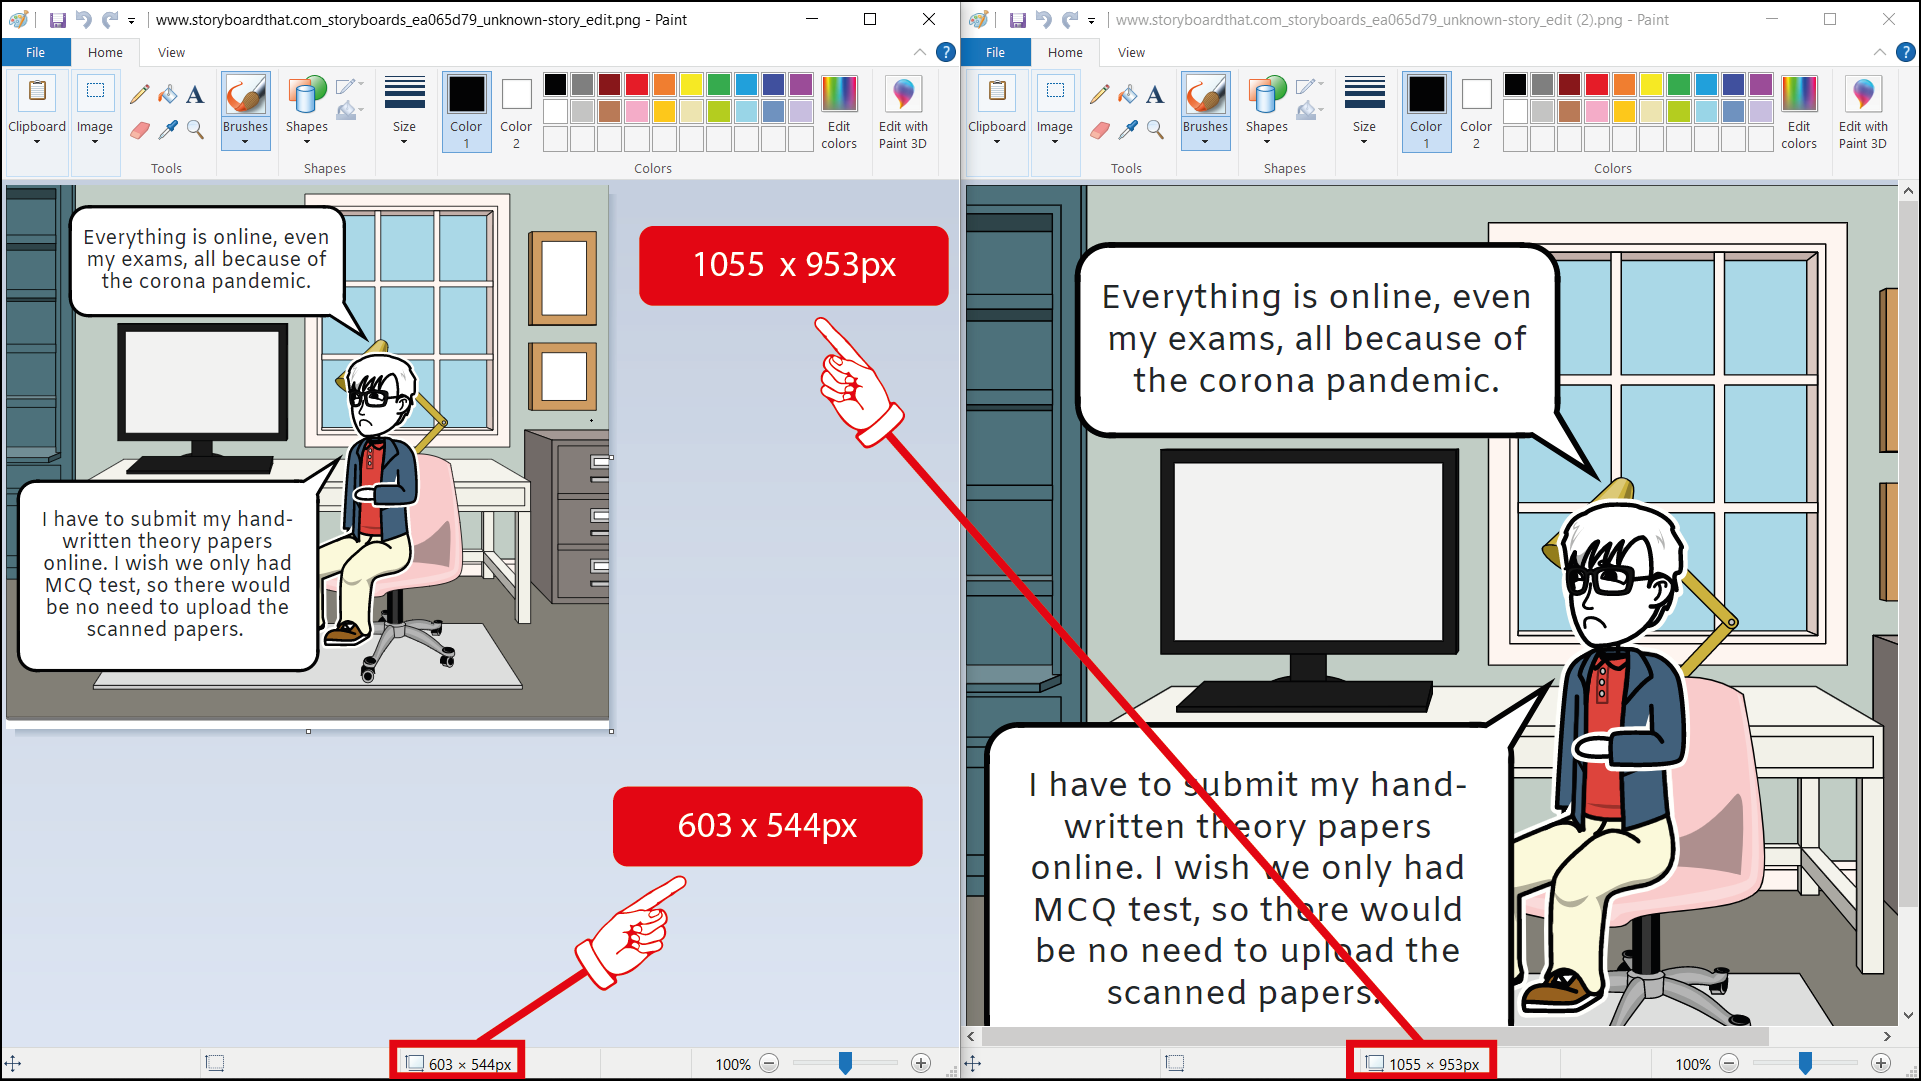
What if the screenshot image seems to be smaller than expected? 😥
Well, there are some creative ways of increasing the element dimensions so that you may end up with a much higher image resolution. You can try the below-mentioned steps:
- Switch to Full Screen Mode
- Delete unnecessary HTML elements from the page
- Increase the page zoom level to make the desired element as big as possible.
- Change the element's or its parent width and height to cover up the entire page space if needed.
Optional Step: Open the same webpage on a screen with higher resolution (if you have one).
Note: While zooming the page, always make sure that your element dimensions do not extend beyond the browser's inner dimensions. And in case if it exceeds, then only the visible region is included, the rest part is cropped out of the screenshot.
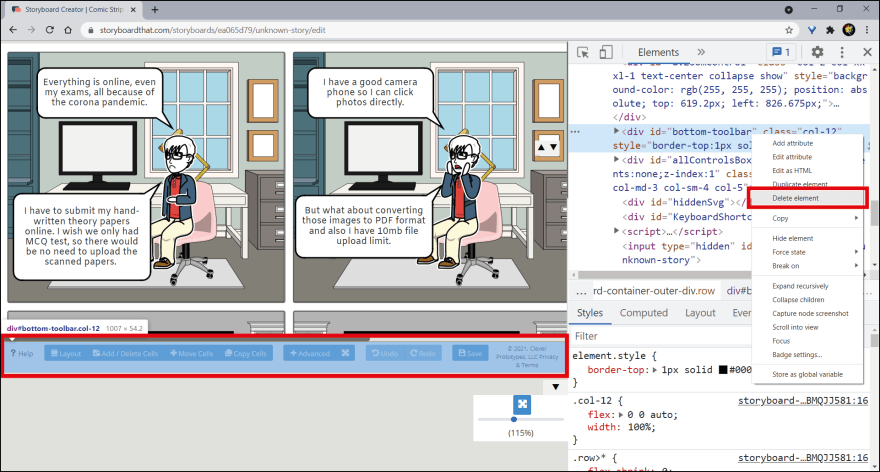
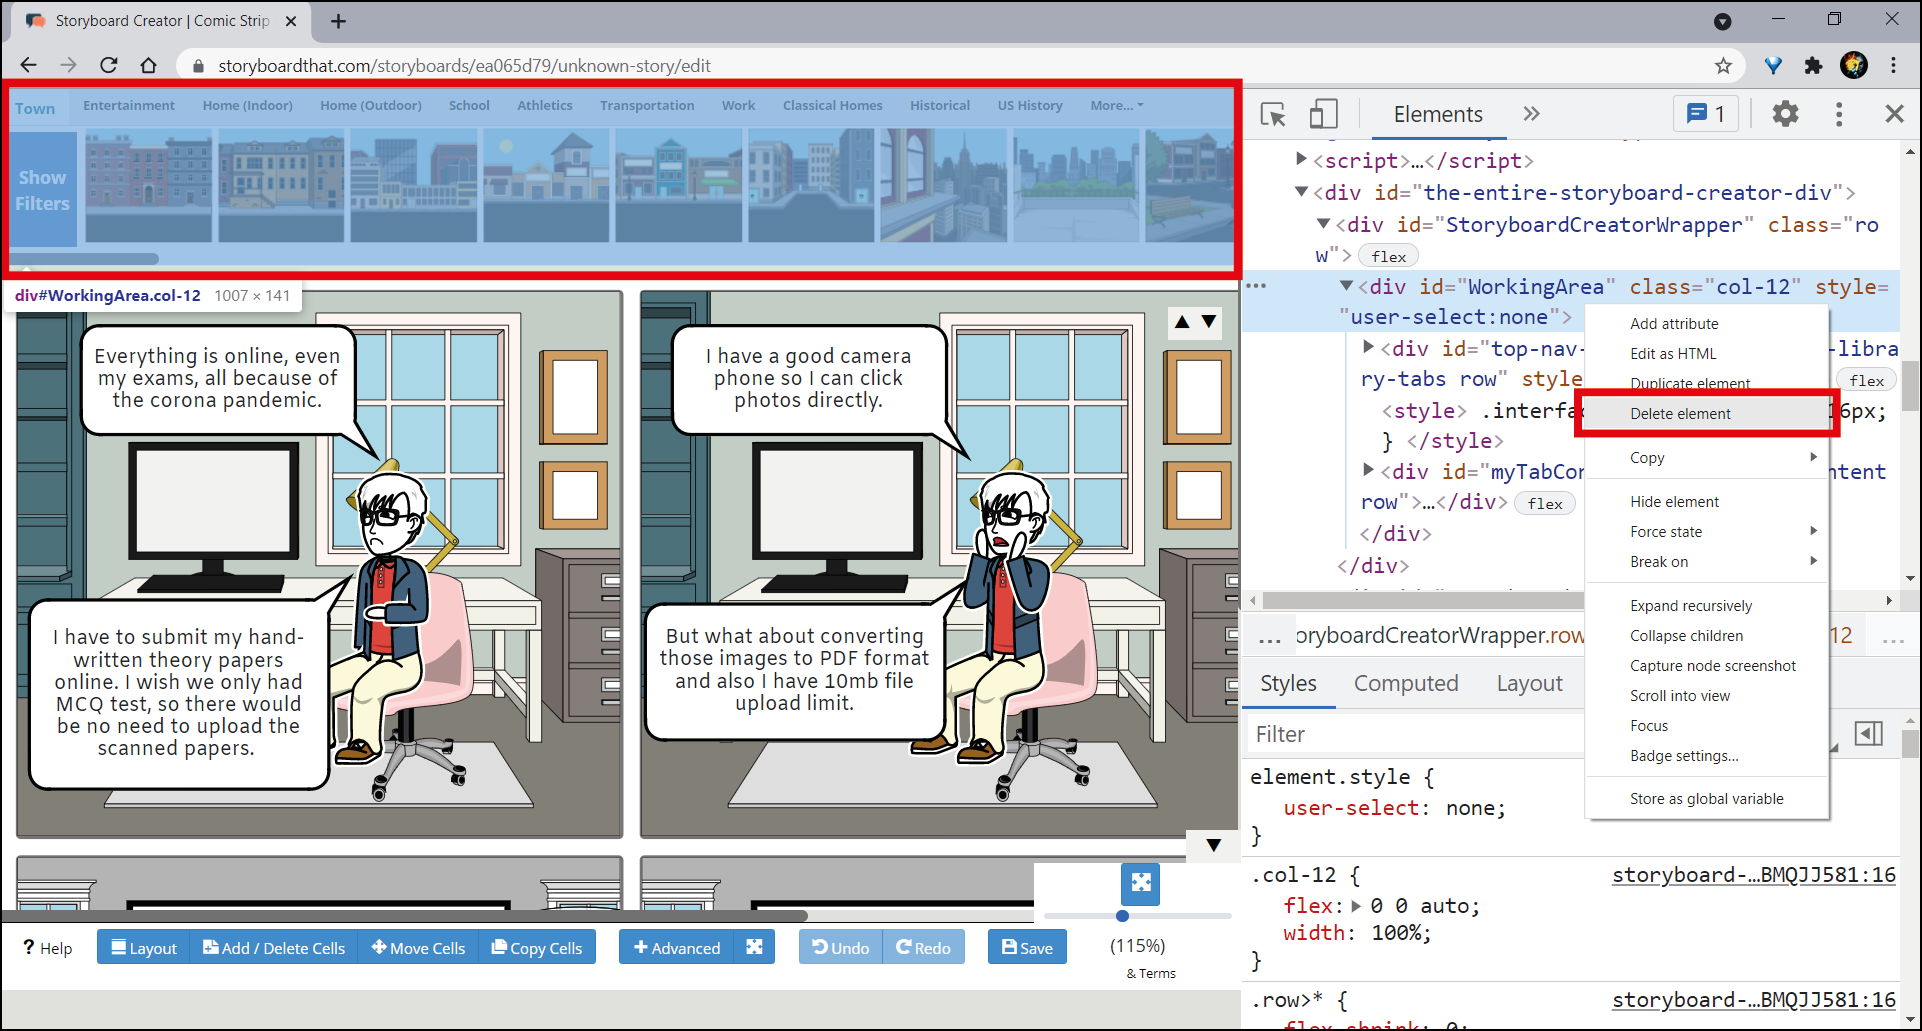
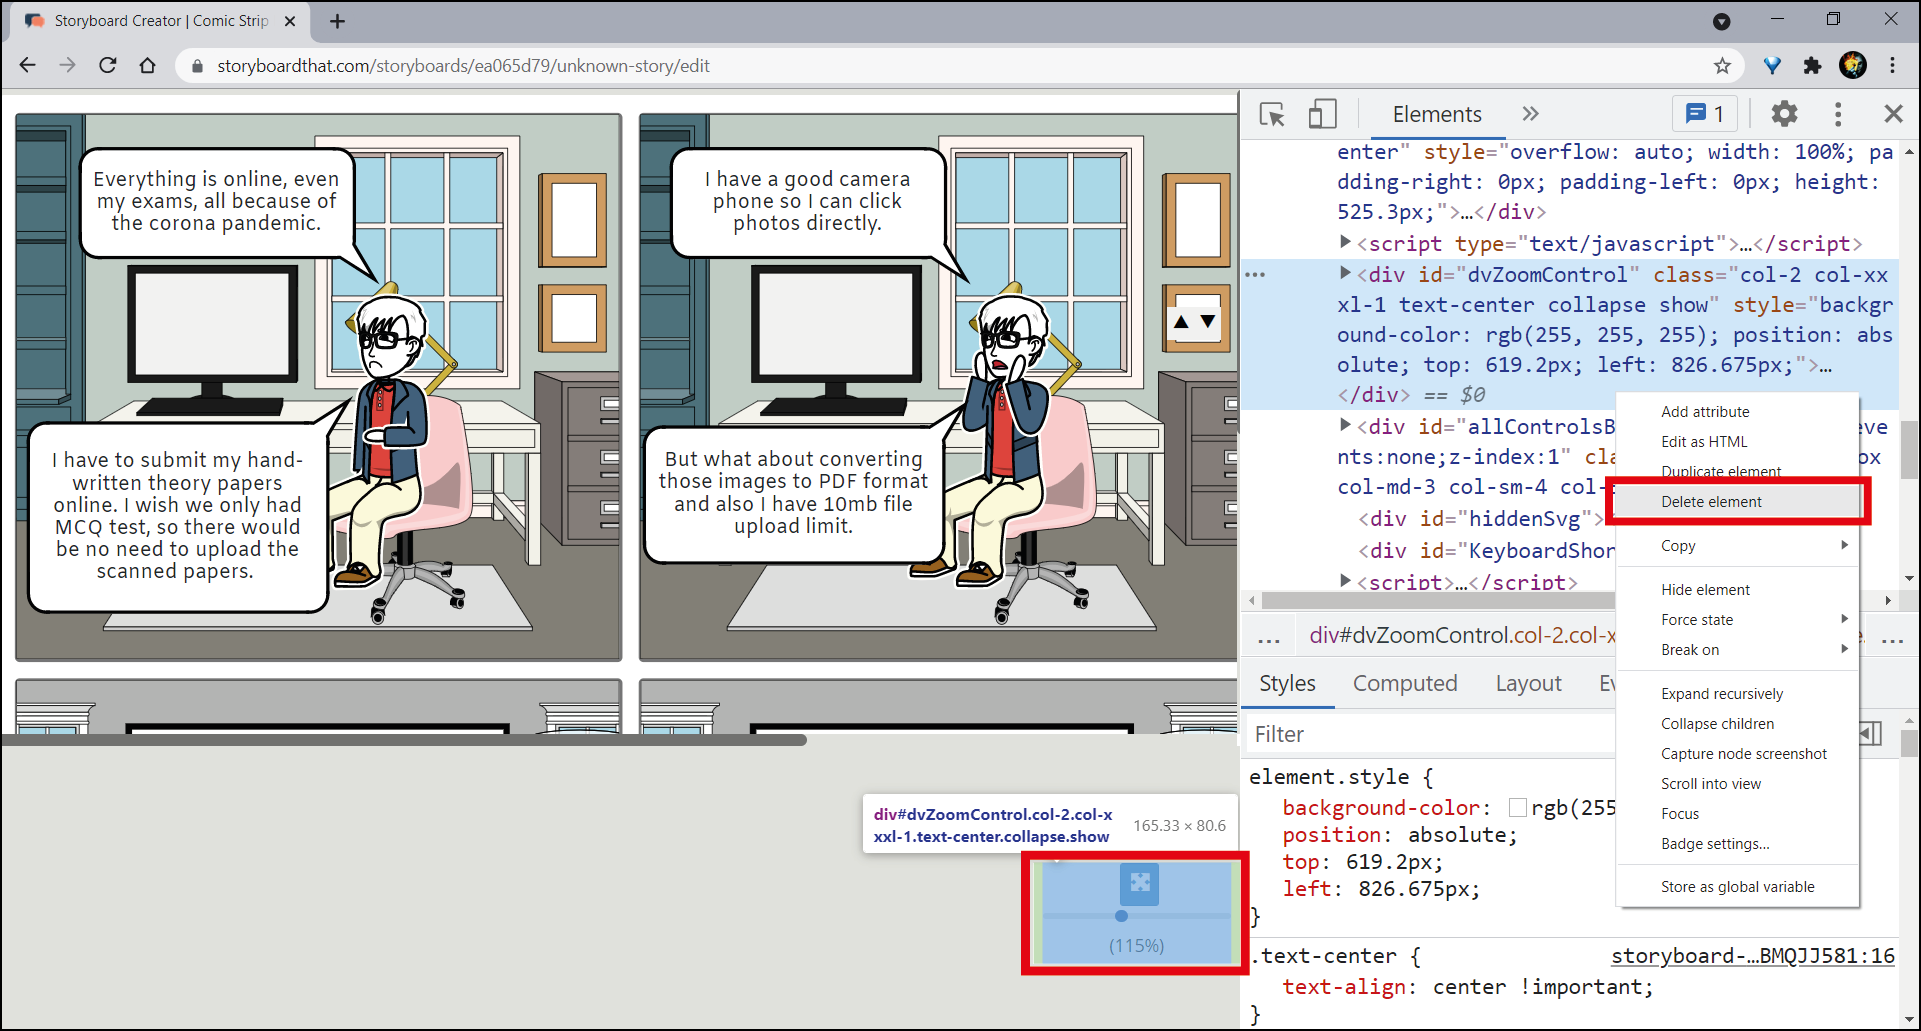
Step 4.1:
Delete all the unnecessary elements from the page.


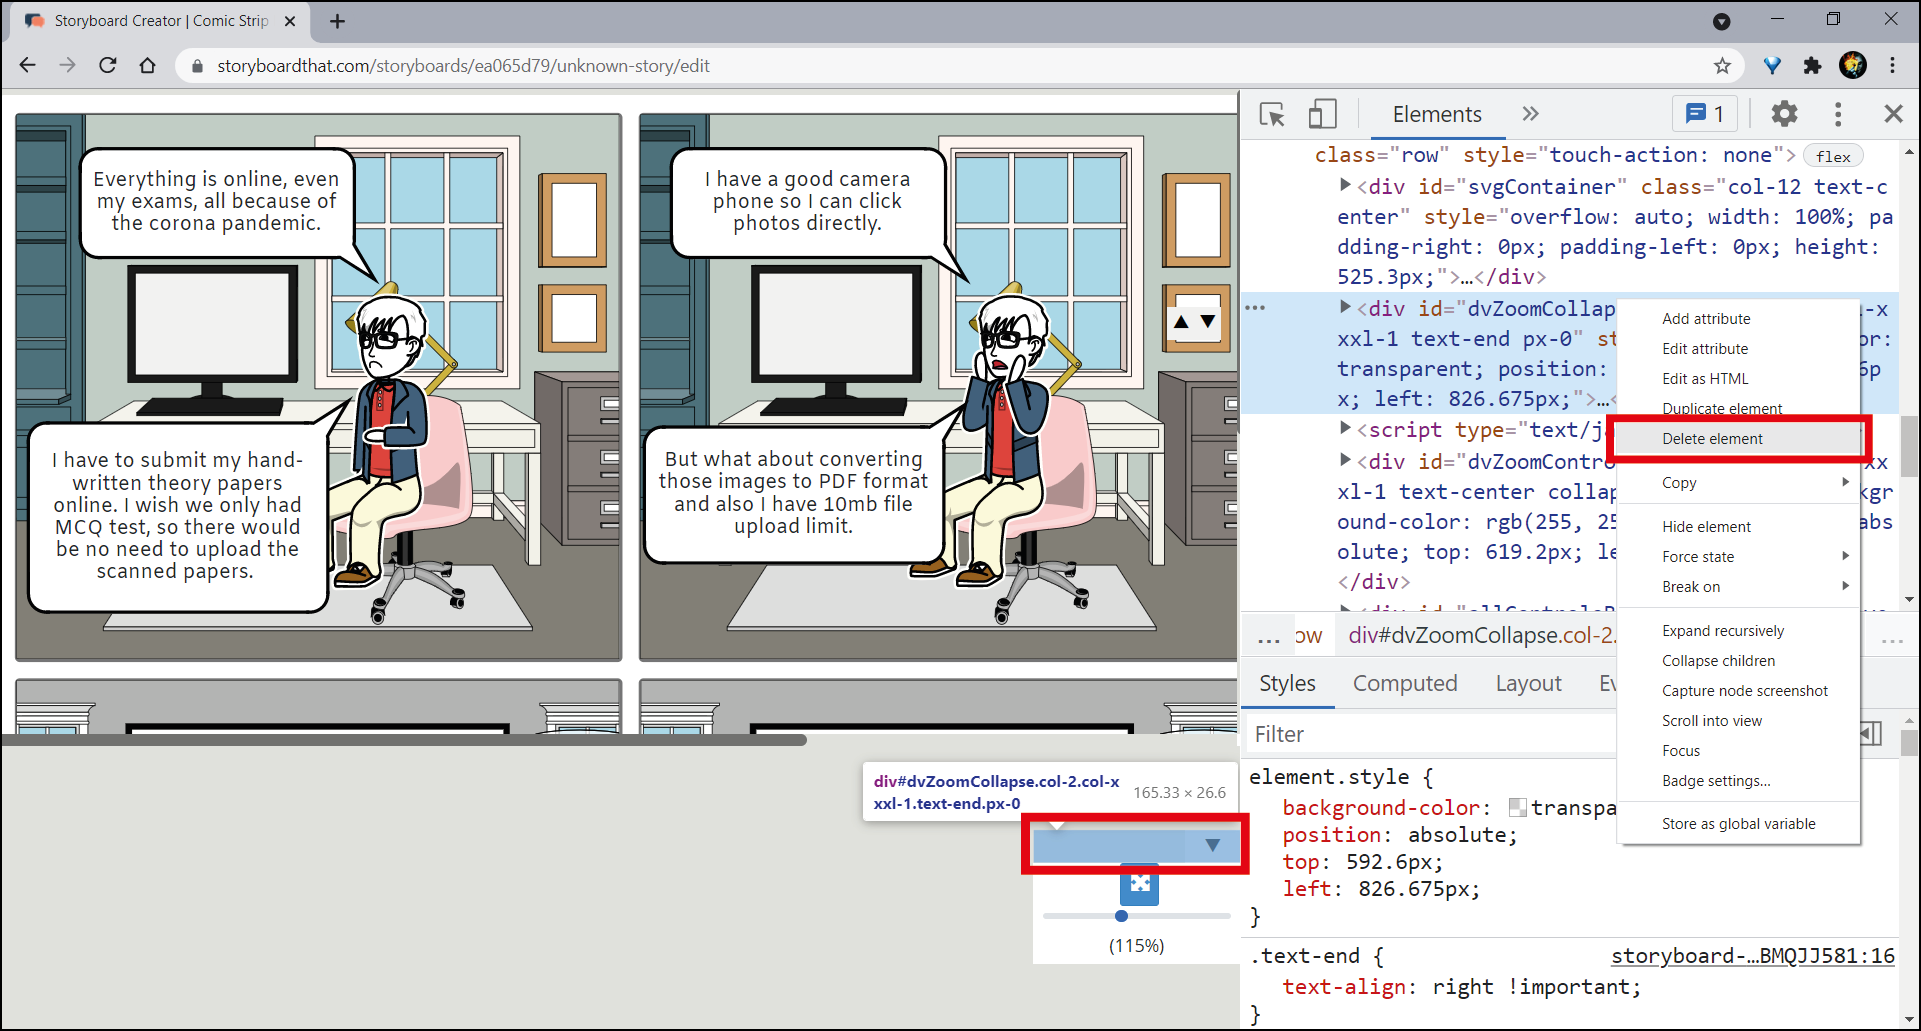
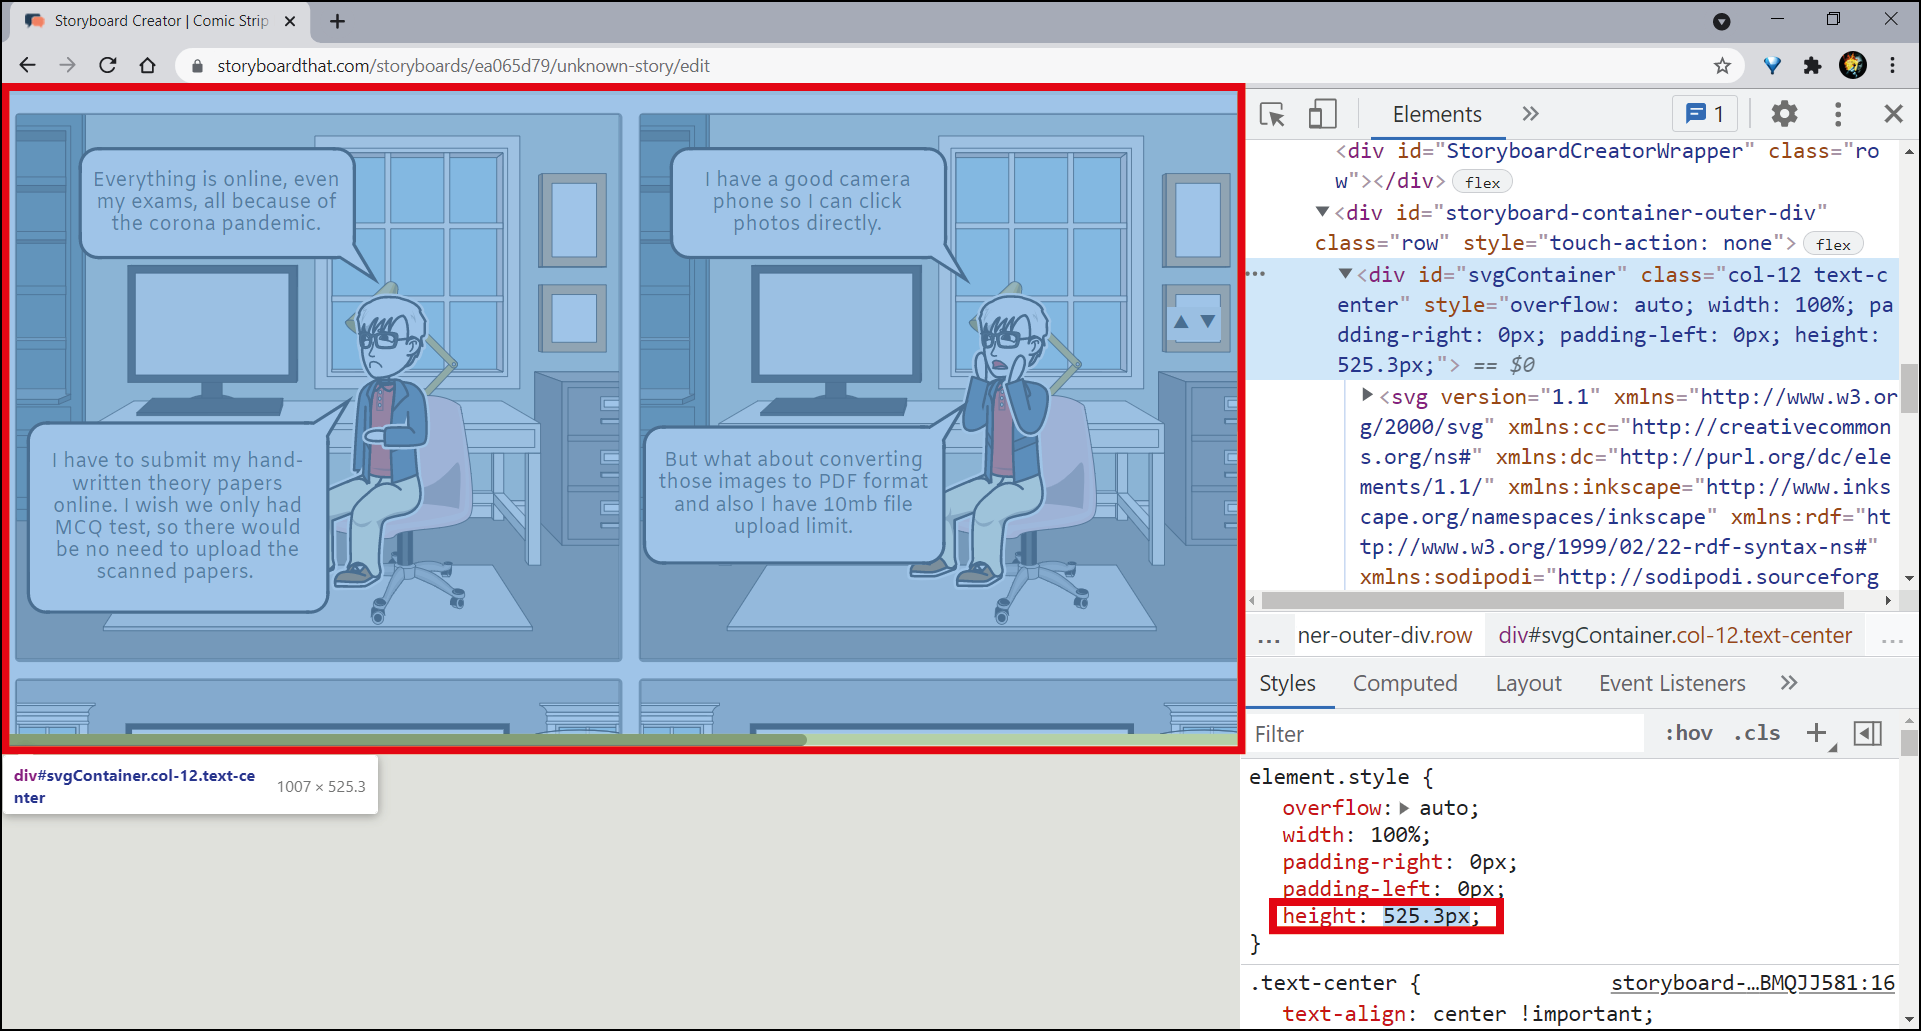
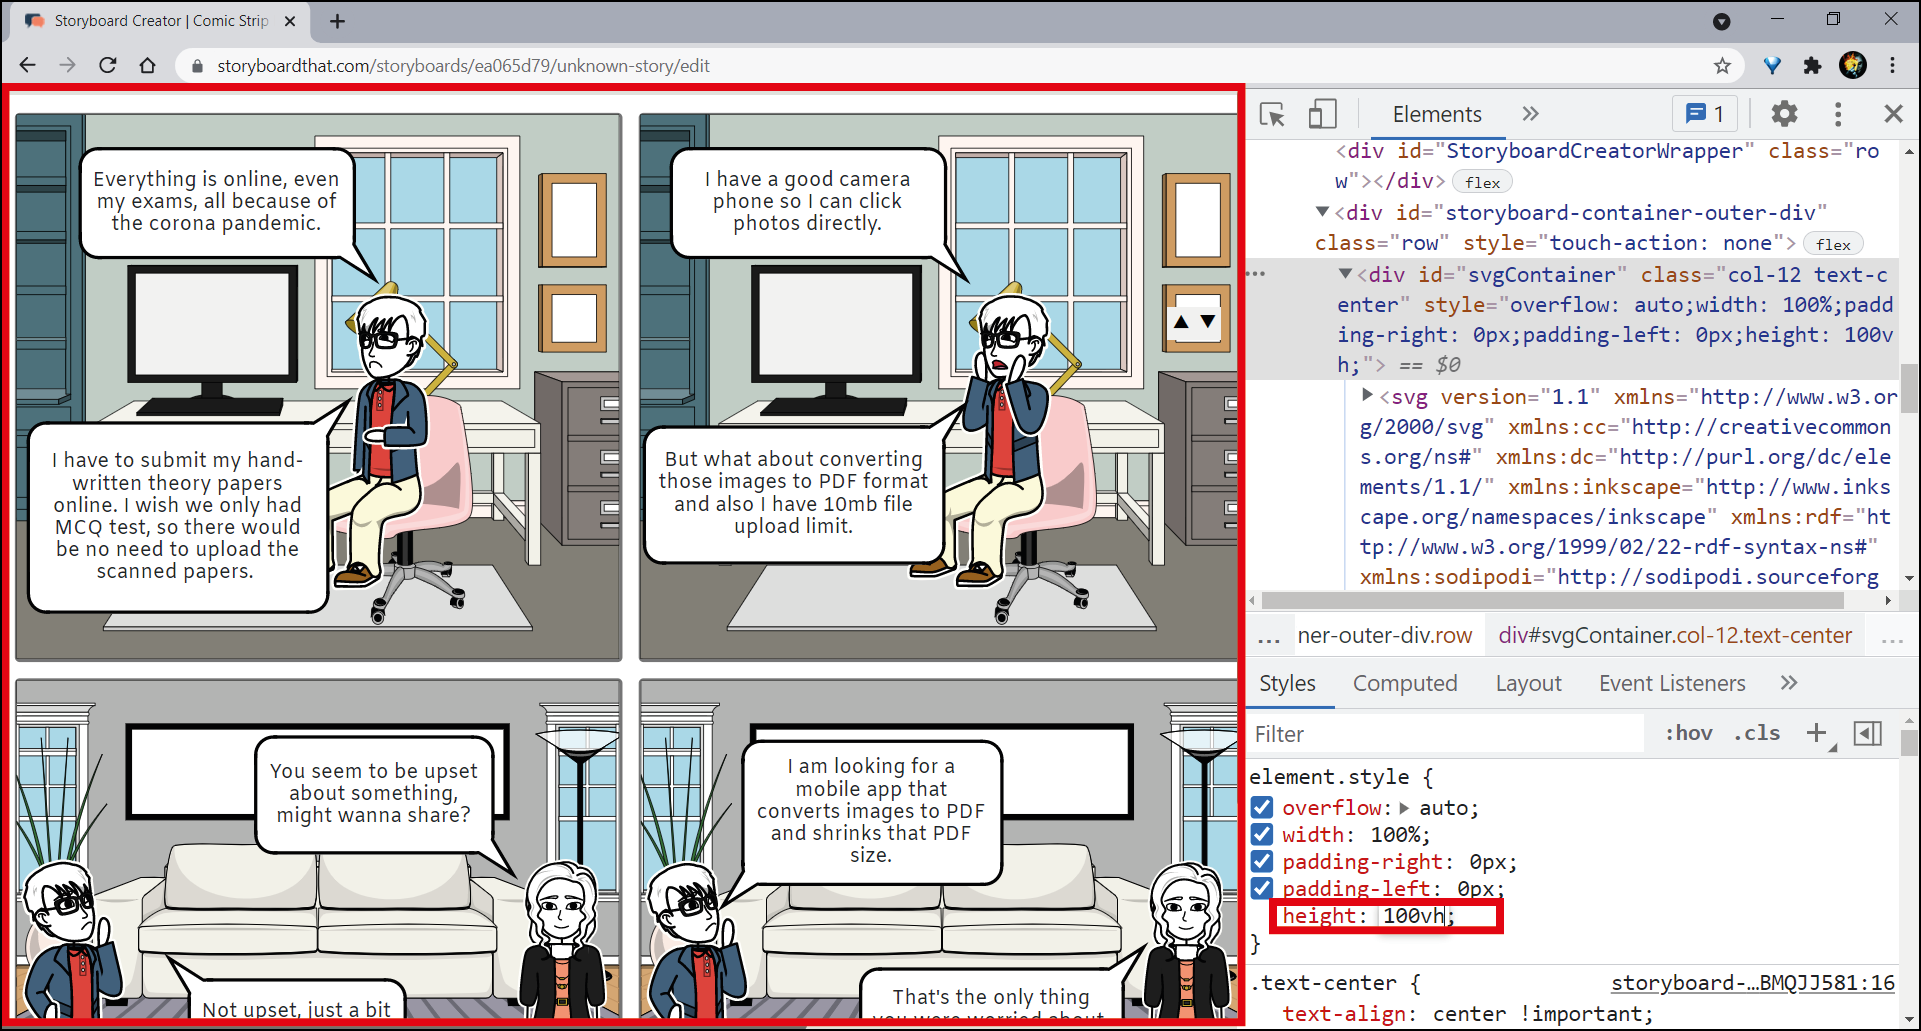
Step 4.2:
Extend the height of the element's container to fill up the page's white space.


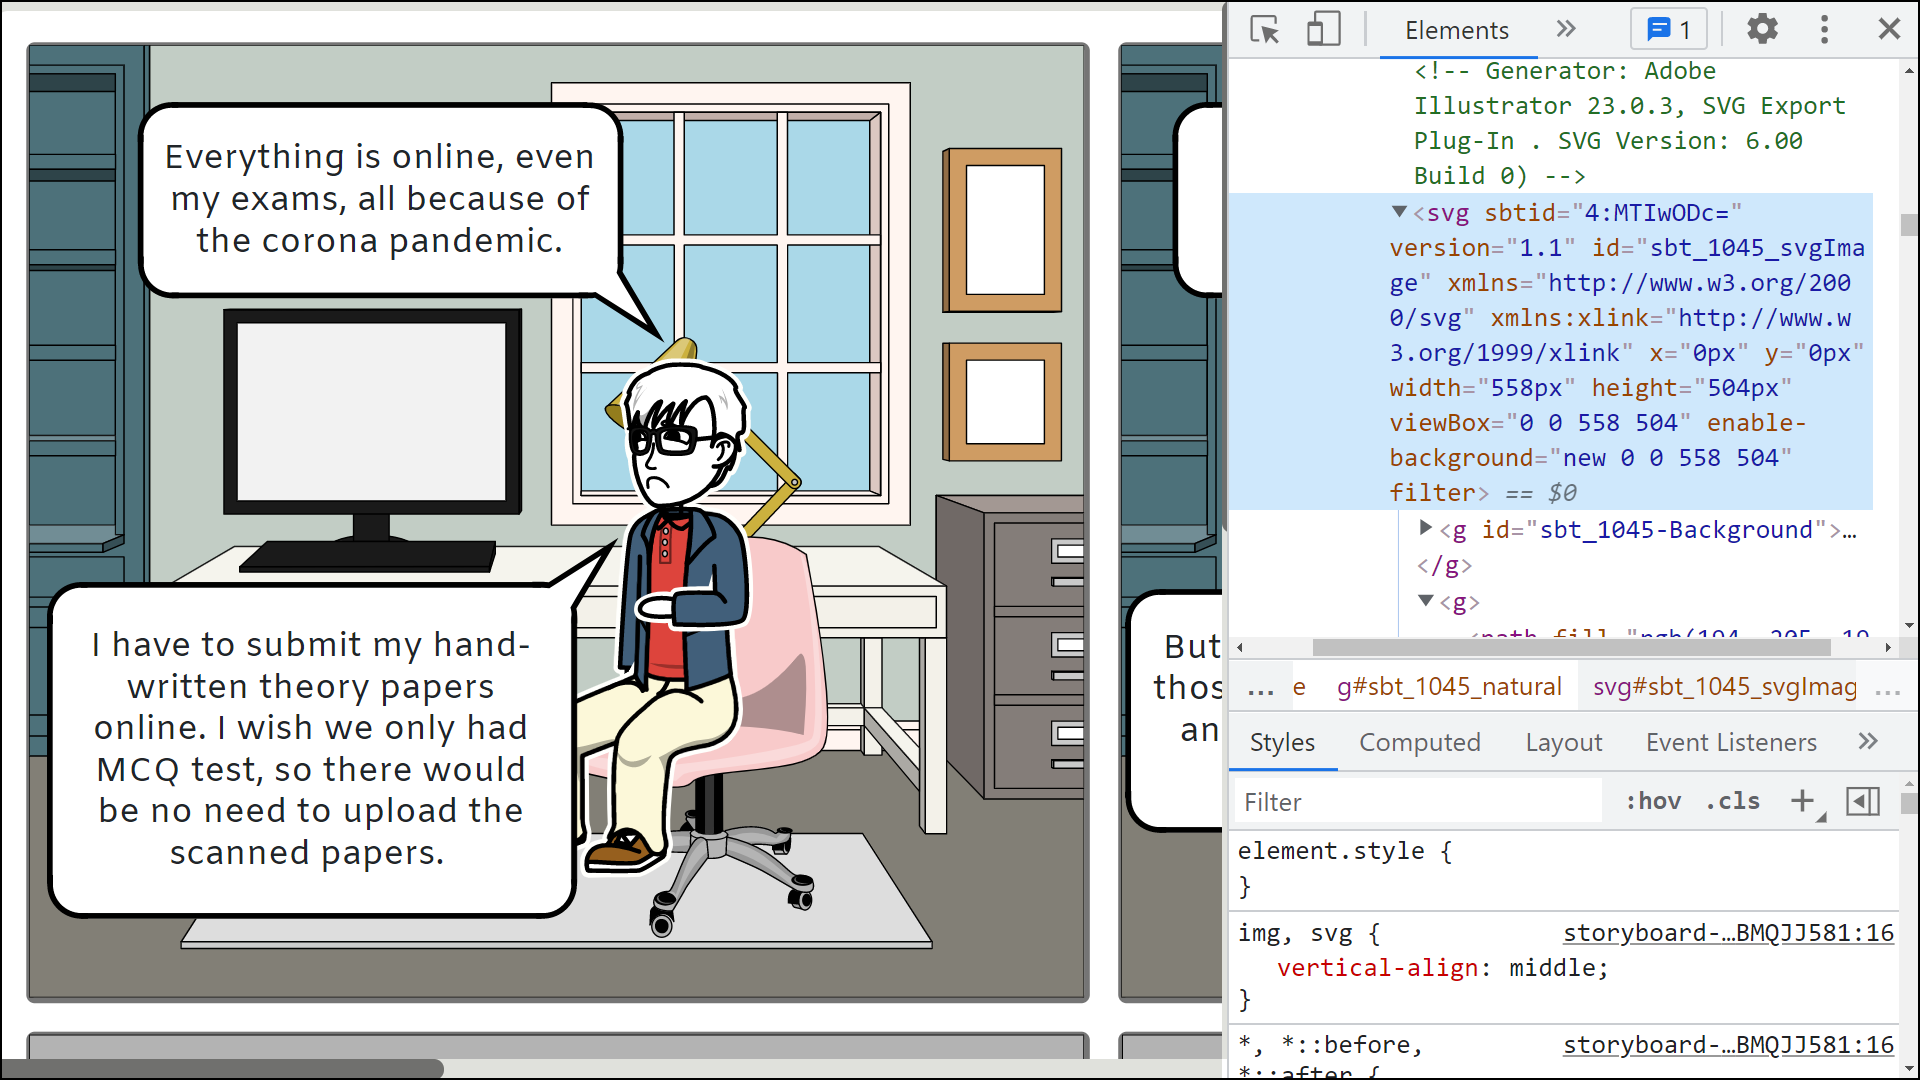
Step 4.3:
Make the browser Full Screen using F11 shortcut key or whatever is applicable for your browser. Also, increase the page zoom level, I have set mine at 175%

Step 4.4:
Repeat steps 2 and 3 to take the screenshot.
Now open the new screenshot, you will notice that its resolution is much greater than the previous one.

2) Google Colab using Microsoft Edge


3) Google Form using Brave Browser


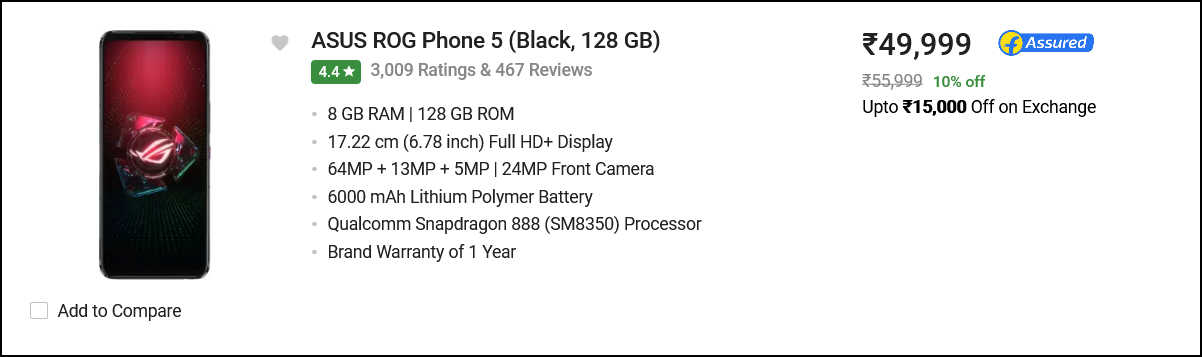
4) Flipkart using Firefox


5) GitHub using Opera


Well, that's it for this article. I hope you learned something new. Follow me for more posts just like this and let me know your thoughts in the comment section.
Share this post with your friends. Thanks. 😊


Top comments (0)