This post will be about the preparations that need to be carried out on a NodeJS root file(conventionally named index.js || server.js), and the Heroku side to successfully deploy a project written in NodeJS.
I'll start with the NodeJS configurations that require to be written in the root file after initializing a project ('npm init' from the command line).
I'll use the express library that runs in the NodeJS runtime, the library has helpers that make dealing with HTTP traffic easier.
NodeJS preparation
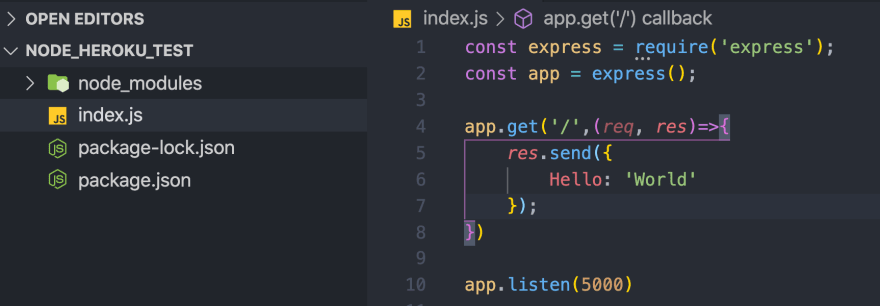
I initiate a root file (index.js) and write the bare minimum code that gets the express server running. The code written includes the route handler 'app.get' that sends out the response on the screen "Hello": "World", and last line 'app.listen(PORT)' instructs express to tell NodeJS it wants to listen to oncoming traffic on port 5000.
Heroku Checklist
When I deploy my app to Heroku, Heroku will expect me to listen to oncoming http traffic on a particular port. I previously instructed NodeJS to listen on port 5000, but whenever I deploy my application to Heroku, Heroku will tell me which port I need to listen to. Setting up the dynamic port binding is a matter of configuring the 'app.listen(PORT)' code line in my index.js file.
Heroku injects environment variables whenever it runs my application, environment variables are variables that are set on the runtime that NodeJS is running on. I can't figure out the port that my application will run on until the application has been deployed. The configuration in the code below shows how it is done.

This set up handles the case where the application is running on a development environment at port 5000, and when the application has been deployed on Heroku and assigned a port.
The next step is to configure the package.json file with the versions of NodeJS and npm (node package manager) that my application is running on. I will write the engines object, where I'll specify the versions of NodeJS and npm which i can retrieve by running the 'node --version' and 'npm --version' commands from the command line .

Whenever Heroku boots up my application, it will read my package.json file, and check if I have declared any versions for use. Heroku will use the versions when it deploys my application.
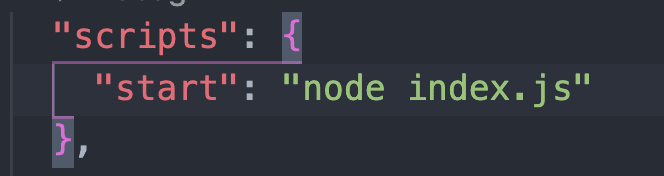
The next step is to instruct Heroku which command to run in order start our server running. I'll configure the start script in the package.json file in the scripts object.
I'll finally create a .gitignore file, this assures that we do not commit to version control (Git) any dependencies that we installed.

Heroku Preparation
The first step is to sign up for a Heroku account on heroku.com. The process is straight forward and easy to fill out. Once you create an account log into Heroku.
The next step is to commit my code to Git (version control), Heroku uses a Git based deployment workflow. I will commit my code to Git as shown below

I will now install Heroku CLI, this will generate a new Heroku project. There are multiple ways to install a Heroku CLI.I installed the CLI using npm command; 'npm install -g heroku'. The command 'heroku --version' on the command line will show the version of Heroku that you just been installed.

I will next login into an instance of heroku from the command line, I'll write the command 'heroku login' where I'll be prompted to enter my credentials, and then I'll create a Heroku application from the command line using the command 'heroku create'.

The output contains two separate links. The first link is the address users navigate to when they visit my application in the browser. The name of the application is randomly generated by Heroku.
The second link is my deployment target. it is a Git repository where we can push our local server to.
I will copy the second link and in the command line I'll write 'git remote add heroku' and paste my link.

I will push the application shown below using the command 'git push heroku master'.
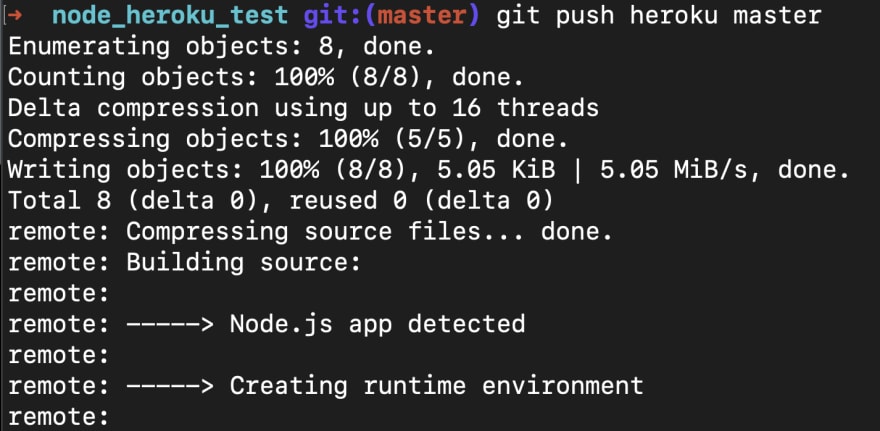
The push command instructs that all the code committed to my master branch in the local repository is pushed to the Heroku repository.
Heroku will build my application, It will detect that I'm using NodeJS and install the versions of NodeJS I specified in my package.json file.
It will install all my dependencies listed inside the package.json file, and the process completes when it reads that the build has succeeded.

I will now test the application in the browser by writing the command 'heroku open'.

This command will open my application in the randomly generated address provided by Heroku on my browser.
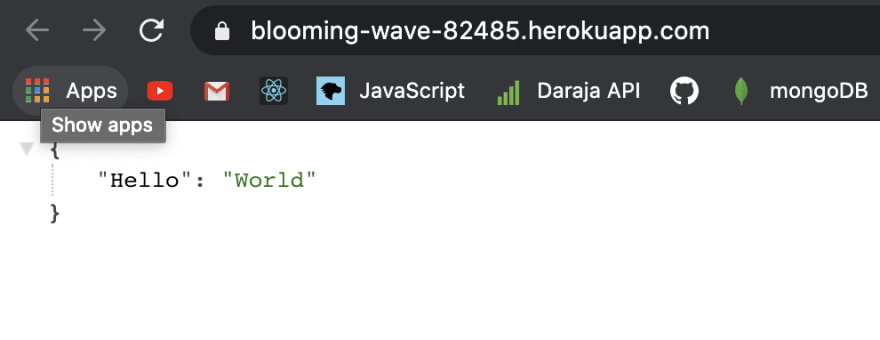
My application is deployed.
However, if you get an error message the command 'heroku logs' written in the command line will generate the output from the deployment process. The logs will give an insight of what went wrong during the deployment.
To redeploy my application, I will use the command 'git push heroku master' after i have committed my changes to Git.


Top comments (0)