Whether it is CI/CD pipelines, event flow documentation systems, or using PubSub+ Event Portal as the unique event design and documentation tool for all your events in your enterprise, I’m sure you would appreciate an API to gather all the information. This is why PubSub+ Event Portal provides a REST API, which is compliant with the OpenAPI specification.
The goal of this tutorial is to explain how this API works. It will also guide you through the steps needed to REST-enable Section 4 of this codelab (done using PubSub+ Event Portal GUI).
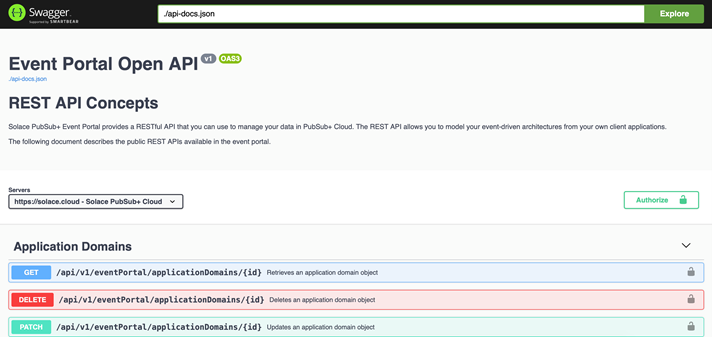
Understanding PubSub+ Event Portal REST API
The PubSub+ Event Portal REST API provides the ability to interact with the PubSub+ Event Portal using RESTful patterns. For instance, it provides ways to browse artefacts, create, update, and delete events or applications. This is an easy way to integrate systems in a programmatic manner with the PubSub+ Event Portal Designer and Catalog.
The PubSub+ Event Portal REST API has an OpenAPI specification document available at https://openapi.solace.cloud.
Prerequisites to access the REST API
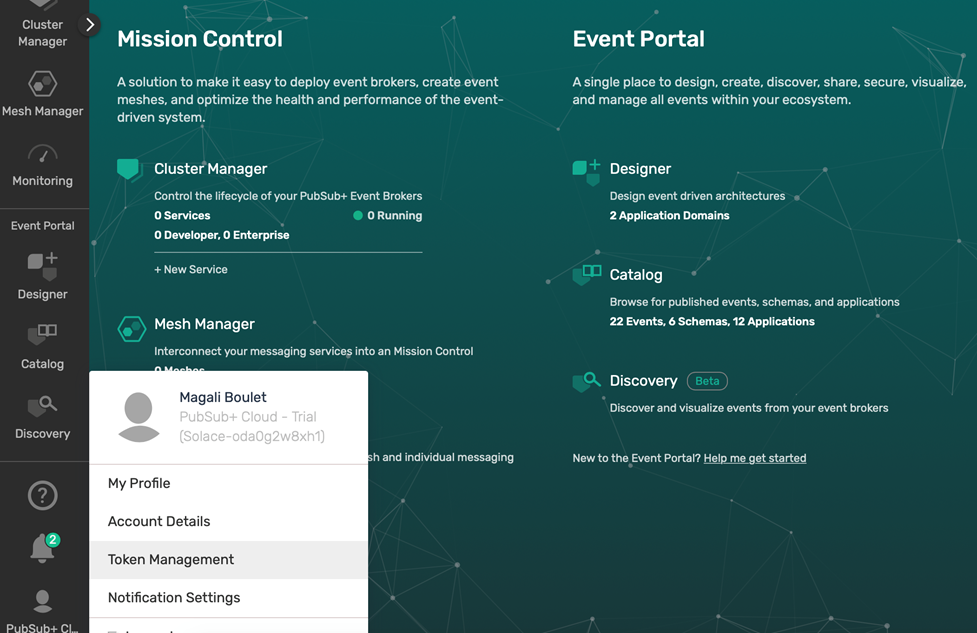
In order to perform REST API calls, you need an API token. Follow the steps to get that token:
- Log in to your PubSub+ Cloud account
- Click on your name and go to the Token Management menu in the console

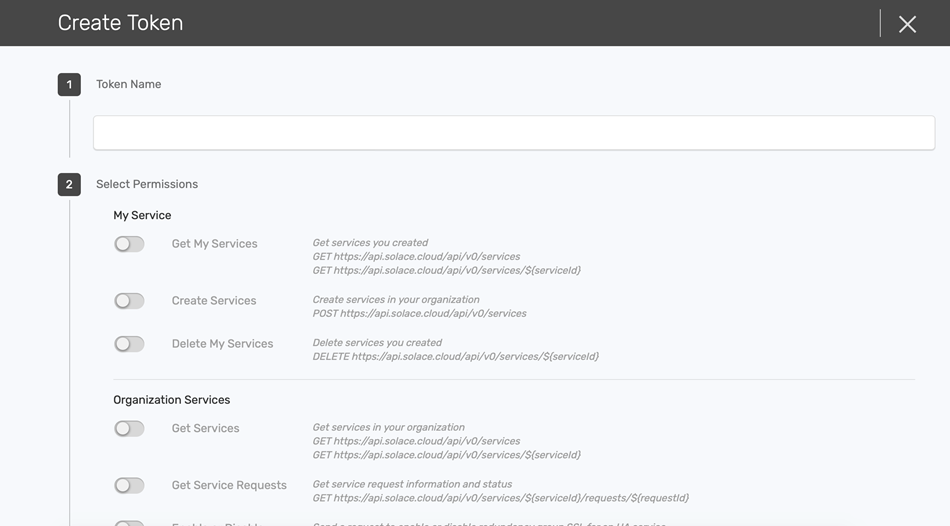
- Click Create Token

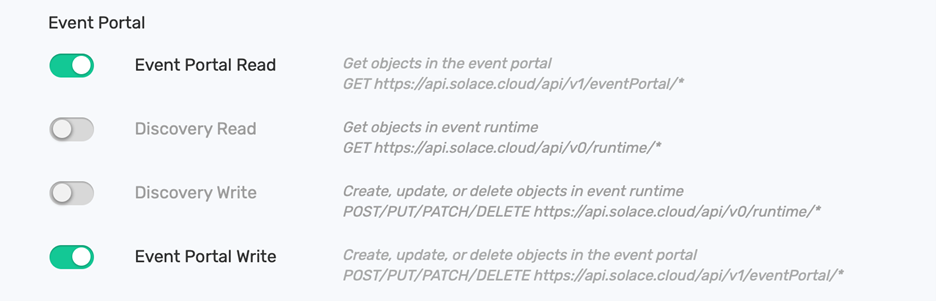
- Give it a name and enable read & write permissions for PubSub+ Event Portal. You could choose to only enable read or write, depending on your needs, but in this tutorial we are going to use both read and write access.

- Click Generate Token and in the popup dialogue box click Copy to store a copy of the token.
Testing the Event Portal REST API
In this section, you are going to REST-enable Section 4 of this codelab, which was done using the PubSub+ Event Portal GUI.
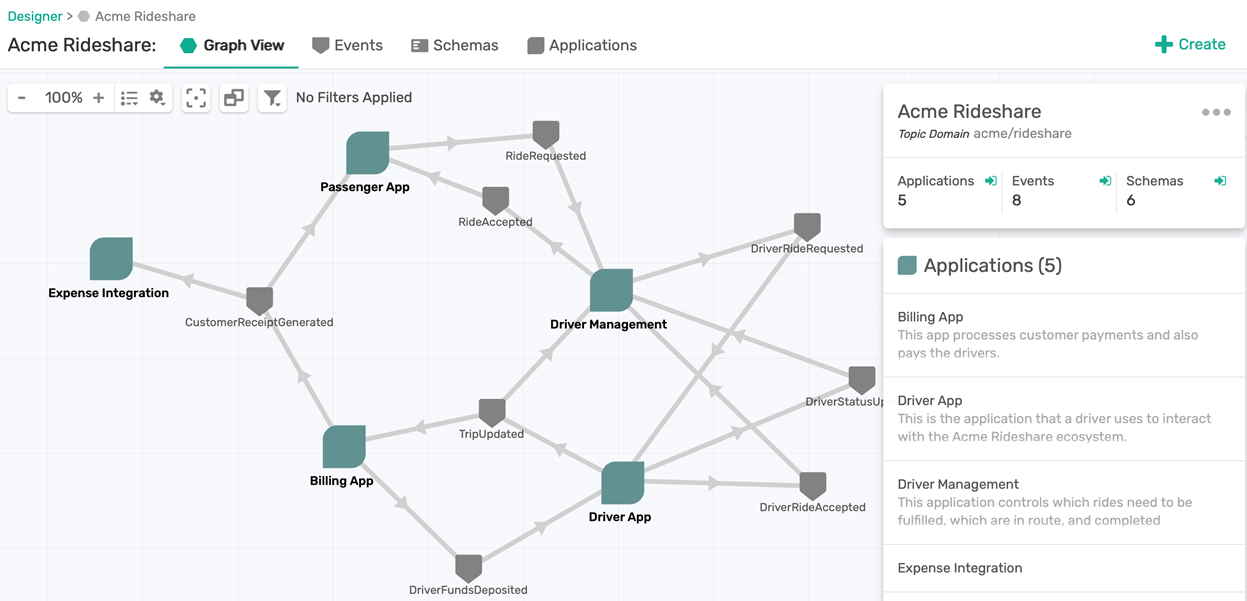
From https://console.solace.cloud, click the PubSub+ Event Portal Designer , either by clicking on the left menu or the right-hand side Event Portal Designer menu.

Enter the Acme Rideshare domain, which is created by default.
As described in the codelab, we are going to follow these steps:
- Create an application
- Create an event
- Update the created application to publish this event
Creating the RideDropoffProcessor Application
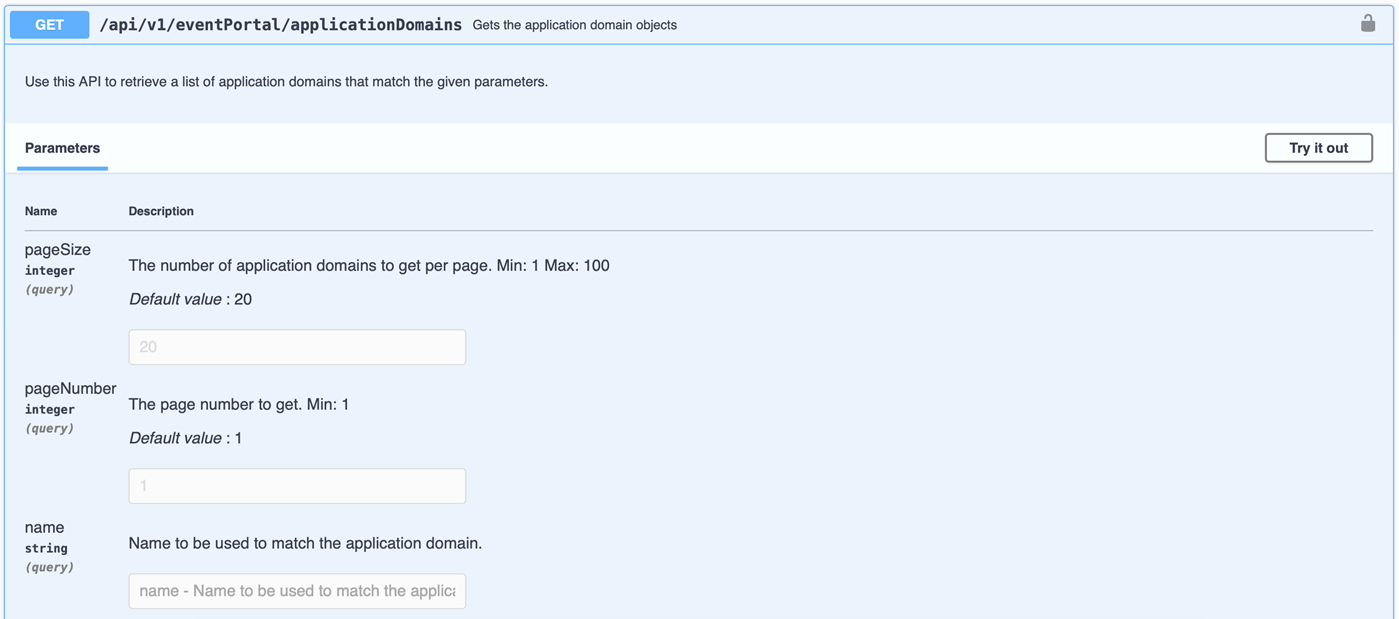
According to the Event Portal OpenAPI specification, to create an application using the POST verb for the Applications resource, we first need a domain id.

So, let’s get the Acme Rideshare domain id. For this, choose the tool you are comfortable with to perform HTTP requests. This tutorial uses Postman, but curl would also be fine. To get the domain id, use the GET verb on the applicationDomains resource with the name parameter.
You should then use the following parameters:
- Url: https://solace.cloud/api/v1/eventPortal/applicationDomains?name=Acme%20Rideshare
- HTTP verb: GET
- HTTP Authorization header: add the previously generated token as Bearer Token
If you are using Postman, you should get the following response:
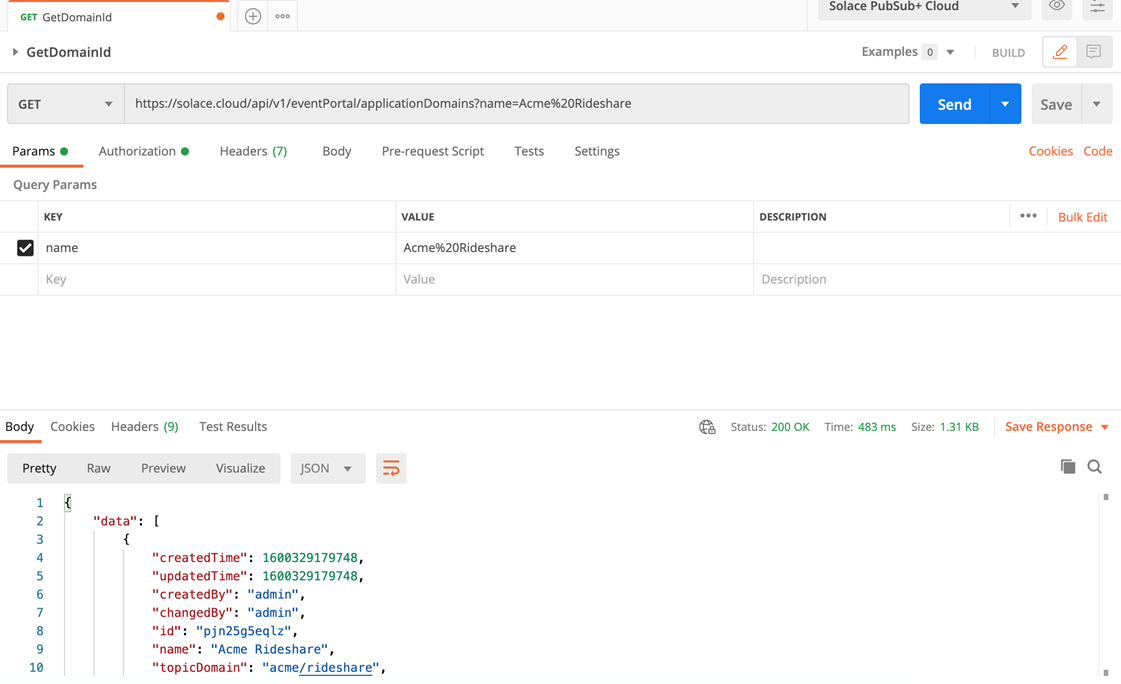
In the response, locate the id element. This is your domain id. In this example, the id is pjn25g5eqlz.
You can now go ahead and create your application by using the following settings:
- Url: https://solace.cloud/api/v1/eventPortal/applications
- HTTP verb: POST
- HTTP Content-type: application/json
- HTTP Authorization header: add the previously generated token as Bearer Token
- Payload: make sure you use your own domain id
{
"name": "RideDropoffProcessor",
"description": "Application created by Solace Event Portal REST API",
"applicationDomainId": "pjn25g5eqlz",
"revisionComment": "application creation",
"applicationClass": "unspecified"
}
If you are using Postman to post this request, you should get the following response:
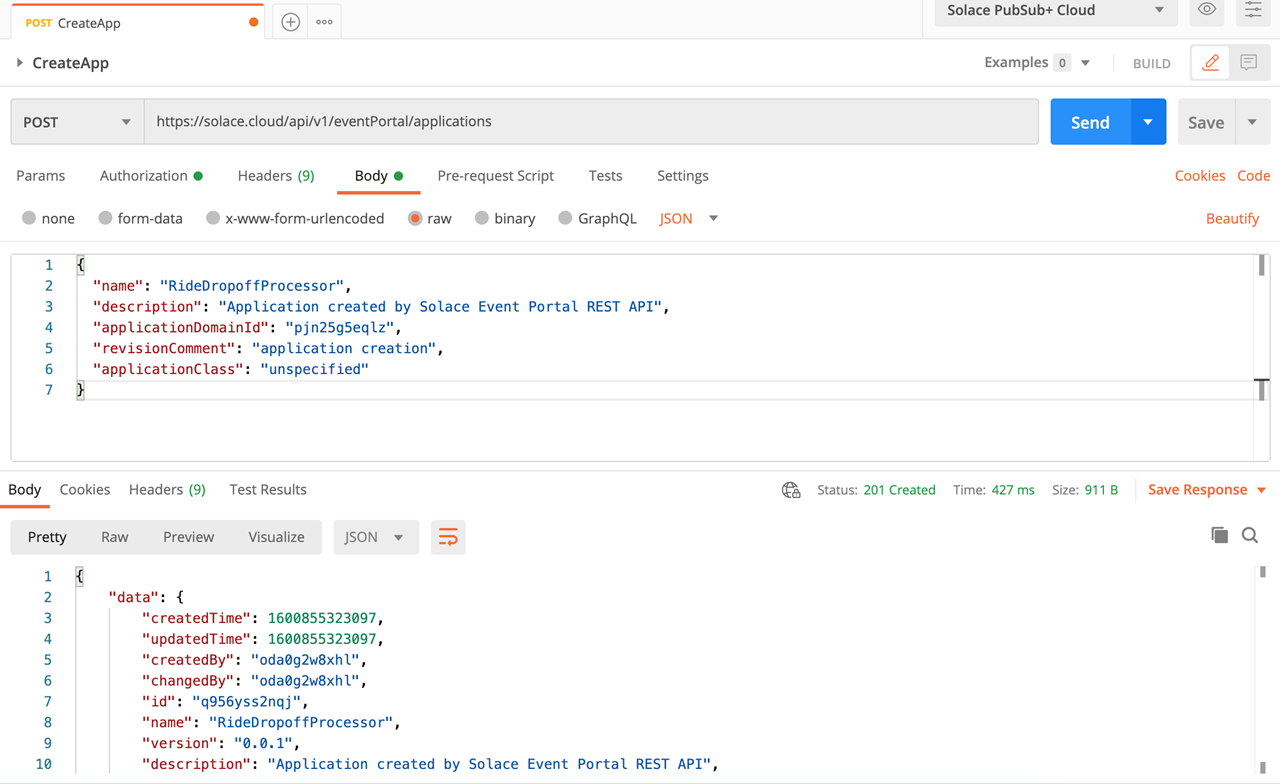
At this stage, write down your application id (you will need it at a later step). In this example, the application id is q956yss2nqj.
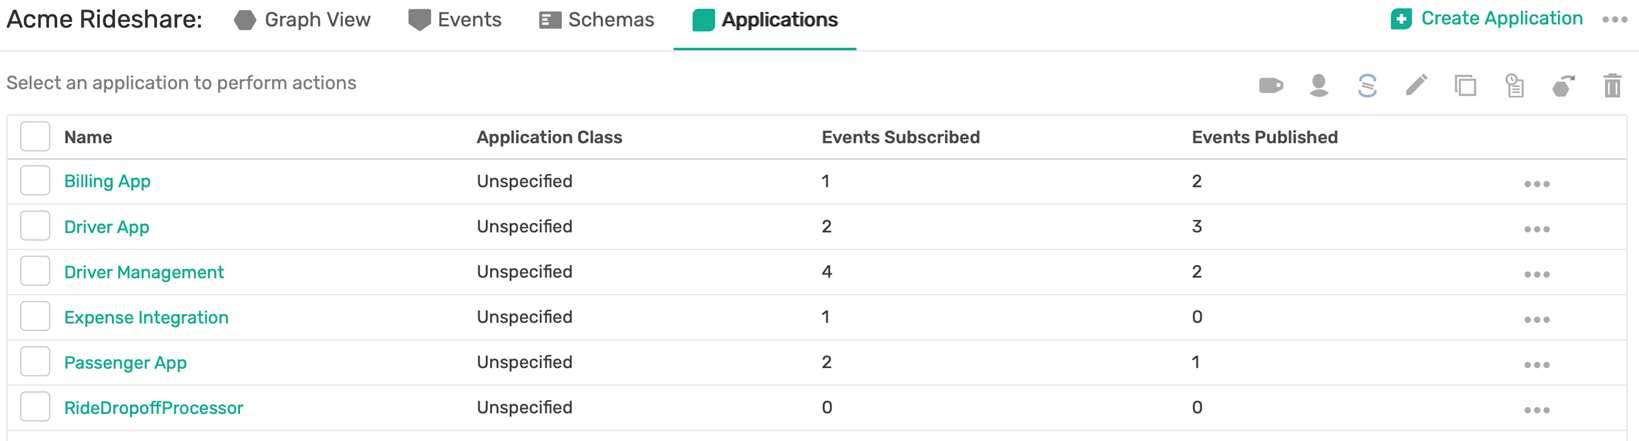
Switch back to Designer, in the Applications tab, you now see the newly created application. In my case, it is at the end of the list:
Creating the Event RideAverageUpdate
Start by understanding the OpenAPI specification to create an event.

The mandatory elements are name and topic, but since we are following Section 4 of the codelab, we also need to link this event to a schema id. This means that the schema has to be created first, and then we’ll get its id.
So, let’s first create the schema. Same as before, we start by having a look at the OpenAPI specification for creating a schema.
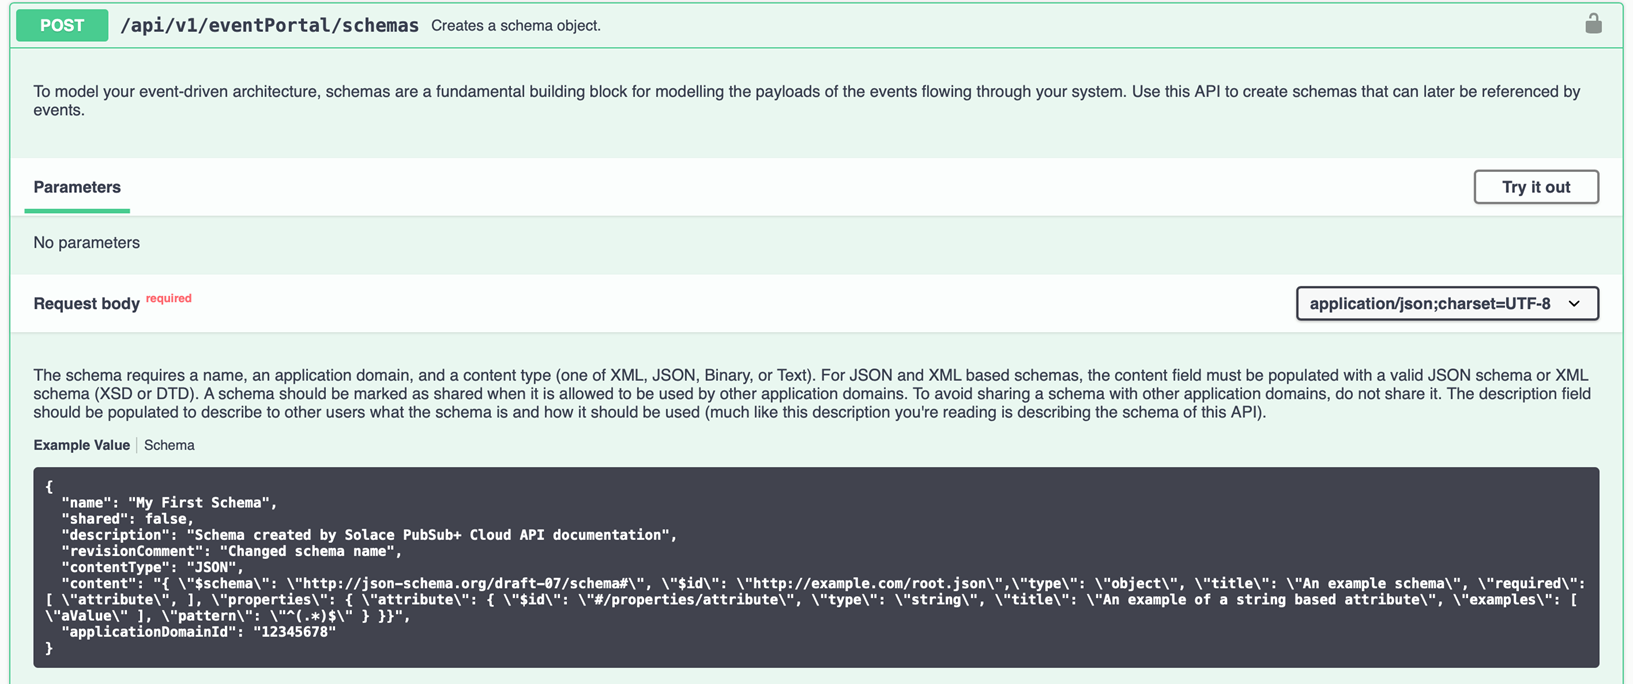
In our context, this means:
- Url: https://solace.cloud/api/v1/eventPortal/schemas
- HTTP verb: POST
- HTTP Content-type: application/json
- HTTP Authorization header: add the previously generated token as Bearer Token
- Payload: (make sure you use your own domain id)
{
"name": "RideAveragePayload",
"shared": false,
"description": "Event Payload which contains average meter readings, average passenger counts, and the number of rides in a given window duration",
"revisionComment": "Schema creation",
"contentType": "JSON",
"content": "{ \"$schema\": \"http://json-schema.org/draft-07/schema\",\"$id\": \"http://example.com/example.json\",\"type\": \"object\",\"title\": \"The root schema\",\"description\": \"The root schema comprises the entire JSON document.\",\"default\": {},\"examples\": [{\"timestamp\": \"2020-06-04T20:09:59.99832-04:00\",\"avg_meter_reading\": 21.615217,\"avg_passenger_count\": 1.5,\"window_duration_sec\": 300,\"window_ride_count\": 5}],\"required\": [\"timestamp\",\"avg_meter_reading\",\"avg_passenger_count\",\"window_duration_sec\",\"window_ride_count\"],\"additionalProperties\": true,\"properties\": {\"timestamp\": {\"$id\": \"#/properties/timestamp\",\"type\": \"string\",\"title\": \"The timestamp schema\",\"description\": \"An explanation about the purpose of this instance.\",\"default\": \"\",\"examples\": [\"2020-06-04T20:09:59.99832-04:00\"]},\"avg_meter_reading\": {\"$id\": \"#/properties/avg_meter_reading\",\"type\": \"number\",\"title\": \"The avg_meter_reading schema\",\"description\": \"An explanation about the purpose of this instance.\",\"default\": 0.0,\"examples\": [21.615217]},\"avg_passenger_count\": {\"$id\": \"#/properties/avg_passenger_count\",\"type\": \"number\",\"title\": \"The avg_passenger_count schema\",\"description\": \"An explanation about the purpose of this instance.\",\"default\": 0.0,\"examples\": [1.5]},\"window_duration_sec\": {\"$id\": \"#/properties/window_duration_sec\",\"type\": \"integer\",\"title\": \"The window_duration_sec schema\",\"description\": \"An explanation about the purpose of this instance.\",\"default\": 0,\"examples\": [300]},\"window_ride_count\": {\"$id\": \"#/properties/window_ride_count\",\"type\": \"integer\",\"title\": \"The window_ride_count schema\",\"description\": \"An explanation about the purpose of this instance.\",\"default\": 0,\"examples\": [5]}}}",
"applicationDomainId": "pjn25g5eqlz"
}
If you are using Postman to post this request, you should get the following response:
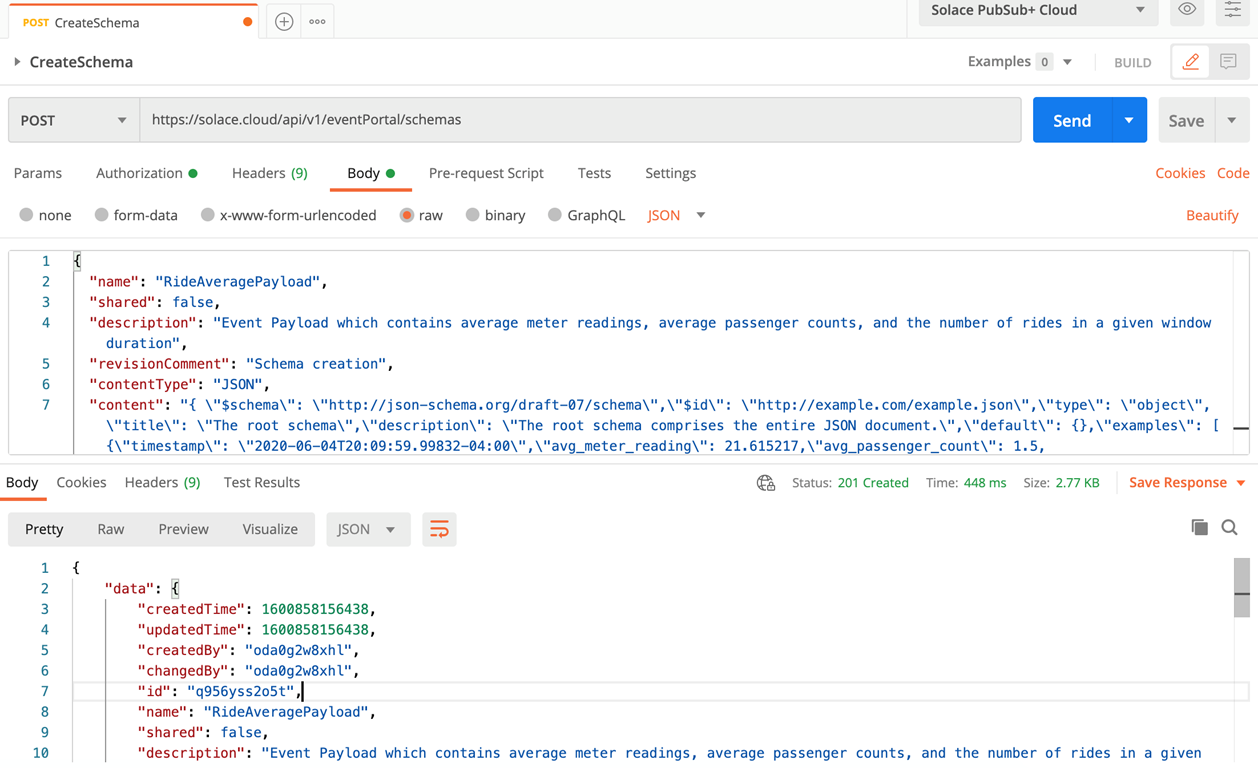
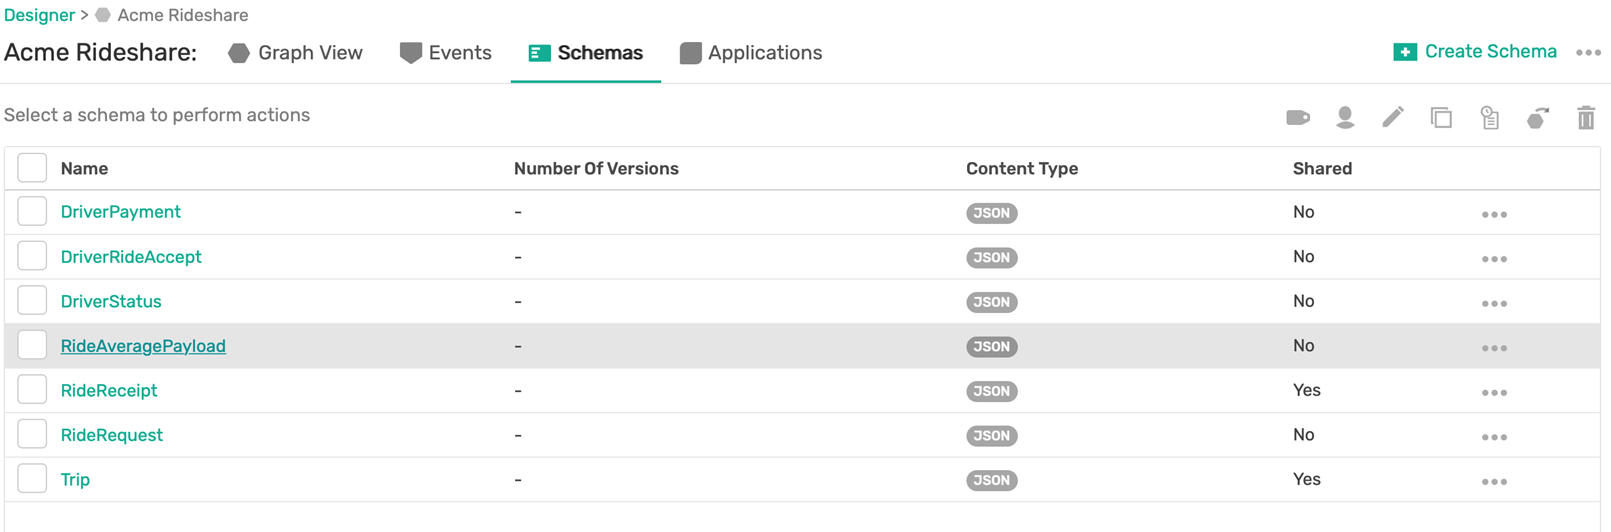
Copy and paste the id from the response. In my case, the schema id is q956yss2o5t. If you switch back to Designer and go to the Schemas tab, you’ll see the newly created schema.
You can now create the RideAverageUpdate event using the following settings:
- Url: https://solace.cloud/api/v1/eventPortal/events
- HTTP verb: POST
- HTTP Content-type: application/json
- HTTP Authorization header: add the previously generated token as Bearer Token
- Payload: make sure you add your own schema id and domain id
{
"name": "RideAverageUpdate",
"shared": false,
"topicName": "taxi/nyc/v1/stats/dropoff/avg",
"description": "This event contains the average cost of rides over a specified duration",
"schemaId": "q956yss2o5t",
"applicationDomainId": "pjn25g5eqlz",
"revisionComment": "Event creation",
"brokerType": "solace",
"type": "event"
}
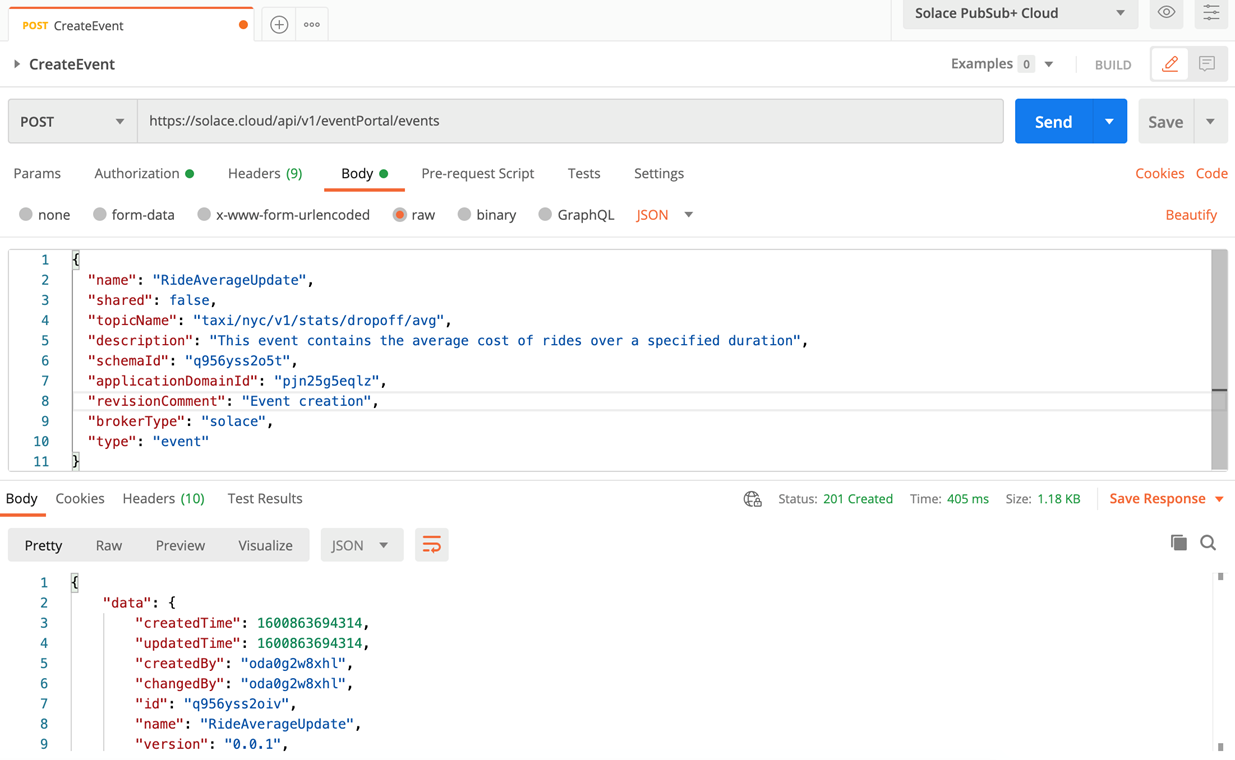
At this stage, write down your event id (you will need it at a later step). In this example, the event id is q956yss2oiv.
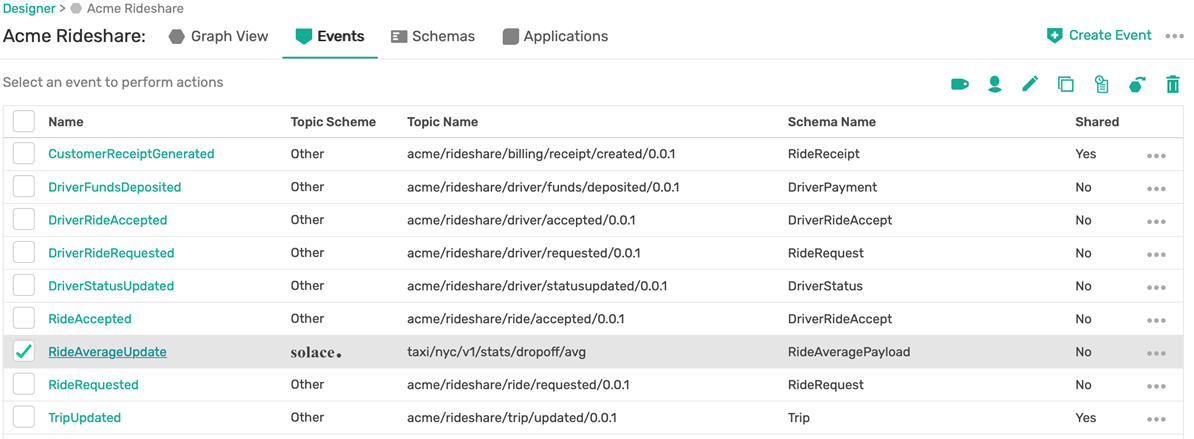
Finally, switch back to Designer to visualize the RideAverageUpdate event that was created.
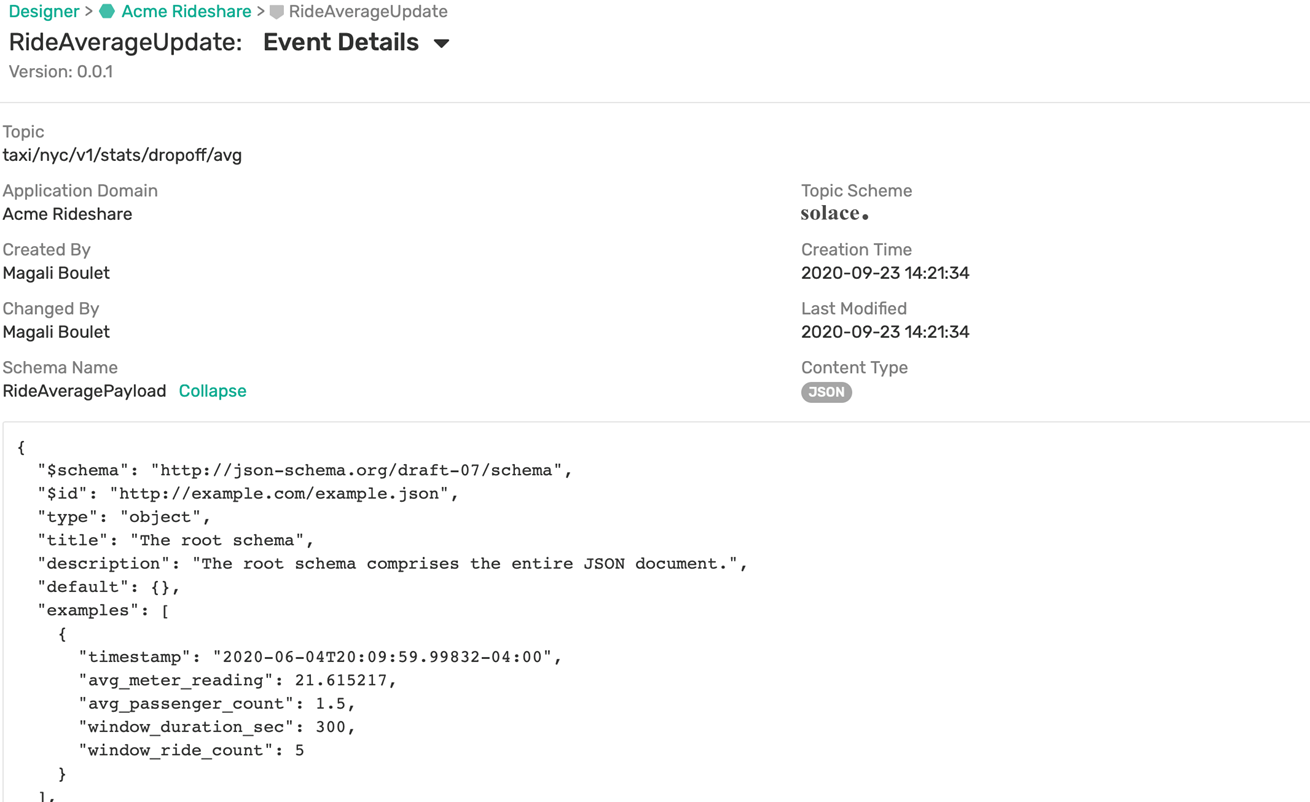
You can also check the details of the event and you’ll find attached the RideAveragePayload schema:
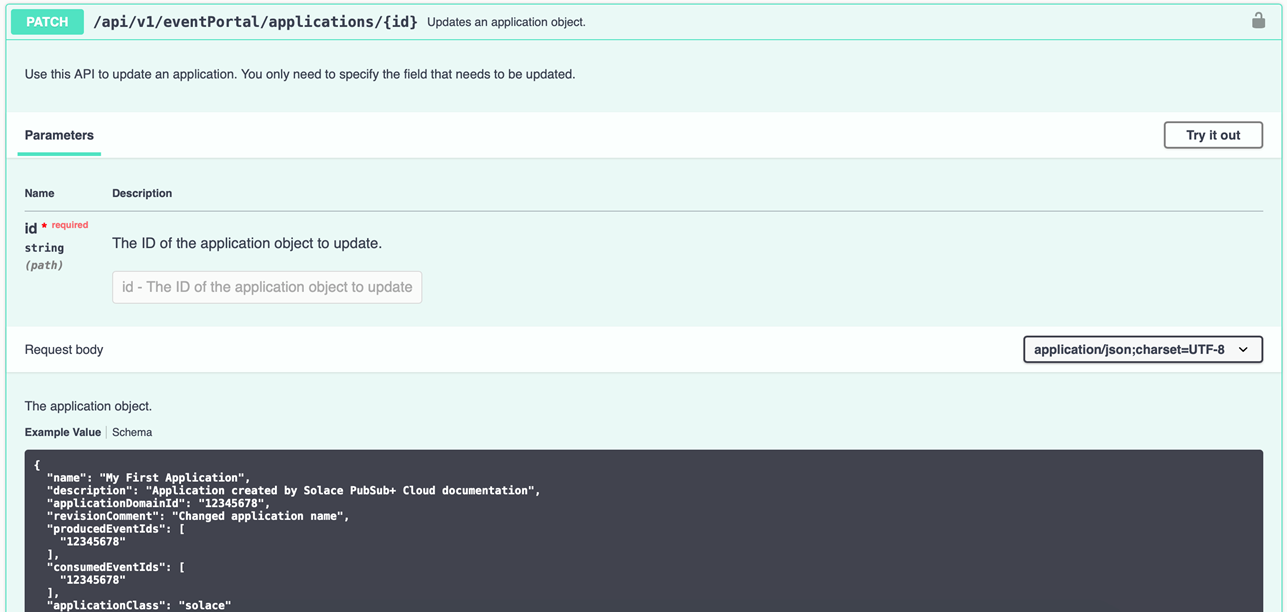
Update the created application
Finally, in order to complete Step 4 of the codelab, you need to update the application RideDropoffProcessor to publish the RideAverageUpdate event. As always, start by understanding how to update an application by reading the OpenAPI specification, in the Applications resource, PATCH verb.
We need the application id (which will be added to the URI) and the fields that need to be updated. In this example, they are the revisioncomment element and the producedEventIds element.
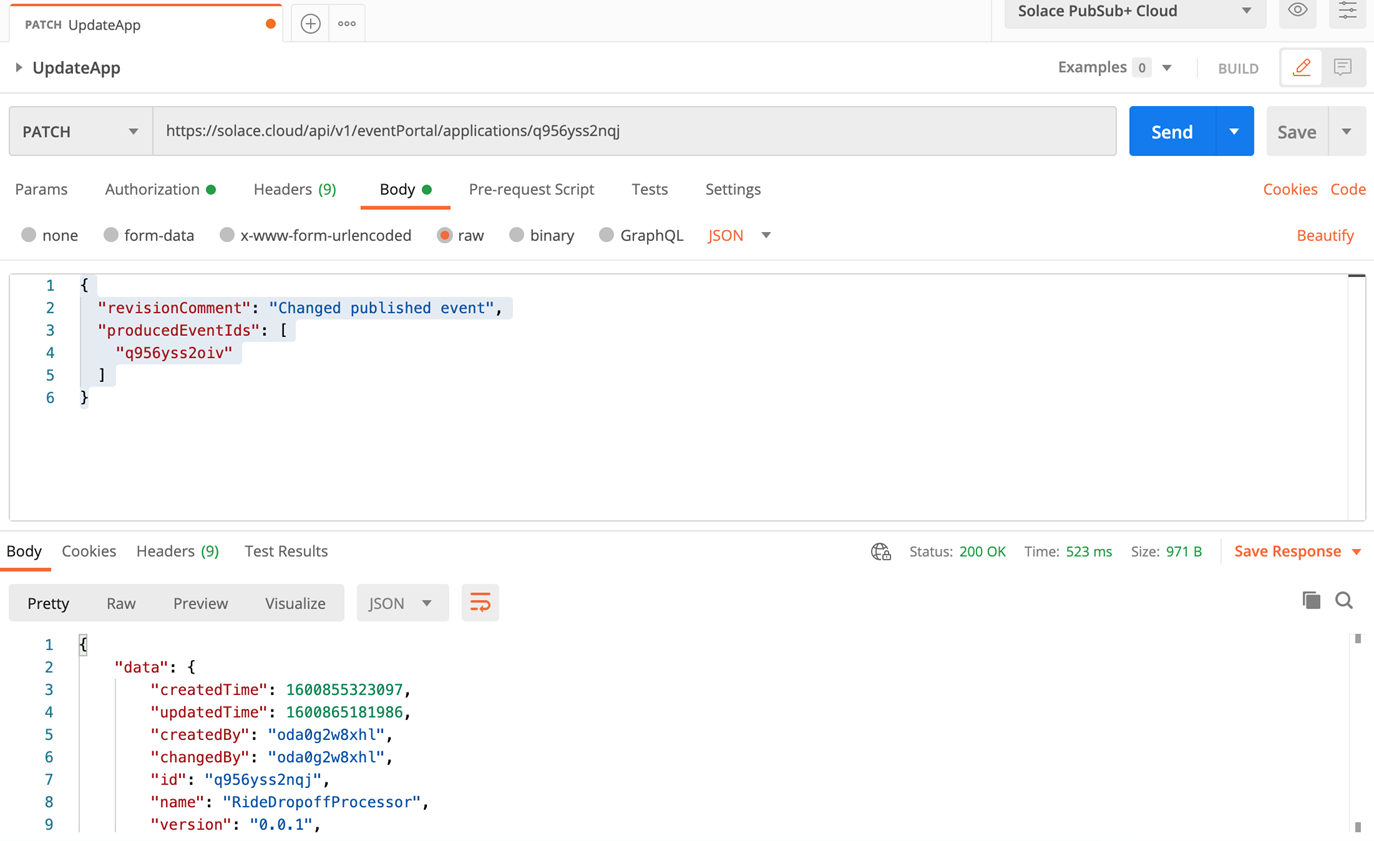
You can now update the application with the following settings:
- Url: https://solace.cloud/api/v1/eventPortal/applications/q956yss2nqj (make sure you use your own application id)
- HTTP verb: PATCH
- HTTP Content-type: application/json
- HTTP Authorization header: add the previously generated token as Bearer Token
- Payload: make sure you add your own event id
{
"revisionComment": "Changed published event",
"producedEventIds": [
"q956yss2oiv"
]
}
If you are using Postman, you should get a response similar to the one below:
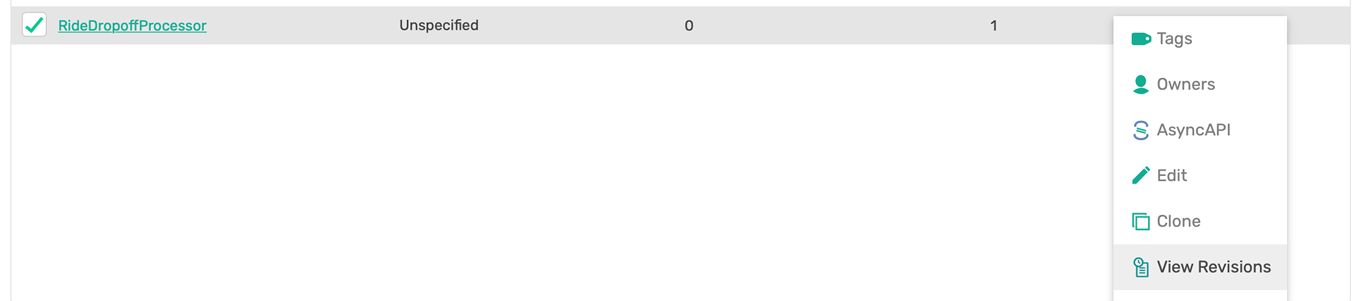
Finally, switch back to Designer to see the event RideAverageUpdate published by the RideDropoffProcessor application:

You can also check the application revision history by clicking the three dots button at the end of the application line:
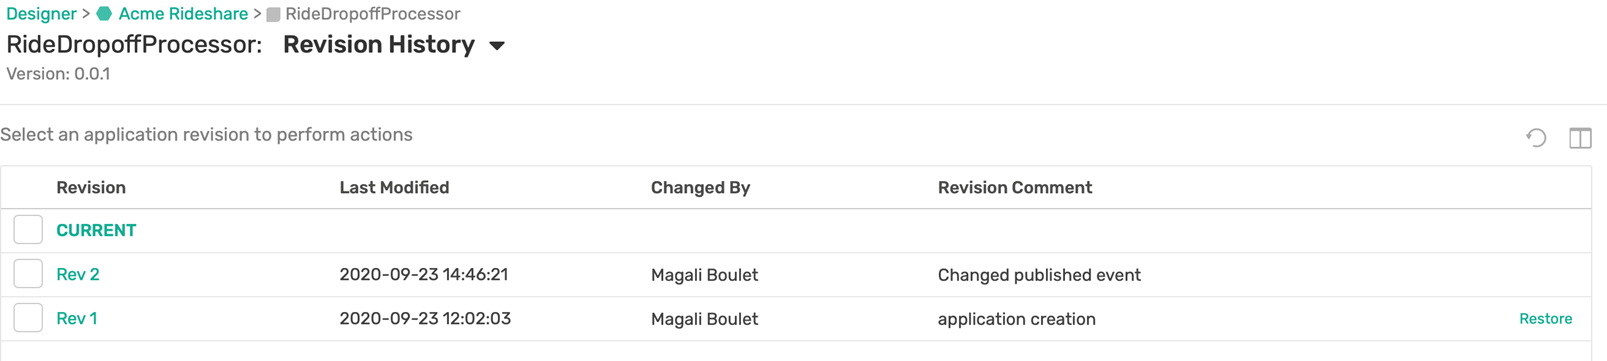
The revision history displays the update performed:
Optional last step: AsyncAPI generation
Now that you have created the application RideDropOffProcessor, you can now begin implementing it. But where to start? And how? One easy way is to start with AsyncAPI, and then use an AsyncAPI code generator.
AsyncAPI has emerged as the industry standard for defining asynchronous, event-driven APIs. You can think of it as OpenAPI for the asynchronous world. It is an open source initiative that provides both a specification to describe and document your asynchronous applications in a machine-readable format, and tooling (such as code generators) to make life easier for developers tasked with implementing them.
The Event Portal REST API enables you to automate the creation of an AsyncAPI document. That will define the application you want to develop. This step describes how to generate this document using the REST API.
So, let’s have a look at the AsyncAPI resource in the PubSub+ Event Portal REST API.
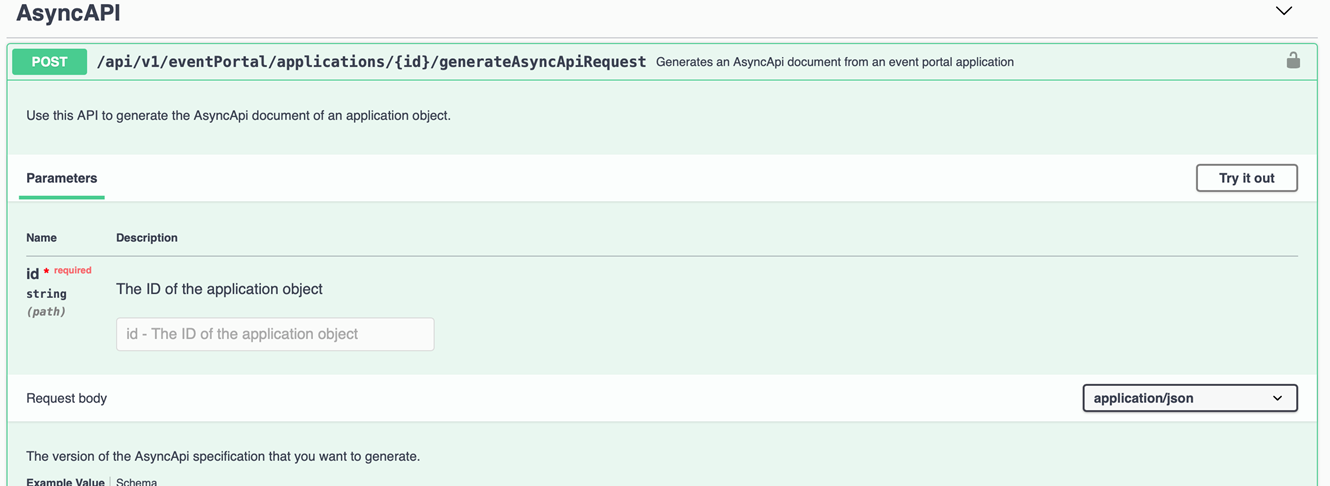
All you need is the application id, which you got previously. It will be passed in the URI and the AsyncAPI version to be generated which will be part of the payload to be sent. You can then generate your AsyncAPI document for the application by using the following settings:
- Url: https://solace.cloud/api/v1/eventPortal/applications/q956yss2nqj/generateAsyncApiRequest (make sure you use your own application id)
- HTTP verb: POST
- HTTP Content-type: application/json
- HTTP Authorization header: add the previously generated token as Bearer Token
- Payload:
{
"asyncApiVersion": "2.0.0"
}
If you are using Postman, you should get a similar response:
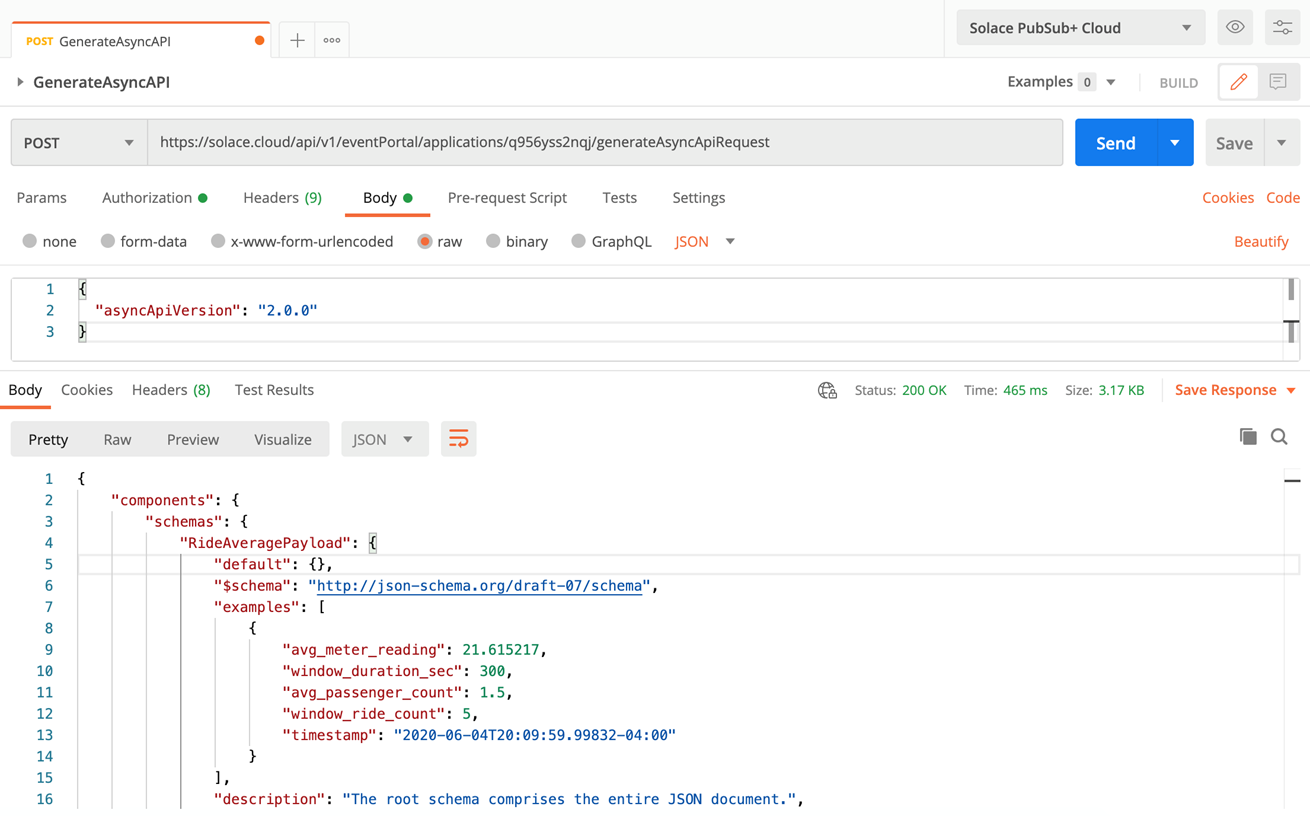
The response contains the AsyncAPI document, describing the RideDropOffProcessor application. Looking for a next step to generate the application code? Refer to Steps 5 and 6 of the codelab.
Conclusion
PubSub+ Event Portal is an excellent tool to design and visualize your event-driven architecture, discover what events exist, and collaborate with your team. Using its REST API, you can automate the creation and modification of all your event-driven artefacts. Using AsyncAPI, your developers can generate the application code skeleton by leveraging the AsyncAPI code generator. If you have any questions about PubSub+ Event Portal and its REST API, post them to the Solace Developer Community.
The post Understanding and Testing the PubSub+ Event Portal REST API appeared first on Solace.


Top comments (0)