Creating a WebAssembly App and Interacting with WAGI
In Part 1, we defined some of the moving parts of the WASM ecosystem and set up a development server with Hippo, Bindle, and the development tooling that we’ll use to dig around with how we can interact with the WAGI runtime.
We’ll start out by connecting to our development server. We could just SSH into the server (and that’s how we’ll start), but for our longer term work, we’ll move to Visual Studio Code and use Remote-SSH extension to more effectively work on our project. Let’s get started.

The cloud-init script left us an output log in output.txt which we can read with
cat output.txt

In that log, we can see that NodeJS, .NET Core, and Rust were installed, along with wasmtime, the hippo CLI, and Yeoman. The last one is what’ll get us started. I like to be organized about my projects, so I’ll create a projects directory and then a directory for helloworld (our exploratory project). There’s also some helpful exports to make the Yeoman generator a bit easier to get started with. The exports are using the same username and password what we configured in the previous post.
After making the environment variables available, it’s time to create our helloworld project. We’ll use the yo-wasm generator.
export USER=admin
export HIPPO_USERNAME=admin
export HIPPO_PASSWORD='Passw0rd!'
export HIPPO_URL=https://localhost:5001
export BINDLE_URL=http://localhost:8080/v1
export GLOBAL_AGENT_FORCE_GLOBAL_AGENT=false

mkdir projects/helloworld
cd projects/helloworld
yo wasm
Yeoman will ask you a few questions:
- What is the name of the WASM module? (the default is the current directory name – which we’ll take)
- What type of application is the module? (For a project with Hippo, we want “Web service or application using WAGI”)
- What is the name of the author? (I filled in my name)
- What programming language will you write the module in? (I chose Rust, because Rust is just fun)
- Where do you plan to publish the module? (We are going to publish it to Hippo)
- What is the URL of your Hippo service? (This is defaults to the value in HIPPO_URL variable that we exported earlier)
- What is the URL of your Hippo’s Bindle server? (This defaults to the value in the BINDLE_URL variable that we exported earlier)
- Would you like to create a new Hippo application for your Hippo app? (“Yes” will connect to the Hippo API with our credentials from HIPPO_USERNAME and HIPPO_PASSWORD, which are asked for in a couple of question, and create the application and several deployment environments – which we’ll look soon)
- What storage ID (bindle name) would you like for your Hippo app? (Since this is a dev box, we’ll accept the default of application name.localhost)
- Enter your Hippo user name (default is pulled from the HIPPO_USERNAME)
- Enter your Hippo password (default is pulled from HIPPO_PASSWORD)

After asking those questions, most of which we take the defaults, Yeoman will scaffold out the project and create the application in Hippo. The project will include a basic “Hello World” application and the necessary files to publish it to Bindle and Hippo. We also get GitHub Actions workflows to make it easier to wire up CI/CD down the road.
At this point, we’ll switch to VS Code and use the VS Code Remote-SSH plugin to connect to our development server. This will give us a great editor experience, simplify port forwarding for local testing, and otherwise simplify our experience.
The Application
We now have the bare minimum required to publish an application to Hippo. The Rust application that was scaffolded down will create a WASM file that can be run in Hippo. Let’s get that started. Since I have a new terminal, I also re-exported the environment variables from the output.txt file to have them handy. Let’s build our app targeting the wasm32-wasi runtime. Then we’ll use the hippo CLI to push the artifact and metadata to our Bindle server.
cargo build --release --target wasm32-wasi
hippo push -k .

Now that we have our test application deployed, let’s see where that ended up.
I’ve used the VS Code Remote-SSH plugin to forward a couple of ports – 5001 and 5003.

The Hippo dashboard is running on 5001 and my app will be published on 5003. I’ve logged on to the dashboard at https://localhost:5001 and entered my username and password. Now, I see my helloworld app with “two channels unhealthy”.
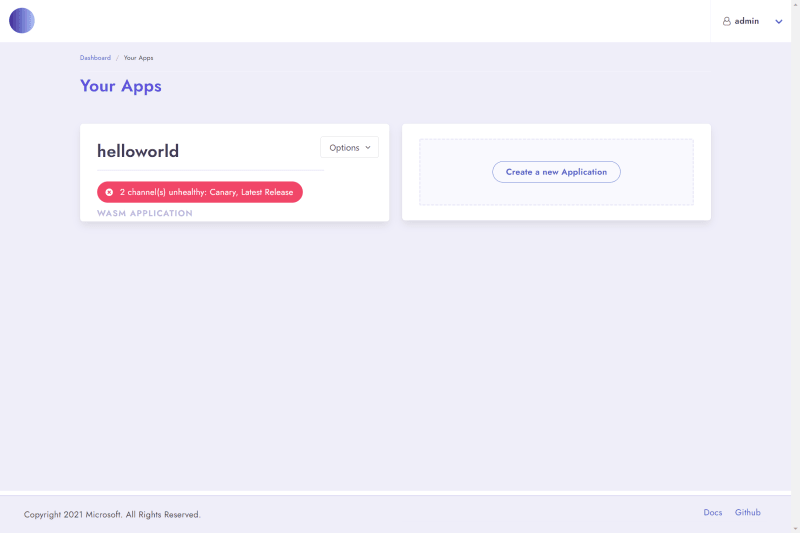
Let’s dig in further and click on helloworld.

The yo-wasm generator configured three environments for our application. We can see that the app we pushed with the Hippo CLI has been published to the development environment. Let’s see how that’s configured. From the three dots to the right of the environment, we can see an option to edit.
In the environment configuration, we can:
- change the domain configured,
- add or edit environment variables and
- specify how we want our app to deploy into this environment.
Autodeploy is configured, with a version spec. The artifacts being looked at are stored in our local Bindle server. As new versions of the application are published, this environment will deploy any newer versions that match the version range.

Let’s see what our application looks like and what content it returns. Back on the application details page, each channel has a dedicated link to that environment. Clicking on the link for the development environment and we should see “Hello, world!”

Now, let’s go back to our editor and start exploring the runtime environment. Let’s start with seeing what environment variables are available to our WASM application. We can edit src/main.rs to print out the environment variables.
use std::env;

fn main() {
  println!("Content-Type: text/plain\n");
  println!("Environment vars:");
  for (k,v) in env::vars() {
    println!("\t{}: {}", k, v);
  }
}
Looking closer at the output that we expect, we can see that we start by writing to standard out the Content-Type header. Then, after a blank line (the \n), we can write out our content.
Once we build and publish that change, we’ll use the REST Client extension to make it easier to validate our changes. I’ll create a test.http file and put a GET request to my development environment.
GET https://admin.helloworld.localhost:5003/
Running that should return a response with the current environment variables as seen by my application. Our response returns a list of variables and their values.
Environment vars:

  PATH_INFO:
  HTTP_TRACEPARENT: 00-74fe18ddc171754089fa3bc394cfbea8-ce7be6b2abfb6847-00
  HTTP_USER_AGENT: vscode-restclient
  REMOTE_HOST: 127.0.0.1
  REMOTE_USER:
  SERVER_PROTOCOL: HTTP/1.1
  SERVER_SOFTWARE: WAGI/1
  HTTP_X_FORWARDED_FOR: 127.0.0.1
  SCRIPT_NAME: /
  X_MATCHED_ROUTE: /
  X_FULL_URL: http://127.0.0.1:32770/
  CONTENT_TYPE:
  GATEWAY_INTERFACE: CGI/1.1
  CONTENT_LENGTH: 0
  PATH_TRANSLATED:
  SERVER_NAME: 127.0.0.1
  SERVER_PORT: 32770
  HTTP_HOST: 127.0.0.1:32770
  HTTP_X_FORWARDED_HOST: admin.helloworld.localhost:5003
  REMOTE_ADDR: 127.0.0.1
  HTTP_X_FORWARDED_PROTO: https
  HTTP_ACCEPT_ENCODING: gzip, deflate
  X_RAW_PATH_INFO:
  QUERY_STRING:
  AUTH_TYPE:
  REQUEST_METHOD: GET
The environment for the process provides a lot of context around the user request. We can see where we’d find our query string parameters (in QUERY_STRING).
GET https://admin.helloworld.localhost:5003/?my=query&string=here
Would set the QUERY_STRING environment variable to
QUERY_STRING: my=query&string=here
And what about the request body? Where would we see that? The CGI standard is that would be treated as standard input. Let’s update our sample app to show how input would come in.
use std::env;
use std::io::{stdin, Read};

fn main() {
  println!("Content-Type: text/plain\n");
  println!("Environment vars:");
  for (k,v) in env::vars() {
    println!("\t{}: {}", k, v);
  }

  let mut input_content = String::new();
  stdin().read_to_string(&mut input_content).expect("Failed to read from standard in.");
  println!("The request body is:");
  println!("{}", input_content);
}
After rebuilding and pushing that to Bindle and Hippo,
cargo build --release --target wasm32-wasi
hippo push -k .
We can make a POST request to the application.
POST https://admin.helloworld.localhost:5003
Content-Type: text/plain

Hello from the request body!

And we'll see a response of:
Environment vars:
    SCRIPT_NAME: /
    REMOTE_HOST: 127.0.0.1
    PATH_INFO:
    X_FULL_URL: http://127.0.0.1:32770/
    GATEWAY_INTERFACE: CGI/1.1
    HTTP_X_FORWARDED_HOST: admin.helloworld.localhost:5003
    SERVER_PROTOCOL: HTTP/1.1
    CONTENT_LENGTH: 28
    HTTP_X_FORWARDED_FOR: 127.0.0.1
    QUERY_STRING:
    AUTH_TYPE:
    REMOTE_USER:
    PATH_TRANSLATED:
    SERVER_PORT: 32770
    HTTP_ACCEPT_ENCODING: gzip, deflate
    HTTP_USER_AGENT: vscode-restclient
    REQUEST_METHOD: POST
    SERVER_SOFTWARE: WAGI/1
    HTTP_X_FORWARDED_PROTO: https
    HTTP_TRACEPARENT: 00-ac52510305f6fc4c94dab9ec51e4bf1d-609c9e1830b79343-00
    X_RAW_PATH_INFO:
    REMOTE_ADDR: 127.0.0.1
    SERVER_NAME: 127.0.0.1
    HTTP_CONTENT_TYPE: text/plain
    CONTENT_TYPE:
    X_MATCHED_ROUTE: /
    HTTP_CONTENT_LENGTH: 28
    HTTP_HOST: 127.0.0.1:32770

The request body is:
Hello from the request body!
We’ve now got a way to run our application, get parameters and return ouput. There are a few other things to mention before we move to part three of this post. We can return non-200 status messages by writing the status to standard out, like:
println!("Status: 404");
We can set other return headers the same way. If we want to send a redirect, we can send a “Location” header and the status will be automatically set to 302 for us.
Now that we have a handle on the runtime environment, let’s take a small CLI I’ve built and convert it to a WASM application.

Top comments (0)