This is a tutorial-style getting started guide for the OpenZeppelin Defender Serverless plugin.
Install Serverless
This step installs the Serverless NPM package globally and walks you through setting up AWS credentials.
$ npm i -g serverless
$ serverless
Select AWS - Node.js - Starter and accept the remaining defaults. You will be walked through the creation of the relevant AWS credentials.
When the AWS setup is complete, cd into the project directory and run serverless deploy to try out the service.
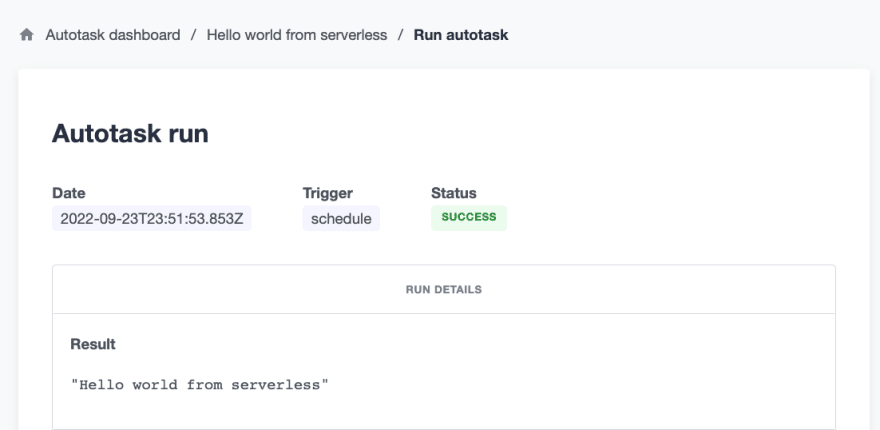
Run the example function with serverless invoke --function hello
serverless remove will remove the example project from deployment.
Download Defender-Serverless Template
Defender-serverless comes with an example configuration you can use as a template for further development.
Initialize the example project:
$ sls install --url https://github.com/OpenZeppelin/defender-serverless/tree/main/template -n hello-world
Next, you'll need to supply your Defender Team API credentials.
$ yarn add dotenv
$ touch .env
Save your Defender API key and secret in .env
TEAM_API_KEY=
TEAM_API_SECRET=
Review the code in serverless.yml. Note the syntax for creating an Autotask (code supplied in autotasks/index.js) and a Relayer.
Add the following line to indicate where the plugin should look to find your environment variables:
useDotenv: true
IMPORTANT:
Ensure that you leave ssot: false. Setting ssot: true will overwrite your existing Defender configuration with that which is defined in the .yml file.
Deploy with serverless deploy
❯ sls deploy
Running "serverless" from node_modules
========================================================
Secrets
Contracts
Relayers
✔ Created API Key (mystack.relayer-1.key1) for Relayer (41d99bcc-8457-4615-9e18-1d7068c48e06)
✔ Created mystack.relayer-1 (41d99bcc-8457-4615-9e18-1d7068c48e06)
Autotasks
✔ Created mystack.autotask-example-1 (207c958e-699b-46c0-b9c9-550278ae1b65)
Notifications
Sentinels
========================================================
Running this command adds the declared configuration to your Defender instance.
You can view the Hello World Autotask by selecting Hello world from serverless from the Defender Autotask dashboard:
Congratulations! With this plugin, you can quickly declare Defender configurations that you would like to reproduce or iterate on in multiple environments.
If you have developed configurations you'd like to share, feel free to post your setup on the OpenZeppelin community forum!

Top comments (0)