A couple of years back, I was struggling to manage my documents - tried all available cloud storages and even thumb drives. Nothing came handy and also searching documents in cloud storage was never easier for me. So, I decided to build a chatbot which can send me documents whenever I ask for it. That's when I built Nila, my first personal chatbot.
Often people ask me how I built Nila. They were surprised when I said it is not a rule-based chatbot and it can understand my language. So, later I added more features to it, but that's a different story.
Since it created a lot of interest among my friends and community, I thought of writing an article about how I built it. And, here it is.
The Tech Stack
I wanted it to be a very thin setup and without major maintenance. As soon as this requirement was decided, the first thing that popped into my mind was serverless architecture. The best thing about it is that I don't have to maintain a server - deploying code was a lot easier compared to server infrastructure. The next question that came to my mind was where to store all this information. This is where my 'Swiss army knife' of product development comes into play. In addition, I decided to use Firebase for everything other than the NLP part.
So, the final tech stack was drilled down to:
- Firebase Cloud Functions - Backend Processing
- Firebase Storage - File Storage
- Firebase Firestore - For Database
- Dialogflow - For NLP
The Infrastructure
The next step was to come up with an infrastructure to build an architecture design that becomes the core. Since the entire system is broken down into distributed modules, I came up with the below setup.
The Use Case
In this article, I'm going to set a simple use case of requesting weather information from the chatbot. And for this, we'll be using the OpenWeatherMap API. So in case, you're going to try the same, sign up for it and get yourself an API Key
Creating the Telegram Bot
Creating bots in telegram is pretty much fun but there is no fancy UI to do that. All you have to do is just ask another bot to create your bot.
There is a bot in telegram called Bot Father and you have to message the bot to create or manage your bots.
Send /start to bot father and it will show you the list of the available options.
Just click on the /newbot hyperlink and it will automatically send the slash command to create a new bot for you. Following that, you'll be asked for some basic information like Name for the bot, username (remember it should end with "bot").
On completing, you'll get a token displayed in the final message from bot father. This token is very important so copy it safely somewhere. In the following sections, we'll refer to this token as the telegram bot token or shortly bot token.
Setting Up Dialogflow
The user-facing piece is now ready. Let's now focus on the bridge part which is our Dialogflow. Setting up DialogFlow is as simple as setting up the telegram bot. All you've to do is to sign up for Dialogflow and create a new agent.
That's it! You're all set with the Dialogflow project. Now, let's go ahead and connect our telegram to the Dialogflow project.
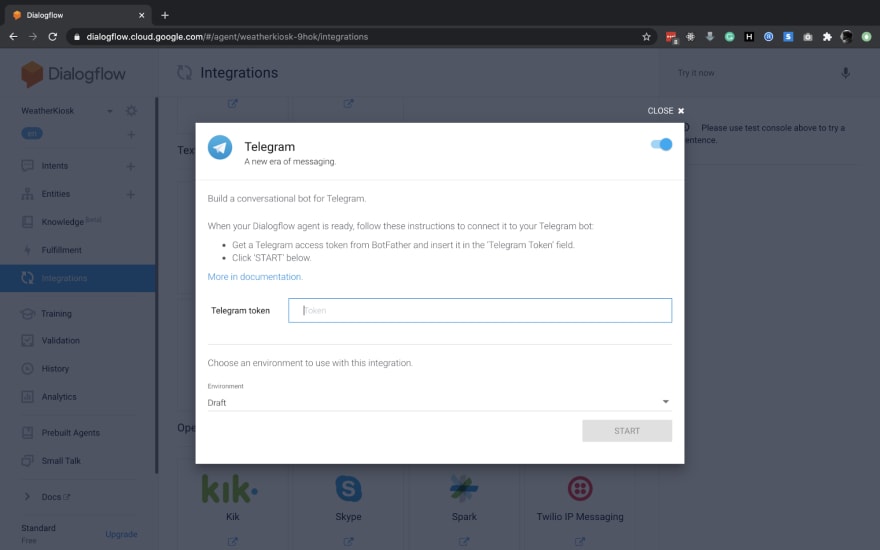
Navigate to the integration option in the Dialogflow sidebar. This page will list all the possible platforms that Dialogflow can seamlessly integrate. You can navigate to Telegram and enable the platform. This will bring up an option to configure your bot with the help of the bot's token ID - the token that we got from telegram's bot father earlier.
Paste the token in the telegram token field of the modal and click on start to complete your operation. As you connect both of these services, you're ready to talk to your bot.
Click on the bot's link that's available in the last message from bot father to start the bot. Now, all you can send is just "Hi" and a few other basic greetings. This is because Dialogflow comes with basic greetings inbuilt and for anything more you need to configure it.
Setting up the Weather intents
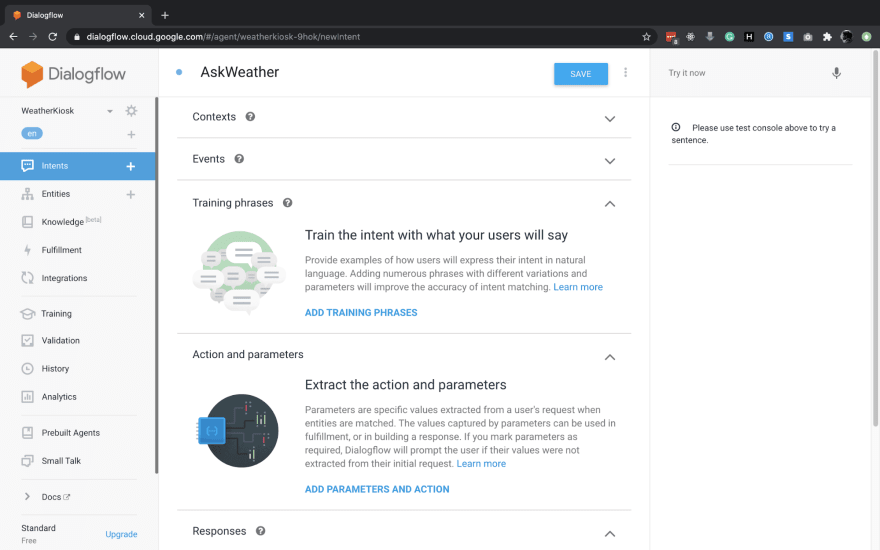
Let's make the bot more meaningful by making it understand what we're trying to ask. To do that we need to create something called Intents in Dialogflow (This is quite a common term used in chatbot domain). Intents are nothing but conversations that happen between the bot and the user. In our case, we're going to ask the bot to give us the weather information, so let's create an Intent called "AskWeather".
The real magic happens when we configure the training phrase.
The training phrases are nothing but the statements that the user asks or tells the bot in the conversation. In our cases, the phrases could be any of the following for weather information
"What's the weather in Dubai?"
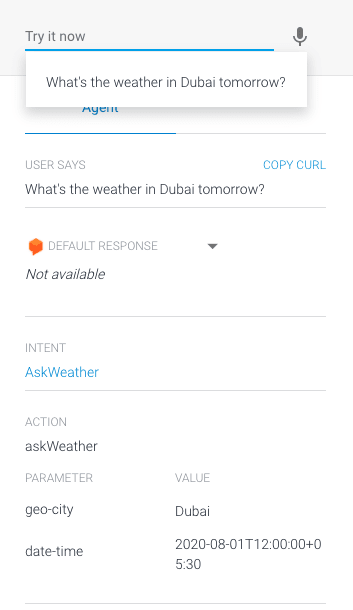
"What's the weather in Dubai tomorrow?"
Also, if you notice there is certain information hidden inside these statements, which is nothing but the city of which we're asking the weather for and the time or date. Dialogflow is smart enough to identify these in our conversation and extract them as variables. In case, if the bot is missing it we can also configure ourselves by just selecting and mapping it.
On scrolling down, you can see "Action and Parameters" which is where we define the properties required and action mapped to this specific intent.
Actions in Dialogflow intents are nothing more than a namespace that we give to the action performed in webhook, as a result of this intent to get data from your customer services.
In our case, the city and date are the possible params, but it could be more down the line which we can add on the fly. Also, I've made the city parameter as required field as we won't be able to get the weather information without a city or location. But, the date is optional since we can assume that the user is asking for today's weather, in case if it is not mentioned implicitly.
Now, that we've configured the intent, we can start testing it. Before that, save the intent and then the system will take some time to retrain the agent. So once it's trained, you can try asking the bot in the interface to the right side.
In the right section, after asking your question the DF system will parse the statement and show you the action and parameter for the corresponding user phrases.
Setting Up Cloud Functions
The dialogs are set now! Time for the geeky stuff. Not every dialog can be answered with some static reply or a bunch of static questions. This is where the webhook/fulfilments come into the place where we can configure intents to be handled by your server. In our case, as our title says we're going to use firebase cloud functions as our backend.
Let's get started by creating our new firebase project in our local system. In this article, I'm going to use an existing firebase project.
Setting up the local project
Create a new folder in a location in your machine and initialize a firebase project.
npm install -g firebase-tools
mkdir WeatherKiosk
cd WeatherKiosk
firebase init
The initializer will be a wizard which asks you the project and the modules we need for the project. I'll be selecting the project and the functions as the module.
On completion, you'll be finding a functions folder where we have the server code. Let's write an endpoint for Dialogflow to use as webhook/fulfillment.
functions/index.js
const functions = require("firebase-functions");

exports.chatWebhook = functions.https.onRequest((request, response) => {
  response.json({
    fulfillmentMessages: [
      {
        text: {
          text: ["Text response from webhook"],
        },
      },
    ],
  });
});
Now, this endpoint will send back a simple text response. For now, I'm having this as a dummy text response. In the later stages, we'll configure the weather API for getting the expected weather data.
Let's take it to live by deploying the functions with the below code.
firebase deploy --only functions
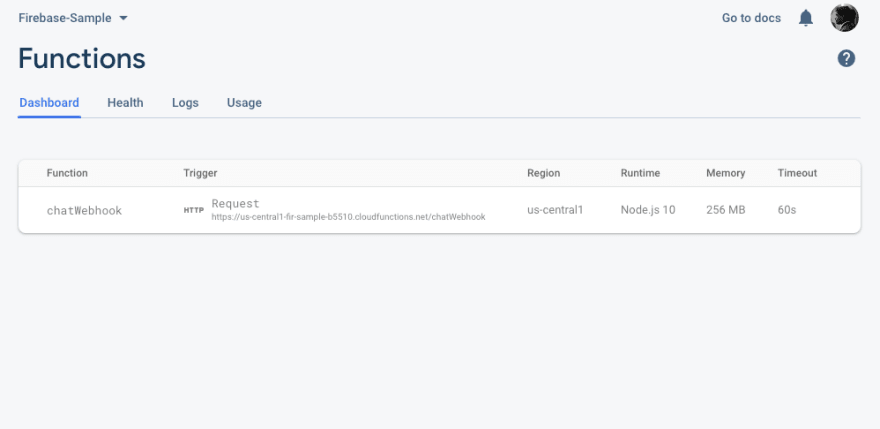
After deploying you can get the endpoint from the firebase function's console. Copy the URL, this will be our Webhook's URL in DF.
Configuring the fulfillment in Dialogflow
In the sidebar of the Dialogflow agent, you'll find the fulfillment section where you need to configure.
Post that you can configure the intent to use the fulfillment like below.
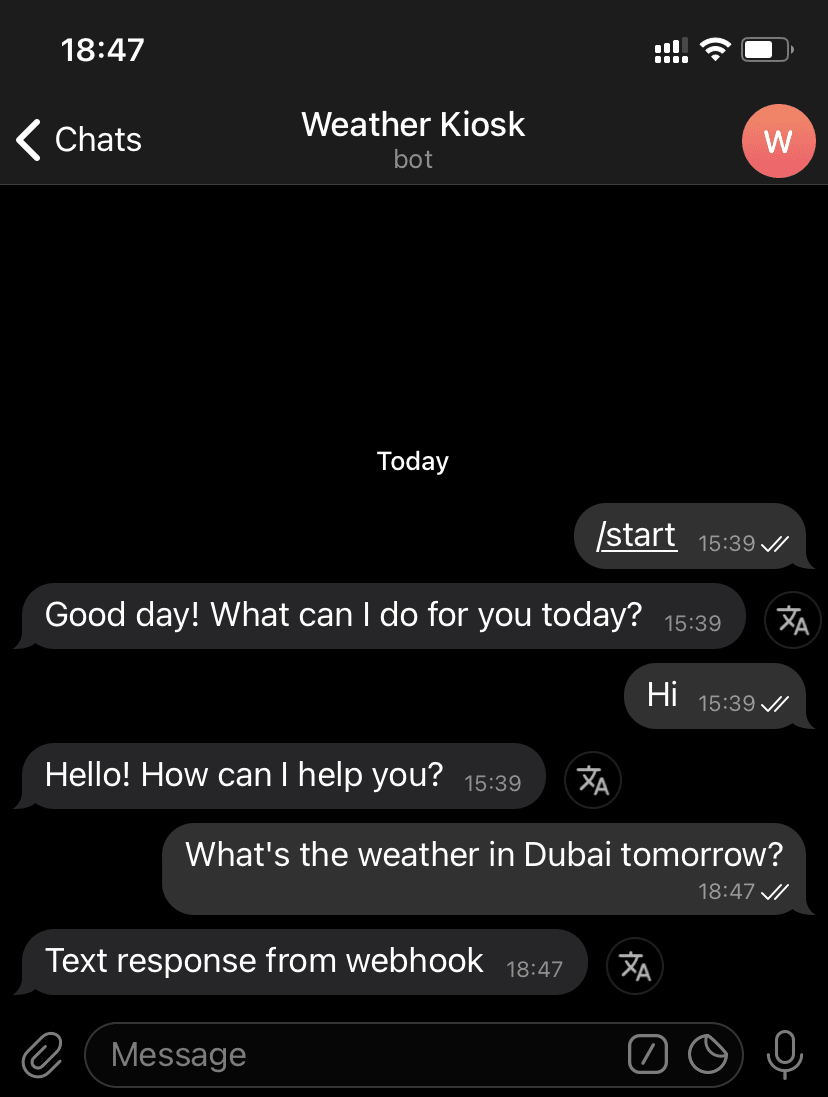
Let's check if it works by sending a message to the bot. The bot has to reply "Text response from webhook" then we can confirm that it works.
The Final Code with API Integration
I've updated the function to parse the params and actions and make the corresponding call to Weather API, and generate the text response that will be sent to the user as bot's reply.
function/index.js
const functions = require("firebase-functions");
const Axios = require("axios");

const WEATHER_API_KEY = "YOUR OPENWEATHERMAP HERE";

const responseBuilder = (msg) => ({
  fulfillmentMessages: [{ text: { text: [msg] } }],
});

exports.chatWebhook = functions.https.onRequest((req, res) => {
  let body = req.body;
  let { parameters, action } = body.queryResult;

  if (action !== "askWeather") return res.json(responseBuilder("Unable to process your query"));
  let city = parameters["geo-city"];
  let url = `https://api.openweathermap.org/data/2.5/weather?q=${city}&appid=${WEATHER_API_KEY}`;

  return Axios.post(url)
    .then((result) => result.data)
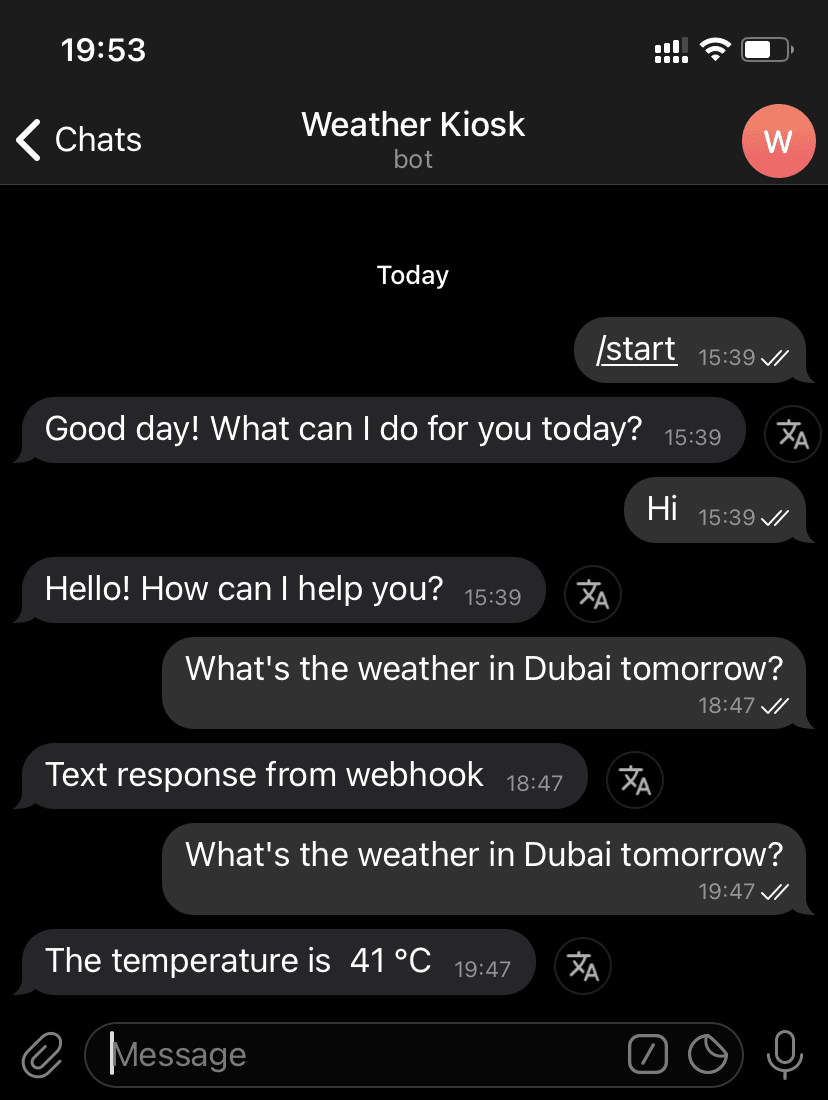
    .then((data) => `The temperature is  ${Math.round(data.main.temp - 273.15)} °C`)
    .then((message) => res.json(responseBuilder(message)))
    .catch((err) => res.json(responseBuilder(err.message)));
});
In the above code, we're extracting the action and the parameters from the body which is sent by Dialogflow when the user asks the question.
After deploying the function, the bot will be able to process the user's message with the help of the webhook.
This is just a very small example of what Dialogflow can do, but you can do a lot more with it. It also provides some custom formatting for telegram like inline buttons, links, etc.







Top comments (0)