
If you were to google "install azure cli on linux". Chances are you'
re going to come across the following guide from Microsoft on how to do it. I also tried a python package that wasn't working for me but you may have more luck.
The issue is if you're using a Linux distribution that isn't Debian or Ubuntu it seems like there's no hope. For me, using Linux Mint 19.3 I couldn't see the issue initially, then I noticed lsb_release -cs in the 3rd step of the above guide. This outputs just the codename of your distribution. And if there is no target for it you're not only not getting your new shiny CLI but you get a malformed repository in your software sources.
Let's do this
Firstly, assuming you have blindly followed Microsofts guide as I did then we need to remove that malformed repository. The easiest way to do it for this step is to open a GUI, blasphemous I know. Anyway, in Linux Mint I open up "Software Sources", select the "Additional repositories" section and remove all Microsoft repos.
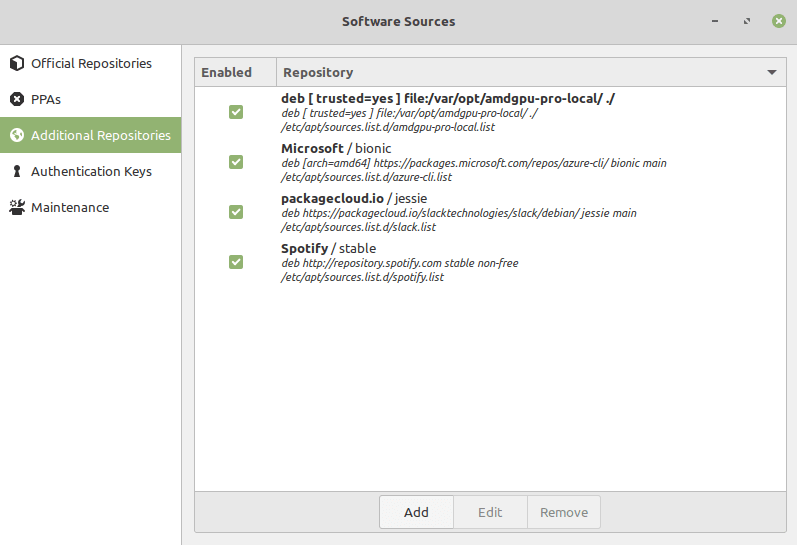
If you're not using Linux mint there will be something similar for you just have a look around.
Now that's dealt with let's add the correct repository for our system. We need to know what version our distro is based on. For mint there is this handy table. Where Linux Mint 19.x is based on Ubuntu Bionic Beaver. With the codename being bionic. Or you can just use the command cat /etc/upstream-release/lsb-release, my output is:
DISTRIB_ID=Ubuntu
DISTRIB_RELEASE=18.04
DISTRIB_CODENAME=bionic
DISTRIB_DESCRIPTION="Ubuntu 18.04 LTS"
Now we can do some installing. For ease, I'm copy and pasting the first 2 steps from the Microsoft guide.
Packages for install process:
sudo apt-get update
sudo apt-get install ca-certificates curl apt-transport-https lsb-release gnupg
Download and install Microsoft signing key:
curl -sL https://packages.microsoft.com/keys/microsoft.asc |
    gpg --dearmor |
    sudo tee /etc/apt/trusted.gpg.d/microsoft.asc.gpg > /dev/null
You may have to remove the new lines after the | (pipes).
Next, the new and improved, add Azure CLI repository:
echo "deb [arch=amd64] https://packages.microsoft.com/repos/azure-cli/ bionic main" |
sudo tee /etc/apt/sources.list.d/azure-cli.list
Again here with the new line removals. Notice that bionic is added in there. If your system is not using bionic swap it out for whatever your systems codename is.
Now it's just a case of the usual install:
sudo apt-get update
sudo apt-get install azure-cli
You should be set to do all the azure commands :)
Issue submitted: https://github.com/Azure/azure-cli/issues/12758


Top comments (1)
Amazingly helpful article! I spun my wheels on this issue for roughly six hours, until your instructions became even more clear. The "cat" command that produced the codename of my Distro was the breakthrough I needed... I followed along with your details and substituted "jammy" instead of "bionic" in your example, and everything worked beautifully... Huge breakthrough for me learning a new technology....