
In this project we are going to build on the multi-branch pipeline we set up in the previous project( see here https://shorturl.at/cuCJL). So the main focus for this article will be the deployment stage. Our objective is to connect to a remote server (EC2 Server) via from Jenkins using a SSH Agent and execute docker commands to create a container that runs an application.
Prerequisites:
- AWS account with EC2 instance.
- Docker Hub account with Docker image.
Server 1: Jenkins Setup
- Launch an EC2 instance for Jenkins (Server 1). we have already set up a Jenkins server in the previous tutorial. See the link above.
Server 2: EC2 Instance Setup
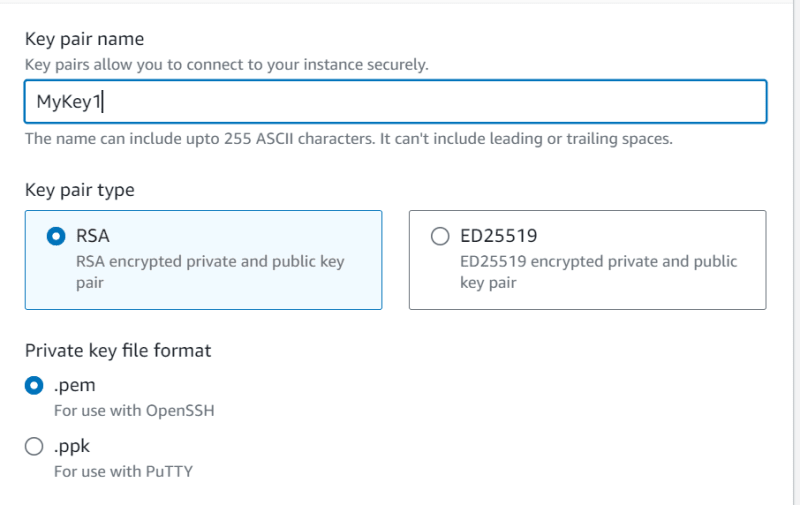
- Launch another EC2 instance for your application (Server 2) Create a new key pair and store it in a secure and accessible location on your computer. I have chosen .pem format as I am using Linux.
- SSH into the server using the private key and install Docker:
   sudo yum update
   sudo yum install docker.io
- Start Docker service:
   sudo systemctl start docker
   sudo systemctl enable docker
- Add ec2-user to docker group to be able to execute commands:
sudo usermod -aG docker $USER
Log out and log back for it to take effect.
- Login to docker
Jenkins Configuration
- Install SSH Agent plugin.

- Configure SSH agent in Jenkins:
Inside credentials for multi-branch
Go to "Manage Jenkins" > "Manage Credentials" > "Global credentials" > "Add Credentials".
Choose "SSH Username with private key".

- Give it an ID, enter the username (
ec2-user), paste the private key downloaded earlier (for server 2).

- Add SSH Agent credentials to the Jenkins file:
Jenkins has a cool feature that will generate the syntax needed for any plugin. Inside the Multi-branch pipeline go to 'Pipeline Syntax'
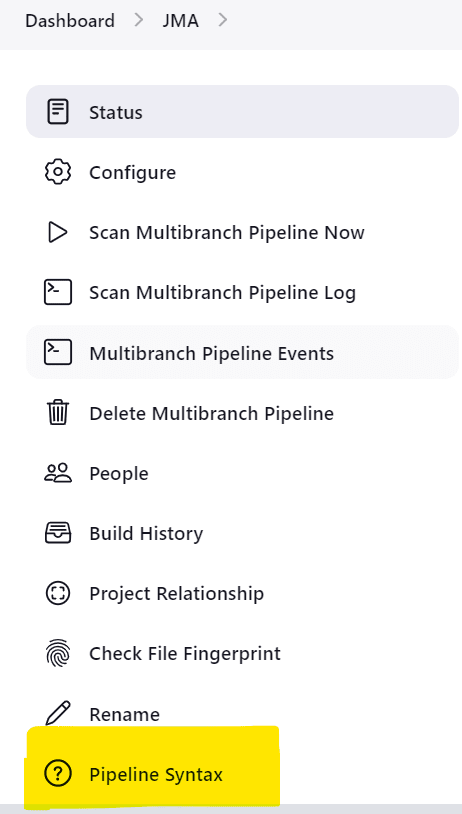
Choose the 'sshagent: SSH Agent', choose 'ec2-user' and generate.

Now, lets paste the generated syntax in to our Jenkins file and add our logic.
stage("deploy") {

            steps {
                script {
                    echo 'Deploying docker image to EC2'
                    def dockerCmd = "docker run -p 8080:8080 -d shersi32/myapp:1"
                sshagent(['ec2-server']) {
                  sh "ssh -o StrictHostKeyChecking=no ec2-user@54.175.82.44 ${dockerCmd}"
                    }
                }
            }
A few points about out the Jenkins file:
- We created a variable for the docker run command to make things easier.
- The "-o StrictHostKeyChecking=no" command suppresses pop ups (basically questions that may prevent the commands from executing)
- Finally, there is no need for 'docker login' since we have logged in already (see above)
Save the Jenkins file.
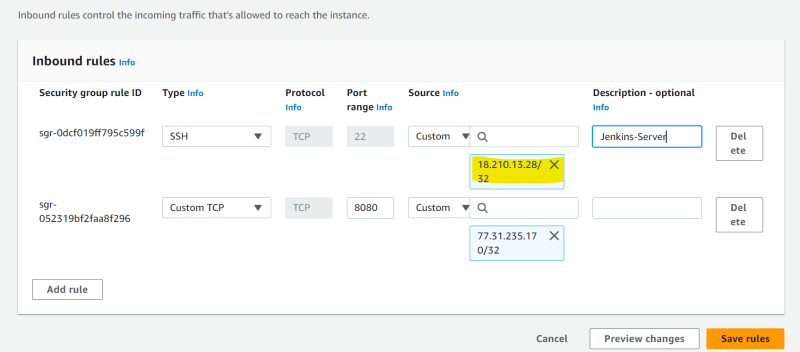
Configure the Firewall on Server 2 (EC2)
Add an inbound rule for server 2 to allow SSH access from the Jenkins server.
Now lets see it in action
- Commit your code changes to the Git repository.
- Trigger the Jenkins pipeline manually
- Jenkins will build your Docker image, push it to Docker Hub.
- Then for the deploy stage, Jenkins will SSH in to the EC2 Server, pull the image from Docker Hub and start the container.
Here is the stage view of the pipeline:

And the logs for the 'deploy' stage:

Now lets check out the EC2 server:

And we did it! There is the container up and running!
All that's left now is to access our application using a browser. we just need the the public IP address and the port.
So, for us it is 54.175.82.44:3080.

And there it is, Brilliant!
So, That's all from me for now. I hope this blog is useful!
_Feel free to contact me with any feedback/questions/suggestions. _


Top comments (0)