Multi-Factor Authentication (MFA) is an important part of a secure authentication process, but it's painful for developers to set it up correctly.
In this post, I will walk you through to setup MFA in a sample application to add extra level of security.
Pre-requisites
All you need to get started is a Magic account.
New to Magic? Sign up for free
Set up
Add the login form script
Create a new login page index.html and add the script tag below.
<head>
  <meta name="viewport" content="width=device-width, initial-scale=1" />

  <!-- Start the login flow just by including this script tag! -->
  <script
    src="https://auth.magic.link/pnp/login"
    data-magic-publishable-api-key="pk_live_7F4F8AEF74A0C9BC"
    data-redirect-uri="/callback.html"
  ></script>
</head>
Your API key can be found on the Home page of your Magic Dashboard.

This will generate a pre-built login form based on the branding and login methods you’ve enabled via Dashboard.
Add the callback script
Next, create a callback.html page containing the script tag below to handle the authentication callback.
<!DOCTYPE html>

<head>
  <meta name="viewport" content="width=device-width, initial-scale=1" />

  <!-- Automatically handle auth callback using Magic! -->

  <script
    src="https://auth.magic.link/pnp/callback"
    data-magic-publishable-api-key="pk_live_7F4F8AEF74A0C9BC"
  ></script>

  <!-- Use data from Magic! -->

  <script>
    window.addEventListener("@magic/ready", (e) => {
      const { idToken, userMetadata, oauth } = e.detail;
    });
  </script>

  <link rel="stylesheet" href="/css/main.css" />
</head>

<!-- UI implementation -->

<body>
  <div class="page">
    <h1>Now let's enable MFA</h1>
    <div class="data">
      <a class="link" href="/settings.html">Open user settings</a> to enable
      MFA.
    </div>
    <div class="data">
      Once enabled, <a class="link" href="/logout.html">log out</a> then log
      back in to try multi-factor login.
    </div>
  </div>
</body>
Upon a user's successful login, you may wish to perform your own client-side and server-side business logic. To do so, you can hook into the @magic/ready event on the window object of the page containing your https://auth.magic.link/pnp/callback script.
The @magic/ready event contains an object of custom data attached to event.detail. The following fields are surfaced:
-
magic- An instance of Magic JS which can be used to interface with any Magic methods at a low-level. -
idToken- A DID token for the user. -
userMetadata- Up-to-date user metadata for the user. -
oauth- An OAuth response for the user, if the login method was initiated through an OAuth provider — otherwise, this field isundefined.
Add the logout script
Now, create a logout.html page containing the script tag below to handle the logout function.
<!DOCTYPE html>

<head>
  <meta name="viewport" content="width=device-width, initial-scale=1" />

  <!-- Automatically handle logout using Magic! -->

  <script
    src="https://auth.magic.link/pnp/logout"
    data-magic-publishable-api-key="pk_live_7F4F8AEF74A0C9BC"
    data-redirect-uri="/"
  ></script>
</head>
Implementing User Settings for MFA
Magic provides an out-of-the-box settings widget through which your users can self-service different functions of their account, including enabling or disabling multi-factor auth (MFA).
Now, create a settings.html page containing the script tag below:
<!DOCTYPE html>

<head>
  <meta name="viewport" content="width=device-width, initial-scale=1" />

  <!-- Automatically handle logout using Magic! -->

  <script
    src="https://auth.magic.link/pnp/settings"
    data-magic-publishable-api-key="pk_live_7F4F8AEF74A0C9BC"
    data-redirect-uri="/callback.html"
  ></script>
</head>
Users will automatically be redirected to the URI provided in data-redirect-uri (or, if no value is provided, a relative path of /callback) upon dismissal of the settings widget. In your custom callback logic, you will have access to a prevUserMetadata field on the @magic/ready event data so that settings updates can be manually diffed and utilized in your app. If a user is not currently logged-in upon accessing the settings widget, they will be automatically redirected to the URI provided in data-login-uri (or, if no value is provided, window.location.origin is used instead).
Add some CSS to look nice
Create a css/main.css file and paste the below code:
.page {
    height: 100%;
    width: 100%;
    display: flex;
    flex-direction: column;
    align-items: center;
    justify-content: center;
  }

  .page a {
    margin-top: 1rem;
  }

  .data:not(:first-child) {
    margin-top: 2rem;
  }

  .data label {
    font-size: 1.5em;
    font-weight: bold;
    font-family: "Roboto", sans-serif;
  }

  .data pre {
    background-color: gainsboro;
    padding: 1.5em;
    width: 500px;
    border-radius: 1em;
    overflow-x: auto;
  }

  h1 {
    color: #18171a;
  }

  .data {
    font-family: Inter;
    font-style: normal;
    font-weight: 600;
    font-size: 18px;
    line-height: 28px;
    max-width: 368px;
  }

  .link {
    color: #6851ff;
  }
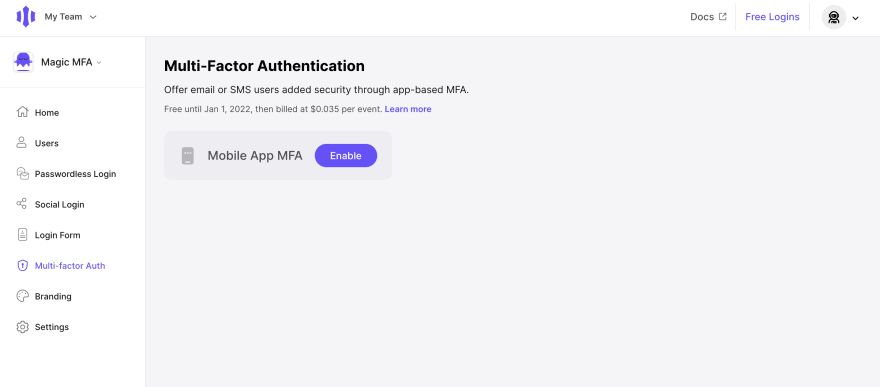
Enable MFA in Dashboard
Enable through Multi-factor Auth Dashboard page.
User's 1st login flow after MFA is configured

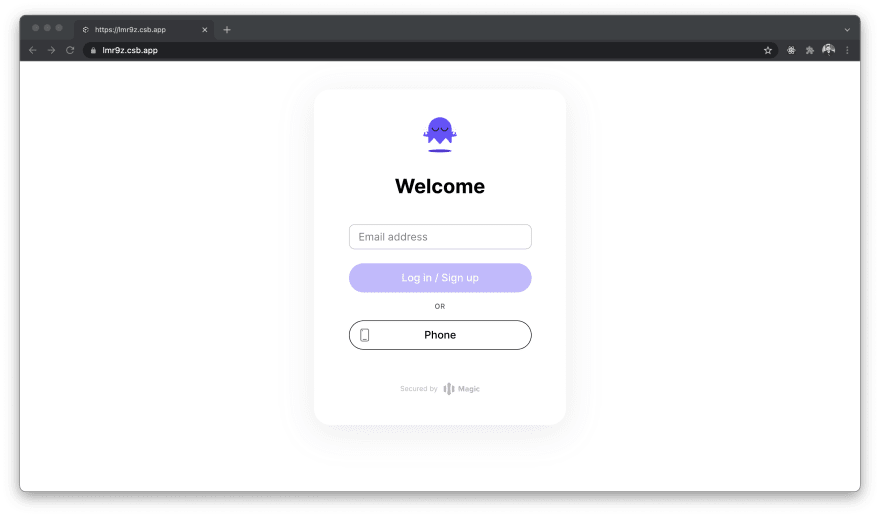
It's time to check MFA in our application. The home page(https://lmr9z.csb.app) would look something like above 👆, with Email and SMS login option enabled. You can enable Social login options too, but MFA is currently supported for email and SMS primary factors.
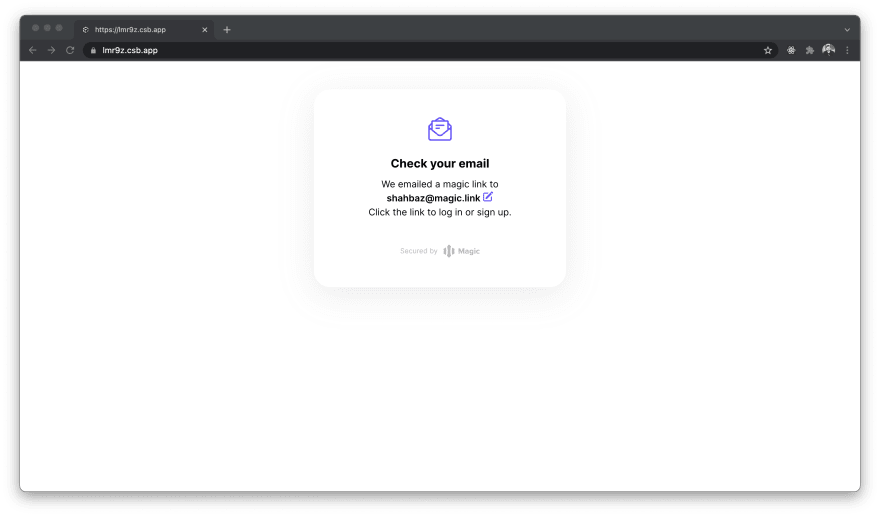
Upon providing your email and clicking Log in / Sign up button, you will see a pop-up window saying "Check your email".
Note: Don't close this tab, Check your email and click the link to log in.

Upon successful login, you'll be redirected to callback page. Here, we will enable MFA. Once enabled, upon next login, MFA flow will be used.
Let's open the user's settings page by clicking Open user settings link on the page.

Here, you'll see the 2-step verification as OFF.
Click on Turn on button to enable it.

You'll need to choose an authenticator app like Google Authenticator or Authy to enable two-step verification.

Now, scan the QR code displayed with your authenticator app and click on the Next button.

In this step, please enter the 6-digit code from your authenticator app.

Upon success, you'll be prompted to save your recovery code. Store this in a safe place. This code can be used to log in if you lose access to your authenticator app.

Click on Finish setup.

2-step verification status is now ON.
Logout and Log back in to see the MFA in action.
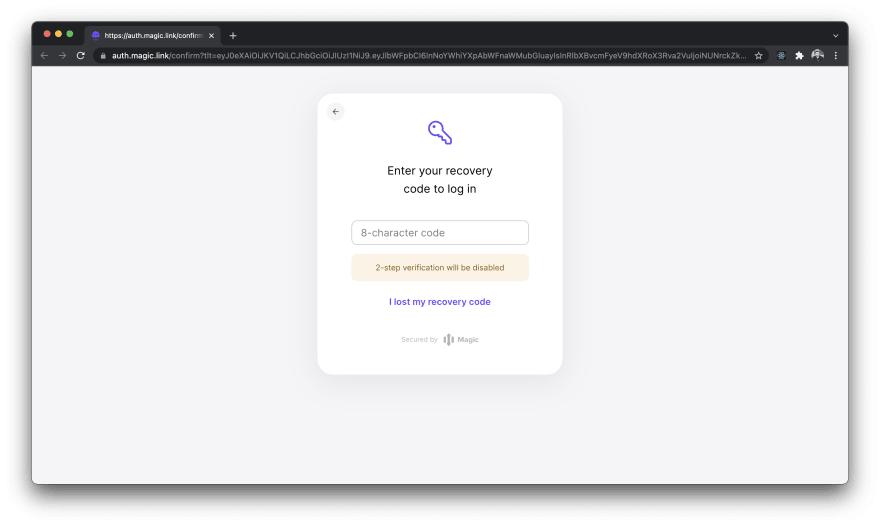
In your next visit, upon clicking the link in your email, you'll be prompted to enter the 6-digit code from your authenticator app or the same recovery code you stored in some place safe.

That's it for this post, I hope to see your application using MFA.
Here are some useful links:
- Live Demo: https://lmr9z.csb.app
- Code on GitHub: https://github.com/magiclabs/example-mfa
- MFA: https://magic.link/docs/login-methods/mfa
- Magic: https://magic.link

Top comments (1)
Enhance your online security effortlessly by integrating Multi-Factor Authentication (MFA) with Magic. This cutting-edge solution makes it easy to fortify your digital accounts and protect sensitive information. With Magic, adding MFA support is a seamless process, providing an extra layer of defense against unauthorized access. The intuitive interface ensures a hassle-free setup, empowering users to strengthen their online presence with just a few clicks. Here you learn magic online to unlock a world of secure possibilities and safeguard your digital assets with confidence.