
Originally posted at Serverless
It’s relatively easy to setup a url shortener these days, but most of what you’ll end up with is a generic short url that doesn’t represent your brand (ie. bit.ly/abc), or an extremely limited branded domain that you’ll end up paying for as your traffic grows.
With Serverless Cloud, you can provision your own branded URL shortener service, which you can customize later on if you need to. In this short article, we’ll show you how you can do that in just 2 minutes.
Fork the URL Shortener
Before you begin, you will need to sign up or login into the Serverless Cloud dashboard. If you are signing up for the first time, you’ll be asked to choose a username that will also act as the organization name for your personal organization. Serverless Cloud is currently in Public Preview and free to use!
After signing up, you should see a list of available applications you can fork right away. Note that you can see all those forkable apps anytime in the public official Serverless, Inc org.
Click on the url-shortener app to fork it into your organization. You will be prompted to rename your forked app, and to enter the required parameters for this app. For the url-shortener app, you only need to enter the ADMIN_PASSWORD parameter, which sets the admin password for you to log into your url-shortener dashboard.
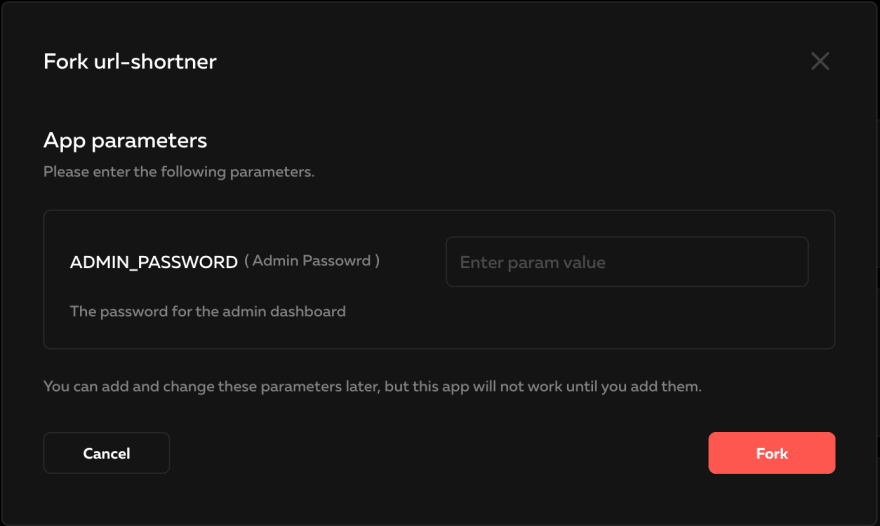
Choose any password you’d like, but make sure you remember it as we’ll need it later. To keep things simple, we’re going to go with just admin. Click Fork and after a few moments you should be redirected to your app view where you can see a single production stage. Click on it to configure a custom domain.
Configure a Custom Domain
The URL shortener is useless without a short custom domain. If you have a short domain that makes sense for your brand, use that. Otherwise, we recommend you to use the go.yourdomain.com subdomain instead. For the sake of demonstration, we’re use go.serverless.com.
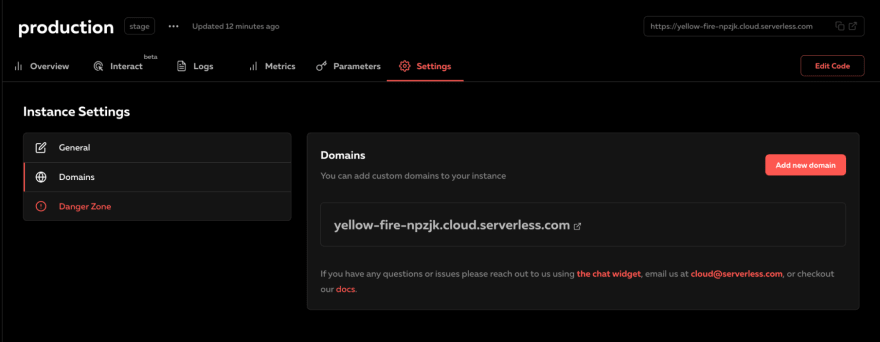
Click on the Settings tab in the production stage page, then click on Domains in the left panel, and Add new domain, and enter your domain name. If you are using a subdomain, make sure you enter the entire subdomain (ie. go.yourdomain.com)
After you add your domain, you should see a verification record that you will need to add to your registrar to verify your domain.
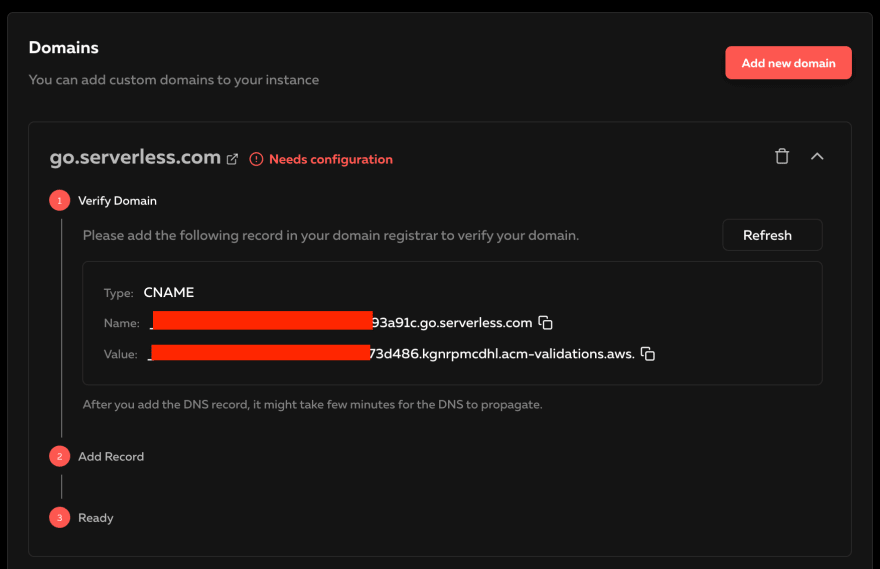
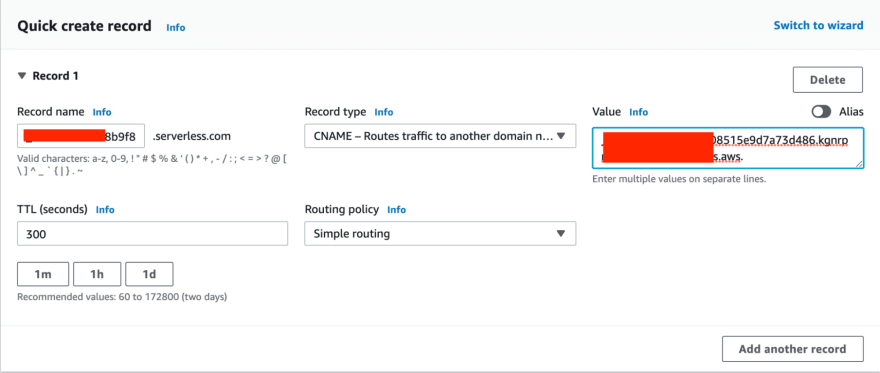
Log into your domain registrar dashboard and copy/paste the CNAME record name & value. We are using AWS Route53, and while your registrar could be different, the process will be similar.
It might take a little while for us to pick up the verification DNS record that you just added, so click on refresh every few moments, until you move to the next and final step, which is adding your app’s DNS record.
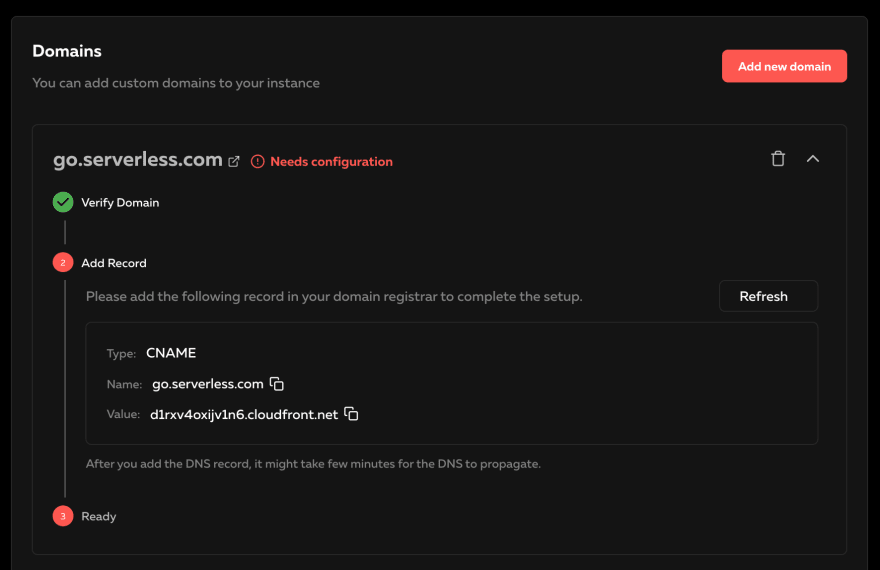
Add this CNAME record to your registrar just like you added the verification record, and again refresh until your domain has a status of “Ready”.
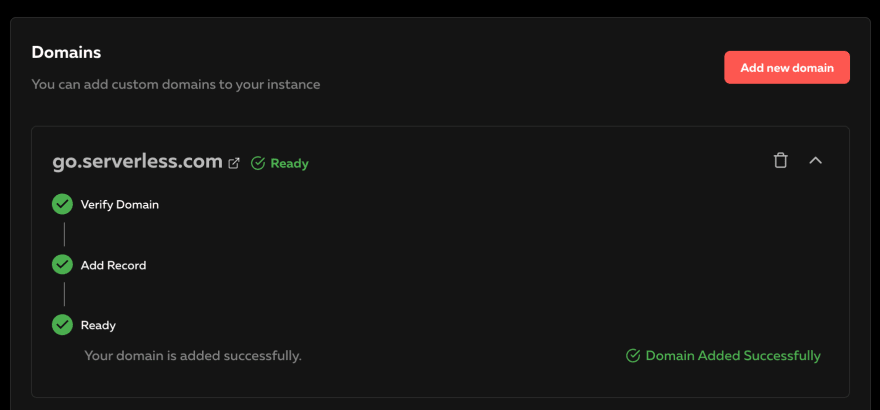
You’ve now completed the custom domain setup. Give the CDN a few minutes to propagate, and then you should be able to visit your own private url shortener service under your own domain.
Use the URL Shortener Dashboard
When you forked the app, you were asked to enter an ADMIN_PASSWORD parameter. To log into your URL shortener dashboard, you need to enter that same password you’ve set previously. Needless to say, you shouldn’t share this password for anyone except your team. You may change it anytime in the Serverless Cloud dashboard. Once you enter that password, you should see the following screen:

You can now shorten any URL you want. You also have the option to specify the exact short name you want to use for each URL. If you don’t specify a name, a short name will be automatically generated for you. For example, We can shorten the Serverless Cloud Docs URL to **go.serverless.com/docs** by specifying the “docs” name.
Use the URL Shortener API
We’ve seen how to shorten URLs using a GUI, but you could also use the same service programmatically and integrate it into your application to rapidly create short urls on demand. All you have to do is just make the following HTTP request, after replacing go.serverless.com with the domain or subdomain you’ve set, and passing the admin password, url you want to shorten, and optionally a short name.
Summary
You’ve seen how you can easily set up a url shortener service for your application, configure a custom domain, and start shortening urls both manually and programmatically. A URL shortener is one of many apps you can instantly fork and use with no coding required. You can see a list of all the available apps in our public organization page, and you can fork any of them using relatively the same process. If you have any questions, feel free to reach out to me on twitter.

Top comments (2)
Thanks a lot for sharing this custom url shortener with us. I am going to try this on Salt Free Water Conditioners Utah. Let me check it.
i suggest you try brand domain at shorturls.link and reed this at linkedin