Install Joomla! CMS on Heroku is an operation quite simple if you know the steps to follow.
This guide for developers teaches how to deploy a Joomla! CMS website to Heroku, explaining commands and guiding the reader step-by-step through the Installation and configuration process.
Configuring the local environment for Heroku
There is a plugin for PHPStorm to manage Heroku’s Apps: http://plugins.jetbrains.com/plugin/6659?pr=phpStorm
1. Setting up the Heroku Environment
- Create the local folder Heroku in your main development directory.
- From terminal, enter into it
> cd path/to/your/devroot
> mkdir Heroku
> cd Heroku
- Sign up for an Heroku account and configure it (SSH keys, above all): https://id.heroku.com/signup
- Create a new project and call it as you like and choose your preferred location between United States and Europe. I called it “Continuous Joomla! – CMS” and set “continuous-joomla-cms” as ID (hosted in Europe, as I’m italian). In the rest of this guide, substitute them with the name or the ID of your own Heroku project.
- Go to continuous-joomla-cms.herokuapp.com: you should see an error page. Don’t take care of it for the moment.
- In the current folder (it should be /Heroku), clone your app from the Heroku’s repository:
git clone git@heroku.com:continuous-joomla-cms.git
The repository is empty for the moment: we’ll fill it in a few moments.
- Instead, for the moment, let’s go install Heroku Toolbelt: https://toolbelt.heroku.com/
- Open Terminal and type the command “heroku”: if you installed Toolbelt correctly, you should see something like this:
MacBook-Pro-di-Adamo:Heroku Aerendir$ heroku
Usage: heroku COMMAND [--app APP] [command-specific-options]

Primary help topics, type "heroku help TOPIC" for more details:

addons # manage addon resources
apps # manage apps (create, destroy)
auth # authentication (login, logout)
config # manage app config vars
domains # manage custom domains
logs # display logs for an app
ps # manage dynos (dynos, workers)
releases # manage app releases
run # run one-off commands (console, rake)
sharing # manage collaborators on an app

Additional topics:

certs # manage ssl endpoints for an app
drains # display syslog drains for an app
fork # clone an existing app
git # manage git for apps
help # list commands and display help
keys # manage authentication keys
labs # manage optional features
maintenance # manage maintenance mode for an app
members # manage membership in organization accounts
orgs # manage organization accounts
pg # manage heroku-postgresql databases
pgbackups # manage backups of heroku postgresql databases
plugins # manage plugins to the heroku gem
regions # list available regions
stack # manage the stack for an app
status # check status of heroku platform
twofactor #
update # update the heroku client
version # display version

MacBook-Pro-Adamo:Heroku Aerendir$
- Try to login to Heroku by typing
MacBook-Pro-di-Adamo:Heroku Aerendir$ heroku login
You will be asked for your email and your password: use the one you used for registration at Heroku.com:
MacBook-Pro-di-Adamo:Heroku Aerendir$ heroku login
Enter your Heroku credentials.
Email: hi@aerendir.com
Password (typing will be hidden):
Found the following SSH public keys:
1) id_boot2docker.pub
2) id_rsa.pub
Which would you like to use with your Heroku account? 2
Uploading SSH public key /Users/Aerendir/.ssh/id_rsa.pub... done
Authentication successful.
MacBook-Pro-di-Adamo:Heroku Aerendir$
“Authentication successful.”: the message we want to read!
2. Try to deploy a dummy app to Heroku
Now, let’s try to upload a dummy app to Heroku.
Information about how to get started with PHP on Heroku: https://devcenter.heroku.com/articles/getting-started-with-php
Information about Git
- https://devcenter.heroku.com/articles/git
- http://git-scm.com/book
- https://na1.salesforce.com/help/pdfs/en/salesforce_git_developer_cheatsheet.pdf
NOTE: The example described in this post differs from the ones provided by Heroku itself in its article about using Git to connect to the Heroku’s servers (https://devcenter.heroku.com/articles/git): for this first test deployment, we will use “origin” instead of the suggested “heroku”.
Later, when we will push Joomla! CMS to Heroku’s servers, we will change this remote name from “origin” to “heroku” as described by Heroku itself.
For the moment, let’s start to try our new Heroku space and try to deploy our first version and our second version, too, to test the versioning system.
- Enter into the new folder continuous-joomla-cms created by the git cloning
$ cd continuous-joomla-cms
- See the list of current set remotes for the current repository using -v(erbose) parameter (continuous-joomla-cms): (NOTE: here the Heroku tutorial suggested to use “heroku” as the name of the remote source repository: we use, instead, the conventional name “origin”, v. supra)
$ git remote -v
origin git@heroku.com:continuous-joomla-cms.git (fetch)
origin git@heroku.com:continuous-joomla-cms.git (push)
- Create an empty file in heroku/continuous-joomla-cms and call it composer.json: this file indicates to Heroku that your app is written in PHP
$ touch composer.json
- Create the index.php file
$ touch index.php
- Open index.php and put into it the following code:
<?php
    echo 'Hello World!';
- Add to Git the two files:
$ git add composer.json
$ git add index.php
- Commit the changes, adding a message:
$ git commit -m "Initial import of Hello Joomla! on Heroku"
[master (root-commit) b1ad9d9] Initial import of Hello Joomla! on Heroku
2 files changed, 2 insertions(+)
create mode 100644 composer.json
create mode 100644 index.php
- Push the changes to Heroku (origin in this example):
$ git push origin master
Initializing repository, done.
Counting objects: 4, done.
Delta compression using up to 4 threads.
Compressing objects: 100% (2/2), done.
Writing objects: 100% (4/4), 310 bytes | 0 bytes/s, done.
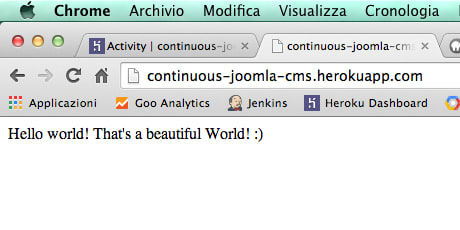
- Go to http://continuous-joomla-cms.herokuapp.com and see the fruits of your work!

Let’s better understand the Heroku’s versioning system.
3. Understanding and Using the Heroku’s versioning system
Info on Heroku about versioning and releases: https://devcenter.heroku.com/articles/releases
- Open index.php and change its content from
<?php
    echo 'Hello world!';
to
 <?php
    echo 'Hello world! That's a beautiful World! :)';
and save it.
- Stage in Git the changed index.php file:
$ git stage index.php
- Commit the changes to Git:
$ git commit -m "Second test version of Hello Joomla! on Heroku"
[master 15f901a] Second test version of Hello Joomla! on Heroku
1 file changed, 1 insertion(+), 1 deletion(-)
- Push the changes to the Heroku’s remote repository (origin in this example):
$ git push origin master
Fetching repository, done.
Counting objects: 5, done.
Delta compression using up to 4 threads.
Compressing objects: 100% (3/3), done.
Writing objects: 100% (3/3), 363 bytes | 0 bytes/s, done.
Total 3 (delta 0), reused 0 (delta 0)

-----> PHP app detected

       NOTICE: Your composer.json is completely empty.
       Consider putting at least "{}" in there to make it valid JSON.
       See https://devcenter.heroku.com/categories/php

-----> No runtime requirements in composer.json, defaulting to PHP 5.5.14.
-----> Installing system packages...
       - PHP 5.5.14
       - Apache 2.4.9
       - Nginx 1.4.6
-----> Installing PHP extensions...
       - opcache (automatic; bundled, using 'ext-opcache.ini')
-----> Installing dependencies...
       Composer version e77435cd0c984e2031d915a6b42648e7b284dd5c 2014-07-02 15:44:54
       Loading composer repositories with package information
       Installing dependencies
       Nothing to install or update
       Generating optimized autoload files
-----> Preparing runtime environment...
       NOTICE: No Procfile, defaulting to 'web: vendor/bin/heroku-php-apache2'
-----> Discovering process types
       Procfile declares types -> web

-----> Compressing... done, 62.7MB
-----> Launching... done, v4
       http://continuous-joomla-cms.herokuapp.com/ deployed to Heroku

To git@heroku.com:continuous-joomla-cms.git
   d46235c..15f901a master -> master
The last arrow labeled “Launching… done, v4” indicates you the current deployed version: in this example it’s the version 4 of the app;
- Go again to continuous-joomla-cms.herokuapp.com…
 It works!!!
The last thing, now, is to see how Heroku manages the different versions of an app.
Go to your Heroku’s dashboard, click on your app’s name and then on the “Activity” icon (https://dashboard.heroku.com/apps/continuous-joomla-cms/activity): you should see a list of the various versions you’ve deployed to Heroku.

If something went wrong with your deployment, you can simply click on the violet “Roll back”s links and Heroku automatically loads again your previous version and put it in live mode.
Try to deploy a Joomla! CMS website to Heroku
Now that our dummy app is deployed and works well, it’s time to go one step further and try to make a Joomla! CMS website work on Heroku.
Setting Up the Local Environment and Push a Copy of the Joomla! CMS on Heroku
- From the command line, go to the Heroku folder: 2.
> cd path/to/your/devroot/Heroku/
- Here, we have to backup the continuous-joomla-cms folder (a simple renaming!):
> mv continuous-joomla-cms continuous-joomla-cms_bak
- Fork the Joomla! CMS repository in GitHub and then clone the branch “3.2.x” from the forked version (in /Heroku, where we currently are):
> git clone -b 3.2.x https://github.com/Aerendir/joomla-cms.git
This will create a new folder “joomla-cms” that you can rename as you like:
> mv joomla-cms continuous-joomla-cms
- Change the remotes to point to the Heroku’s servers.
(NOTE: Until now, for our Hello World! test app, we have used the repo downloaded directly from Heroku: it was yet configured to connect to the Heroku’s server.
But now, we have a new repository and we need to connect it to our App’s repository on Heroku’s servers – that actually contains only two files: index.php and composer.json.
To connect our just downloaded copy of the Joomla!’s repository to our App’s repository on Heroku, we have to add the Heroku’s “remotes”, that are some specific URL that tell Git where to connect when we do a push. Doing this, we can distinguish between the Joomla!’s main repository on GitHub and our App’s main repository on Heroku. Also if this is not relevant for this scenario – we will update Joomla! directly from the control panel -, it’s useful to know how to use more than one remote.
For this procedure you can also follow the guide provided here: https://devcenter.heroku.com/articles/git – this is the one we decided to not follow some steps above, v. supra)
- See the currently set remotes:
> git remote -v
origin  https://github.com/Aerendir/joomla-cms.git (fetch)
origin  https://github.com/Aerendir/joomla-cms.git (push)
- To add the Heroku’s remotes to our just downloaded Joomla!’s repository we have two alternatives: use Heroku Toolbelt or use “ordinary” Git commands. To use Heroku Toolbelt (https://devcenter.heroku.com/articles/git#creating-a-heroku-remote), give:
> heroku git:remote -a continuous-joomla-cms
That produces this:
> git remote -v
heroku  git@heroku.com:continuous-joomla-cms.git (fetch)
heroku  git@heroku.com:continuous-joomla-cms.git (push)
origin  https://github.com/Aerendir/joomla-cms.git (fetch)
origin  https://github.com/Aerendir/joomla-cms.git (push)
that is the same as “ordinary” Git command:
> git remote add heroku git@heroku.com:continuous-joomla-cms.git
To prove it, use the Toolbelt first, then remove the “heroku” remote (git remote remove heroku) and then try re-add it using Git. To remove a
Git remote: http://stackoverflow.com/questions/16330404/how-to-remove-remote-origin-from-git-repo
Now you can push changes directly to the Joomla’s main repository (or your fork, if you cloned from a fork – Please, Keep attention to where you push! ) with a simple git push, or to the Heroku’s servers, using a simple git push heroku.
If you like to read more about remotes and their conventional names, you can read those pages:
- http://stackoverflow.com/questions/9529497/what-is-origin-in-git
-
http://stackoverflow.com/questions/9257533/what-is-the-difference-between-origin-and-upstream-in-github
- Push Joomla! to your App’s repo on Heroku, forcing a sync between their two HEADs (no bones will be crashed!):
> git push heroku +HEAD:master
Fetching repository, done.
Counting objects: 342853, done.
Delta compression using up to 4 threads.
Compressing objects: 100% (98745/98745), done.
Writing objects: 100% (342853/342853), 93.29 MiB | 50.00 KiB/s, done.
Total 342853 (delta 242146), reused 342311 (delta 241620)

-----> PHP app detected

 ! WARNING: No composer.json found.
 Using index.php to declare PHP applications is considered legacy
 functionality and may lead to unexpected behavior.

-----> No runtime requirements in composer.json, defaulting to PHP 5.5.14.
-----> Installing system packages...
 - PHP 5.5.14
 - Apache 2.4.9
 - Nginx 1.4.6
-----> Installing PHP extensions...
 - opcache (automatic; bundled, using 'ext-opcache.ini')
-----> Installing dependencies...
 Composer version ea6917c87ae68dbcdd581255396d223588d01319 2014-07-15 16:53:51
 Loading composer repositories with package information
 Installing dependencies
 Nothing to install or update
 Generating optimized autoload files
-----> Preparing runtime environment...
 NOTICE: No Procfile, defaulting to 'web: vendor/bin/heroku-php-apache2'
-----> Discovering process types
 Procfile declares types -> web

-----> Compressing... done, 72.0MB
-----> Launching... done, v5
 http://continuous-joomla-cms.herokuapp.com/ deployed to Heroku

To git@heroku.com:continuous-joomla-cms.git
 + 15f901a...1a0b7a0 HEAD -> master (forced update)
If you try a simple push, you will receive an error (also if you use the –force flag):
> git push --force heroku master
Fetching repository, done.
error: src refspec master does not match any.
error: failed to push some refs to 'git@heroku.com:continuous-joomla-cms.git'
This happens because the HEADs of the two repositories aren’t in sync (the HEAD of our App’s repository on Heroku and the HEAD of the one downloaded from the repository of Joomla! CMS on GitHub that we are trying to push on Heroku’s).
The command above specifies that the local HEAD has to be pushed to and synced with the remote repository, the one on Heroku’s servers (http://stackoverflow.com/questions/2971550/how-to-push-different-local-git-branches-to-heroku-master)
If Git returns an error similar to this
MacBook-Pro-di-Adamo:continuous-joomla-cms Aerendir$ git push heroku +HEAD:master
Initializing repository, done.
Counting objects: 342853, done.
Delta compression using up to 4 threads.
Compressing objects: 100% (98690/98690), done.
Received disconnect from 50.19.85.154: 10: user closed connection
error: pack-objects died of signal 13
error: failed to push some refs to 'git@heroku.com:continuous-joomla-cms.git'
then it probably is because of the sizes of the Joomla!’s repository.
Read here for more info and suggestions: https://discussion.heroku.com/t/how-to-solve-error-pack-objects-died-of-signal-13/140
Try to re-init the repository using the following command:
> git init
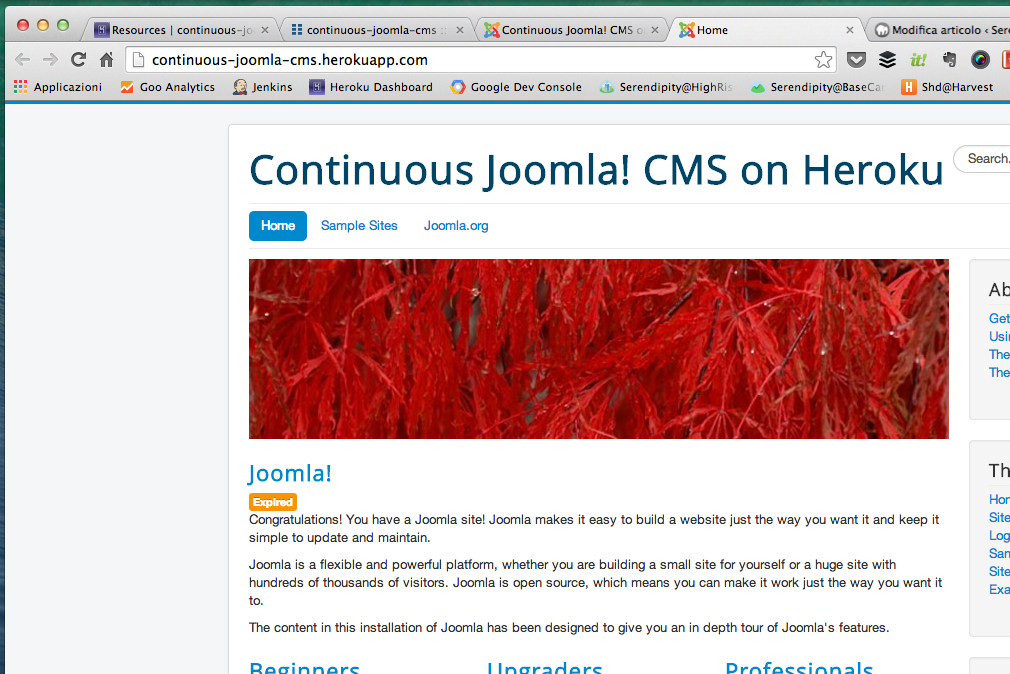
- Go to http://continuous-joomla-cms.herokuapp.com and… taa-daa, your Joomla! Installation screen appears!

Hurrraaa! It seems it’s time to go to install Joomla! CMS on Heroku! Let’s try!
NOTE: If the page not appears, it is reasonably because there are no active Dynos.
First thing to try is to go to Resources and activate at least one dyno (the first one is free, the subsequent are paid). Try to go again to your app: now all should work well.
If you have some other troubles, try to see the logs: https://devcenter.heroku.com/articles/logging
NOTE: If you like to use a custom domain, it should be more convenient to set it now, as Joomla! uses the URL domain to configure itself: https://devcenter.heroku.com/articles/custom-domains.
You can set them also from the Dashboard, going to Settings.
Then you need to change your CNAME records using your hosting admin panel.
The propagation of the change may take several hours to take effect on the Net, so, in the meantime, you can you can set your local hosts file to use your domain to install Joomla!. Then, when the changes will be propagated, you’ll delete the record from your hosts file.
ALERT: Don’t use domains like http://example.com ([root | base | apex] domains) as they cause some relevant issues with DNS and clouds management.
More info about this:
- https://devcenter.heroku.com/articles/apex-domains#naked-domain-arecord-limitations
- http://stackoverflow.com/questions/13478008/heroku-godaddy-naked-domain
- http://stackoverflow.com/questions/16022324/how-to-setup-dns-for-an-apex-domain-no-www-pointing-to-a-heroku-app
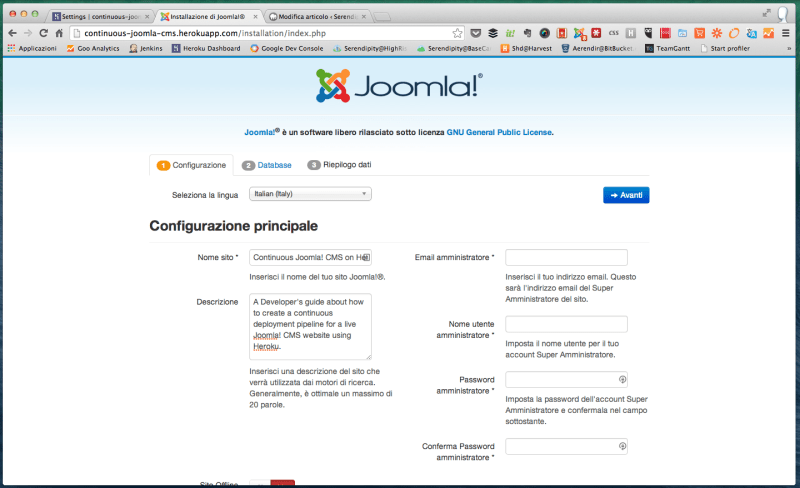
The Joomla!’s installation on Heroku: the Database’s settings
The first screen of the Joomla!’s installation procedure is simply enough to not require more attentions.
The second screen, instead, may be really worrisome: database parameters? Where could never the connection parameters be?
Let’s think… we don’t have a database, yet, so we need one, simple!
To get a database on Heroku, we need to… before understand some things
Heroku’s deployment is easier using PostgreSQL
The dogma: Heroku natively supports PostgreSQL.
This means that handling your app’s database is easier and that you can benefit of some interesting features, such as the data clips: https://blog.heroku.com/archives/2012/2/14/simple_data_sharing_with_data_clips)
But if you are used to use Joomla! on a traditional hosting, may be possibile your are more familiar with MySQL.
Now, if you don’t have past PostgreSQL experience, you are in front of a couple of tradeoffs.
Here the alternatives:
- You like to maintain on your machine a local MySQL-based test environment of the live Joomla! website: you want to use MySQL locally and on Heroku, too;
- You like to maintain on your machine a local MySQL-based test environment of the live Joomla! website: but you want to use PostgreSQL remotely, on Heroku;
- Maybe PostgreSQL deserves some more attention: you should give it a chance;
- You have already installed PostgreSQL on your local machine and you know how to use it: this discussion for you appears to be irrelevant;
- You have never used PostgreSQL and for you is irrelevant to have a local working copy of your live Joomla! website.
In case 1, you have to use an add-on like ClearDB to be able to use MySQL for your Heroku app. You can you use ClearDB for the goal: https://addons.heroku.com/cleardb). This could be useful for more info about the topic: http://stackoverflow.com/questions/15191259/how-to-deploy-local-mysql-database-to-heroku.
In case 2, you really like challenges and strange things: you are about to use locally MySQL and migrate all the data to PostgreSQL immediately before the deploying… so intriguing, but also so useless o.O
Anyway, this could be of some interest for you: https://devcenter.heroku.com/articles/heroku-mysql
In case 3, you are about to learn how to use locally the Heroku’s native database engine system, but you have to install locally PostgreSQL and learn how to use it. More, if you use something like MAMP, XAMP, EasyPHP, ecc., you have also learn how to integrate them with PostgreSQL.
If you are among the brave, this could be a good starting point: https://www.google.com/search?q=how+to+install+PostgreSQL
In case 4, no one has any problem: you know what must be done!
In case 5, you will be glad to know that Joomla! natively supports PostgreSQL as database engine: no problems here, too! We can continue without distracting digressions 
If, as i’m, you are interested in knowing more about the tradeoffs before to choose, you can start with two simple Google’s queries: https://www.google.com/search?q=postgresql+vs+mysql and https://www.google.com/search?q=heroku+mysql+vs+postgresql
For the rest of this guide, we will use the both Joomla! and Heroku’s native engine, PostegreSQL, without a local workstation equipped with it.
Where to find the Heroku’s database connection parameters

For more info about the installation of PostgreSQL on Heroku: https://devcenter.heroku.com/articles/heroku-postgresql
- In the Joomla!’s Installation screen, select PostgreSQL as default database engine;
- In Heroku’s dashboard, add and configure the PostgreSQL database:
- Go to Resources and click on the “Get add-ons” link;
- Find and add the “Heroku Postgres” add-on;
- Select the plan that best fits your needs (i chose the free “Hobby dev” plan: https://addons.heroku.com/heroku-postgresql#hobby-dev);
- Select the app for which the database is (i chose continuous-joomla-cms);
- Add the app.
- Go to the Heroku’s dashboard again: there should be listed a “Heroku Postgres :: Something” add-on;
- Click on the name of your Heroku Postgres instance: here you can find all the connection parameters.
To verify the correct installation of the PostegreSQL database on Heroku, you can also use the terminal through Heroku Toolbelt, that gives you other information than the web dashboard:
> heroku pg:info
=== HEROKU_POSTGRESQL_SOMETHING_URL
Plan: Hobby-dev
Status: Available
Connections: 0
PG Version: 9.3.3
Created: 2014-07-15 21:38 UTC
Data Size: 6.4 MB
Tables: 0
Rows: 0/10000 (In compliance)
Fork/Follow: Unsupported
Rollback: Unsupported
Region: Europe
NOTE: If you like to connect to the Heroku’s PostgreSQL database using an external tool (like PHPStorm), you have to enable the SSL and provide some specific configurations. Read here for an example of configuration: http://ufasoli.blogspot.it/2014/05/heroku-postgresql-and-dbvisualiser.html.
In PHPStorm you have to download the PostegreSQL driver and install PostgreSQL on your local machine.
Finishing the Joomla! CMS installation on Heroku
Once you’ve entered the correct database parameters into the Joomla!’s Installation form, you’ll can also go to the next step.
Here you will find a review of the system settings: in my test, the configuration was fully compatible with the settings preferred by Joomla!, except for the Output buffering (but I ignored it ).

A click on “Install” on the top-right corner et voilà, you are now ready to navigate the internet on a Heroku boat with Joomla! canvas!
If this page doesn’t appear, don’t worry: maybe your dyno were restarted in the meantime.
Continue the procedure to solve this problem, because it is not yet finished here!
Also if it not seems to be the case, in reality, in practical terms, at this moment we have only a database with some Joomla!’s tables and data and nothing more.
To make things happen, we have to manually do some other settings. Let’s go!
(Troubleshooting) Manually edit the Joomla!’s configuration file in the local Git repository
If the Joomla!’s home page didn’t appear in the before paragraph, and even if the administrator’s one didn’t, maybe it is because you have to manually push a configuration file for Joomla! and manually delete the “installation” folder before you can really use the CMS.
But, wait a moment: these two things have not been done already during the installation procedure?
Reply: yes, but that dyno is no longer available. Confused? For more information about this, read about the “ephemeral filesystem” of Heroku (https://devcenter.heroku.com/articles/dynos#ephemeral-filesystem) and about its statelessness (https://devcenter.heroku.com/articles/runtime-principles#statelessness).
So, we have to update our Git repo and push our changes to Heroku.
One thing a time, start by deleting the “installation” folder… STOP!!! Not delete, rename! We need it!
So, rename the “installation” folder into something like “_installation”: a simple underscore 
Into it, find the file “configuration.php-dist”, copy it and paste into the root folder: this is our Joomla! configuration file.
Rename it into “configuration.php” (remove the “-dist” part) and open it.
Find the section relative to the database settings and fill in the connection parameters you can (Do you remember? We used them during the installation procedure: use that ones).
/* Database Settings */
public $dbtype = 'mysql';   // Normally mysql
public $host = 'localhost'; // This is normally set to localhost
public $user = '';  // DB username
public $password = '';  // DB password
public $db = '';    // DB database name
public $dbprefix = 'jos_';  // Do not change unless you need to!
Some other changes: the database type has to be “postgresql” (remember discussion about this some paragraphs above?).
The problem: the db prefix, where to find it?
If you pinned it during the installation phase… no problem!
If you didn’t, i think you have to inspect the Heroku’s instance of the PostgreSQL database to discover which is.
See here for more information about PostegreSQL (and about how to install it on your system, whichever it is):
https://devcenter.heroku.com/articles/heroku-postgresql
Then, see some paragraphs below, the one “If you cannot login”, for some other advices.
Once you have filled in all the required parameters, commit the changes and push them to the Heroku’s repository.
Then try to go again to http://continuous-joomla-cms.herokuapp.com and then to http://continuous-joomla-cms.herokuapp.com/administrator.
All should work well. Now, if you like, you can also delete the “_installation” folder (then commit changes and push again!).
If all work well, is now time to login to your Joomla! website. Try to do it, and if you cannot, read the next paragraph.
NOTE: There is a more convenient way of setting the database parameters that involves the use of the environment constant DATABASE_URL. Using it needs to change the config file adding a construct method like the following:
public function __construct()
{
    if ($url = parse_url(getenv('DATABASE_URL')))
    {
        $this->host = $url['host'];
        $this->user = $url['user'];
        $this->password = $url['pass'];
        $this->db = trim($url['path'], '/');
    }
    else
    {
        $this->host = '';
        $this->user = '';
        $this->password = '';
        $this->db = '';
    }
}
If you cannot login
If you cannot login into Joomla!, it is possible that during the installation procedure your user’s data didn’t were stored correctly.
After you have connected to the your database’s instance, you should see something like this:

A snapshot of the jos_users table after the Joomla! installation on Heroku (taken through PHPStorm).
To solve the problem, you have to simply change some settings, yes, directly into the database.
Change:
- jos_users.username: your username;
- jos_users.email: your e-mail;
- jos_users.activation: 1.
To set the password, read this: http://docs.joomla.org/How_do_you_recover_or_reset_your_admin_password%3F
Shortcut: as password use “secret” in its hashed version:
d2064d358136996bd22421584a7cb33e:trd7TvKHx6dMeoMmBVxYmg0vuXEA4199
Now, try to login again: all should work well.
Configuring the email
Use a third smtp server (Mandrill?) or use an Heroku’s add-on: https://devcenter.heroku.com/articles/smtp
Failing saving categorie, articles and other things
Try to turn off debugging in the Joomla! configuration file.
To do this, set the $debug property to “0”.
To be continued…
A lot of things will certainly need more attention.
In the next… “times”, this guide will be updated with more new solutions to most common problems that could happen during the installation of Joomla! on Heroku.
Other things not covered here:
- adding the live_site;
- adding the var/logs folder;
- Where to put the static files? o.O
Remember to “Make. Ideas. Happen.”.
I wish you flocking users, see you soon!
L'articolo Deploying a Joomla! CMS website to Heroku proviene da ÐΞV Experiences by Serendipity HQ.


Top comments (0)