
When writing JavaScript with an editor, there are a number of ways you can ensure your code is syntactically correct and in line with current best practices. One of the best ways to check for code integrity is setting up a linter such as ESLint
What is ESLint?

ESLint is an open source project that helps developers find and fix problems with their JavaScript code. It's the number one JavaScript linter by downloads on npm (over 6.5 million downloads per week) and is used at companies like Microsoft, Airbnb, Netflix, and Facebook. Due to ESLint's flexibility, it's also able to help find and fix problems in JavaScript derivative languages such as Flow and TypeScript, as well as for mobile development with React Native.
Rules in ESLint are configurable, and customized rules can be defined and loaded. ESLint covers both code quality and coding style issues.
Architecture

Taking a high level look at ESLint we are going to discuss a few important key parts which would be very useful to understand the inner core components which can be configured to achieve more with ESLint.
eslint.js is a dumb component that does nothing more than bootstraping ESLint and passing the command line arguments to the CLI(cli.js). It does not require much heavy lifting and thus is pretty small.
api.js is the main entry point of require command. It exposes an object that contains public classes to Linter, CLIEngine, RuleTester and Source Code.
init module contains the --init functionality that sets up the configuration for a end user.
cli.js takes an array of arguments and then uses eslint to execute the commands.
cli-engine module consists of CLIEngine class that is responsible to figure out the configuration files and then verify code using Linter.
linter does code verification based on the configurations provided. It does not interact with the console at all.
Learn more at the official docs
CLI Engine
It reads both configuration and source files(including eslintrc and package.json) as well as manages the environment that is passed into the Linter object.
The main method of the CLIEngine is executeOnFiles(), which accepts an array of file and directory names to run the linter on.
It does not use formatters or outputs to the console. The operation is not asynchronous as well.
Linter
The main method of the Linter object is verify() and accepts two arguments: the source text to verify and a configuration object. First the given text is parsed using a parser(which you decide, some common parsers are espree, typescript-eslint-parser, etc) and it generates back an AST(Abstract Syntax Tree).
The AST is produced with both line/column and range locations which are useful for reporting location of issues and retrieving the source text related to an AST node, respectively. The AST is then traversed from top to bottom.
At each node, the Linter object emits an event that has the same name as the node type (i.e., "Identifier", "WithStatement", etc.). On the way back up the subtree, an event is emitted with the AST type name and suffixed with ":exit", such as "Identifier:exit" - this allows rules to take action both on the way down and on the way up in the traversal.
In this blog I'll be talking about the eslint configuration we use in Litmus.

Litmus is a framework for practicing chaos engineering in cloud-native environments. Litmus provides a chaos operator, a large set of chaos experiments on its hub, detailed documentation, and a friendly community. Litmus is very easy to use; you can also set up a very quick demo environment to install and run Litmus experiments.
If you don't already have a typescript project created you can do so by generating a boilerplate basic setup, for example this is how you can get up and running with a base react-typescript setup, similar to what we have with Litmus
npx create-react-app your-app --template typescript
Setting up the Project
The first thing that needs to be done is to install eslint and eslint-plugin-import in your project directory to be able to initialise our project with eslint configurations and also add on further configurations later.
npm install eslint eslint-plugin-import --save-dev
Once the package is installed we can use it to initialize an ESLint configuration by running
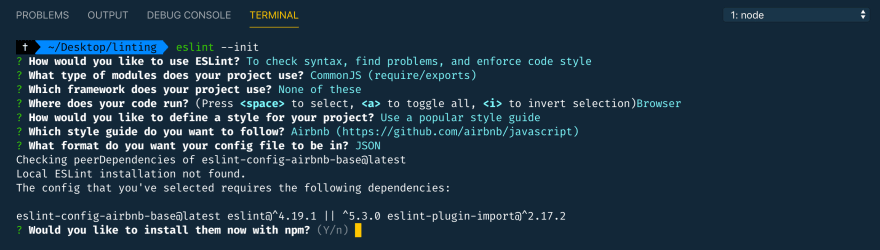
eslint --init
Soon you would be prompted in an interactive CLI to choose your style guide, framework, etc following which eslint will create a .eslintrc file for you with those configurations but we are not going to follow that.
Instead we are going to create our own eslintrc file with our custom configurations.
Pre-requisites
In order to create a set of amazing custom linting rules we would require some packages which would help us get the work done in a lot less time.
First things first, you need to make sure you already have typescript installed in your project and your project is following a typescript template based setup with a tsconfig file.
NOTE: You could also use these eslint rules and configurations without typescript but the packages/parsers might be a little different for you
A few dev-dependencies/peer-dependencies that would be required for this particular setup are -
- eslint-config-airbnb
- eslint-config-prettier
- eslint-plugin-import
- eslint-plugin-jsx-a11y
- eslint-plugin-prettier
- eslint-plugin-react
- eslint-plugin-react-hooks
- prettier
- @typescript-eslint/eslint-plugin
- @typescript-eslint/parser
Since writing efficient code and following best practices are a key to achieving quality code we prefer following the Airbnb style guide for cleaner code.
In order to be able to put them to use in our project we need to install some peer dependencies which need to have an exact version number in order to function properly, let's do that first before jumping into the next one.
npx install-peerdeps --dev eslint-config-airbnb
NOTE: In order to use
install-peerdepswe would requireeslint-plugin-importwhich we'd already installed earlier
Once the style guide and its peer-dependencies are set we also need to add the parsers, eslint-plugin for typescript as well as prettier for eslint to make our linted code check for correct code formatting.
npm install --save-dev prettier @typescript-eslint/eslint-plugin @typescript-eslint/parser eslint-config-prettier eslint-plugin-prettier
Creating our own .eslintrc
Create a .eslintrc.json file at the root of your project, this is where we would be writing our own configuration for our project.
Parser
Let's put the packages we had previously installed to use and assign our eslint a parser.
"parser": "@typescript-eslint/parser"
This parser would leverage TypeScript ESTree to allow for ESLint to lint TypeScript source code.

Extend Configuration
Since we are following Airbnb style guide to achieve best practices and cleaner code we need to let our linter know about this. We can extend our linter's configuration in order to extend its functionality
"extends": ["airbnb"]
Although eslint formats our code it does not go far enough. The code does not look very nice. This is where the wheat is separated from the chaff. ESLint is primarily intended for code quality. Prettier, as the name implies, makes your code Prettier. With added extensibility of Prettier our linter would let us know when a certain code format is incorrect in term of airbnb style guide and also the set of custom rules.
"extends": ["airbnb", "plugin:prettier/recommended", "prettier/react"]
ESLint Plugin
Next we move on to adding the eslint-plugin.
"plugins": ["@typescript-eslint"]
This eslint plugin provides an already configured list of linting rules which you can use right out of the box. Take a look at the rules here. They provide a list of recommended rules which includes naming-convention, no-this-alias, etc which are very handy.
To be able to use them in our project we need to add them in "rules". Some of the typescript-eslint rules which are extensively used in Litmus are -
"rules": {
    "@typescript-eslint/no-unused-vars": "error",
    "@typescript-eslint/no-useless-constructor": "error"
}

Modifying Rules
Just these two rules won't do for a codebase like ours which requires quick a lot of checks to achieve top quality code integrity. So let's add some more.
"rules": {
    "jsx-a11y/href-no-hash": ["off"],
    "react/jsx-props-no-spreading": ["off"],
    "react/jsx-filename-extension": [
      "warn",
      { "extensions": [".js", ".jsx", ".ts", ".tsx"] }
    ],
    "no-console": [
      "error",
      {
        "allow": ["warn", "error"]
      }
    ],
    "multiline-ternary": 0,
    "no-unused-vars": "off",
    "no-shadow": 0,
    "@typescript-eslint/no-unused-vars": "error",
    "no-useless-constructor": "off",
    "@typescript-eslint/no-useless-constructor": "error",
    "react/prop-types": 0,
    "import/extensions": [
      "error",
      "ignorePackages",
      {
        "js": "never",
        "jsx": "never",
        "ts": "never",
        "tsx": "never"
      }
    ],
    "max-len": [
      "warn",
      {
        "code": 80,
        "tabWidth": 2,
        "comments": 80,
        "ignoreComments": false,
        "ignoreTrailingComments": true,
        "ignoreUrls": true,
        "ignoreStrings": true,
        "ignoreTemplateLiterals": true,
        "ignoreRegExpLiterals": true
      }
    ]
}
You can customise your configuration by modifying the rules section. You will need to input key -> value pairs, where the key is the name of the rule.
The values Error, Off, Warn have a specific meaning when it comes to configuring the rules.
“Error” will strictly request you to change the portion of code which does not comply with the rules specified, “Warn” will only provide you a warning but you can still continue with your code, and “Off” would simply not check for that particular rule in your code base.
Environments
To specify environments in a configuration file, we use the env key and specify the environments we want to enable by setting each to true.
"env": {
    "browser": true,
    "es6": true
}
Here we are enabling the browser and es6 environments.
NOTE:
envis required for global variables. ESLint will enable the globals for the env variables we select.

Settings
Modifying the default eslint settings to our own needs
"settings": {
    "import/extensions": [".js", ".jsx", ".ts", ".tsx"],
    "import/parsers": {
      "@typescript-eslint/parser": [".ts", ".tsx"]
    },
    "import/resolver": {
      "node": {
        "extensions": [".js", ".jsx", ".ts", ".tsx"]
      }
    }
  }
Adding import/extensions to support linting of ES2015+ (ES6+) import/export syntax, and prevent issues with misspelling of file paths and import names.
We also need to import/require files with extension .ts/.tsx, Use paths defined in tsconfig.json and resolve @types/* definitions over plain .js, .ts
Here is the whole .eslintrc file at a glance
{
  "parser": "@typescript-eslint/parser",
  "plugins": ["@typescript-eslint"],
  "extends": ["airbnb", "plugin:prettier/recommended", "prettier/react"],
  "env": {
    "browser": true,
    "es6": true
  },
  "settings": {
    "import/extensions": [".js", ".jsx", ".ts", ".tsx"],
    "import/parsers": {
      "@typescript-eslint/parser": [".ts", ".tsx"]
    },
    "import/resolver": {
      "node": {
        "extensions": [".js", ".jsx", ".ts", ".tsx"]
      }
    }
  },
  "rules": {
    "jsx-a11y/href-no-hash": ["off"],
    "react/jsx-props-no-spreading": ["off"],
    "react/jsx-filename-extension": [
      "warn",
      { "extensions": [".js", ".jsx", ".ts", ".tsx"] }
    ],
    "no-console": [
      "error",
      {
        "allow": ["warn", "error"]
      }
    ],
    "multiline-ternary": 0,
    "no-unused-vars": "off",
    "no-shadow": 0,
    "@typescript-eslint/no-unused-vars": "error",
    "no-useless-constructor": "off",
    "@typescript-eslint/no-useless-constructor": "error",
    "react/prop-types": 0,
    "import/extensions": [
      "error",
      "ignorePackages",
      {
        "js": "never",
        "jsx": "never",
        "ts": "never",
        "tsx": "never"
      }
    ],
    "max-len": [
      "warn",
      {
        "code": 80,
        "tabWidth": 2,
        "comments": 80,
        "ignoreComments": false,
        "ignoreTrailingComments": true,
        "ignoreUrls": true,
        "ignoreStrings": true,
        "ignoreTemplateLiterals": true,
        "ignoreRegExpLiterals": true
      }
    ]
  }
}
Conclusion
Voila, you have successfully created an eslint config file which can check for unused variables, unused import statements, extra long comments, etc. You can ofcourse extend these and play around to create something out of your own. We welcome everyone to comment and let us know about what/how we can improve these linting configure to achieve more! Every suggestion is appreciated.

Are you an SRE or a Kubernetes enthusiast? Does Chaos Engineering excite you?
Join Our Community On Slack For Detailed Discussion, Feedback & Regular Updates On Chaos Engineering For Kubernetes: https://kubernetes.slack.com/messages/CNXNB0ZTN
(#litmus channel on the Kubernetes workspace)

Check out the Litmus Chaos GitHub repo and do share your feedback: https://github.com/litmuschaos/litmus
Submit a pull request if you identify any necessary changes.
Don't forget to share these resources with someone who you think might benefit from these. Peace out. ✌🏼

Top comments (0)