
Introduction
SignalR is an open-source library that facilitates to add real-time functionality to web applications. Using this, the server application can push real-time data to the client.
This article explains how to connect with SignalR Server hub and receive the message data from the server to the client application using the SignalR JavaScript client in ASP.NET Core 6 application. There are several ways to receive the data from SignalR server application to the client using different reference packages. Among them, we already learned one in the previous part of the article series where we used SignalR .NET Client. However, in this article, we will explore SignalR JavaScript client and use it in .NET6 application to receive the data from the server hub. In this example, we will focus on a client application. Same as the previous article, the scenario is useful when we have two different applications for SignalR server and client, and we need to use SignalR JavaScript client for ASP.NET Core 6 application where we need to use client-side JavaScipt code only. In the previous part of the article series, we used server-side code to receive data in the SignalR client application; however, in this part, we will use client-side code.
Prerequisites
- Visual Studio 2022
- Functioning SignalR Server Application If you have already an existing client application in .NET6.0 and you need to only implement the SignalR part using JavaScript Client in the client application to receive the real-time data from your server application using SignalR JavaScript client, then you can directly jump into Step 2.
Source code for client application check this Git Repo
Step 1 - Create an ASP.NET Core6 project as usual.
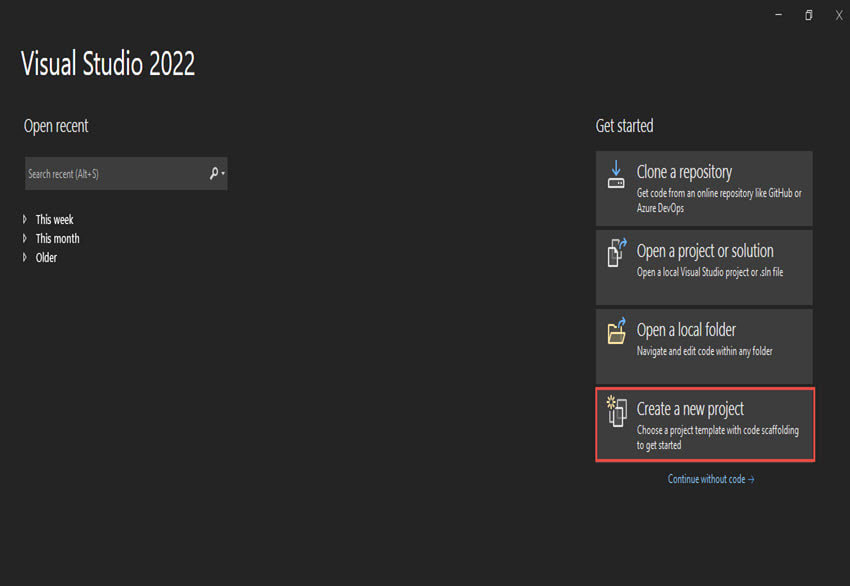
Open Visual Studio and click on Create a new project.
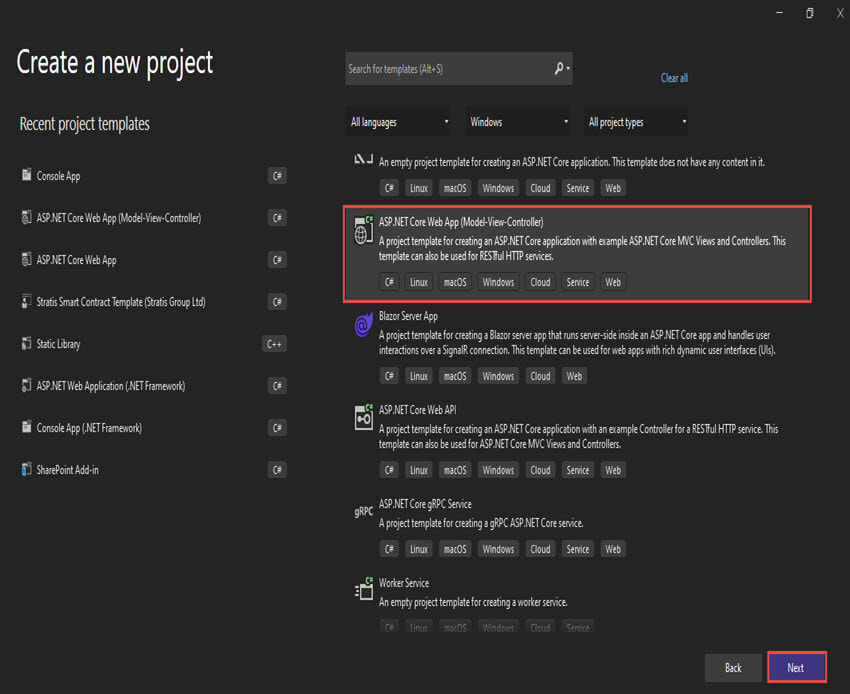
Select ASP.NET Core web app (MVC) as illustrated below and click on Next.
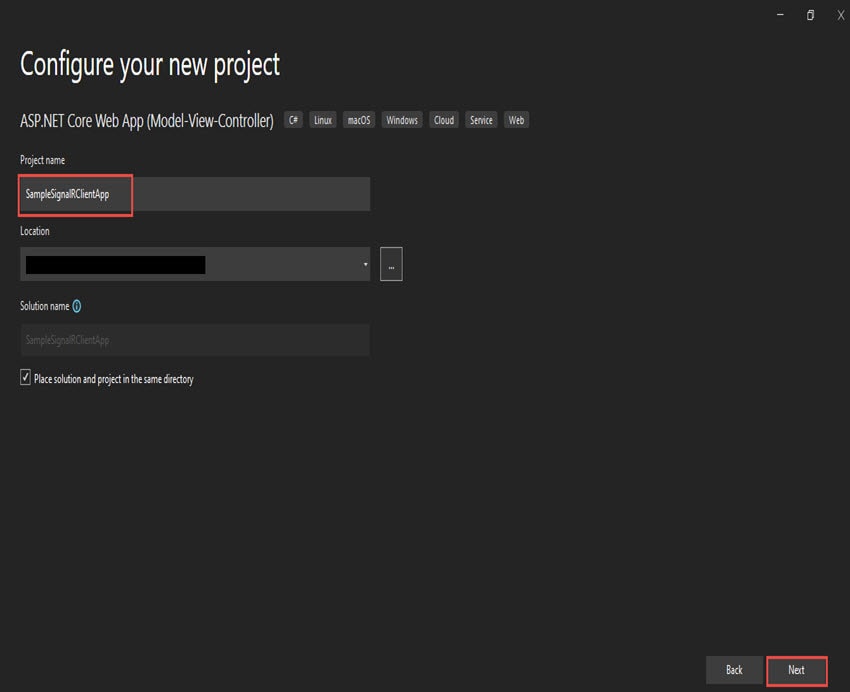
Give the project name, location of the project, and click on Next.
Then select the Framework: .NET 6.0(Long-term support) as shown below and click on Create.

Then, your default SignalR client app will be created. Which you can run and see the default design in the browser.
Now, we will move to SignalR client part.
Step 2 – Install SignalR JavaScript Client
Now, we will need to install SignalR JavaScript client. Open package manager console as depicted below.

Then run the below bash commands from the package manager console.
npm init -y
npm install @microsoft/signalr
Additionally, you can install it with LibMan from here.
Once installed: Create folder signalr under wwwroot/lib and go to node_modules\@microsoft\signalr\dist\browser folder and copy and paste the signalr.js file in the signalr folder as shown below.

Now, your signalr file is ready we can reference the SignalR JavaScript client in the script element such as.
<script src="~/lib/signalr/signalr.js"></script>
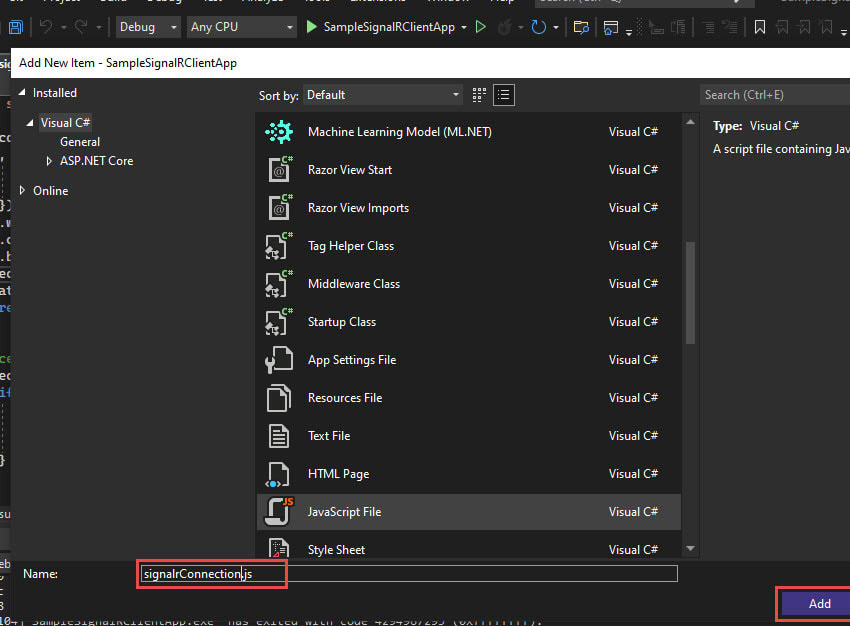
Step 3 - Add SignalR Client JavaScript
Now we will add a new JavaScript file under the js folder which we will use to connect with the SignalR Server hub and customize all our code in this file.
Step 4 – Connecting to Hub (SignalR Server application)
Similar to the previous article, in this step, we will get familiar with the connection hub builder, which we will be required to connect with the server hub. Only the difference is we are using JavaScript to connect with the Server.
To make a connection, we need to create HubConnectionBuilder and start the Build, where we have to provide the server URL and message event. The below example withUrl contains the SignalR server URL and SignalR event hub name. You need to provide the correct value in the WithUrl in order to connect with the server.
var connection = new signalR.HubConnectionBuilder().withUrl(“http://localhost:53150/ChatHub”)
    .configureLogging(signalR.LogLevel.Information)
    .build();
Additionally, to reconnect automatically when the server connection gets lost, we can use WithAutomaticReconnect() method as well. Moreover, we can use StartAsync() method to start the connection asynchronously.
The complete code for the connection is given below.
var connection = new signalR.HubConnectionBuilder().withUrl("http://localhost:39823/ChatHub", {
        skipNegotiation: true,
        transport: signalR.HttpTransportType.WebSockets
    }).withAutomaticReconnect() //when server get disconnects it reconnects with the serevr
    .configureLogging(signalR.LogLevel.Information).build();
connection.start().then(function() {}).catch(function(err) {
    return console.error(err.toString());
});
Note: You should have CORS enabled in your server app for the signalR client app to be connected.
Step 5 - Calling Client Method from the hub
Now, it’s time to call the client method to receive messages from the hub. For this, we will use on method of the HubConnection
We need two things for this.
- Name of client method
- Argument(s) that need to pass to the method Based on my client method name and argument on the method, the connection on code becomes:
connection.on("receiveEvent", function (message) {
  //receive your message here
 var value = message.Val1;
})
Below is the complete code of signalrConnection.js file.
"use strict"
var connection = new signalR.HubConnectionBuilder().withUrl("http://localhost:39823/events-hub", {
        skipNegotiation: true,
        transport: signalR.HttpTransportType.WebSockets
    }).withAutomaticReconnect() //when server get disconnects it reconnect with the serevr
    .configureLogging(signalR.LogLevel.Information).build();
connection.start().then(function() {}).catch(function(err) {
    return console.error(err.toString());
});
//Below method is for Receiving message
connection.on("receiveEvent", function(message) {
    var value = message.headerHeight;
    if (message.headerHeight) {
        document.getElementById('lblHeight').innerHTML = ` ${message.headerHeight}`;
    }
})
Step 6 - Link the js file
To get and display the received message data in your page, you need to just link the js file on the page where you require showing the message data.
For the simplicity of this demo, I have just shown the value of the message in the Index.asp page as portrayed below.
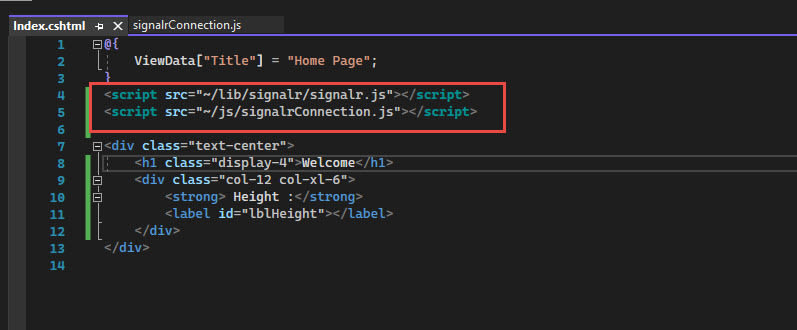
In my design page, I have just created a division and label to display the received message on the page.
Checking the output
Now we can run and open the Devtool or inspect the elements in the browser and see the received message. Below is the output of my client application after successfully connecting to the server hub and receiving real-time data from the server.

On successfully connecting to SignalR hub and receiving the message data, you can work on the design to display the messages on the page according to your need.
The Git repo of this example can be found here.
Summary
In a nutshell, the article has described and demonstrated how to get real-time data in ASP.NET Core client application from the server application using the SignalR JavaScript client. This article will help you when you have two different applications for SignalR server and client, and you need to use SignalR JavaScript client for your client application.
Thanks for reading the article.
If you like to implement the .NET Client for the same purpose, you can refer to the previous article here.
References

Top comments (0)