

In this article, we will be sharing steps to building an iOS chatbot with Dialogflow. All you need to build a sample chatbot using Dialogflow and Kommunicate for an iOS app.
Below is an example of Kommunicate Support Bot developed in iOS using Dialogflow and Kommunicate. We actually use this bot on our website. If you wish to see the bot live in action, click here.
We support both the languages Swift and Objective C in our iOS SDK and we have made it very easy to add using CocoaPod.
The actionable rich messaging-powered bot can reply based on whether users are on chat for general queries, technical queries, Just checking out, or scheduling a demo.
You can use your existing Dialogflow bot or checkout bot samples to build a qualifying bot of your own. Download the Kommunicate Support Bot from here and import it into your Dialogflow account.
Let us know jump into the crux of this post.
Step by Step Guide to Building iOS Chatbot with Dialogflow
Step 1: Setup an account in Kommunicate
This is fairly simple. You can get a free account in Kommunicate. Signup and navigate to the Bot Integration section. Click on Dialogflow ES or CX integration.

Now, navigate to your Google cloud console and download the service account key file. Here are the steps to locate the file:
- Login to Dialogflow ES console
- Go to Create Service Account Key in Google Cloud console. Make sure you have selected the correct project and select the New service account from the Service account list
- In the Service account name field, enter a name
- From the Role list, select Project > Owner
- Click Create. A JSON file that contains your key downloads to your computer
- Upload the Service account private key (JSON)
You can also refer to this doc for Dialogflow integration with Kommunicate.

To integrate Dialogflow CX into Kommunicate follow the same instructions to download the JSON key and mention the Agent Id in the Kommunicate dashboard
To get the Agent Id: Go to "Dialogflow CX console" >> Select the Project >> In the Agent you have created ‘Copy the agent name to the clipboard will be in the format mentioned below, where the Agent Id is "54b0c663-2c01-4a09-a482-277ff39c0b05"

Setup your bot’s name and profile picture and choose whether to allow the bot to human handoff for your newly created bot. Click Finish bot integration setup and voila, your bot is now integrated.

You can check your newly created bot in two places:
Dashboard →Bot Integration → Manage Bots: You can check all your integrated bots here.
Dashboard → Bot Integration: Your Dialogflow icon should be green with the number of bots are you have successfully integrated.
Once you create a bot then you set it as a default bot in the conversation routing section as shown below. Click on Settings –> Conversation rules –> Then click on bot like below and select your bot

Now, this bot will reply in all the conversations.
Step 2: Install and setup Dialogflow integrated iOS Chatbot SDK into your app
In this step, you need to add Kommunicate iOS SDK to your app. Installing Kommunicate SDK comes with pre-configured Dialogflow integration. Follow the below instructions to add iOS SDK in your app:
Initialize CocoaPods:
Kommunicate is available through CocoaPods. To install it, simply add the following line to your Podfile:
pod 'Kommunicate'
This is how a pod file looks like finally
    target 'MyTargetName' do
       use_frameworks!
       pod 'Kommunicate'
    End
Run pod install in your project terminal folder
pod install
After finishing the installation, you can initialize the SDK by calling the below method:
Setup App id:
Kommunicate.setup(applicationId:<Your App ID>)
You can get your unique Application ID in the Installation Section. If in any file, you’d like to use Kommunicate, don’t forget to import the framework with import Kommunicate.Login user to Kommunicate: You need to register the user using below Kommunicate.registerUser method before starting chatting and pass the userId and email of the user.
let kmUser = KMUser()
kmUser.userId = userId
// Pass userId here NOTE : +,*,? are not allowed chars in userId.
kmUser.email = emailId // Optional

// Use this same API for login
Kommunicate.registerUser(kmUser, completion: {
    response, error in
    guard error == nil else {return}
    print(" login Success ")
    // You can launch the chat screen on success of login
})
NOTE: Before login user to Kommunicate, you need to use the Kommunicate.setup(applicationId:) so that applicationId will be set up in starting phase
Step 3: Send and receive Information
Now, you can send the payload data to Dialogflow through the chat screen and get a text response from Dialogflow Agent. Kommunicate provides a ready-to-use Chat UI so only launching the chat screen is required in this step.
let kmConversation =
    KMConversationBuilder()
        .useLastConversation(true)
        .build()
Kommunicate.createConversation(conversation: kmConversation) { result in
    switch result {
    case .success(let conversationId):
        print("Conversation id: ",conversationId)
        DispatchQueue.main.async {
            Kommunicate.showConversationWith(
                groupId: conversationId,
                from: self,
                completionHandler: { success in
                    print("conversation was shown")
            })
        }
    case .failure(let kmConversationError):
        print("Failed to create a conversation: ", kmConversationError)
    }
}
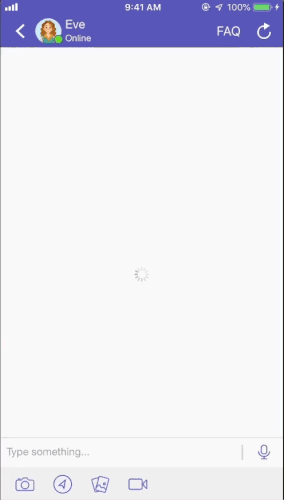
You can refer the more documentation for the conversation section here. Run the iOS project and chat with the Dialogflow bot. You can easily integrate Dialogflow in iOS apps in a few simple steps. In case you need more information, check out the Kommunicate iOS documentation. Here are some sample chat screens of the iOS app with Dialogflow and Kommunicate.
Are you considering chatbots for your business? Download the Complete Beginner’s Guide to Chatbots for a more detailed explanation of chatbots’ capabilities, industry use-cases, and a step-by-step guide on how to build one.
Kommunicate Sample application: Download the sample app from here which includes ready to use Kommunicate iOS SDK
Dialogflow iOS SDK Client:
Dialogflow provides iOS Client SDK that makes it easy to integrate speech recognition with API.ai natural language processing API on Apple devices.
If you are looking to develop your own chat implementation and directly you can integrate Dialogflow into your iOS app without Kommunicate SDK, then integrate with the following SDK from Github – Dialogflow iOS Client SDK.

Top comments (0)