
Step 1: Downloading the dataset
As with any AI project, the first step will be to download and organize the data, which in this case, is images of the following flower species:
-Daisy
-Dandelion
-Rose
-Sunflower
-Tulip
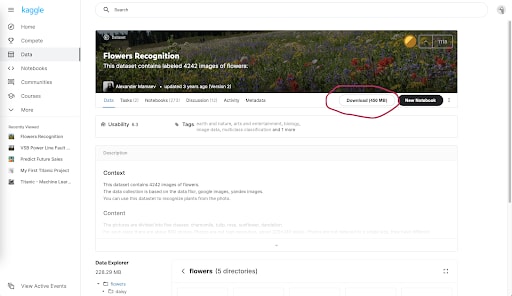
Luckily, there’s a Kaggle notebook with all of these species and all you have to do is download it...here’s how:
a. Visit https://www.kaggle.com/alxmamaev/flowers-recognition
b. Click on the “Download” button (create an account if needed)
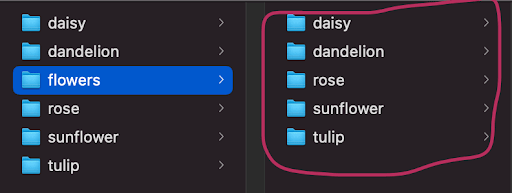
Unzip the download and make sure you have these folders
GREAT JOB! You have successfully downloaded the dataset. Let’s move onto step 2!
Step 2: Setup your Teachable Machine Image Model
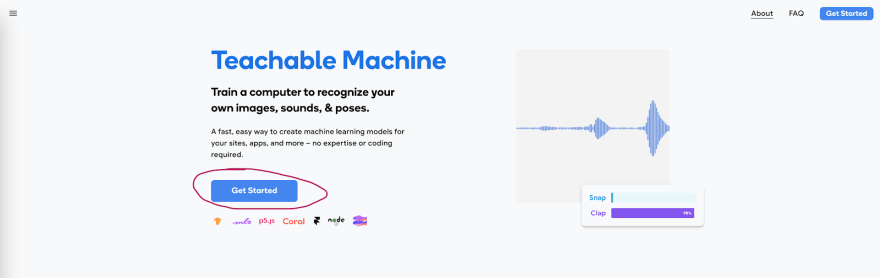
Visit https://teachablemachine.withgoogle.com/
Click “Get Started”
Click “Image Project” (since we are classifying images)
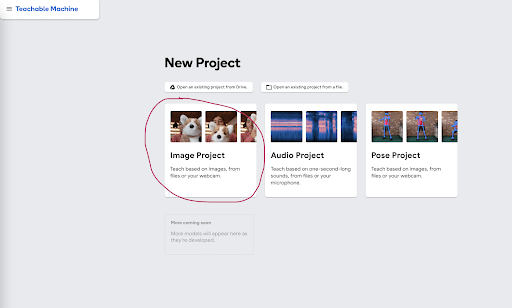
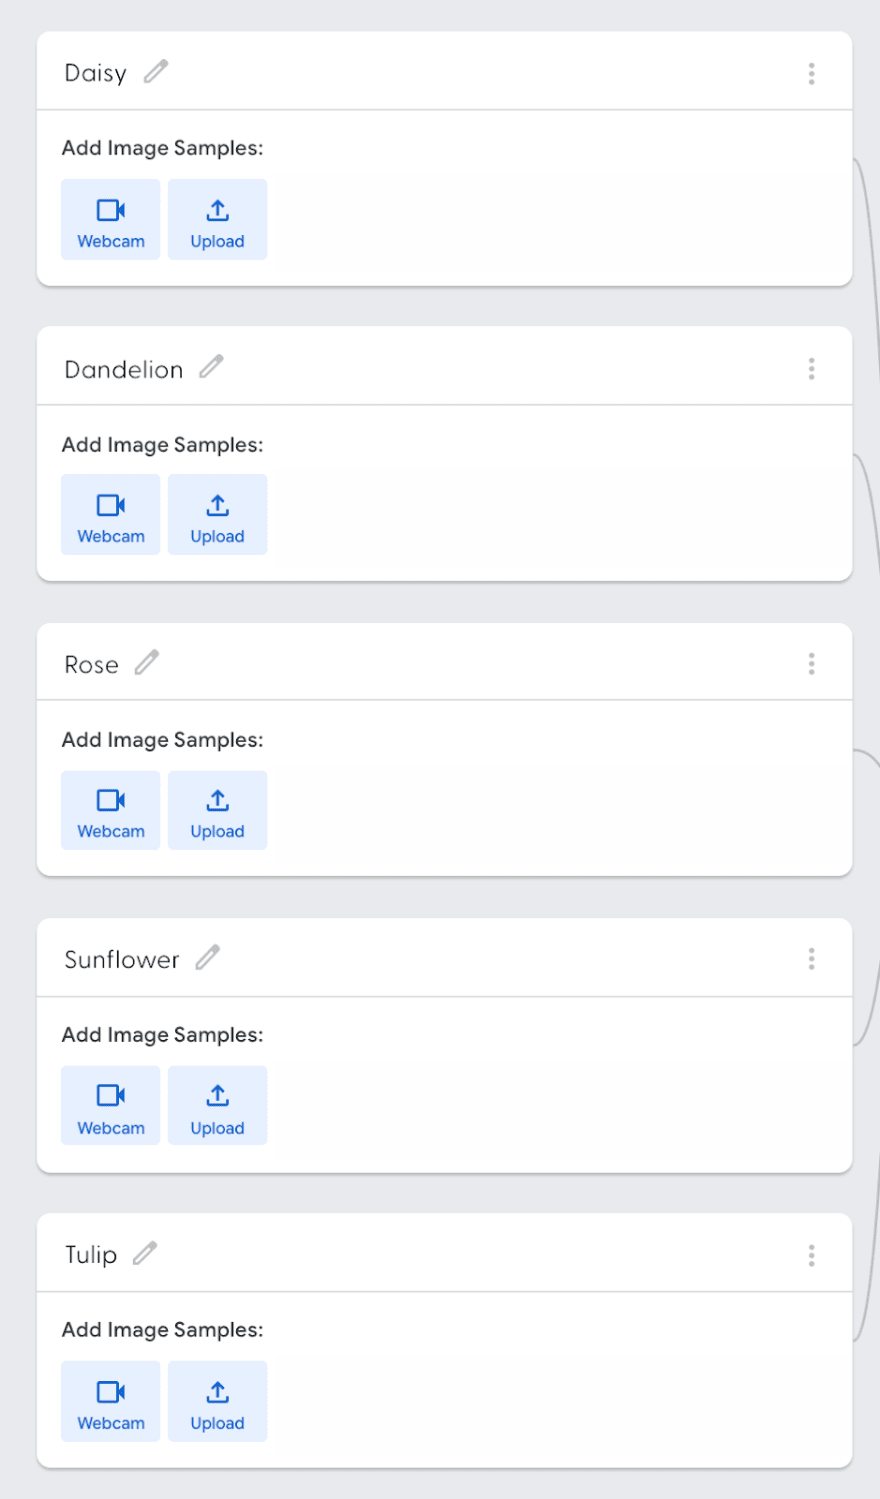
And make sure you see this screen:

Just as a recap, we are classifying between the following 5 different species of flowers: Daisy, Dandelion, Rose, Sunflower, and Tulip. Each class will represent one of these 5 species...so...you guessed it!
Let’s begin by creating 5 classes by clicking the “Add a Class” button 3 times

And you should end up with 5 classes

Let’s name each of the classes “Daisy, Dandelion, Rose, Sunflower, and Tulip” to stay organized
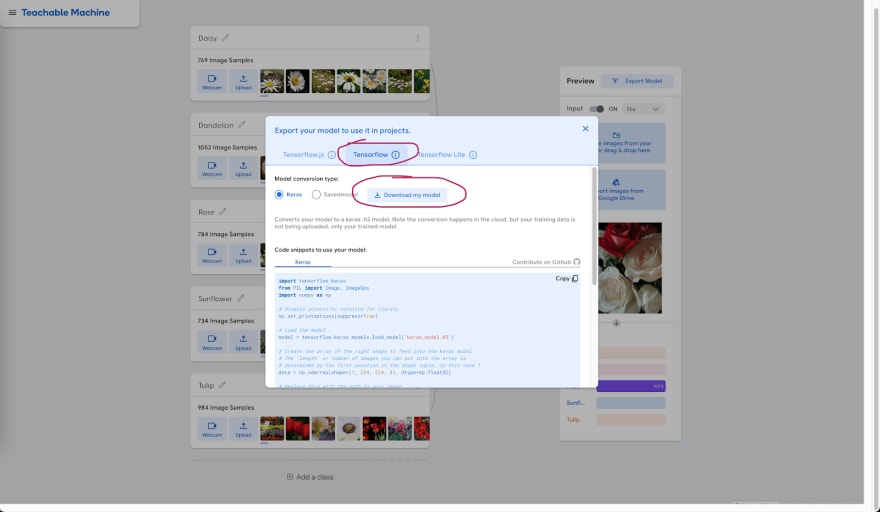
Now drag and drop each of the folders we download earlier in Step 1 into their corresponding classes on Teachable ML

This is what you should end up with:

Hit the “Train Model” button to train the model...or…
If you would like to play with the various parameters, click “Advanced” and change the number of epochs, batch size, etc.
Epochs: the number of passes of the entire training dataset the machine learning algorithm has completed
Batch Size: the number of training examples utilized in one iteration
Learning Rate: a tuning parameter in an optimization algorithm that determines the step size at each iteration while moving toward a minimum of a loss function
For example purposes, I will not change any of the parameters and will press train model

Click Export Model

Click “Tensorflow” and then Download Model
Step 3: Setting Up The Mobile Application Using The Flutter Framework
For this project, we’re going to use Flutter to develop a mobile application that is compatible with both IOS and Android
Flutter → Flutter SDK is Google's UI toolkit for crafting beautiful, natively compiled applications for mobile, web, and desktop from a single codebase. If you would like to learn more about Flutter, check out the documentation.
There are many YouTube tutorials online on how to make your very own app, but since this tutorial is regarding the integration of SashiDo.io’s amazing services, we will skip that bit and leave it for you!
Here’s a YouTube tutorial by freeCodeCamp.org: https://www.youtube.com/watch?v=pTJJsmejUOQ&ab_channel=freeCodeCamp.org
Begin by creating a Flutter project and setting up the application. For our example, we have set up a login page and this is ultimately what we will be integrating SashiDo.io’s services with using their Parsing functions to allow the user to easily login and out of their accounts.
Ensure that you have an emulator of a chosen device and you are able to run the project on that emulator using the ‘flutter run’ command in terminal. Drag and drop the Tensorflow model’s file you downloaded from step 2 into the project’s directory where it can be referred to.
Step 4: Integrating SashiDo into your project
Download and import the flutter parse server sdk dependency to your project. To connect the application frontend with the SashiDo backend, which can be done why finding the keyApplicationId, keyClientKey, and the parse server url to initialize the connection with the parse server.
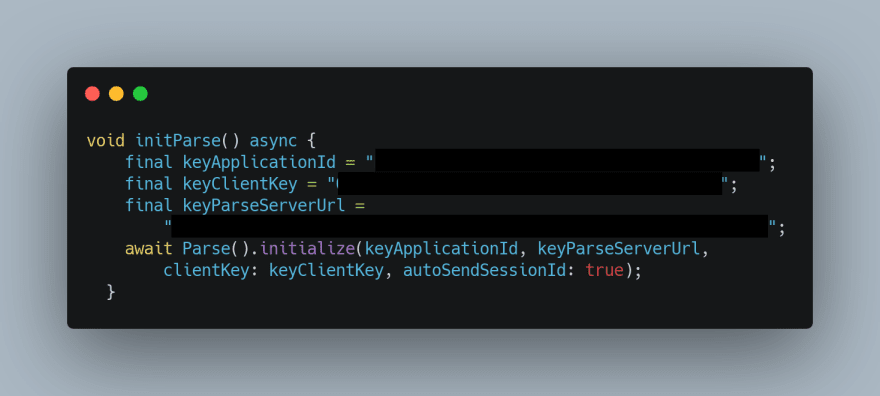
This function can now be added inside the initState function at the beginning of the screen class.
To login the user, this parse server can be initialized with the username and password using the parse server library function.

Simply pass this function when the login button in your application is pressed.
To register the user, the same process can be used by creating a new parse sever user using the username, password, and email as parameters and the signUp function from the parse server library.

The screen routing functions can be added using the Navigator.push()function on login/register success.
[Optional] To use a Google account for logging in, import the google sign in library [https://pub.dev/packages/google_sign_in] by first installing it in your pubspec.yaml file. Then, go ahead and create a new async function where the Google signIn function can be used to authenticate the user using their valid Google email.
Use the parse server's loginWith function to use google sign in with the scopes as shown below:

The authentication process is now complete!
Step 5: Start creating the interface for your application:
For every flutter project, you want to always use certain basic components such as scaffolds, buttons, containers, etc. In doing so, you must add certain properties such as margins, width & height parameters, and others which you will learn along the way - see below for some screenshots of what we’re talking about!

Let’s dissect the components in this button components!
First, we wrap the component in a container, which allows it act as an individual component on the screen which can be manipulated by margins, since we can’t directly manipulate the RaisedButton with these same properties. The EdgeInsets.only allows us to specify if we only want margins from the top, left, right, or bottom, whereas EdgeInsets.fromLTRB stands for EdgeInsets from left, top, right, and bottom correspondingly. Thereafter, we add a child components such as the RaisedButton.icon as you see in this example. For the button, we add an onPressed() functionality so that an action executes once the user has interacted with the button. Additionally, we have different attributes such as a label which is the text that shows up on the button, an icon that represents what shows up right before the button text, and also a shape, which allows us to control the curvature on the button - here is the finished product!

Many of the flutter components follow a similar format, try figuring out this one on your own!
Step 6: Use a Machine Learning model with application
Add the downloaded machine learning model folder to the project repository inside your assets folder.
Download the TF Lite [https://pub.dev/packages/tflite] flutter package and import it inside the working file.
Download and import the image_picker [https://pub.dev/packages/image_picker] flutter package in the same working file.
Use the TF Lite package to load the model along with the labels as shown below:

To let the user pick an image from their smartphones, create a pickImage function that uses the image picker package and lets the user select their desired image.

To run the TF Lite model on the selected image, simply use the Tensorflow runModelOnImage function to output the plant type as shown below:
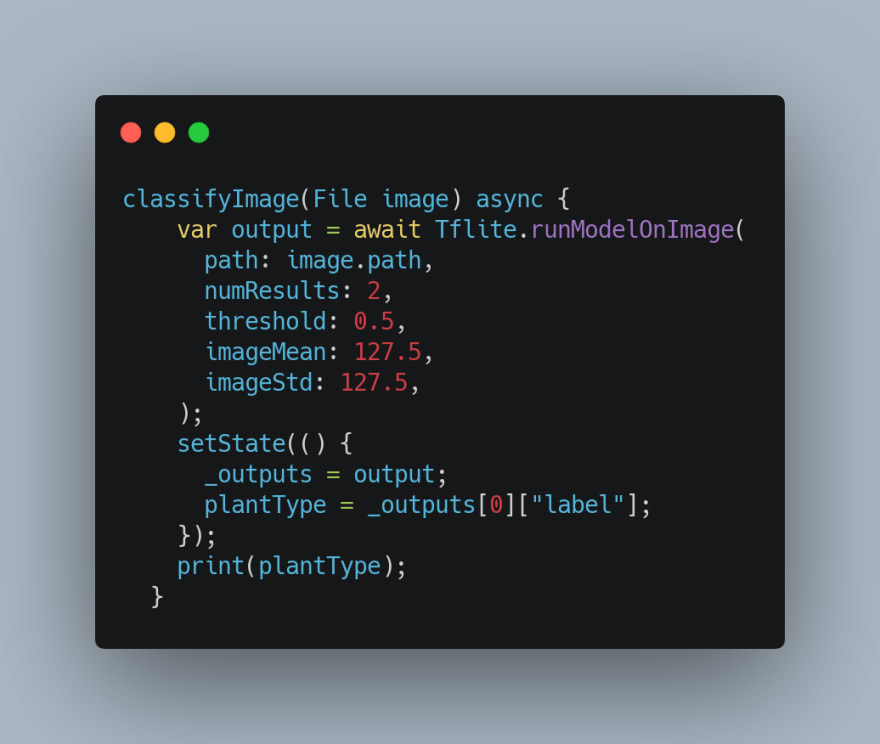
This function can now be called inside the pickImage and passing the directory of picked image as a parameter, just like how it’s done below:

Finally, load the model inside the initState function of the class and pass in the pickImage function when the button is pressed in your frontend of the application to connect everything together.

THE FINISHED PRODUCT:


Latest comments (0)