
Introduction
Recently I stumbled upon Next.js new experimental feature called Server Actions. The feature allows to run code on the server without having to create and maintain separate API endpoints. This can simplify your codebase and make it easier to develop and maintain your application.
What are the benefits of using server actions?
- Security: Server actions are more secure than traditional API endpoints, as the code is executed on the server and is not exposed to the client. This can help to prevent attacks such as cross-site scripting (XSS) and cross-site request forgery (CSRF).
- Performance: Server actions can help to improve the performance of your application by caching the results of server actions. This can reduce the number of requests that need to be made to the server, which can lead to faster page load times.
- Ease of use: Server actions are easier to use than traditional API endpoints, as you do not need to manually create API endpoints. This can simplify your code and make it easier to maintain.
What about the use cases for server actions?
- Writing to a database
- Executing any server-related business logic, such as sending emails, creating files, etc.
- Calling external APIs
Best way to explain it is with an example, so let's dive into it.
Set up
Since the Server Actions is still in the experimental phase, we have to enable it manually. In the next.config.js file, we have to add the following:
// next.config.js
const nextConfig = {
  experimental: {
    serverActions: true,
  },
}
In the demo I will build a simple form, which allows us to add guests. To start I will use mockapi.io to generate custom data and to be able to perform GET AND POST requests. I created a simple API endpoint for our guests.

Having created the API endpoint, I can now navigate to the provided url and make a GET request
https://650be2bb47af3fd22f66a17c.mockapi.io/guests. Voila, the results below.

Creating the form
First we need to create a form. We can do this by adding the following code to our page:
// page.tsx
export default async function Home() {
  return (
    <div className="container mx-auto p-4">
      <h1 className="text-2xl font-bold mb-4">Guest List</h1>
      <form action="" className="mb-4">
        <input
          type="text"
          placeholder="Guest name..."
          className="p-2 border border-gray-300 rounded"
        />
        <button
          type="submit"
          className="bg-blue-500 text-white ml-4 py-2 px-4 rounded"
        >
          Add guest
        </button>
      </form>
    </div>
  )
}
A form, that allows us to add guests:

Making a GET request
The next step would be to make a GET request to our API, and display our guests. Inside our Home component, I will make a fetch request, which I will map over the response and display it in the browser:
// page.tsx
export type Guest = {
  id?: number
  name: string
}

export default async function Home() {
// Fetch request to our mock API.
  const res = await fetch('https://650be2bb47af3fd22f66a17c.mockapi.io/guests')
  const guests: Guest[] = await res.json()

  return (
    <div className="container mx-auto p-4">
      <h1 className="text-2xl font-bold mb-4">Guest List</h1>
      <form action="" className="mb-4">
        <input
          type="text"
          placeholder="Guest name..."
          className="p-2 border border-gray-300 rounded"
        />
        <button
          type="submit"
          className="bg-blue-500 text-white ml-4 py-2 px-4 rounded"
        >
          Add guest
        </button>
      </form>

      <div className="grid grid-cols-1 sm:grid-cols-2 md:grid-cols-3 lg:grid-cols-4 gap-4">
// Mapping over our guest list
        {guests.map((guest) => (
          <div
            key={guest.id}
            className="bg-white p-4 border border-gray-300 rounded"
          >
            <h2 className="text-xl font-bold mb-2">{guest.name}</h2>
            <p>Guest ID: {guest.id}</p>
          </div>
        ))}
      </div>
    </div>
  )
}
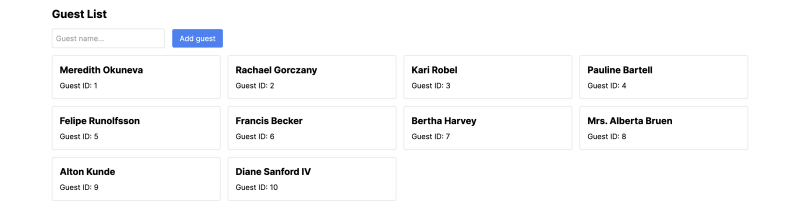
The end result:
Making a POST request
The next step is to be able to make a POST request to our API, to allow us to add guests. The action prop of the form element specifies the function that should be called when the form is submitted. In this case, we are setting the action prop to the addGuestToDatabase() function.
const res = await fetch(
  'https://650be2bb47af3fd22f66a17c.mockapi.io/guests',
  {
    next: {
      tags: ['guest'],
    },
   }
  )

{.... rest of the code}
// action prop
<form action={addGuestToDatabase} className="mb-4">
  <input
    type="text"
    name="name"
    placeholder="Guest name..."
    className="p-2 border border-gray-300 rounded"
/>
next: { tags: ['guest'] } option tells Next.js to invalidate the cache for any components that are subscribed to the guest tag when the request is successful. This ensures that the guest list is updated immediately after a new guest is added.
Implementing the addGuestToDatabase() function
The addGuestToDatabase() function is responsible for adding a new guest to the database. We can implement this function as follows:
'use server'
export const addGuestToDatabase = async (data: FormData) => {
  const name = data.get('name')?.toString()
  if (!name) return

  const newGuest: Guest = {
    name,
  }

  await fetch('https://650be2bb47af3fd22f66a17c.mockapi.io/guests', {
    method: 'POST',
    body: JSON.stringify(newGuest),
    headers: {
      'Content-Type': 'application/json',
    },
  })

  revalidateTag('guest')
}
The use server directive tells Next.js that this function should be executed on the server.
The revalidateTag() function tells Next.js to invalidate the cache for any components that are subscribed to the guest tag. This ensures that the guest list is updated immediately after a new guest is added to the database.

Conclusion
Server Actions is a powerful new feature that can simplify your codebase, make it easier to develop and maintain your Next.js applications, and improve performance by caching the results of server actions.
In this article, we have learned how to use Server Actions to create a simple form that allows users to add guests to a database. We have also seen how to use the revalidateTag() function to ensure that the guest list is updated immediately after a new guest is added.
Server Actions are still in the experimental phase, but they have the potential to revolutionise the way we develop Next.js applications. I encourage you to try out Server Actions and see how they can improve your development workflow.

Top comments (1)
Really cool post!
Welcome to DEV!