This is a brief summarization of the main principles covered in my extended post here . Check it out if you're looking to understand these concepts more fully.
CSS Variables
CSS Variables allow you to create pre-defined CSS properties and assign their scope.
When to Create CSS Variables
When defining variables it’s important to consider how they can cut down on your development time in the future.
Let’s consider this some more in the form of a design theme. For my project I want to have a masculine and feminine theme. I am going to be using background svg’s, images, border, font, and color styles to define each theme. Using CSS Variables, I can change the styles for all of my elements across the board more easily.
Where to Define CSS Variables
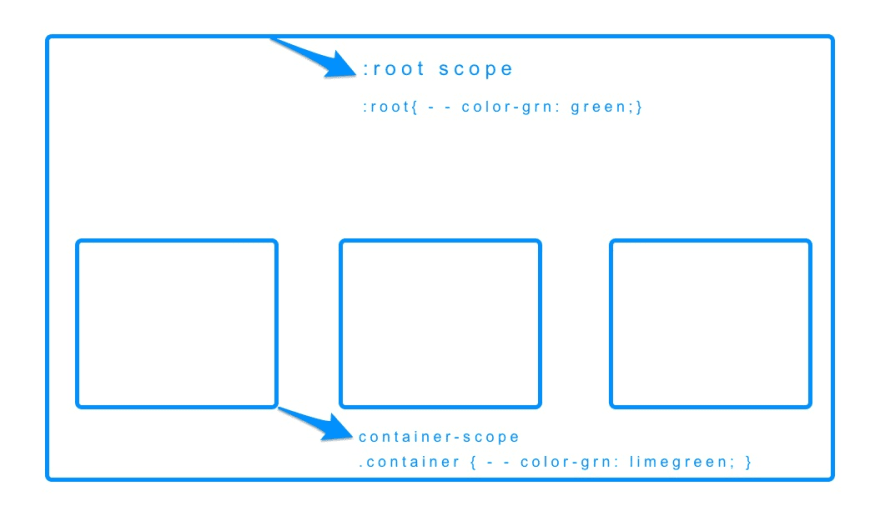
When defining the scope of your variables, you can set them to the :root object. That will ensure your variables can be used on all of the document’s elements.
If you have variables that should only be used in certain contexts, for instance variables just for containers, then adjusting the scope of the variables to the .container class makes more sense.
Example of this scoping principal in action:
CSS Layers
With normal CSS, the only way to overwrite styles is to use a more specific selector. Or as a last resort by using the !important directive (ewwww David).
With CSS Layers, you can create modules of CSS that will apply to elements under different contexts and you can also prevent writing hyper specific code or using !important when you don’t need to.
How to Use CSS Layers
CSS Layers provide you with a way to specify which styles to load and in what order. This is helpful especially if you have different stylesheets for different things.
For instance, you might have a utilities stylesheet that sets the padding, margins, and button properties to given class names. During development, you only need to add those class names to your HTML to see it magically styled in front of your eyes. You could use layers to define when to load utility stylesheets like Bootstrap and Tailwind to your project.
How to Define CSS Layers
With CSS Layers, you can use shorthand in a style tag to define the layer precedence like this below. If you define this at the top of your head element, it won’t matter in what order you load your stylesheets 🎉 :
<style>@layer third-most, second-most, most-important;</style>
When you first load my codepen here, you’ll see four total CSS layers applied to this site design.
- layout (layer 0)
- utilities (layer 1)
- typography (layer 2)
- femmeTheme (layer 3)
If you open up the inspector tools in Chrome 99 and up and click on the “Toggle CSS layers view” button, you can see the order in which the browser is prioritizing these layers.
The Femme Theme Layer and Variables
In my femmeTheme layer, although the H1 element has properties defined in the typography layer, I don't need to add a class name to my H1 element to overwrite the previous styles.
Similarly, I don't need to add additional specificity to the header element to adjust the border-bottom property. The CSS layer does the work for me.
I’m using Javascript to replace the images, and insert an internal stylesheet into the page.
=> When you click the “Change Theme” button, you’ll see the site design change.
What’s really going on under the hood?
As you can see in the below image, I’ve used CSS Variables to re-define the properties already in use. I’ve also overwritten the H1 property a second time without having to adjust the specificity at all 😏.
When the button is clicked, this stylesheet is inserted after the beginning of the body tag. This ensures that it will have more precedence than any of the layers that were defined before it.
See the project here:


Top comments (0)