
Introduction
Continuous Delivery (CD) is a software engineering approach in which the development team produces valuable software in short cycles and ensures that a reliable version of the software can be released at any time.
Although it can be painful to develop your own custom Continuous Delivery solution, it's relatively simple to do it with Heroku. Although you'll find a good documentation about this on Heroku, you'll not see in one place an application example fully integrated into the CD approach. The goal of this post is to provide this example for further reference.
The pipeline will consist of the following steps:
- As soon as a Pull Request (PR) is opened on the GitHub repository, a review app is created;
- Once the PR is merged, automatically deploy the alterations into the staging app;
- Manually promote the staging app to production.
I like to have review apps enabled because it gives you an URL reflecting the repository code on your PR. It's easy to share it with your team or even with customers (the ones paying you for the work).
The staging environment is normally intended to be a copy of the production environment and used as a final validation step before sending your alterations to production.
In this post, I'll be showing a configuration I often have in my projects. I'll be deploying a Ruby on Rails application, but if you came here aiming to configure CD for another kind of application, don't worry: the configuration is quite general.
Setting Up Heroku Pipeline
First things first, we create the production app on Heroku (naming it is up to you):
heroku apps:create generic-app-t
Now we create the pipeline:
➜  ~ heroku pipelines:create -a generic-app-t
? Pipeline name generic-app-t-pipeline
? Stage of generic-app-t production
Creating generic-app-t-pipeline pipeline... done
Adding ⬢ generic-app-t to generic-app-t-pipeline pipeline as production... done
The parameter -a specifies the app name, and that's required when creating a pipeline. I changed the default name for the pipeline appending the -pipeline at the end of the app name (personal taste, you can keep the default if you want) and informed that generic-app-t is the production app.
Note: If you prefer to use the Heroku dashboard, the action above plus the next ones can be found in the Deploy tab.

Now it's time to create the staging app:
heroku apps:create generic-app-t-staging
and add it to our pipeline:
➜  ~ heroku pipelines:add generic-app-t-pipeline -a generic-app-t-staging
? Stage of generic-app-t-staging staging
Adding ⬢ generic-app-t-staging to generic-app-t-pipeline pipeline as staging... done
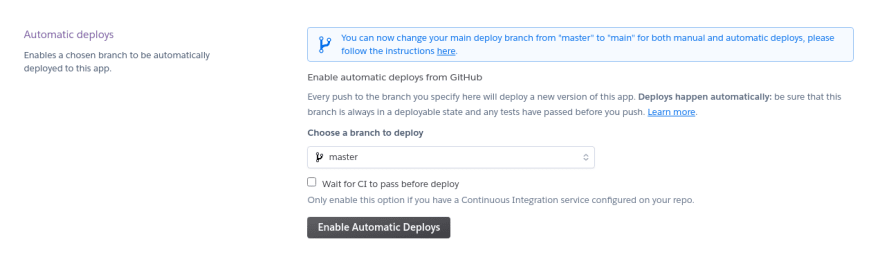
Let's review what we wanna achieve with the staging app: each time we merge the PR in our master branch, the alteration must be deployed to our staging app. To allow this to happen, you need to enable automatic deploys. The configuration option is found in the deploy tab:
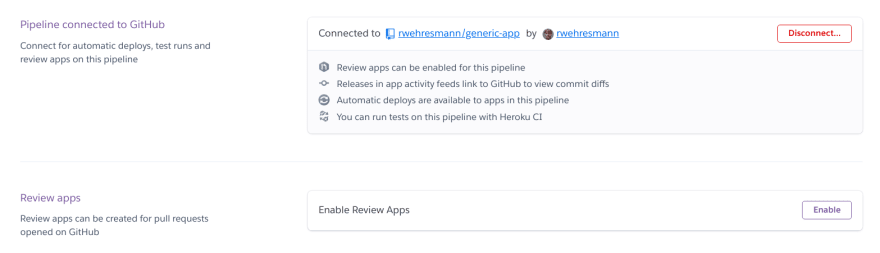
Supposing you already have your app repository on GitHub, it's time to connect your pipeline to it:

Now it's possible to enable Review Apps in your pipeline. We have some configuration options available, and I'll choose the following:
- Create new review apps for new pull requests automatically, as proposed in the introduction section of this post;
- Destroy review apps that don't have any new deploy after 30 days. It's up to you really, but I don't like to keep old review apps, and you can always create a new one if necessary.

With that, the pipeline has all the apps it should contain. Let's continue with specific configurations for each one now.
Configuring Environments and Review Apps on Heroku
I'm assuming that both environments will have the following Heroku add-ons:
1) Two Heroku Postgres databases;
2) Redis Cloud database;
3) Rollbar.
For what purpose I'll use two databases or any other add-on, that is not important in the context of this post. They're here just to provide more comprehensive configurations.

As a Ruby on Rails application, we also include the heroku/ruby buildpack.

The next step is to set your config vars. My config vars are all inside an encrypted credentials file, so I'll just set one called RAILS_MASTER_KEY that is used to decrypt it.
Add-ons, buildpack, and config vars: do again exactly the same you did but now for the staging app (in my case, generic-app-t-staging).
To finish it, set the config vars for the review apps. This is a general configuration that will be applied over all review apps that will be created in the future, and you can find it in the Settings tab of your pipeline.


Configuring Review Apps on Your Application
The final step to have your review apps working is the app.json file. This is a file that needs to be on the root of your repository, containing instructions of which add-ons/builpacks should be used, as well as the required config vars.
In my case, I'm replying the configuration made for production/staging, and here is how it'll look like:
{
  "env":{
     "RAILS_MASTER_KEY":{
        "require":true
     }
  },
  "scripts":{
     "postdeploy":"bin/bundle exec rake db:migrate rake db:seed"
  },
  "addons":[
     {
        "plan":"heroku-postgresql:free"
     },
     {
        "plan":"heroku-postgresql:free",
        "as":"audit"
     },
     {
        "plan":"rediscloud:free"
     },
     {
      "plan": "rollbar:free"
     }
  ],
  "buildpacks":[
     {
        "url":"https://github.com/heroku/heroku-buildpack-ruby"
     }
  ]
}
We have two postgresql add-ons, and we cannot add both with the same name. To handle that we simply name differently one of them with as. The add-on notation is add-on-name:plan, and one question you may face is where to find the add-on name to add: add-ons can be added through the heroku-cli (heroku addons:create [name]), and the name must follow the same notation. This name can be found on the add-on page (e.g., Redis Enterprise Cloud). The postdeploy specifies if something should run right after the deploy is finished. In my case, I'm using rails command to create/update the database tables (db:migrate) and provide some seed data (db:seed).
Putting Everything to Work
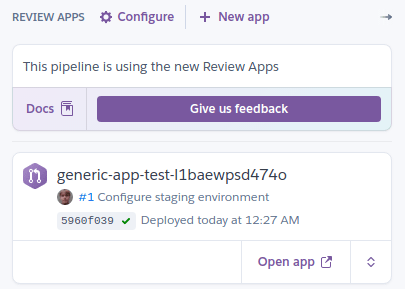
Create a PR in your GitHub repository, and you'll see a review app being deployed.
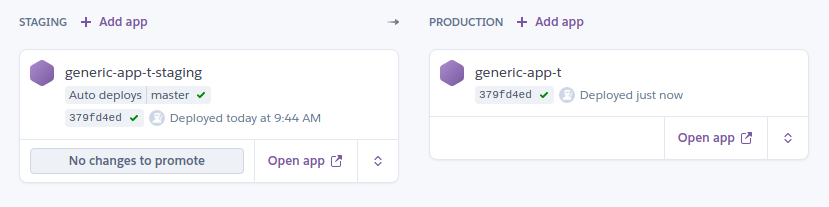
Merge the PR, and you'll see that's automatically deployed to the staging app, offering you the option to promote to production:
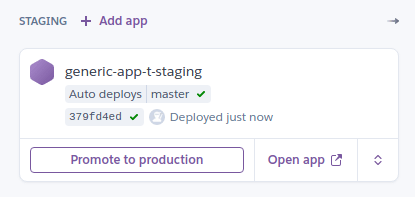
Promote it to production, and congratulations: you delivered your software alterations in a short cycle using the continuous delivery approach!
Conclusion
This post showed how to integrate an application in a Continuous Delivery approach using Heroku. It was presented how to fully configure the pipeline that consisted of review apps for each pull request, a staging app for tests, and finished with the production app.
The configuration presented is just an example of what you could do, and you can modify it according to your needs. For instance: Continous Integration (CI). CI is out of the scope of this post, but you could easily include it in your approach (e.g., deploying to the staging app only if your tests pass).
Keep in mind that besides what was shown here, you need to configure your application on how to handle the staging environment. The same way you have specific configurations implemented for the test, development, and production environment, your application needs to know how to behavior when env == staging.
As a final suggestion, if you're not using Continuous Delivery, considered it. Regardless of the size of your project, if your team is small or even if you're working alone: it's better to organize your project.
This is it! If you have any comments or suggestions, don't hold back, let me know.
Options if you like my content and would like to support me directly (never required, but much appreciated):
BTC address: bc1q5l93xue3hxrrwdjxcqyjhaxfw6vz0ycdw2sg06


Top comments (0)