Introduction
In this blog post, I will share my experience building a comprehensive and well-defined e-commerce API using NestJS, MongoDB, and Postman.
The API I built includes several endpoints that collectively make up a complete e-commerce API. These endpoints are for admins, end users, products, and categories.
Each endpoint is well-defined and provides a clear and concise interface for interacting with the API. The endpoints are also well-documented, making it easy for developers to understand how to use them.
I hope this blog post will be helpful to other developers who are interested in building e-commerce APIs with NestJS.
Here are some of the key takeaways from this project:
- NestJS is a powerful framework that can be used to build comprehensive and well-defined APIs.
- MongoDB is a reliable and scalable database that is well-suited for e-commerce applications.
- Postman is a powerful tool for testing and debugging APIs.
I encourage you to try building your own e-commerce API using NestJS, MongoDB, and Postman. It is a great way to learn about these technologies and build a valuable skill set.
About Project
Ecommerce systems typically have two types of users: users and admins. Users can register and login to the system, but they can only read products. Admins can register, login, and perform CRUD operations on products.
The password hashing for both users and admins is done with the bcrypt module in npm. This module provides a secure way to hash passwords.
Product categories are defined with the help of the .populate() method. This method allows you to fetch the product categories from the database when you fetch a product. This makes it easy to display the product categories on the product page.
Detailed Explaination :-
- Users and admins: Users are the end users of the ecommerce system. They can register and login to the system, and they can view products. Admins are system administrators. They have more privileges than users, and they can perform CRUD operations on products.
- Password hashing: Password hashing is a security measure that helps to protect user passwords. When a user registers for an ecommerce system, their password is hashed using a secure algorithm. This means that the password is not stored in plain text, and it cannot be easily decoded.
- jsonwebtoken module: The jsonwebtoken module is a popular module for generating and verifying JSON Web Tokens (JWTs). JWTs are a secure way to authenticate users. When a user logs in to an ecommerce system, they are issued a JWT. This JWT can then be used to authenticate the user on subsequent requests.
- .populate() method: The .populate() method is a method that is used to fetch related documents from the database. In the context of ecommerce systems, the .populate() method can be used to fetch product categories when a product is fetched. This makes it easy to display the product categories on the product page.
- bcrypt module: The bcrypt module uses the bcrypt algorithm to hash passwords. The bcrypt algorithm is a slow algorithm, which makes it difficult for attackers to brute-force passwords. The bcrypt module also uses a salt, which is a random string that is added to the password before it is hashed. This makes the hash more unique and difficult to crack.
How to create Nest Project
First of all we need to install Nestjs in our root directory. To install Nestjs Cli in our root directory we need to follow the command:-
$npm i -g @nestjs/cli
Moreover, for creating boilerplate for our nest project file We need to write following code:-
$nest new project-name
Your created file will look like this :-
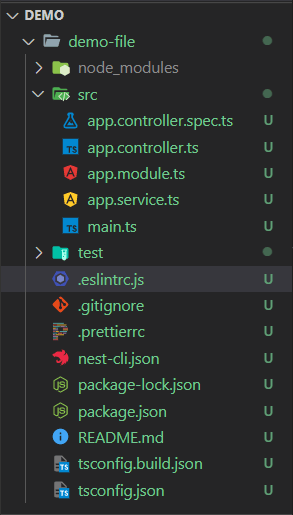
Your project file will look like this at first but you can create or delete folders as per your requirement.
Creating first API
Nest APIs are made up of three main components: providers, controllers, and services.
Providers are plain JavaScript classes that provide functionality to the application. They are declared in module files.
Controllers handle HTTP requests. They are responsible for routing requests to the appropriate providers and services.
Services contain the business logic of the application. They are used by controllers to perform tasks such as data access and manipulation.
In other words, providers are the foundation of an API, controllers are the glue that holds it together, and services are the muscle that makes it work.
The normal flow of data is like....
Controller -> Service;
Service -> Repository/Schema;
Repository/Schema -> Database;
So here's how your all your files inside src folder will look like...

Schema
import { Prop, Schema, SchemaFactory } from "@nestjs/mongoose";
import { Document } from "mongoose";

@Schema()
export class Admin extends Document{

    @Prop({required: true})
    firstName: string

    @Prop({required: true})
    lastName: string

    @Prop({unique: true, required: true })
    userName: string

    @Prop({required: true})
    password: string

    @Prop({ unique: true, required: true })
    mobileNo : number

    @Prop({ unique: true, required: true })
    email: string

    @Prop({required: true})
    gender: string

    @Prop()
    isAdmin: boolean
}
 export const AdminSchema = SchemaFactory.createForClass(Admin)
The code above defines a mongoose schema for the admin API. A schema is a blueprint for a document in a MongoDB database. It defines the structure of the document, including the fields that are allowed and the types of data that can be stored in each field.
The mongoose schema in the code above uses decorators to validate the data that is stored in the document. For example, the IsString() decorator ensures that the value of the name field is a string, and the IsNotEmpty() decorator ensures that the value of the email field is not empty.
This schema ensures that the data that is stored in the admin API is valid and consistent. This makes it easier to manage the data and to ensure that the API is working correctly.
Controllers
import { Body, Controller, Post } from '@nestjs/common';
import { adminService } from './admin.service';
import { Admin } from './admin.schema';
import { adminDto } from './dto/admin.dto';
import { adminLoginDto } from './dto/adminLogin.dto';

@Controller('admin')
export class adminController {

  constructor(
    private adminService: adminService,
    ) {}

  @Post('/register')
  async newAdmin(@Body() adminDto: adminDto): Promise<Admin | object> {
    return this.adminService.newAdmin(adminDto);
  }

  @Post('/login')
  async loginAdmin(@Body() adminLoginDto: adminLoginDto): Promise<object>{
   return this.adminService.loginAdmin(adminLoginDto);
  }
}
The code above shows the Admin API controller file, which is a class that handles HTTP requests and responses for managing admin users. The controller uses only the HTTP POST method for signup and login requests. It also uses the services, as mentioned above, which are classes that provide business logic.
To create a controller file, it is mandatory to use the @Controller() decorator above the controller class. This is a Spring annotation that marks a class as a controller.
The term DTO stands for Data Transfer Object. DTOs are simple objects that are used to transfer data between different components of an application. In this case, they are used to validate data that is flowing in incoming requests.
Here is the Example of a Simple admin login Dto....
import { IsString } from 'class-validator';

export class adminLoginDto {
  @IsString()
  userName: string;

  @IsString()
  password: string;

}
Services
/* eslint-disable prettier/prettier */
import { Injectable, UnauthorizedException } from '@nestjs/common';
import { Admin } from './admin.schema';
import { InjectModel } from '@nestjs/mongoose';
import { Model } from 'mongoose';
import * as bcrypt from 'bcrypt';
import { adminDto } from './dto/admin.dto';
import { JwtService } from '@nestjs/jwt';
import { adminLoginDto } from './dto/adminLogin.dto';

@Injectable()
export class adminService {
  constructor(
    @InjectModel(Admin.name)
    private adminModel: Model<Admin>,
    private jwtService: JwtService,
  ) {}

  async newAdmin(adminDto: adminDto): Promise<Admin | object> {
    const {
      firstName,
      lastName,
      userName,
      password,
      email,
      mobileNo,
      gender,
      isAdmin,
    } = adminDto;

    const salt = await bcrypt.genSalt();
    const hashedPassword = await bcrypt.hash(password, salt);

    const existingUser = await this.adminModel.findOne({
      userName,
      email,
    });
    if (!existingUser) {
      const adminUser = await this.adminModel.create({
        firstName,
        lastName,
        userName,
        password: hashedPassword,
        email,
        mobileNo,
        gender,
        isAdmin: true,
      });
      return adminUser.save();
    } else {
      return {
        statusCode: 400,
        message: `User already exist.`,
      };
    }
  }

  async loginAdmin(adminLoginDto: adminLoginDto): Promise<object> {
    const { userName, password } = adminLoginDto;
    const admin = await this.adminModel.findOne({ userName });
    const isAdmin = admin.isAdmin;
    if (admin && (await bcrypt.compare(password, admin.password))) {
      const payload = { userName, isAdmin };
      const accessToken = await this.jwtService.sign(payload);
      return {
        statusCode: 200,
        message: 'Login Successfull',
        Admin: admin,
        token: accessToken,
      };
    } else {
      throw new UnauthorizedException('User is not authorized');
    }
  }
}
The Services module in a Nest project is responsible for the business logic of the application. It is used by the controller modules to perform tasks such as saving data to the database, verifying passwords, and generating tokens.
In this module, we are saving the admin's data on sign-in with hashed passwords using the bcrypt package. This ensures that the passwords are stored securely and cannot be easily decoded.
The .findOne() method is used to find data in the database based on the username and email fields. These two fields should be unique, so using the .findOne() method ensures that we only return one record.
Array destructuring is used to extract the required fields from the record that we retrieved from the database. These fields will be saved into our database. We also keep a flag to differentiate between end-users and admin users.
The Login function uses the same .findOne() method to find the data from the database. The password is then verified, and if the credentials are correct, the user will receive a token.
The AuthGuard that we used will only give access to the admin to create, delete, and update products. End-users do not have the same authority as the admin.
Conclusion
In this blog post, we discussed the process of creating an admin API for an e-commerce platform. We covered the different endpoints that are typically included in an admin API, as well as the different constraints that you will need to consider when creating an API.
We also discussed the need for additional APIs, such as end-user, product, and category APIs, in order to provide a complete e-commerce experience to users. We briefly touched on the different constraints that you will need to consider when creating these additional APIs.
We hope that this blog post has been helpful. If you have any questions, please feel free to leave a comment below.
Thank you for reading!
Here You can checkout my full project, I tried to keep it as minimal as possible for better understanding..


Top comments (6)
Nice. You can make your code snippet more readable by specifying the language, like using "ts" or "typescript" in the markdown code block. This will add color to your code.
```ts const turorialFunction = (name) => { console.log(`Hello ${name}`) } ```okay....thank you for your valuable feedback ,I didn't knew that I can specify the language :D
Nice one.
Thank you!!
well done !
Thank you!!