
Introduction
MindsDB introduces AI and machine learning to traditional databases to help working data professionals and users – identify patterns, predict trends, and train models.
MindsDB works as an AI layer on top of the existing database and uses the available datasets to train powerful prediction models with great accuracy, all with the ease of just executing a few SQL-like queries.
Well, in this tutorial, we will now learn how to deploy an instance of MindsDB on Scaleway Cloud Compute.
Creating a Scaleway Compute Instance
Scaleway offers prominent cloud solutions to a wide variety of users. However, it is more focused on providing bundled ecosystems rather than individual products. It is the only cloud provider to concurrently provide 3 available ecosystems to users.
- Scaleway Datacenter
- Scaleway Dedibox
- Scaleway Elements
Let's us now get started with creating a cloud instance on Scaleway following the steps below.
Step 1: Sign up for a new Scaleway account here or login to your existing one. Scaleway provides 100€ worth of credits to its new users for about a month to evaluate the platform offerings.

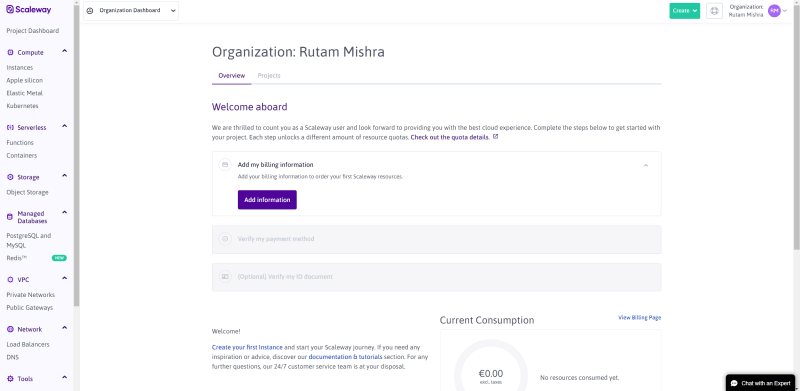
Step 2: Once you're logged in, it navigates to the Organization dashboard where you can find a navigation pane on the left with the list of all the services and billing and other details about your account.
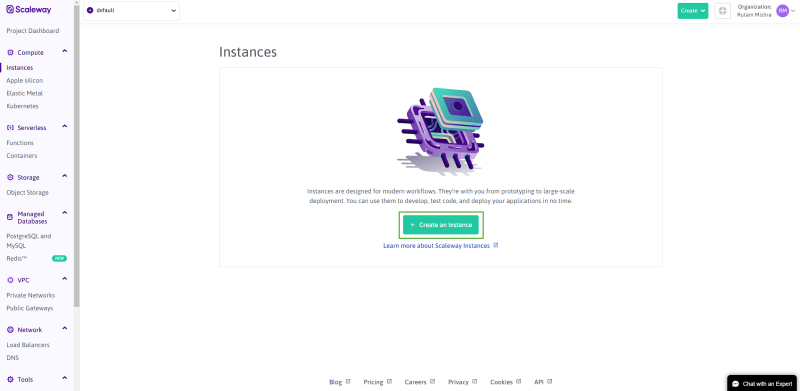
Step 3: From the left panel, click on Instances under Compute section or you can also click on the Create from the top right corner and then tap on Instance from the list that appears. This will open up the Instances dashboard. Now hit the + Create an Instance button.
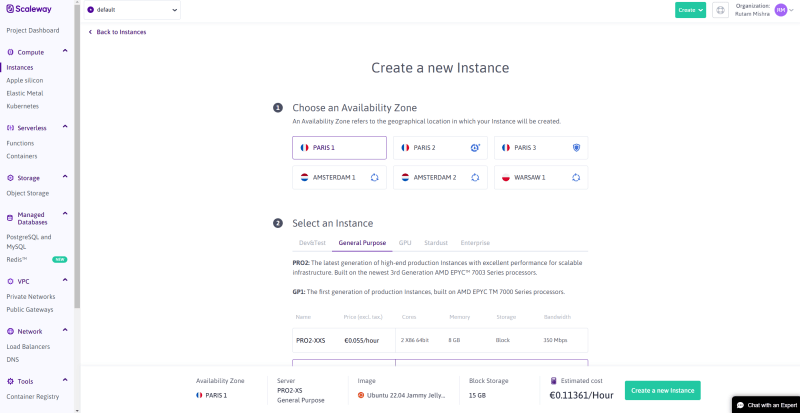
Step 4: In the next screen, we need to choose the configuration for the compute instance. You are free to choose the specs as per your needs or you can follow the list of selections given below to complete this tutorial.
- Choose an Availability Zone: Paris 1
- Select an Instance: General Purpose (PRO2-S--€0.219/hour)
- Choose an image: Ubuntu 22.04 Jammy Jellyfish
-
Add volumes: Simply increase the size of
System volumeto 30GB from 10GB, as we will need some space later. -
Select a volume to run your OS from: Select
System volumefrom the dropdown. - Enter a name and optional tags:
-
Instance name- Give it something like
mindsdb-demo. - Tags- Leave them blank as it is.
-
Instance name- Give it something like
-
SSH Keys: You need to generate an SSH key to connect.
- Click on
+ Add a new SSH key. - Run the following in your terminal.
ssh-keygen -t rsa -b 4096 -C "user@email.com"- Provide a file name when prompted to save the key in, e.g.,
sshkey. - You can provide a passphrase if you wish to or else simply hit Enter twice for empty passphrase. This should generate a Public/Private key pair for you.

- Now open the Public key file sshkey.pub from the location where it was saved (Generally, C:\Users\USER_NAME/key in Windows), copy its value, and then paste into the
New SSH Keydialog. Provide a name for the key in theNamefield below and then hit theAdd an SSH Keybutton to get the public key added.

- Click on
Finally, hit the Create a new Instance to instantiate the instance.
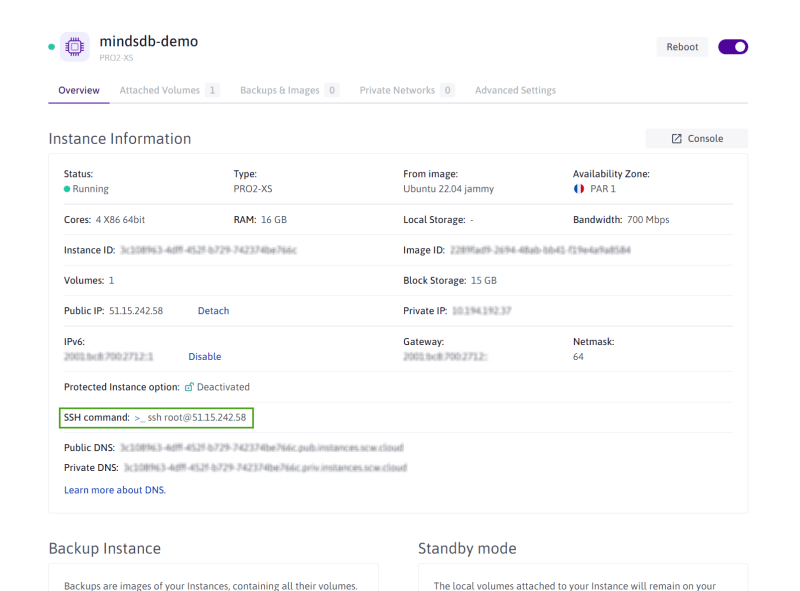
Step 5: It takes a while to launch the instance and once the instance is ready, the control takes you to the Instance Overview page where you can find all the details about the instance and its configurations as well.
Deploying MindsDB in the Instance
As the instance is up and running, now we're ready to start installing MindsDB in it. So, let's get started with the steps below.
Step 1: We will need Docker to install MindsDB. Let's get it installed first in the instance.
apt install docker.io
Type Y and hit Enter when prompted to continue with the installation.
Once the installation is complete, try running the command below and it should return a Hello from Docker! message, which confirms that Docker is successfully installed.
docker run hello-world

Step 2: We will now use docker to pull the latest stable release of MindsDB into the instance.
docker pull mindsdb/mindsdb

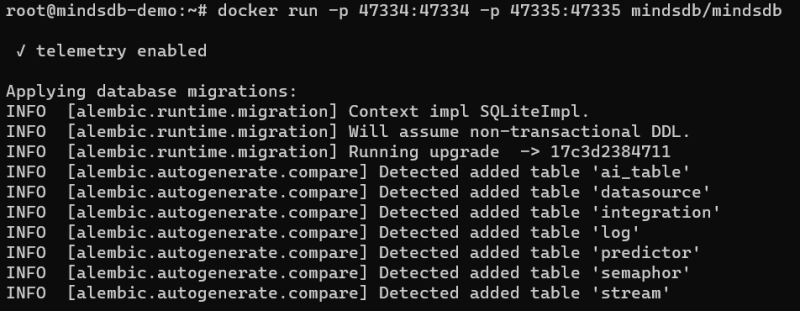
Step 3: Now we will run Mindsdb with Docker and expose the respective ports for the HTTP GUI and the MySQL API. The query would look something like this.
docker run -p 47334:47334 -p 47335:47335 mindsdb/mindsdb
Step 4: Once we expose the ports, we will now try to access the MindsDB GUI using the Public IP of the instance at the respective port 47334.
http://PublicIPv4:47334
This opens up the MindsDB console for us. As you can see, the console consists of three major sections.
- A Query Editor- A place where you will write the queries
- A Result Viewer- A place that will show the result of the query
- Learning Hub- A place for new users to use and learn MindsDB

Fetching the Default Tables in MindsDB
Now we can play with the UI and do amazing stuff with datasets and prediction models. But let us first run a simple query to list out the default tables that we find when we install MindsDB initially.
SHOW tables;
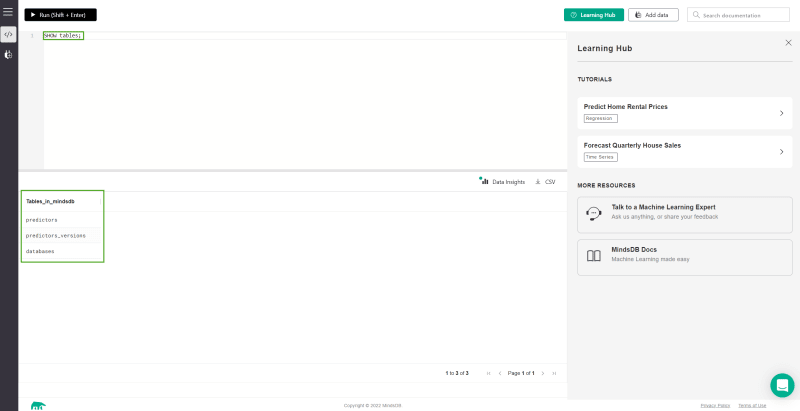
This query lists out the 3 default tables as listed below.
- predictors: This table stores each Predictor model that we train as an individual record along with its details as columns.
- predictors_versions: Versioning occurs when we re-train the model. This table stores the different available versions of a predictor model that we can choose from while predicting a value and using that particular model.
- databases: This table holds the records of different databases that we have connected with the MindsDB instance.
Conclusion
We have now successfully deployed an instance of MindsDB on Scaleway Cloud. Before we wrap up this tutorial, let us first summarize all the things that we did above. So, we started with creating or logging in to a Scaleway account, deployed a compute instance, installed Docker in the instance, used Docker to install MindsDB, ran MindsDB and exposed the ports, accessed the MindsDB console UI, and finally explored the available default tables.
Now that we know how to do this properly, I believe all of you are quite excited to try it on your own and train awesome Predictor models to do predictions for you. Remember, MindsDB offers free versions for all of its users in Self-hosted and Cloud variants so that everyone can try it without any hesitation.
This concludes the tutorial here. Lastly, before you go, do let me know in the comments if you found this article helpful and also, don't forget to drop a LIKE.


Latest comments (0)