
If you are a serious Android developer, consuming REST APIs at some point in your career is inevitable. This article will focus on how Retrofit can be bundled with Kotlin Coroutines to call asynchronous REST APIs, and we’ll build a small app to showcase a real-world example.
The entire source code of this project is available on GitHub.
What will we build?
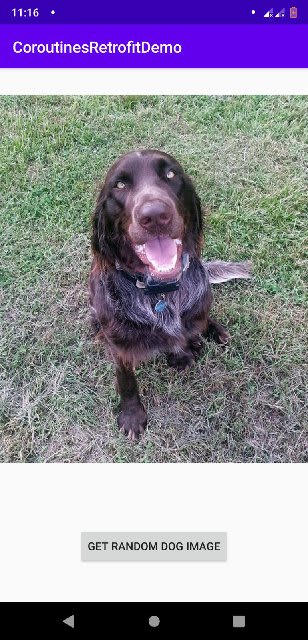
We'll be building a small app that retrieves a random dog image on demand. Our layout will contain an ImageView that fills up the top half of the screen, and a button which will call an API to get a random dog image whenever clicked.
We'll be using Retrofit to make the API calls, the Dog CEO API to get random dog images, and we'll be using an image loading library called Coil to display the image.
Prerequisites
Start off a new Android Studio project with a blank activity. Once the initial Gradle sync and indexing is completed, add the following lines in the dependencies section of app level build.gradle. Then re-sync your project to download all the dependencies.
// Retrofit and relevant converters
implementation 'com.squareup.retrofit2:retrofit:2.8.0'
implementation 'com.squareup.retrofit2:converter-gson:2.1.0'

// Coroutines
implementation 'org.jetbrains.kotlinx:kotlinx-coroutines-core:1.3.5'
implementation 'org.jetbrains.kotlinx:kotlinx-coroutines-android:1.3.5'

// Coil for image loading
implementation 'io.coil-kt:coil:0.9.5'
You will also have to use Java 8, as it is required byboth Retrofit and Coil. Add these lines to your app level build.gradle file.
android {
    compileOptions {
        sourceCompatibility JavaVersion.VERSION_1_8
        targetCompatibility JavaVersion.VERSION_1_8
    }
    kotlinOptions {
        jvmTarget = "1.8"
    }
}
Setting up Retrofit
Our next step would be setting up the Retrofit client, through which we will be calling our APIs.
Firstly, let’s create an Interface called ApiClient. This will eventually become our Retrofit client. In this file, you’ll be defining all your API routes. We use the following scheme to define our APIs.
@METHOD("/endpoint/of/the/api")
suspend fun ourMethodName(): Response<OurApiResponseModel>
Notice that the function is declared as suspend. Suspend functions are a core element of Coroutines. They’re essentially functions that could be paused or resumed during execution.
Here, the placeholders are:
-
METHOD: The API method – GET, PUT, POST etc. -
ourMethodName: The function named relevant to the API call. -
OurApiResponseModel: A class which matches with the API’s JSON response.
In the Dog CEO API, sending a GET request to https://dog.ceo/api/breeds/image/random gives us a random dog image. The API responds with the JSON structure given below:
{
    "message":"https:\/\/images.dog.ceo\/breeds\/hound-basset\/n02088238_3778.jpg",
    "status":"success"
}
We’ll now create a model class called DogImageModel which will be a replica of this response JSON. The keys become variables of the model class and the values will default to null. Retrofit will automatically handle the object mapping part for us. The @Keep annotation is to ensure the class is not obfuscated when using Proguard, which would cause a crash otherwise.
@Keep
class DogImageModel {
    var message: String? = null
    var status: String? = null
}
We’ll now define a new API inside the ApiClient file. Notice that I have omitted the domain name, the reason for which is explained in the next step.
@GET("/api/breeds/image/random")
suspend fun getRandomDogImage(): Response<DogImageModel>
At this point, our ApiClient file looks as follows.
interface ApiClient {
    @GET("/api/breeds/image/random")
    suspend fun getRandomDogImage(): Response<DogImageModel>
}
With our API defined and ready, we’ll create a new Kotlin Object called ApiAdapter. This file will hold the instance of the Retrofit client. Invoking the Retrofit builder, we pass in the base URL (the domain name we had omitted previously), an OkHttpClient instance as our HTTP client, and a GsonConverterFactory which will do the JSON-Object conversion for us.
object ApiAdapter {
    val apiClient: ApiClient = Retrofit.Builder()
        .baseUrl("https://dog.ceo")
        .client(OkHttpClient())
        .addConverterFactory(GsonConverterFactory.create())
        .build()
        .create(ApiClient::class.java)
}
We’re done with Retrofit setup. Let’s now head to the UI part.
Building the UI
Our UI is pretty simple – a vertical LinearLayout with an ImageView and a Button as its children. Here’s the full XML code.
<?xml version="1.0" encoding="utf-8"?>
<LinearLayout xmlns:android="http://schemas.android.com/apk/res/android"
    xmlns:app="http://schemas.android.com/apk/res-auto"
    xmlns:tools="http://schemas.android.com/tools"
    android:layout_width="match_parent"
    android:layout_height="match_parent"
    android:orientation="vertical"
    tools:context=".MainActivity">

    <ImageView
        android:id="@+id/iv_dog_image"
        android:layout_width="match_parent"
        android:layout_height="0dp"
        android:layout_weight="1"/>

    <Button
        android:id="@+id/btn_get_image"
        android:layout_width="wrap_content"
        android:layout_height="wrap_content"
        android:layout_margin="48dp"
        android:text="@string/get_random_dog_image"
        android:layout_gravity="center" />

</LinearLayout>
Calling the API
With our UI and boilerplate code ready, we’ll now venture into Kotlin Coroutines. Simply put, Coroutines is an asynchronous utility in Kotlin that allows you to perform multithreading tasks easily. The usage is diverse and I recommend you to check out the official guide to understand it further.
In order to call a Coroutine, we have to implement a CoroutineScope. This provides the scope in which the given coroutine should send out its results. In our case, we will implement the MainScope(), which creates the scope for UI components.
class MainActivity : AppCompatActivity(), CoroutineScope by MainScope() {

    override fun onCreate(savedInstanceState: Bundle?) {
        super.onCreate(savedInstanceState)
        setContentView(R.layout.activity_main)

        // Rest of the code goes here
    }
}
After we do that, we now have to call the API on a button click. We’ll set an OnClickListener to our Button. Our on-click action would be to call the API. Generally, using Coroutines, the API is called as follows:
- Wrap the entire call within a launch function call, passing the
Dispatchers.Maindispatcher as a function parameter. - Wrap the API call inside a try/catch block. This will allow us to handle any client errors (e.g. bad URL, no internet).
- Call the API by accessing the Retrofit client object in ApiAdapter, and then calling the appropriate API function.
- Check whether the API was successful or not, and then retrieve the response body.
- Do whatever you want to with the data, in our case get the image URL and display the image.
btn_get_image.setOnClickListener {
    launch(Dispatchers.Main) {
        // Try catch block to handle exceptions when calling the API.
        try {
            val response = ApiAdapter.apiClient.yourApiMethod()
            // Check if response was successful.
            if (response.isSuccessful && response.body() != null) {
                val data = response.body!!
                // Check for null safety.
                data.message?.let { imageUrl ->
                // Load URL into the ImageView using Coil.
                iv_dog_image.load(imageUrl)
            } else {
                // Show API error.
                Toast.makeText(
                    this@MainActivity,
                    "Error Occurred: ${response.message()}",
                    Toast.LENGTH_LONG).show()
            }
        } catch (e: Exception){
            // Show API error. This is the error raised by the client.
            Toast.makeText(this@MainActivity,
                "Error Occurred: ${e.message}",
                Toast.LENGTH_LONG).show()
        }
    }
}
And with that, our entire MainActivity looks like this
class MainActivity : AppCompatActivity(), CoroutineScope by MainScope() {

    override fun onCreate(savedInstanceState: Bundle?) {
        super.onCreate(savedInstanceState)
        setContentView(R.layout.activity_main)

        btn_get_image.setOnClickListener {
            // Use launch and pass Dispatchers.Main to tell that
            // the result of this Coroutine is expected on the main thread.
            launch(Dispatchers.Main) {
                // Try catch block to handle exceptions when calling the API.
                try {
                    val response = ApiAdapter.apiClient.getRandomDogImage()
                    // Check if response was successful.
                    if (response.isSuccessful && response.body() != null) {
                        val data = response.body()!!
                        // Check for null
                        data.message?.let { imageUrl ->
                            // Load URL into the ImageView using Coil.
                            iv_dog_image.load(imageUrl)
                        }
                    } else {
                        // Show API error.
                        Toast.makeText(
                                this@MainActivity,
                                "Error Occurred: ${response.message()}",
                                Toast.LENGTH_LONG).show()
                    }
                } catch (e: Exception) {
                    // Show API error. This is the error raised by the client.
                    Toast.makeText(this@MainActivity,
                            "Error Occurred: ${e.message}",
                            Toast.LENGTH_LONG).show()
                }
            }
        }
    }
}
That’s all. We’re ready to see our new creation in action! But before you run the code, make sure you add the internet permission at the top of your project’s AndroidManifest.xml file.
<uses-permission android:name="android.permission.INTERNET" />
If everything goes well, you’ll be able to see a random dog image every time you tap on the button. Congratulations!
Closing Thoughts
Retrofit is an amazing HTTP client for Android. It reduces, if not eliminates, the time you spend doing mundane and time-consuming tasks like handling network calls and mapping your objects. The library, bundled with the new coroutines feature of Kotlin, makes consuming HTTP network calls pathetically simple!
As always, i'll be glad to answer your questions in the comments section. Until next time!

Top comments (5)
Rashid,the response logic is not ok its not working...
Hey @qendev , Rishabh here! Can you share some more information about the issue?
Maybe @qendev didn't add settings in module level file
compileOptions {
sourceCompatibility JavaVersion.VERSION_1_8
targetCompatibility JavaVersion.VERSION_1_8
}
kotlinOptions {
jvmTarget = JavaVersion.VERSION_1_8.toString()
}
Good catch, will include it in the post.
Can the Response type be generic? Like so
suspend fun getRandomDogImage(): Response