Around July 2017, TensorFlow’s Object Detection API was released. The TensorFlow Object Detection API is an open source framework built on top of TensorFlow that makes it easy to construct, train and deploy object detection models.
What makes this API huge is that unlike other models like YOLO, SSD, you do not need a complex hardware setup to run it.
They have published a paper titled Speed/accuracy trade-offs for modern convolutional object detectors . Here they discuss various architecture available for object detection like YOLO, Faster R-CNN, SSD and R-FCN.
This API is capable of identifying many types of objects like cars, pedestrians, person, kite, dog and many more. You can find the whole list here.
I have used this API, for detecting traffic signal in a live video stream for capstone project of Udacity’s self-driving car nanodegree program. In this project we had to run the Carla (self-driving car of Udacity) on the road.

Let’s begin the setup.
- Clone the tensorflow-model repository.
- The main API documentation is at https://github.com/tensorflow/models/tree/master/research/object_detection.
- Install tensorflow.
# For CPU
pip install tensorflow
# For GPU
pip install tensorflow-gpu
- Install all other dependencies
pip install pillow
pip install lxml
pip install jupyter
pip install matplotlib
Download Google Protobuf https://github.com/google/protobuf Windows v3.4.0 release “protoc-3.4.0-win32.zip”
Extract the Protobuf download to Program Files, specifically
C:\Program Files\protoc-3.4.0-win32
- Now cd into models\research.
cd path\to\models\research
- Execute the protobuf compile
“C:\Program Files\protoc-3.4.0-win32\bin\protoc.exe” object\_detection/protos/\*.proto --python\_out=.
This is the most important step in the installation process.
Now navigate to models\research\object_detection\protos and and verify the .py files were created successfully as a result of the compilation. (only the .proto files were there to begin with)
cd to \models\research\object_detection. Open the jupyter notebook object_detection_tutorial.ipynb. Here you can play with the API.
Problem you will probably face :
- If you move the notebook to any other directory, and run it and you will get an error
ModuleNotFoundError: No module named 'utils'
- Source of this error are these two lines in the code.
from utils import label\_map\_util
from utils import visualization\_utils as vis\_util
- This error is because we are yet to inform Python how to find the utils directory that these lines use.
Issue Resolution :
- Go to System -> Advanced system settings -> Environment Variables -> New, and add a variable with the name PYTHON_PATH and these values:
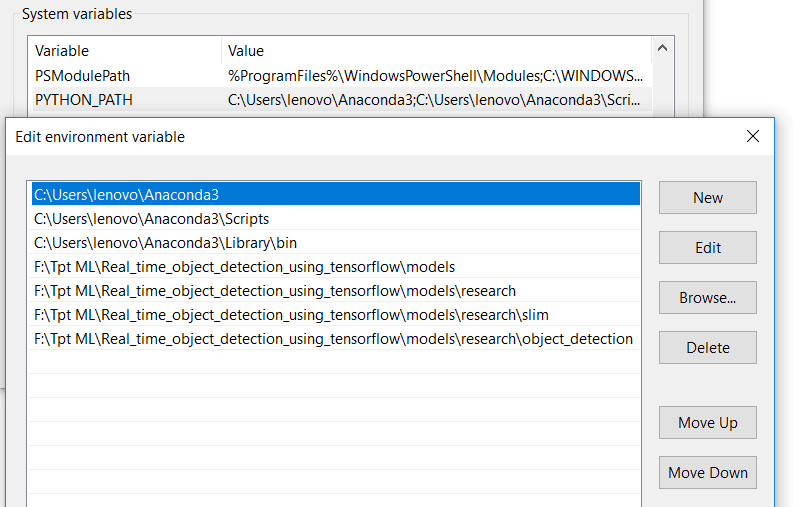
- In system variables, edit PATH and add %PYTHON_PATH%.
- You will need to restart the system and then you are free to use this code anywhere in the system.
Some output samples


For experimenting with this API, I used my webcam and mobile’s camera. I used IP Webcam Android App for interfacing the mobile camera. You can checkout the repository.
rohts-patil/TensorFlow-Object-Detection-API-On-Live-Video-Feed
Thank you for reading. You can find me on Twitter @Rohitpatil5, or connect with me on LinkedIn.

Top comments (0)