
So, for developers new to AWS, especially the S3 Bucket, the S3 Bucket is a simple storage service in the cloud that houses images, videos, and other documents. It also provides a secure and scalable for users or developers to manage their data.
Now, in order to interact with your S3 to perform various operations like uploading a file to deleting it, we use the AWS SDK.
So let head right in!!!!
Firstly, you would have to create an account, if you don't have an account you can follow this link here.
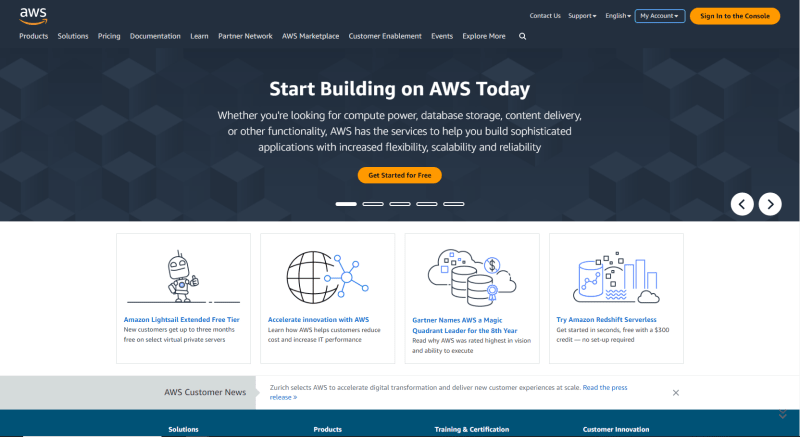
And this should be the page you should see as in 2023.
Once we sign-in or sign-up, this is where we will be taken to,

and if you don't see anything in Recently visited, don't worry.
So we will first create our policy, and user, then create our S3 bucket.
See the search bar on the navbar? click on it and type aim
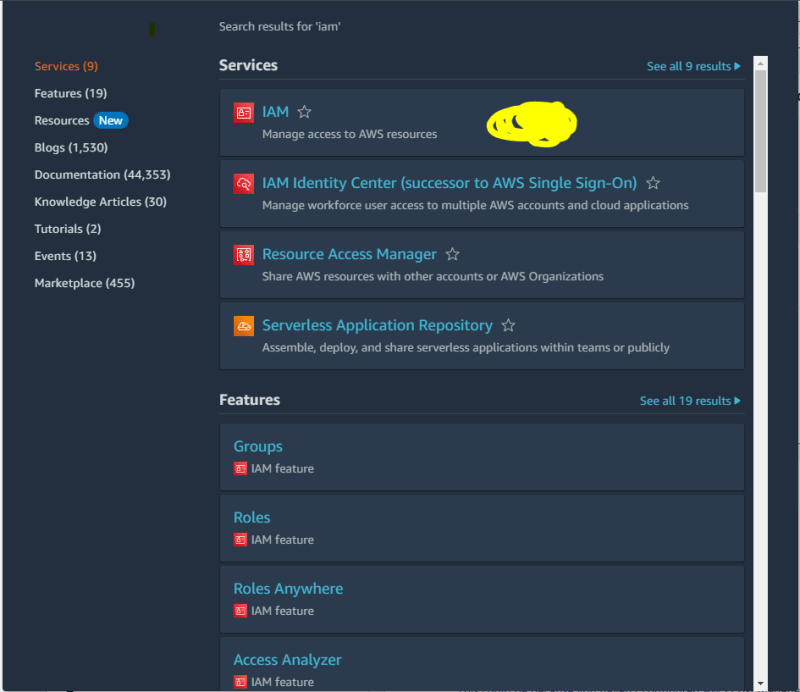 and click and on it. Then you will be taken to the IAM Dashboard.
On the sidebar, look for Policies, and keep note we also have Users there, and that's where we will go next after creating the policy. And also don't worry if your dashboard doesn't look like mine.

Once we are at the policies page, we create our own custom policy, the reason is that, we want to upload files, delete files, and update files, which gives us the read and write access permission to our user or developer to manage the S3 bucket in Node.js application, otherwise we'll definitely run into a problem with our application.
Let's continue...
Click on create policy

Then we click on Choose a service.
Then we type S3 in the search bar, and with the options that show, we select S3.

There, the next step is to select the permission we want to assign to our S3 bucket. So, we check the radio for Read, to retrieve data from the s3 bucket and read it (Meaning making a GET request).
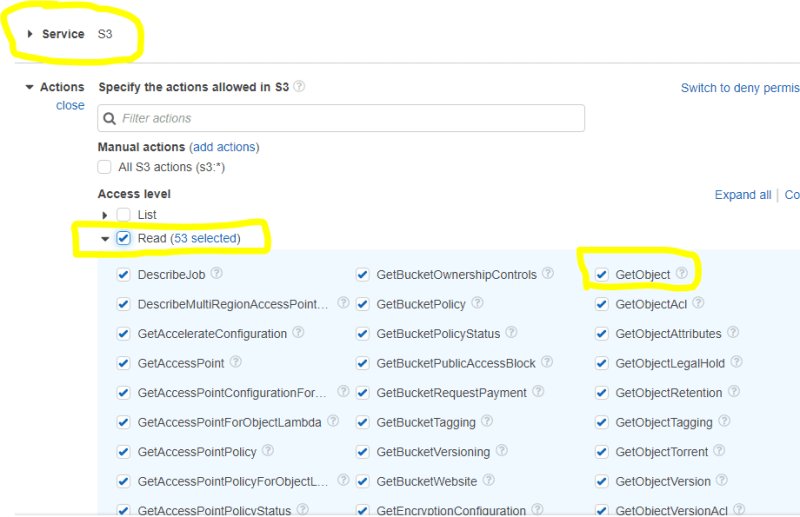
Now with all the option selected, we only need to check one, which is the GetObject, then with the write radio selected, we check two items which are DeleteObject, and PutObject

So the next step is the Resources, after you click on it, it expands then click on Add ARN, a screen pop-ups, there we have two fields to fill, one is the Bucket name, and the other is the Object name. Since we haven't create our bucket, we type the name we would give to the S3 bucket when creating it, in this case mine is nodebucket, and the Object name we put *.

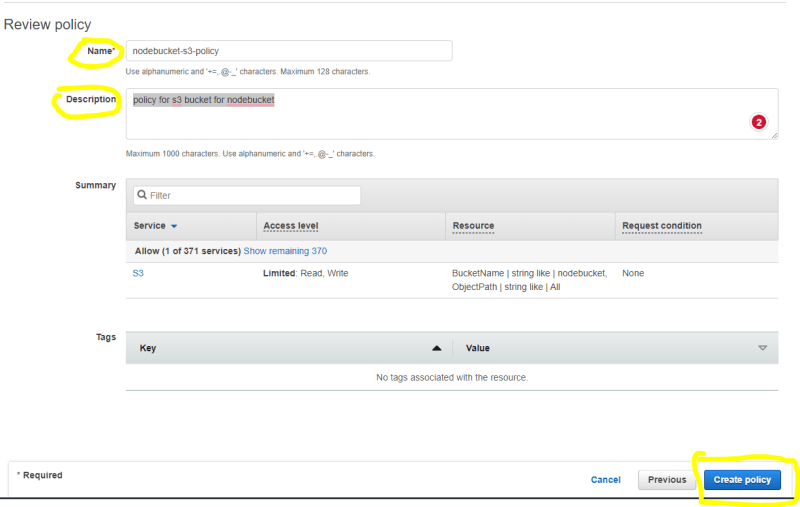
After, click on Add and we are done setting up our policy, the next step is optional, so we click on the Next: Tags to the next page, then click next again Next: Review, on the review page, we fill in our policy name, and description.
In mine case i named it nodebucket-s3-policy, and the description i wrote policy for s3 bucket for nodebucket, you can write yours to, it doesn't have to be the same as mine. Then we click on Create Policy to finish with our AWS Policy Creation.
After you will be re-drected to your policy dashboard, and you should see your policy name, and a note say your policy has been created.

Now we have created our custom policy, we now need to create our user, and attach this policy to it, now why do we need to do that? Because once we are done creating the user, we are going to create or generate an Access Key, and Access Secret Key, which we can use to our Node.js application, and since we connected our policy to the user, our Access Key, and Access Secret Key will permission to upload, delete and updates files however we want, because that the permission we set on our policy.
Hope you understood this.
Now that we have covered this part, in part 2, we will cover creating our user, and generating our Access Key, and Access Secret Key.

Top comments (0)