Deploy a Node.js Telegram Bot and learn how to host backend code on Code Capsules for free.
Set up
Code Capsules connects to GitHub repositories to deploy applications. To follow this guide, you’ll need a Code Capsules account and a GitHub account.
To demonstrate how to deploy a Node.js Telegram Bot with Code Capsules, we’ve provided an example bot which you can find on the Code Capsules GitHub repository.
Sign in to GitHub, and fork the example bot repository by clicking “Fork” at the top-right of your screen and selecting your GitHub account as the destination.
Create a Space for your Bot
Log into your Code Capsules account and navigate to the “Spaces” tab. Once there, click the “Create A New Space For Your Apps” button.
Follow the prompts, choosing your region and giving your Space a name, then click “Create Space”.
Link to GitHub
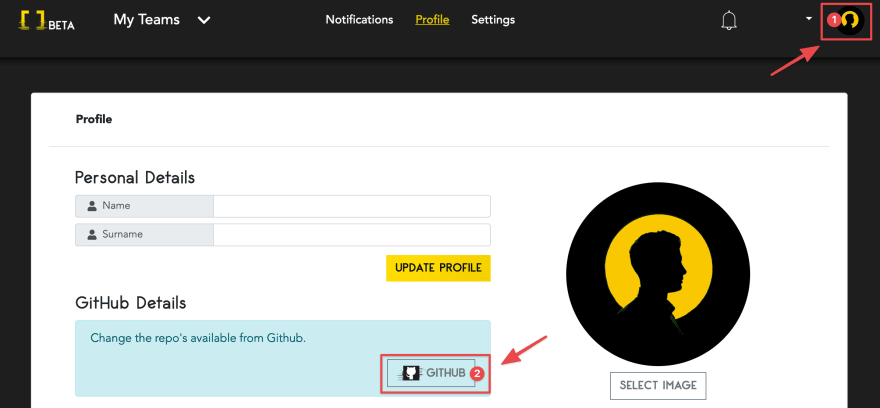
To link to GitHub, click your profile image at the top right of the Code Capsules screen and find the “GitHub” button under “GitHub Details”.
Click the “GitHub” button, select your GitHub username, and do the following in the dialog box that appears:
- Select “Only Select Repositories”.
- Choose the GitHub repository we forked.
- Press “Install & Authorize”.
Add Repository to Team
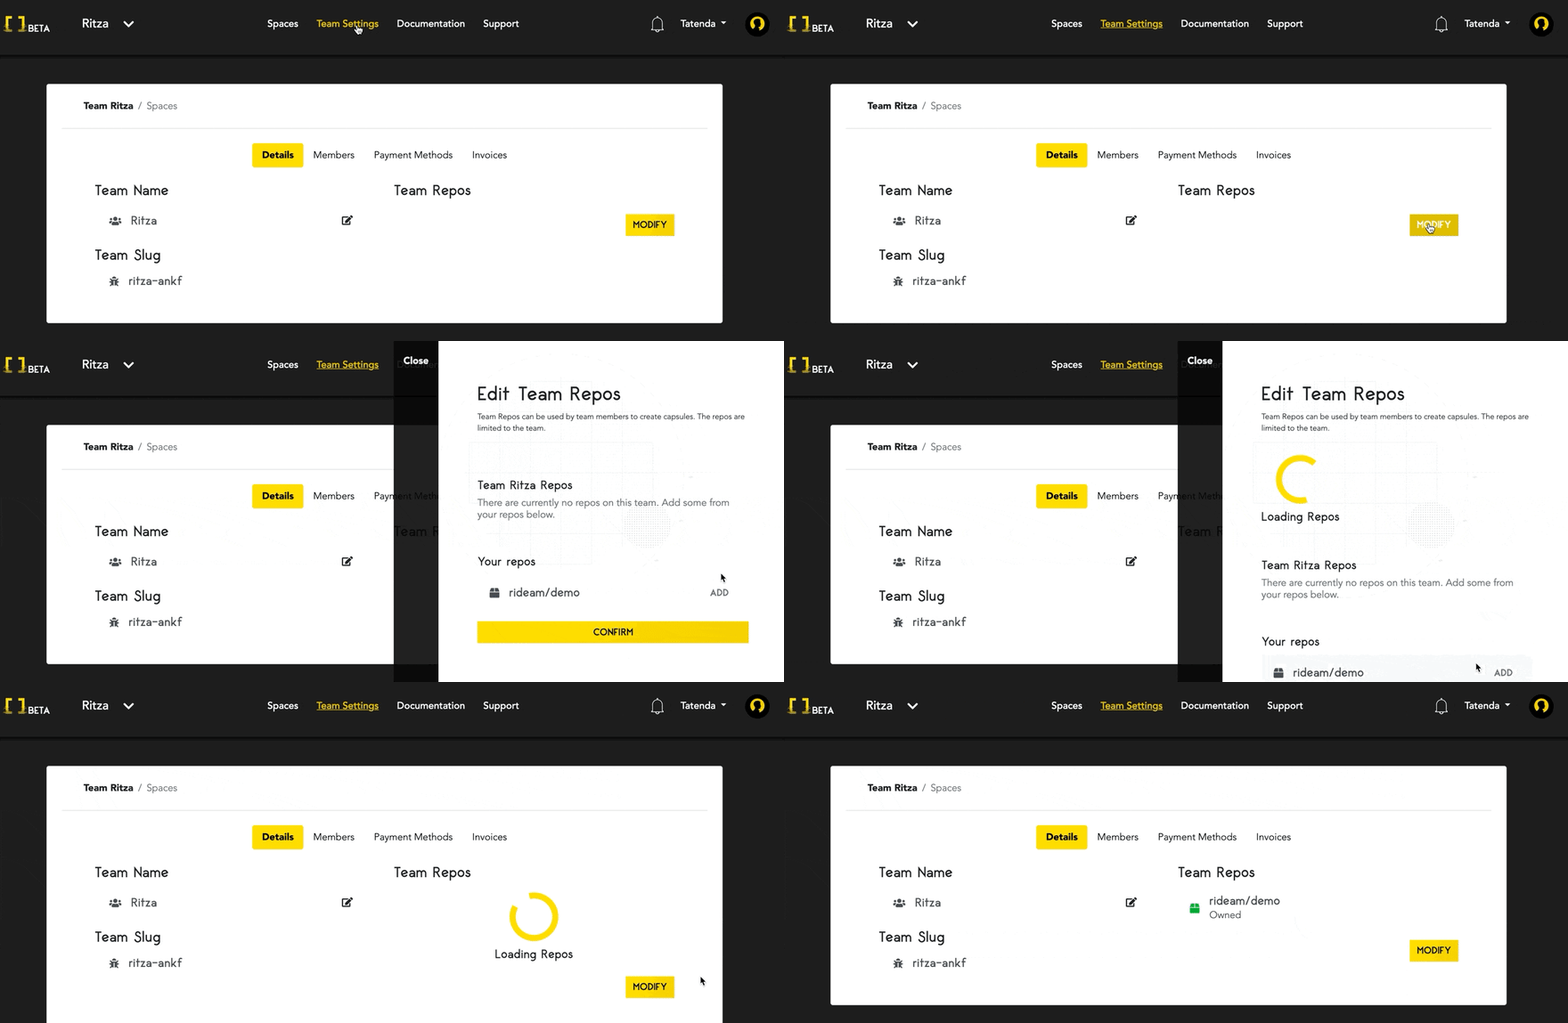
Select “Team Settings” in the top navigation bar to switch to the Team Settings tab.
Click on the “Modify” button under the “Team Repos” section. An “Edit Team Repos” screen will slide in from the right. Click “Add” next to the demo repo, and then “Confirm”. All the Spaces in your Team will now have access to this repo.
Register the Bot
You'll need a Telegram user account before you can create a Telegram bot. Head over to Telegram and create an account if you don't already have one.
When you've signed in to Telegram, search for “BotFather” (a bot for managing all other Telegram bots) and start a new chat with it. Follow the steps below to register a new bot with the BotFather:
- Type
/startand press send. - Type
/newbotand press send. - Choose a name for your bot.
- Choose a username for your bot that ends in “bot”.
The BotFather will respond with a message containing an access token for your newly created bot. This access token will allow our application to access the Telegram API and tell our bot what to do when receiving different messages from users.
To confirm that your bot was created successfully, search for the bot's username. You should be able to see it and start a conversation with it, although it won't respond as we haven't written the bot's logic yet.
Create the Capsule
A Capsule provides the server for hosting an application on Code Capsules.
Navigate to the “Spaces” tab and open the Space you’ll be using.
Click the “Create a New Capsule for Your Space” button, and follow the instructions below:
- Choose “Backend Capsule”.
- Under “Product”, select “Sandbox”.
- Choose the GitHub repository you forked.
- Press “Next”.
- Leave “Run Command” blank.
- Click “Create Capsule”.
Code Capsules will automatically build your application when you’ve finished creating the Capsule. While the build is in progress, you can view the log by clicking “View Build Progress” next to the “Building Capsule” message.
Once your application is live, you can view the build log by selecting the “Deploy” tab and clicking the “View build log” link in the “Builds” section.
Add a BOT_TOKEN Environment Variable
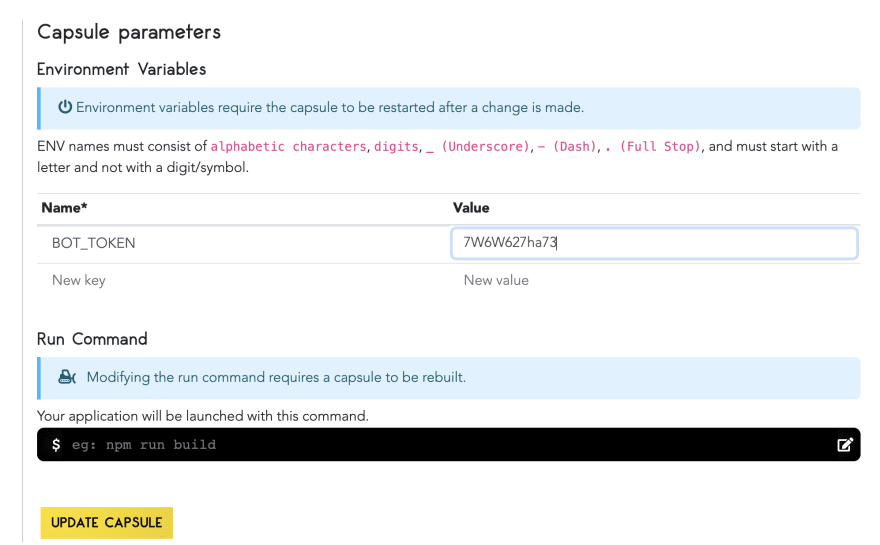
Once the build is complete, you have to add a BOT_TOKEN environment variable on the “Configure” tab under the “Capsule parameters” section. Assign it the value of the access token you were given by the BotFather when you registered the bot.
Confirm your changes by clicking on “Update Capsule”, then restart your Capsule by toggling the radio button in the top right off and on again.
Add Webhook URL
The next step is to add a webhook URL in the bot's logic to tell Telegram how to notify your bot when it receives a message. Clone the repository you forked in the first step of this guide to your local development environment. Open index.js and edit the code snippet below by replacing <YOUR-CAPSULE-URL-HERE> with the actual value for your Capsule's URL. To get this value, navigate to your Capsule's “Overview” tab. Copy the value under the “Domains” section and paste it in place of <YOUR-CAPSULE-URL-HERE> in the code snippet below.
bot.launch({
    webhook: {
      domain: '<YOUR-CAPSULE-URL-HERE>',
      port: process.env.PORT
    }
})
Push your changes to GitHub by running git push in a terminal window while in the project's root folder. Code Capsules will automatically rebuild your bot after it notices changes to the main branch of your forked repository.
Chat with the Bot
The bot will be able to respond to messages after Code Capsules finishes building it. When this is done, search for your bot on Telegram using the username you assigned it and start a chat with it. The bot has been programmed to respond to /start and echo any messages you send it.
If you’d like to deploy another application in a different language or framework, take a look at our other deployment guides.


Top comments (0)